Page 463 of 569

Please CorrectVehicles with Advanced TPMS*:
The tire pressure is too l")
462 Practical hints
What to do if …
Display symbolDisplay messagePossible cause/consequencePossible solution
HTire Pressure(s)
Please CorrectVehicles with Advanced TPMS*:
The tire pressure is too low in one
or more tires.�Check and correct tire inflation pressure as
required (
�page 373).
Tire Pressure
Caution - Tire DefectOne or more tires are deflating.�Carefully bring the vehicle to a halt, avoiding
abrupt steering and braking maneuvers.
�If necessary, change the wheel (�page 492).
Caution: Tire DefectOne or more tires are deflating.
Vehicles with Advanced TPMS*:
The respective tire is indicated in
the multifunction display.�Carefully bring the vehicle to a halt, avoiding
abrupt steering and braking maneuvers.
�If necessary, change the wheel (�page 492).
Warning!G
Do not drive with a flat tire. A flat tire affects
the ability to steer or brake the vehicle. You
may lose control of the vehicle. Continued
driving with a flat tire will cause excessive
heat build-up and possibly a fire.
Page 464 of 569

463 Practical hints
What to do if …
Display symbolDisplay messagePossible cause/consequencePossible solution
HTire Pressure
Check TiresThe tire pressure in one or more tires is
already below the minimum value.�Carefully bring the vehicle to a halt, avoid-
ing abrupt steering and braking maneuvers.
�Check and adjust tire pressure as required
(
�page 373).
�If necessary, change the wheel
(
�page 492).
Check TiresThe tire pressure in one or more tires is
already below the minimum value.
Vehicles with Advanced TPMS*:
The respective tire is indicated in the
multifunction display.�Carefully bring the vehicle to a halt, avoid-
ing abrupt steering and braking maneuvers.
�Check and adjust tire pressure as required
(
�page 373).
�If necessary, change the wheel
(
�page 492).
Warning!G
Do not drive with a flat tire. A flat tire affects
the ability to steer or brake the vehicle. You
may lose control of the vehicle. Continued
driving with a flat tire will cause excessive
heat build-up and possibly a fire.
Page 465 of 569
464 Practical hints
What to do if …
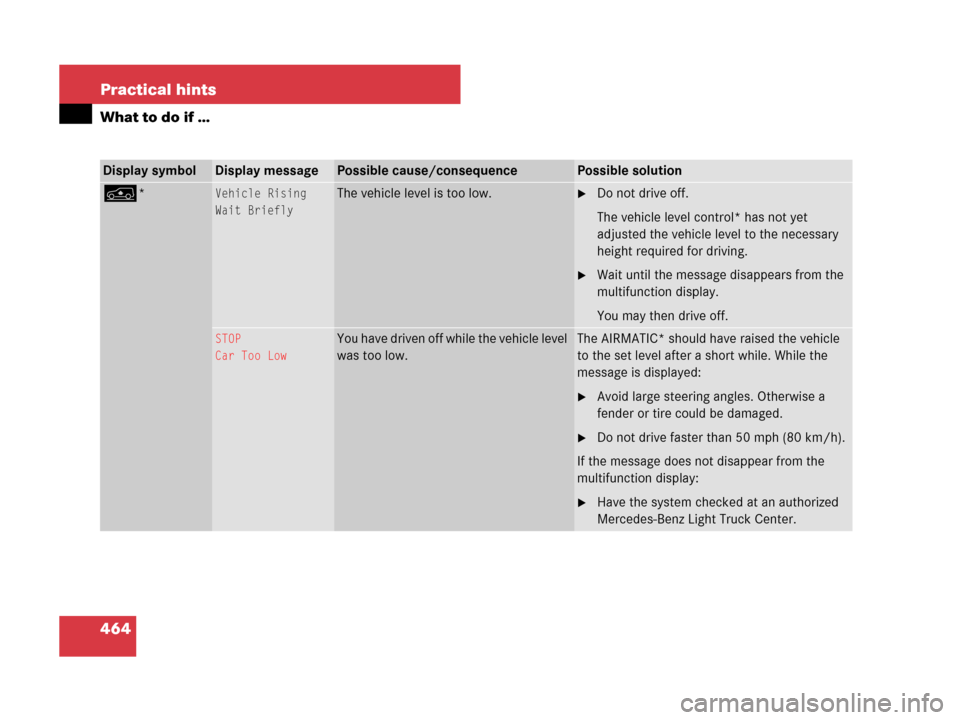
Display symbolDisplay messagePossible cause/consequencePossible solution
n*Vehicle Rising
Wait BrieflyThe vehicle level is too low.�Do not drive off.
The vehicle level control* has not yet
adjusted the vehicle level to the necessary
height required for driving.
�Wait until the message disappears from the
multifunction display.
You may then drive off.
STOP
Car Too LowYou have driven off while the vehicle level
was too low.The AIRMATIC* should have raised the vehicle
to the set level after a short while. While the
message is displayed:
�Avoid large steering angles. Otherwise a
fender or tire could be damaged.
�Do not drive faster than 50 mph (80 km/h).
If the message does not disappear from the
multifunction display:
�Have the system checked at an authorized
Mercedes-Benz Light Truck Center.
Page 466 of 569
465 Practical hints
What to do if …
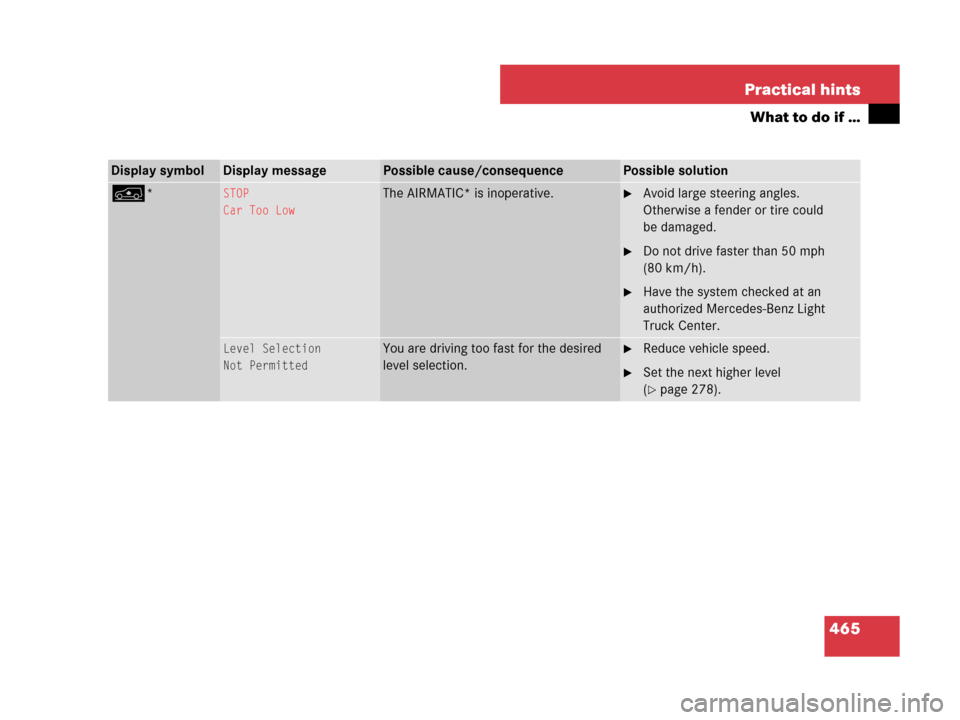
Display symbolDisplay messagePossible cause/consequencePossible solution
n*STOP
Car Too LowThe AIRMATIC* is inoperative.�Avoid large steering angles.
Otherwise a fender or tire could
be damaged.
�Do not drive faster than 50 mph
(80 km/h).
�Have the system checked at an
authorized Mercedes-Benz Light
Truck Center.
Level Selection
Not PermittedYou are driving too fast for the desired
level selection.�Reduce vehicle speed.
�Set the next higher level
(
�page 278).
Page 467 of 569
466 Practical hints
What to do if …
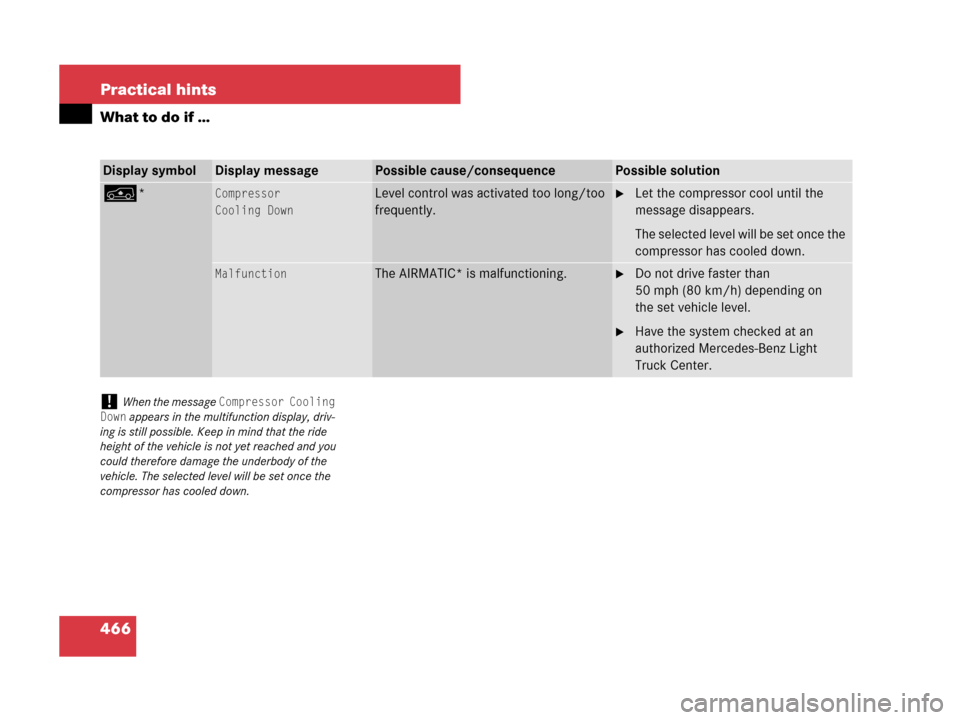
Display symbolDisplay messagePossible cause/consequencePossible solution
n*Compressor
Cooling DownLevel control was activated too long/too
frequently.�Let the compressor cool until the
message disappears.
The selected level will be set once the
compressor has cooled down.
MalfunctionThe AIRMATIC* is malfunctioning.�Do not drive faster than
50 mph (80 km/h) depending on
the set vehicle level.
�Have the system checked at an
authorized Mercedes-Benz Light
Truck Center.
!When the message Compressor Cooling
Down
appears in the multifunction display, driv-
ing is still possible. Keep in mind that the ride
height of the vehicle is not yet reached and you
could therefore damage the underbody of the
vehicle. The selected level will be set once the
compressor has cooled down.
Page 481 of 569
480 Practical hints
Replacing bulbs
Bulbs
Safe vehicle operation depends on proper
exterior lighting and signaling. It is there-
fore essential that all bulbs and lamp
assemblies are in good working order at
all times.
Correct headlamp adjustment is extremely
important. Have headlamps checked and
readjusted at regular intervals and when a
bulb has been replaced. Contact an autho-
rized Mercedes-Benz Light Truck Center
for headlamp adjustment.iIf the headlamps or front fog lamps are
fogged up on the inside as a result of high humid-
ity, driving the vehicle a distance with the lights
on should clear up the fogging.iSubstitute bulbs will be brought into use
when the following lamps malfunction:
�Turn signal lamps
�Brake lamps
�Parking lamps
�Tail lamps
Read and observe messages in the multifunction
display (
�page 455).
Page 503 of 569

Driving the vehicle until the fuel tank is
empty is not recommended. Otherwise, air
may be sucked into the fuel system. If this
hap")
502 Practical hints
Bleeding the fuel system (diesel engine only)
Driving the vehicle until the fuel tank is
empty is not recommended. Otherwise, air
may be sucked into the fuel system. If this
happens, the? malfunction indicator
lamp (USA only) or the ± malfunction
indicator lamp (Canada only) comes on
and the engine may not start immediately
after refueling the vehicle.
After refueling:
�Make sure the automatic transmission
is set toP.
The gear position indicator in the multi-
function display should be on
P.
�Do not depress the accelerator.
�Turn the SmartKey in the starter switch
to position 2 for at least 10 seconds
(
�page 40).
�Return the SmartKey in the starter
switch to position 0 (
�page 40).
�Turn the SmartKey in the starter switch
to position 3 (
�page 41) and hold it
there for a maximum of 40 seconds or
until the engine runs surge-free.
If the engine does not start:
�Wait for approximately 2 minutes.
�Turn the SmartKey in the starter switch
to position 3 (
�page 41) and hold it
there for a maximum of 40 seconds or
until the engine runs surge-free.
If the engine still does not start, do not
make any further attempts to start the
engine. Contact an authorized
Mercedes-Benz Light Truck Center or call
Roadside Assistance (
�page 325).iVehicles with KEYLESS-GO*: If necessary,
remove the KEYLESS-GO start/stop button from
the starter switch (
�page 41).iWhen the? malfunction indicator lamp
(USA only) or the ± malfunction indicator
lamp (Canada only) has been illuminated for the
above condition, it will remain illuminated until
the engine was cycled on and off four times in a
row.
Page 519 of 569

518 Practical hints
Fuses
The electrical fuses in your vehicle serve to
switch off malfunctioning power circuits.
If a fuse is blown, the components and
systems secured by that fuse will stop
operating.If a newly inserted fuse blows again, have
the cause determined and rectified by an
authorized Mercedes-Benz Light Truck
Center.
A fuse chart explains the fuse allocation
and fuse amperages. It is located in the
cargo compartment with the vehicle tool
kit (
�page 469).
The electrical fuses are located in different
fuse boxes:
�on the passenger side of the engine
compartment (
�page 519)
�in the cargo compartment
(
�page 519)
�in the passenger compartment
(
�page 520)Before replacing fuses:
�Apply the parking brake (�page 65).
�Make sure automatic transmission is
set to position P (
�page 192).
The gear position indicator in the
multifunction display should be on
P.
�Turn off all electrical consumers.
�Turn off the engine (�page 66).
�Remove the SmartKey from the starter
switch.
Vehicles with KEYLESS-GO*:
�Open the driver’s door (this puts
the starter switch to position0,
same as with the SmartKey re-
moved from starter switch). The
driver’s door can then be closed
again.
Warning!G
Only use fuses approved by Mercedes-Benz
with the specified amperage for the system
in question and do not attempt to repair or
bridge a blown fuse. Using other than
approved fuses or using repaired or bridged
fuses may cause an overload leading to a
fire, and/or cause damage to electrical
components and/or systems. Have the
cause determined and remedied by an
authorized Mercedes-Benz Light Truck
Center
iA blown fuse must be replaced by an appro-
priate spare fuse (recognizable by its color or the
fuse rating given on the fuse) of the amperage
recommended in the fuse chart.
Any Mercedes-Benz Light Truck Center will be
glad to advise you on this subject.