Page 272 of 561
271 Controls in detail
Loading
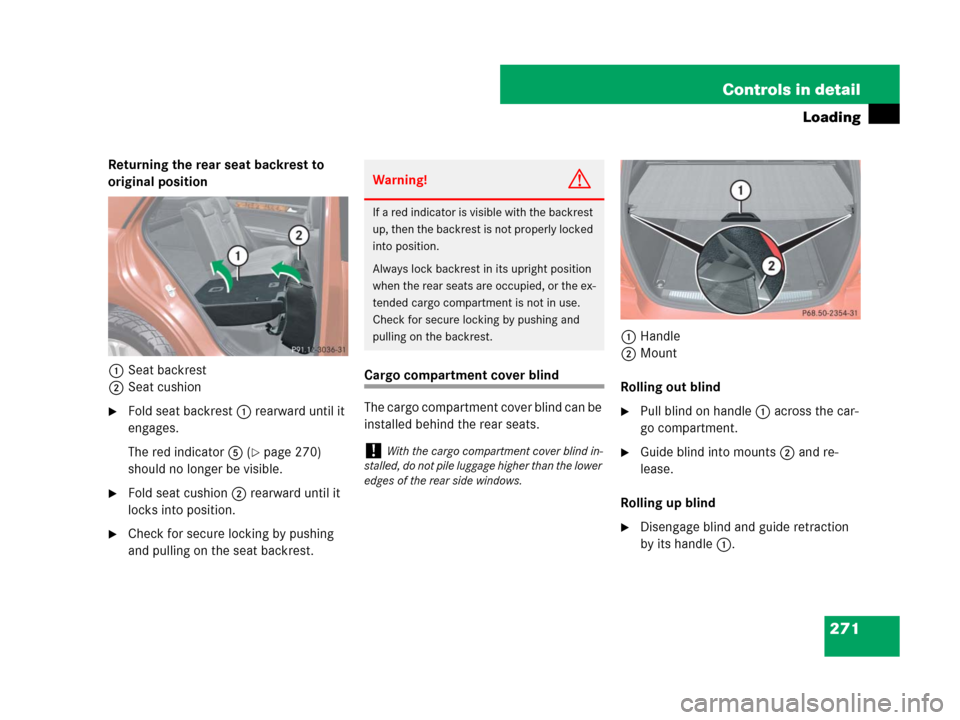
Returning the rear seat backrest to
original position
1Seat backrest
2Seat cushion
�Fold seat backrest1 rearward until it
engages.
The red indicator5 (
�page 270)
should no longer be visible.
�Fold seat cushion2 rearward until it
locks into position.
�Check for secure locking by pushing
and pulling on the seat backrest.
Cargo compartment cover blind
The cargo compartment cover blind can be
installed behind the rear seats.1Handle
2Mount
Rolling out blind
�Pull blind on handle1 across the car-
go compartment.
�Guide blind into mounts2 and re-
lease.
Rolling up blind
�Disengage blind and guide retraction
by its handle1.
Warning!G
If a red indicator is visible with the backrest
up, then the backrest is not properly locked
into position.
Always lock backrest in its upright position
when the rear seats are occupied, or the ex-
tended cargo compartment is not in use.
Check for secure locking by pushing and
pulling on the backrest.
!With the cargo compartment cover blind in-
stalled, do not pile luggage higher than the lower
edges of the rear side windows.
Page 273 of 561
272 Controls in detail
Loading
Installing blind
�Place left side of blind2 in left mount.
�Position right side of blind2 over right
mount.
�Press release button1 and guide
cover2 into mount.
�Make sure the cargo compartment
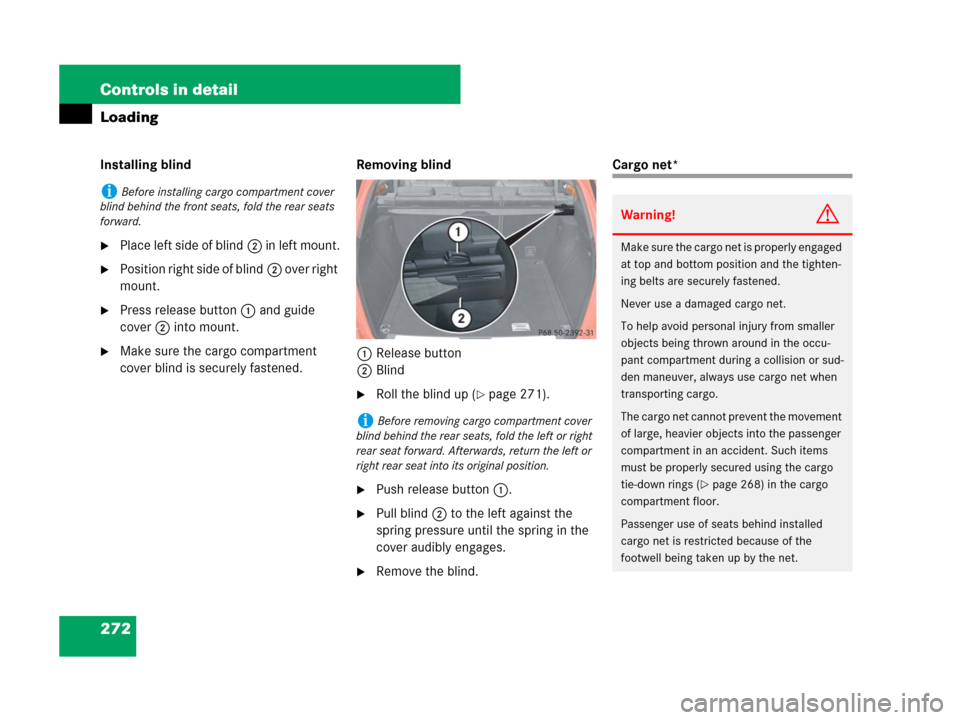
cover blind is securely fastened.Removing blind
1Release button
2Blind
�Roll the blind up (�page 271).
�Push release button1.
�Pull blind2 to the left against the
spring pressure until the spring in the
cover audibly engages.
�Remove the blind.
Cargo net*
iBefore installing cargo compartment cover
blind behind the front seats, fold the rear seats
forward.
iBefore removing cargo compartment cover
blind behind the rear seats, fold the left or right
rear seat forward. Afterwards, return the left or
right rear seat into its original position.
Warning!G
Make sure the cargo net is properly engaged
at top and bottom position and the tighten-
ing belts are securely fastened.
Never use a damaged cargo net.
To help avoid personal injury from smaller
objects being thrown around in the occu-
pant compartment during a collision or sud-
den maneuver, always use cargo net when
transporting cargo.
The cargo net cannot prevent the movement
of large, heavier objects into the passenger
compartment in an accident. Such items
must be properly secured using the cargo
tie-down rings (
�page 268) in the cargo
compartment floor.
Passenger use of seats behind installed
cargo net is restricted because of the
footwell being taken up by the net.
Page 274 of 561

273 Controls in detail
Loading
Use of the cargo net is a particularly impor-
tant safety factor when the vehicle is load-
ed higher than the top of the seat
backrests with smaller objects. For your
safety, always use the cargo net when
transporting cargo.
The cargo net can be installed in two
locations:
1Holder in B-pillar
2Holder in C-pillar�Without the cargo compartment ex-
panded (
�page 269), use holders
above C-pillars2 and the cargo
tie-down rings in the cargo compart-
ment (
�page 268).
�With the cargo compartment expanded
(
�page 269), use holders above
B-pillars1 and the cargo tie-down
rings behind the front seats
(
�page 268).
�Open the hook and loop fasteners on
the cargo net package.
�Roll out the cargo net.
�Unfold the cargo net.
The cargo net bars must audibly
engage.Installing the cargo net
Cargo net bar hung up behind the C-pillar
1Holder
2Cargo net bar
�Hang cargo net bar2 on holder1 as
indicated by the arrow.
�Push cargo net bar2 forward into
holder1 in direction of arrow.
Page 275 of 561
274 Controls in detail
Loading
Pulling the cargo net tight
Belt hook attached behind the front seats
1Belt hook
2Cargo tie-down ring
3Tightening belt
�Hook belt hook1 into cargo tie-down
ring2 in direction of arrow.
�Pull tightening belt3 by the loose end
in direction of arrow until the cargo net
is pulled tight.
�After driving a short distance, make
sure the cargo net is still tight and, if
necessary, pull it tight again.Loosening the cargo net
Belt hook attached behind the front seats
1Buckle
2Belt hook
3Cargo tie-down ring
�Loosen the tightening belt by pulling
buckle1 upward in direction of arrow.
�Remove belt hook2 from cargo
tie-down ring3.Removing and storing the cargo net
�Take cargo net bar2 out of holder1,
see “Installing the cargo net”
(
�page 273).
�Press the red button on the upper and
lower cargo net bar.
�Fold the cargo net.
�Roll up the cargo net.
�Close the hook and loop fasteners on
the cargo net package.
Page 278 of 561
277 Controls in detail
Loading
�Place load between the cargo net and
the side wall of the cargo compart-
ment.
�Press locking button3 on belt
reel1. With the other hand, slowly
pull net over load until it is taut.
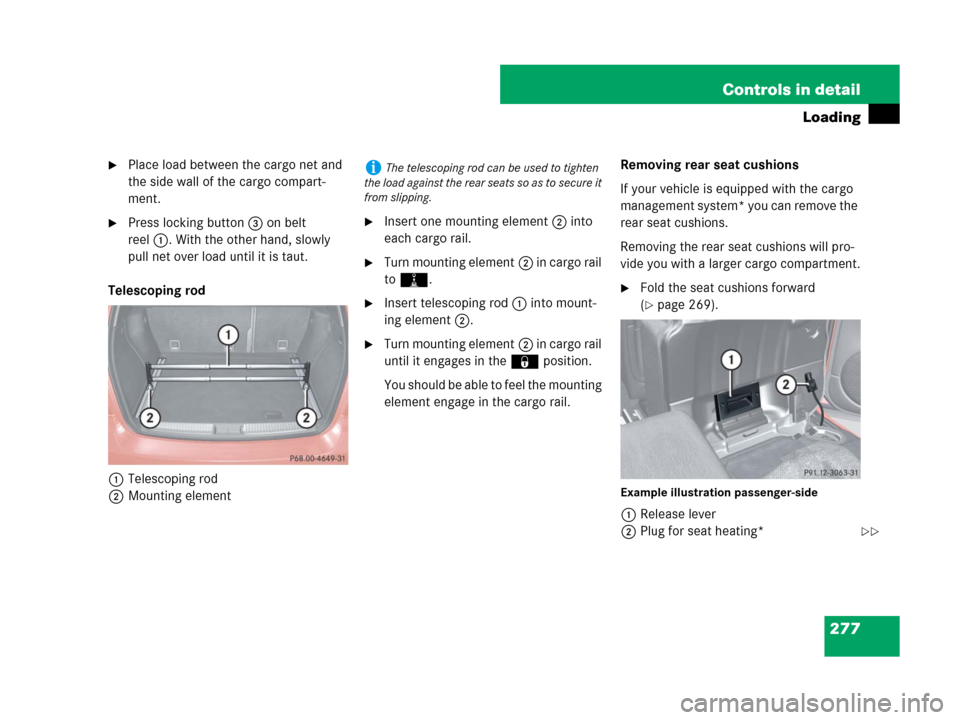
Telescoping rod
1Telescoping rod
2Mounting element�Insert one mounting element2 into
each cargo rail.
�Turn mounting element2 in cargo rail
toN.
�Insert telescoping rod1 into mount-
ing element2.
�Turn mounting element2 in cargo rail
until it engages in the‹ position.
You should be able to feel the mounting
element engage in the cargo rail.Removing rear seat cushions
If your vehicle is equipped with the cargo
management system* you can remove the
rear seat cushions.
Removing the rear seat cushions will pro-
vide you with a larger cargo compartment.
�Fold the seat cushions forward
(
�page 269).
Example illustration passenger-side
1Release lever
2Plug for seat heating*
iThe telescoping rod can be used to tighten
the load against the rear seats so as to secure it
from slipping.
��
Page 283 of 561
282 Controls in detail
Useful features
2Storage/telephone* compartment
3Coin holder
Opening the storage/telephone* com-
partment
�Pull button1 and lift up armrest.
The coin holders3 are located in front
of storage/telephone*
compartment2.Rear storage compartments
Depending on the vehicle configuration,
your vehicle may be equipped with three
storage compartments in the front of the
rear seats.
1Storage compartment cover
2Release button
�Briefly press release button2 on
storage compartment cover1.
The storage compartment opens
automatically.
iDepending on vehicle equipment, the upper
storage compartment may be replaced by a
control panel, for example in vehicles with rear
climate control* (
�page 216) or rear automatic
climate control* (
�page 231).
iDepending on vehicle configuration, the
middle storage compartment contains an
ashtray (
�page 286).
Page 286 of 561
285 Controls in detail
Useful features
Removing and reinstalling cup holder
The front cup holder can be removed for
cleaning purposes.
1Cup holder
2Bridge with card, ticket holder
�Hold cup holder at its bridge2 and
pull out bridge in direction of arrow.
�Pull cup holder1 out in direction of ar-
row.
�First, insert the cup holder1 and then
insert bridge2.
Ashtrays
Depending on vehicle configuration, your
vehicle is equipped with an ashtray and a
cigarette lighter (
�page 287) located in
the front center console and an ashtray lo-
cated in front of the rear seats
(
�page 286).
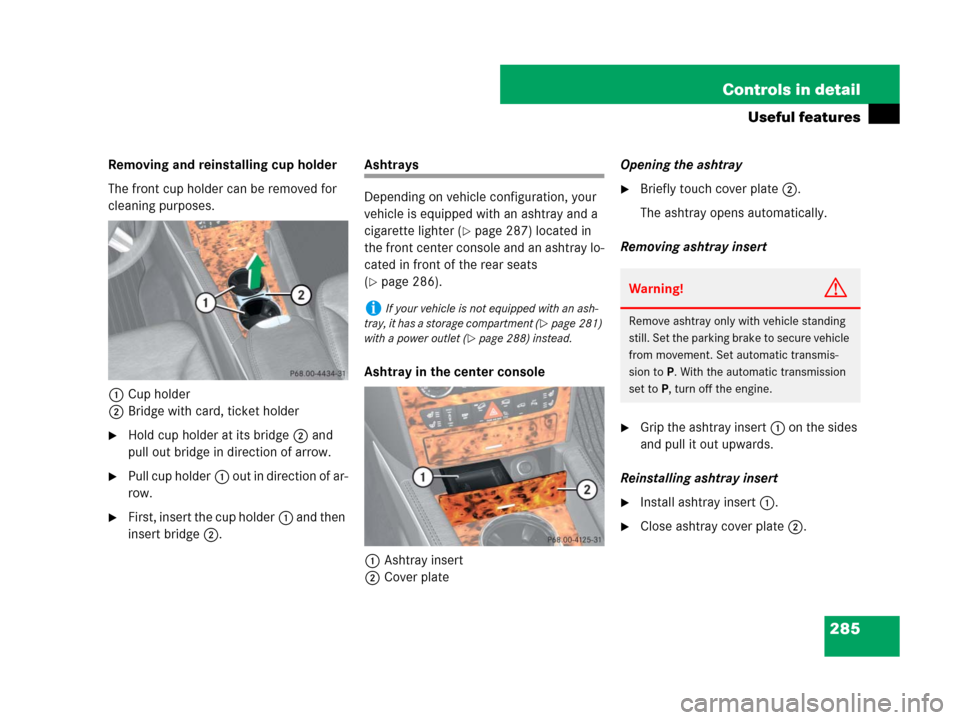
Ashtray in the center console
1Ashtray insert
2Cover plateOpening the ashtray
�Briefly touch cover plate2.
The ashtray opens automatically.
Removing ashtray insert
�Grip the ashtray insert1 on the sides
and pull it out upwards.
Reinstalling ashtray insert
�Install ashtray insert1.
�Close ashtray cover plate2.
iIf your vehicle is not equipped with an ash-
tray, it has a storage compartment (
�page 281)
with a power outlet (
�page 288) instead.
Warning!G
Remove ashtray only with vehicle standing
still. Set the parking brake to secure vehicle
from movement. Set automatic transmis-
sion toP. With the automatic transmission
set toP, turn off the engine.
Page 287 of 561
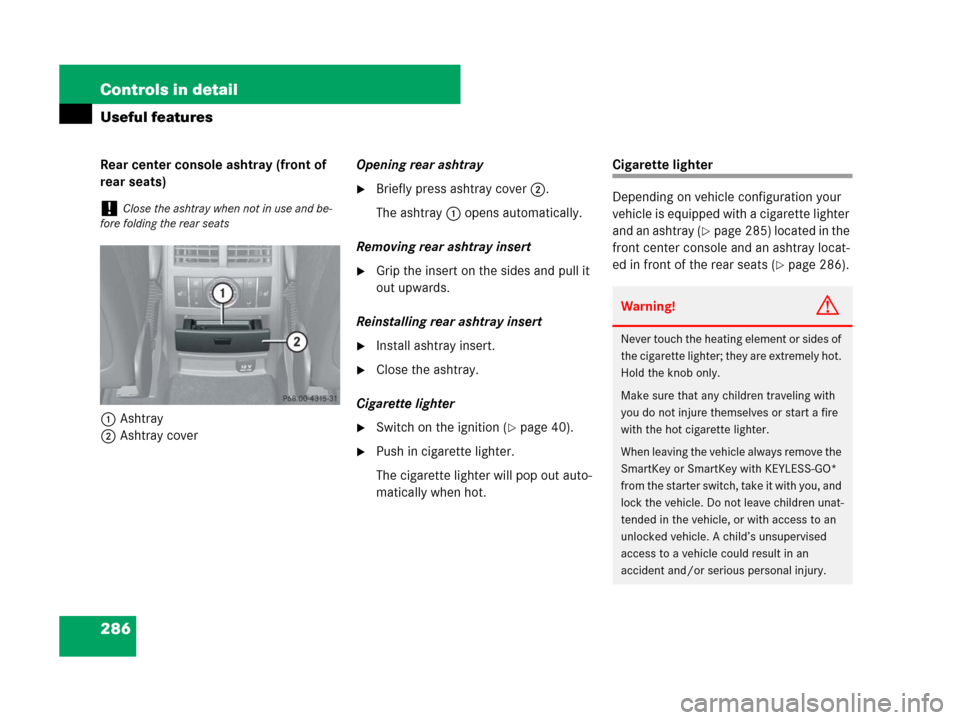
286 Controls in detail
Useful features
Rear center console ashtray (front of
rear seats)
1Ashtray
2Ashtray coverOpening rear ashtray
�Briefly press ashtray cover2.
The ashtray1 opens automatically.
Removing rear ashtray insert
�Grip the insert on the sides and pull it
out upwards.
Reinstalling rear ashtray insert
�Install ashtray insert.
�Close the ashtray.
Cigarette lighter
�Switch on the ignition (�page 40).
�Push in cigarette lighter.
The cigarette lighter will pop out auto-
matically when hot.
Cigarette lighter
Depending on vehicle configuration your
vehicle is equipped with a cigarette lighter
and an ashtray (
�page 285) located in the
front center console and an ashtray locat-
ed in front of the rear seats (
�page 286).
!Close the ashtray when not in use and be-
fore folding the rear seats
Warning!G
Never touch the heating element or sides of
the cigarette lighter; they are extremely hot.
Hold the knob only.
Make sure that any children traveling with
you do not injure themselves or start a fire
with the hot cigarette lighter.
When leaving the vehicle always remove the
SmartKey or SmartKey with KEYLESS-GO*
from the starter switch, take it with you, and
lock the vehicle. Do not leave children unat-
tended in the vehicle, or with access to an
unlocked vehicle. A child’s unsupervised
access to a vehicle could result in an
accident and/or serious personal injury.