Page 428 of 561

427 Practical hints
What to do if …
Symbol messages
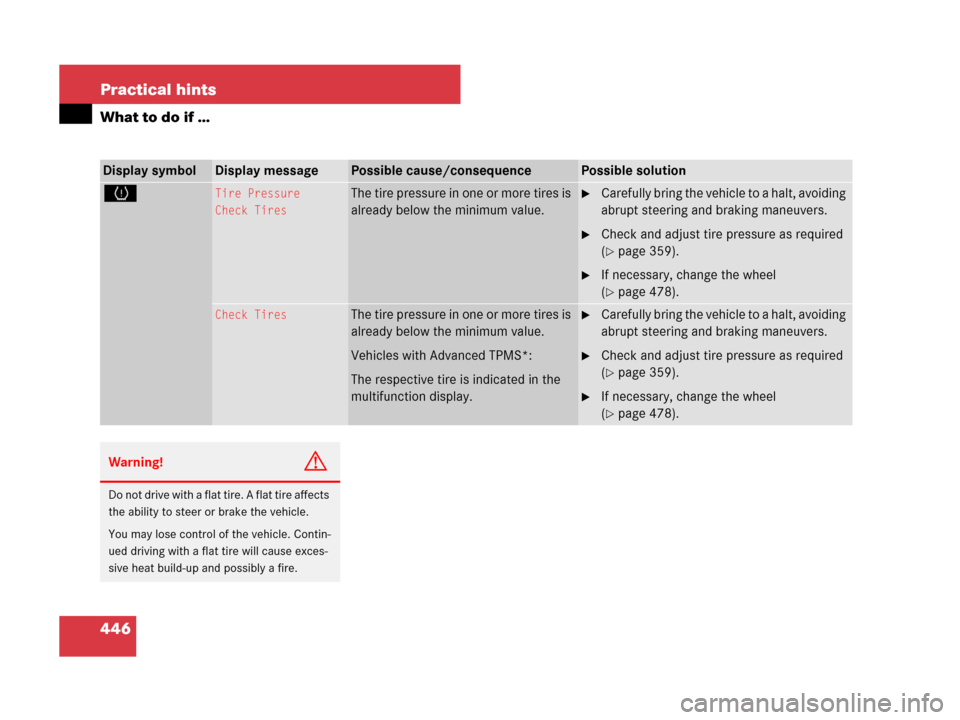
Display symbolDisplay messagePossible cause/consequencePossible solution
ò Replace air filter.The air filter is clogged.�Have the air filter checked by an authorized
Mercedes-Benz Light Truck Center.
#The battery is no longer charging.
Possible causes:
�alternator malfunctioning
�broken poly-V-belt
Do not forget that the brake system
requires electrical energy and may be
operating with restricted capability.
Considerably greater brake pedal
force is required and the stopping dis-
tance is increased.
�Stop the vehicle in a safe location or as soon as
it is safe to do so.
�Apply the parking brake (�page 65).
� Check the poly-V-belt.
If it is broken:
�Do not continue to drive. Otherwise the engine
will overheat due to an inoperative water pump
which may result in damage to the engine.
Contact an authorized Mercedes-Benz Light
Truck Center.
If it is intact:
�Drive immediately to the nearest authorized
Mercedes-Benz Light Truck Center. Adjust
driving to be consistent with reduced braking
responsiveness.
Page 435 of 561

434 Practical hints
What to do if …
When the message Check engine oil
level at next refueling.
appears while
the engine is running and at operating tem-
perature, the engine oil level has dropped
to approximately the minimum level.
When this occurs, the warning will first
come on intermittently and then stay on if
the oil level drops further.
Visually check for oil leaks. If no obvious oil
leaks are noted, drive to the nearest
service station where the engine oil should
be topped to the required level with an
approved engine oil.For information on approved engine oils,
refer to the Factory Approved Service
Products pamphlet (USA only) or contact
an authorized Mercedes-Benz Light Truck
Center.
Display symbolDisplay messagePossible cause/consequencePossible solution
NCheck engine oil level
at next refueling.The engine oil level is too low.�Check the engine oil level (�page 343)
and add engine oil as required
(
�page 344).
!The engine oil level warning should not be
ignored. Extended driving with the symbol dis-
played could result in serious engine damage
that is not covered by the Mercedes-Benz
Limited Warranty.
Page 447 of 561

446 Practical hints
What to do if …
Display symbolDisplay messagePossible cause/consequencePossible solution
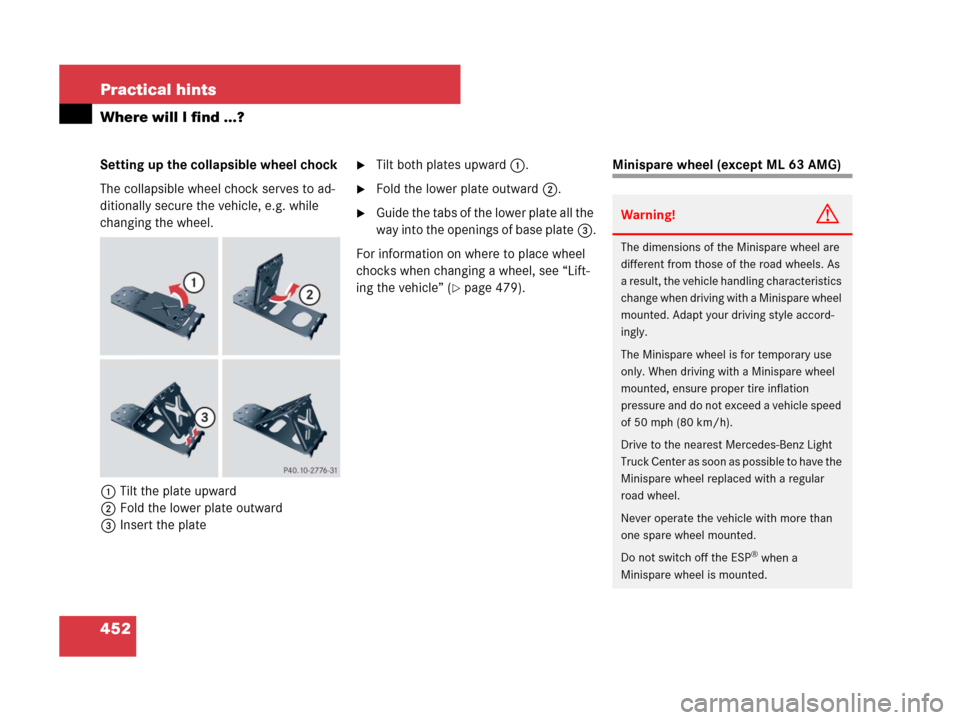
HTire Pressure
Check TiresThe tire pressure in one or more tires is
already below the minimum value.�Carefully bring the vehicle to a halt, avoiding
abrupt steering and braking maneuvers.
�Check and adjust tire pressure as required
(
�page 359).
�If necessary, change the wheel
(
�page 478).
Check TiresThe tire pressure in one or more tires is
already below the minimum value.
Vehicles with Advanced TPMS*:
The respective tire is indicated in the
multifunction display.�Carefully bring the vehicle to a halt, avoiding
abrupt steering and braking maneuvers.
�Check and adjust tire pressure as required
(
�page 359).
�If necessary, change the wheel
(
�page 478).
Warning!G
Do not drive with a flat tire. A flat tire affects
the ability to steer or brake the vehicle.
You may lose control of the vehicle. Contin-
ued driving with a flat tire will cause exces-
sive heat build-up and possibly a fire.
Page 453 of 561

452 Practical hints
Where will I find ...?
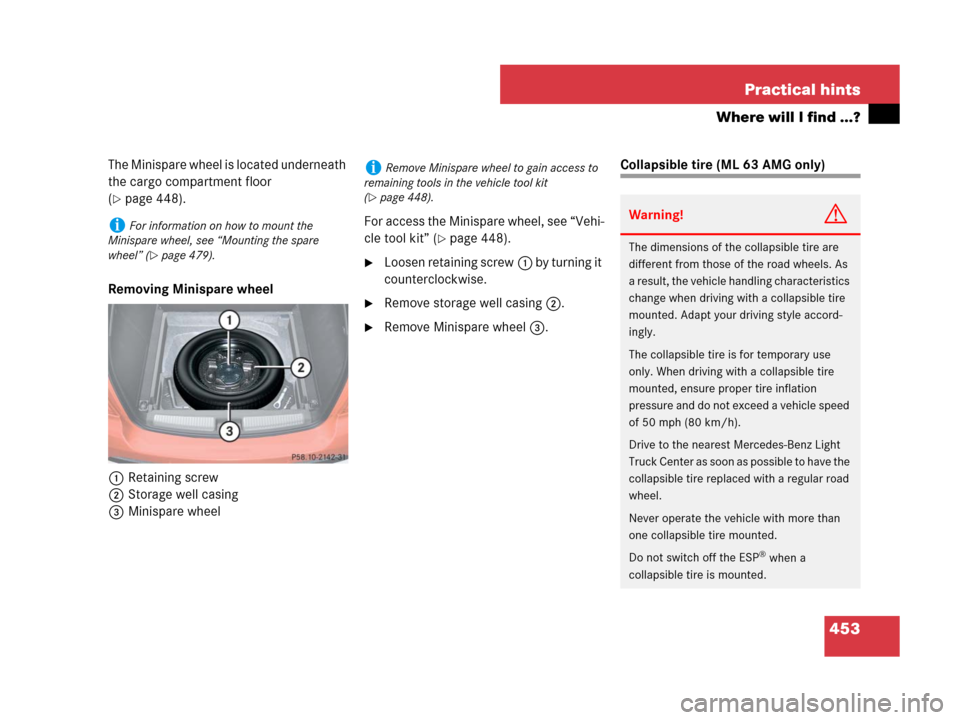
Setting up the collapsible wheel chock
The collapsible wheel chock serves to ad-
ditionally secure the vehicle, e.g. while
changing the wheel.
1Tilt the plate upward
2Fold the lower plate outward
3Insert the plate�Tilt both plates upward1.
�Fold the lower plate outward2.
�Guide the tabs of the lower plate all the
way into the openings of base plate3.
For information on where to place wheel
chocks when changing a wheel, see “Lift-
ing the vehicle” (
�page 479).
Minispare wheel (except ML 63 AMG)
Warning!G
The dimensions of the Minispare wheel are
different from those of the road wheels. As
a result, the vehicle handling characteristics
change when driving with a Minispare wheel
mounted. Adapt your driving style accord-
ingly.
The Minispare wheel is for temporary use
only. When driving with a Minispare wheel
mounted, ensure proper tire inflation
pressure and do not exceed a vehicle speed
of 50 mph (80 km/h).
Drive to the nearest Mercedes-Benz Light
Truck Center as soon as possible to have the
Minispare wheel replaced with a regular
road wheel.
Never operate the vehicle with more than
one spare wheel mounted.
Do not switch off the ESP
® when a
Minispare wheel is mounted.
Page 454 of 561

453 Practical hints
Where will I find ...?
The Minispare wheel is located underneath
the cargo compartment floor
(
�page 448).
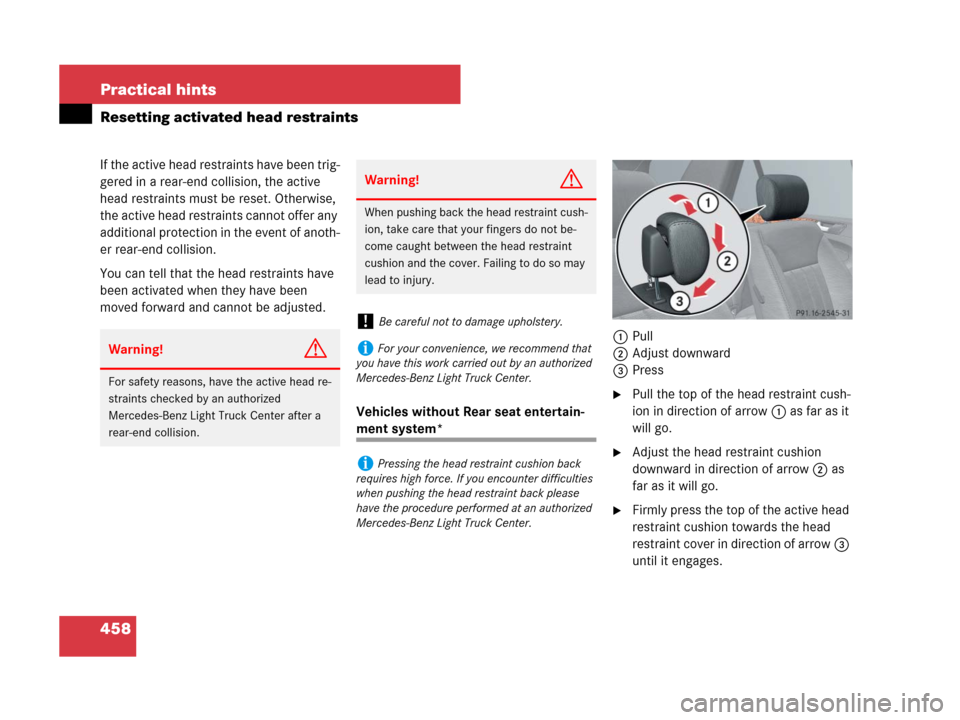
Removing Minispare wheel
1Retaining screw
2Storage well casing
3Minispare wheelFor access the Minispare wheel, see “Vehi-
cle tool kit” (
�page 448).
�Loosen retaining screw1 by turning it
counterclockwise.
�Remove storage well casing2.
�Remove Minispare wheel3.
Collapsible tire (ML 63 AMG only)
iFor information on how to mount the
Minispare wheel, see “Mounting the spare
wheel” (
�page 479).
iRemove Minispare wheel to gain access to
remaining tools in the vehicle tool kit
(
�page 448).
Warning!G
The dimensions of the collapsible tire are
different from those of the road wheels. As
a result, the vehicle handling characteristics
change when driving with a collapsible tire
mounted. Adapt your driving style accord-
ingly.
The collapsible tire is for temporary use
only. When driving with a collapsible tire
mounted, ensure proper tire inflation
pressure and do not exceed a vehicle speed
of 50 mph (80 km/h).
Drive to the nearest Mercedes-Benz Light
Truck Center as soon as possible to have the
collapsible tire replaced with a regular road
wheel.
Never operate the vehicle with more than
one collapsible tire mounted.
Do not switch off the ESP
® when a
collapsible tire is mounted.
Page 459 of 561

458 Practical hints
Resetting activated head restraints
If the active head restraints have been trig-
gered in a rear-end collision, the active
head restraints must be reset. Otherwise,
the active head restraints cannot offer any
additional protection in the event of anoth-
er rear-end collision.
You can tell that the head restraints have
been activated when they have been
moved forward and cannot be adjusted.
Vehicles without Rear seat entertain-
ment system*1Pull
2Adjust downward
3Press
�Pull the top of the head restraint cush-
ion in direction of arrow1 as far as it
will go.
�Adjust the head restraint cushion
downward in direction of arrow2 as
far as it will go.
�Firmly press the top of the active head
restraint cushion towards the head
restraint cover in direction of arrow3
until it engages.
Warning!G
For safety reasons, have the active head re-
straints checked by an authorized
Mercedes-Benz Light Truck Center after a
rear-end collision.
Warning!G
When pushing back the head restraint cush-
ion, take care that your fingers do not be-
come caught between the head restraint
cushion and the cover. Failing to do so may
lead to injury.
!Be careful not to damage upholstery.
iFor your convenience, we recommend that
you have this work carried out by an authorized
Mercedes-Benz Light Truck Center.
iPressing the head restraint cushion back
requires high force. If you encounter difficulties
when pushing the head restraint back please
have the procedure performed at an authorized
Mercedes-Benz Light Truck Center.
Page 460 of 561
459 Practical hints
Resetting activated head restraints
�Repeat this procedure on the active
head restraint for the second front
seat.
For information on active head restraints,
see “Active head restraint” (
�page 88).
For information on head restraint adjust-
ment, see “Seats” (
�page 43).Vehicles with Rear seat entertainment
system*
�Take the reset tool out of the
Mercedes-Benz vehicle literature
pouch.
1Reset tool
2Active head restraint1Reset tool
2Active head restraint
3Rectangular opening
�Guide reset tool1 into rectangular
opening3 of active head restraint2.
�Press reset tool1 downward in
direction of arrow until you hear the
head restraint release mechanism
audibly disengage.
�Pull out reset tool1.��
Page 461 of 561
460 Practical hints
Resetting activated head restraints
�Firmly press the active head restraint
cushion backward towards the head
restraint cover in direction of arrow
until it engages.
�Repeat this procedure on the active
head restraint for the second front
seat.
�After resetting the active head
restraints store reset tool1 in the
Mercedes-Benz vehicle literature
pouch.
For information on active head restraints,
see “Active head restraint” (
�page 88).
For information on head restraint adjust-
ment, see “Seats” (
�page 43).
��