2008 MERCEDES-BENZ E-CLASS SALOON ESP
[x] Cancel search: ESPPage 119 of 401
Transmission
116 ë Neutral
Releasing the brakes will allow you
to move the vehicle freely, e.g. to
push it or tow it.
Do not move the selector lever to
N while you are driving. The auto-
matic transmission could other-
wise be damaged.
If ESP ®
is deactivated or faulty:
only move the selector lever to Nif
the vehicle is in danger of skidding,
e.g. on icy roads. ê Drive
The automatic transmission
changes gear automatically. All
forward gears are available.
One-touch gearshifting
When the selector lever is in position
D, you
can perform gearshifts yourself, even on vehi-
cles with automatic transmission.
X To shift up: briefly press the selector lever
to the right towards D+.
The automatic transmission shifts up to the
next gear, depending on the gearshift pro- gram selected. This also extends the shift
range.
X To shift down: briefly press the selector
lever to the left towards D–.
The automatic transmission shifts down to
the next gear, depending on the gear cur-
rently selected. This also restricts the shift
range.
i To prevent the engine from overrevving,
the automatic transmission does not shift
down if you push the selector lever towards
D– while driving at too high a speed.
X To derestrict the shift range: press and
hold the selector lever towards D+until D
is shown once more in the display.
The automatic transmission shifts from the
current shift range directly to D.
X To select the most effective shift
range: press and hold the selector lever to
the left towards D–.
The automatic transmission will shift to a
range which allows ideal acceleration and
deceleration. To do this, the automatic
transmission will shift down one or more
gears. Shift ranges When the selector lever is in position
D, it is
possible to restrict or derestrict the shift
range for the automatic transmission.
X Briefly press the selector lever to the right
towards D+or to the left towards D–.
The shift range selected is shown in the
display. The automatic transmission shifts
only as far as the selected gear.
i If the maximum engine speed for the shift
range is reached and you continue to accel-
erate, the automatic transmission shifts up
in order to prevent the engine from over-
revving even if the shift range is restricted. Driving situation
è The braking effect of the engine can
be used in this position.Controls
211_AKB; 2; 5, en-GB
mkalafa
,V ersion: 2.9.4
2008-02-29T16:57:07+01:00 - Seite 116 Dateiname: 6515_3416_02_buchblock.pdf; preflight
Page 121 of 401
Transmission
118 Steering wheel gearshift paddles*
and manual gearshift program*
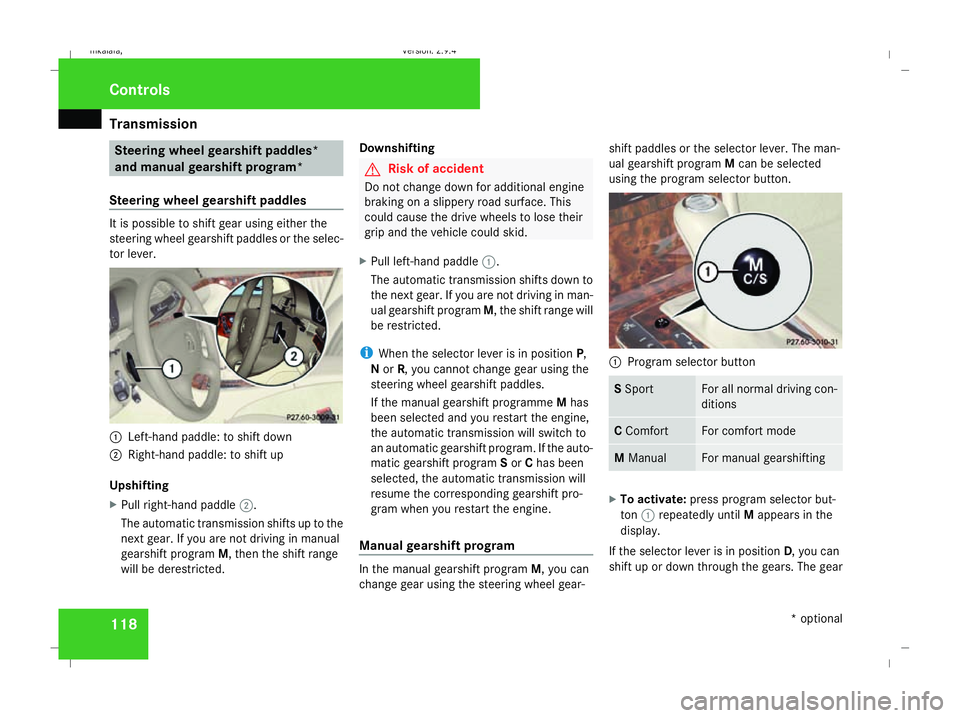
Steering wheel gearshift paddles It is possible to shift gear using either the
steering wheel gearshift paddles or the selec-
tor lever.
1
Left-hand paddle: to shift down
2 Right-hand paddle: to shift up
Upshifting
X Pull right-hand paddle 2.
The automatic transmission shifts up to the
next gear. If you are not driving in manual
gearshift program M, then the shift range
will be derestricted. Downshifting G
Risk of accident
Do not change down for additional engine
braking on a slippery road surface. This
could cause the drive wheels to lose their
grip and the vehicle could skid.
X Pull left-hand paddle 1.
The automatic transmission shifts down to
the next gear. If you are not driving in man-
ual gearshift program M, the shift range will
be restricted.
i When the selector lever is in position P,
N or R, you cannot change gear using the
steering wheel gearshift paddles.
If the manual gearshift programme Mhas
been selected and you restart the engine,
the automatic transmission will switch to
an automatic gearshift program. If the auto-
matic gearshift program Sor Chas been
selected, the automatic transmission will
resume the corresponding gearshift pro-
gram when you restart the engine.
Manual gearshift program In the manual gearshift program
M, you can
change gear using the steering wheel gear- shift paddles or the selector lever. The man-
ual gearshift program
Mcan be selected
using the program selector button. 1
Program selector button S
Sport For all normal driving con-
ditions
C
Comfort For comfort mode
M
Manual For manual gearshifting
X
To activate: press program selector but-
ton 1repeatedly until Mappears in the
display.
If the selector lever is in position D, you can
shift up or down through the gears. The gear Controls
* optional
211_AKB; 2; 5, en-GB
mkalafa
,V ersion: 2.9.4
2008-02-29T16:57:07+01:00 - Seite 118 Dateiname: 6515_3416_02_buchblock.pdf; preflight
Page 124 of 401
On-board computer
121Resetting the trip meter
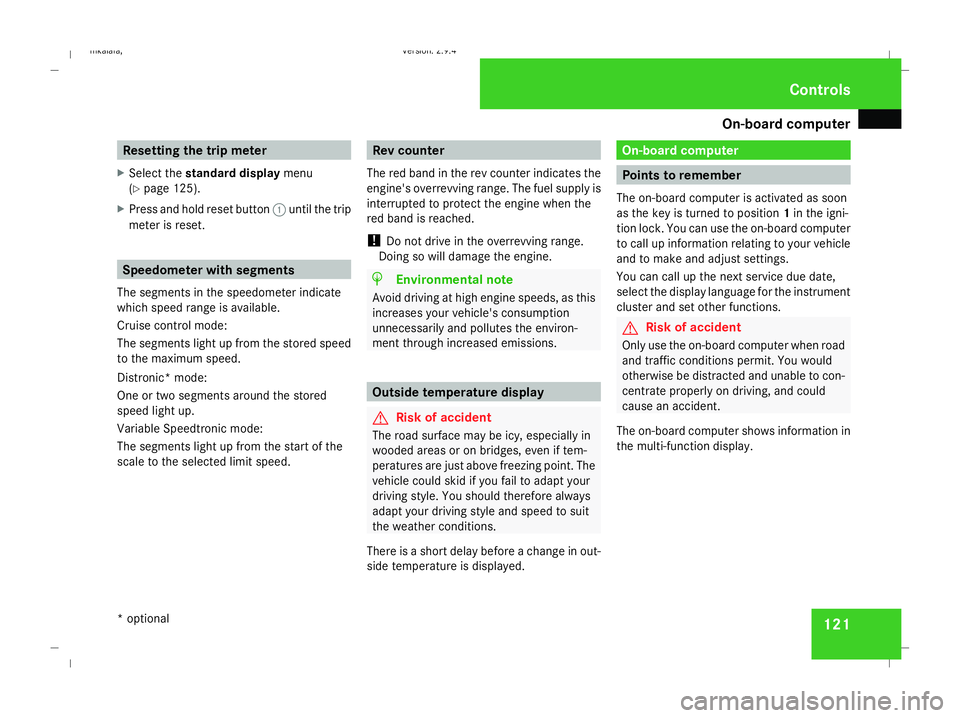
X Select the standard display menu
(Y page 125).
X Press and hold reset button 1until the trip
meter is reset. Speedometer with segments
The segments in the speedometer indicate
which speed range is available.
Cruise control mode:
The segments light up from the stored speed
to the maximum speed.
Distronic* mode:
One or two segments around the stored
speed light up.
Variable Speedtronic mode:
The segments light up from the start of the
scale to the selected limit speed. Rev counter
The red band in the rev counter indicates the
engine's overrevving range. The fuel supply is
interrupted to protect the engine when the
red band is reached.
! Do not drive in the overrevving range.
Doing so will damage the engine. H
Environmental note
Avoid driving at high engine speeds, as this
increases your vehicle's consumption
unnecessarily and pollutes the environ-
ment through increased emissions. Outside temperature display
G
Risk of accident
The road surface may be icy, especially in
wooded areas or on bridges, even if tem-
peratures are just above freezing point. The
vehicle could skid if you fail to adapt your
driving style. You should therefore always
adapt your driving style and speed to suit
the weather conditions.
There is a short delay before a change in out-
side temperature is displayed. On-board computer
Points to remember
The on-board computer is activated as soon
as the key is turned to position 1in the igni-
tion lock. You can use the on-board computer
to call up information relating to your vehicle
and to make and adjust settings.
You can call up the next service due date,
select the display language for the instrument
cluster and set other functions. G
Risk of accident
Only use the on-board computer when road
and traffic conditions permit. You would
otherwise be distracted and unable to con-
centrate properly on driving, and could
cause an accident.
The on-board computer shows information in
the multi-function display. Controls
* optional
211_AKB; 2; 5, en-GB
mkalafa,
Version: 2.9.4
2008-02-29T16:57:07+01:00 - Seite 121 ZDateiname: 6515_3416_02_buchblock.pdf; preflight
Page 138 of 401

On-board computer
135
X
Press the èor· button to select the
Settings... menu.
X Press the jbutton to call up the selec-
tion of submenus.
X Press the æorç button to select the
Time/Date submenu.
Setting the time
X Use the jbutton to select Clock,
hours Press R to confirm (orClock,
minutes Press R to confirm ).
X Press the æorç button to set a
value.
X Press the reset button on the left of the
instrument cluster.
The set time is stored.
Setting the date
X Press the jbutton to select Set date
Day (orSet date Month orSet date
Year).
X Press the æorç button to set the
values.
X Press the j,èorÿ button to
select a different display. Setting constant headlamp mode If you have set constant headlamp mode and
the light switch is in position MorU,
the side lamps, dipped-beam headlamps and
licence plate lighting are switched on auto-
matically when the engine is running. Turning
the light switch to a different position
switches on the corresponding lights. Make
sure that the light switch is turned to Bor
U if you switch off constant headlamp
mode while driving in the dark.
In countries in which constant headlamp
mode is a legal requirement, Constantis the
factory setting.
X Press the èor· button to select the
Settings... menu.
X Press the jbutton to call up the selec-
tion of submenus.
X Press the æorç button to select the
Lighting submenu.
X Press the jbutton to select Headlamp
mode. X
Press the æorç button to set the
mode for the headlamps to ManualorCon-
stant (constant headlamp mode).
X Press the j,èorÿ button to
select a different display.
Switching the surround lighting on or
off If the surround lighting is switched on, the
following lights will be switched on automat-
ically in the dark after you have unlocked the
vehicle using the key:
R
the side lamps
R the tail lamps
R the licence plate lighting
R the front foglamps
The surround lighting switches off automati-
cally if you open the driver's door or after 40
seconds.
X Press èor· to select the Set-
tings... menu.
X Press the jbutton to call up the selec-
tion of submenus.
X Press the æorç button to select the
Lighting submenu. Controls
211_AKB; 2; 5, en-GB
mkalafa,
Version: 2.9.4
2008-02-29T16:57:07+01:00 - Seite 135 ZDateiname: 6515_3416_02_buchblock.pdf; preflight
Page 140 of 401
On-board computer
137
X
Press the æorç button to select the
Lighting submenu.
X Press the jbutton to select Interior
lighting delayed switch-off.
X Press the æorç button to activate
or deactivate the Interior lighting
delayed switch-off feature.
X Press the j,èorÿ button to
select a different display.
Switching the Intelligent Light Sys-
tem* on/off You can set whether motorway mode, the
active light system and the extended range
foglamps are to be activated using the
Intelligent Light System
function.
X Press the èor· button to select the
Settings... menu.
X Press the jbutton to call up the selec-
tion of submenus.
X Press the æorç button to select the
Lighting submenu.
X Press the jbutton to select Intelli-
gent Light System. X
Press the æorç button to switch
the Intelligent Light System on/off.
X Press the j,èorÿ button to
select a different display.
Activating/deactivating the automatic
door locking feature The
Automatic door locking feature
allows you to set whether your vehicle will
lock centrally from a speed of about
15 km/h upwards.
i For more information on the automatic
locking feature, see (Y page 70).
X Press the èor· button to select the
Settings... menu.
X Press the jbutton to call up the selec-
tion of submenus.
X Press the æorç button to select the
Vehicle submenu.
X Press the jbutton to select Automatic
door locking . X
Press the æorç button to activate
or deactivate the Automatic door lock-
ing feature.
X Press the j,èorÿ button to
select a different display.
Selecting the switch-on time for the
auxiliary heating* This function is only available if the vehicle
has an auxiliary heating system.
The
Auxiliary heat. function allows you to
select three switch-on times. You can set the
exact switch-on time using the other func-
tions in the Heatersubmenu.
The auxiliary heating adopts the Thermatic or
4-zone Thermotronic *temperature setting.
The minimum and maximum temperature set-
tings for the auxiliary heating are 20 † and
24 † respectively.
You can switch off the auxiliary heating by
using the remote control or the auxiliary heat-
ing button on the centre console.
The auxiliary heating is switched off automat-
ically after 50 minutes. This time can be
changed. To do this, visit a qualified specialist
workshop, e.g. a Mercedes-Benz Service
Centre. Controls
* optional
211_AKB; 2; 5, en-GB
mkalafa
,V ersion: 2.9.4
2008-02-29T16:57:07+01:00 - Seite 137 ZDateiname: 6515_3416_02_buchblock.pdf; preflight
Page 145 of 401
Driving sys
tems 142
X
Press the èor· button to select the
Telephone menu.
X Press the jork button to call up
the phone book.
X Press the jork button to select the
desired name. To scroll through the tele-
phone book faster, press and hold the
j ork button for longer than 1 sec-
ond.
X Press the sbutton to start dialling.
The multi-function display shows the Con-
necting call...message.
The number dialled is stored in the redial
memory.
When there is a connection, the name of
the person called – if stored in the phone
book – or the number dialled appears in the
multi-function display.
or
X If you do not wish to make a call, press the
t button.
Redialling The on-board computer stores the last phone
numbers which were dialled. X
Press the èor· button to select the
Telephone menu.
X Press the sbutton to call up the most
recently dialled number in the redial mem-
ory.
X Press the jork button to select the
desired name or number.
X Press the sbutton to start dialling. Driving systems
Overview of driving systems
The vehicle's driving systems are described
on the following pages:
R Cruise control, Distronic* and Speedtronic,
which are used to control the speed of the
vehicle
R HOLD, which makes pulling away easier,
particularly on steep uphill gradients
R Vehicle level setting and AIRMATIC DC*,
which are used to adjust the vehicle's sus-
pension system
R 4*MATIC (permanent four-wheel drive), for
optimum traction
R Parktronic*, which assists you in parking
and manoeuvring
The ABS, BAS, adaptive brake lights, ESP ®
,
EBV (electronic brake-power distribution) and
ADAPTIVE BRAKE driving safety systems are
described in the "Driving safety systems" sec-
tion (Y page 58). Controls
* optional
211_AKB; 2; 5, en-GB
mkalafa
,V ersion: 2.9.4
2008-02-29T16:57:07+01:00 - Seite 142 Dateiname: 6515_3416_02_buchblock.pdf; preflight
Page 146 of 401
Driving sys
tems 143Cruise control
Cruise control maintains a constant road
speed for you. It brakes automatically in order
to avoid exceeding the set speed. On long and
steep downhill gradients, especially if the
vehicle is laden or towing a trailer, you must
shift to a lower gear in good time or select
shift range 1,2or 3in vehicles with automatic
transmission*. By doing so you will make use
of the braking effect of the engine, which
relieves the load on the brake system and
prevents the brakes from overheating and
wearing too quickly. G
Risk of accident
Do not change down for additional engine
braking on a slippery road surface. This
could cause the drive wheels to lose their
grip and the vehicle could skid.
Use cruise control only if road and traffic con-
ditions make it appropriate to maintain a
steady speed for a prolonged period. You can
store any road speed above 30 km/h. G
Risk of accident
Cruise control cannot take account of road
and traffic conditions.
Always pay attention to traffic conditions
even when cruise control is activated. Cruise control is only an aid designed to
assist driving. You are responsible for the
vehicle's speed and for braking in good
time. G
Risk of accident
Do not use cruise control:
R in road and traffic conditions which do
not allow you to maintain a constant
speed (e.g. heavy traffic or winding
roads). You could otherwise cause an
accident.
R on slippery roads. Braking or accelerat-
ing could cause the drive wheels to lose
traction and the vehicle could then skid.
R when there is poor visibility, e.g. due to
fog, heavy rain or snow
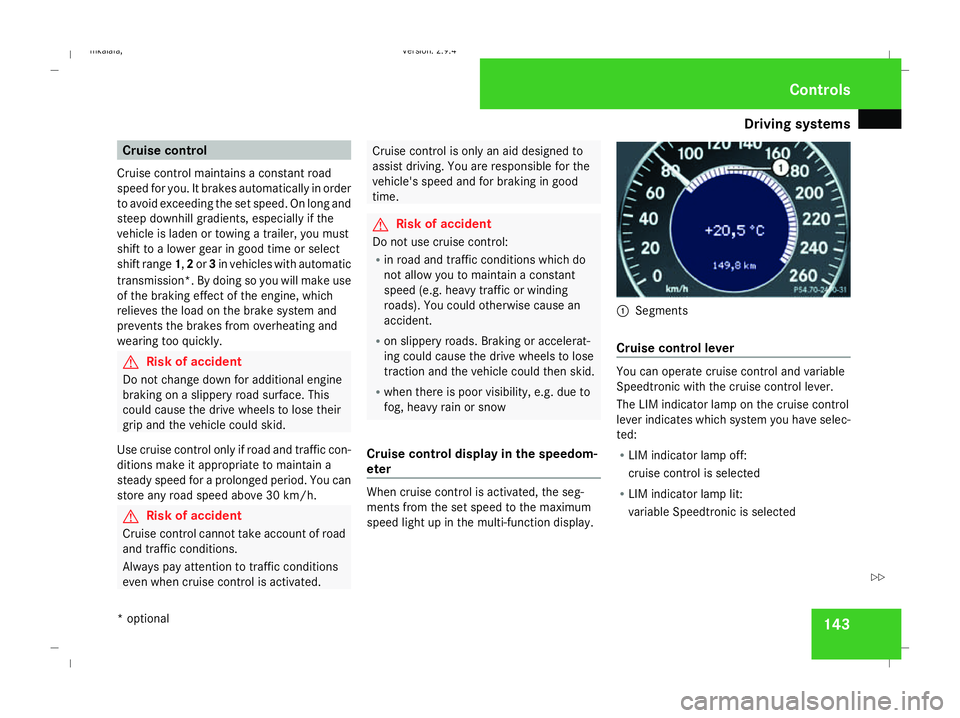
Cruise control display in the speedom-
eter When cruise control is activated, the seg-
ments from the set speed to the maximum
speed light up in the multi-function display. 1
Segments
Cruise control lever You can operate cruise control and variable
Speedtronic with the cruise control lever.
The LIM indicator lamp on the cruise control
lever indicates which system you have selec-
ted:
R
LIM indicator lamp off:
cruise control is selected
R LIM indicator lamp lit:
variable Speedtronic is selected Controls
* optional
211_AKB; 2; 5, en-GB
mkalafa
,V ersion: 2.9.4
2008-02-29T16:57:07+01:00 - Seite 143 ZDateiname: 6515_3416_02_buchblock.pdf; preflight
Page 147 of 401

Driving sys
tems 1441
To store the current speed or a higher
speed
2 LIM indicator lamp
3 To select the current or last stored speed
4 To store the current speed or a lower
speed
5 To switch between cruise control and var-
iable Speedtronic
6 Deactivating cruise control
Selecting cruise control X
Check whether LIM indicator lamp 2is off.
If it is off, cruise control is already selected.
If it is not, press the cruise control lever in
the direction of arrow 5.
LIM indicator lamp 2in the cruise control
lever goes out. Cruise control is selected. Storing and maintaining the current
speed You can store the current speed if you are
driving faster than 30 km/h and ESP ®
is acti-
vated (Y page 60).
X Accelerate the vehicle to the desired
speed.
X Briefly press the cruise control lever up
1 or down 4.
X Remove your foot from the accelerator
pedal.
Cruise control is activated. The vehicle
automatically maintains the stored speed.
i Cruise control may be unable to maintain
the stored speed on uphill gradients. The
stored speed is resumed when the gradient
evens out. Cruise control maintains the
stored speed on downhill gradients by
automatically applying the brakes.
Vehicles with manual transmission:
R Always drive at adequate, but not exces-
sive, engine speeds.
R Change gear in good time.
R If possible, do not change down several
gears at a time. Selecting the current or last stored
speed G
Risk of accident
Only select a stored speed if you know what
that speed is and whether it is suitable for
the current situation. Otherwise, sudden
acceleration or braking could endanger you
or others.
X Briefly pull the cruise control lever towards
you 3.
X Remove your foot from the accelerator
pedal.
The first time cruise control is activated it
stores the current speed or regulates the
speed of the vehicle to the previously
stored speed.
Setting a speed X
Press the cruise control lever up 1for a
higher speed or down 4for a lower speed.
X Keep the cruise control lever pressed until
the desired speed is reached.
X Release the cruise control lever.
The new speed is stored. Controls
211_AKB; 2; 5, en-GB
mkalafa
,V ersion: 2.9.4
2008-02-29T16:57:07+01:00 - Seite 144 Dateiname: 6515_3416_02_buchblock.pdf; preflight