Page 130 of 769
129 Control systems
COMAND video DVD
Notes about handling DVDs �
Only hold discs by the edge.
�
Handle discs carefully to prevent play-
back problems.
�
Avoid getting scratches, fingerprints
and dust on discs.
�
Clean discs from time to time with a
commercially-available cleaning cloth.
Do not wipe them with a circular mo-
tion, but only in straight lines from the
center outwards.
�
Only use a pen designed for such a pur-
pose to label discs.
�
Place discs back in their boxes after
use.
�
Protect discs from heat and direct sun-
light.
Functional limitations
Depending on the DVD, it is possible that
certain functions or actions may be tempo-
rarily or permanently unavailable. If you try
to utilize such functions or carry out such
actions, you will see the 7 symbol in the
display.
Inserting or ejecting DVDs�
Inserting a DVD (
�page 116).
or
�
Ejecting a DVD (
�page 118).
!
Do not affix stickers or labels to the discs.
These could peel away and damage COMAND.
COMAND is designed to hold discs which com-
ply with the IEC 60908 standard. You can there-
fore only use discs with a maximum thickness of
1.3 mm.
If you insert thicker discs, e.g. those that contain
data on both sides (DVD on one side and audio
data on the other), they cannot be ejected and
can damage COMAND.
Do not use discs with an 8 cm diameter, even if
they have an adapter.
Only use round discs with a 12 cm diameter.
Warning!
G
Only insert or eject a DVD when the vehicle
is stationary. There is a risk of accident by
being distracted from road and traffic condi-
tions if you load a DVD while the vehicle is in
motion.
Bear in mind that at a speed of just 30 mph
(approximately 50 km/h), your vehicle is
covering a distance of 44 feet (approximate-
ly 14 m) every second.
Page 131 of 769
130 Control systemsCOMAND video DVDSubmenu overview of video DVDSwitching to video DVD mode�
Insert a DVD (
�page 116).
or
�
Select “Video” � “Video” � “Video
DVD”.
or
�
Press the M shortcut button once or
twice.
DVD-V
Pause/Play
Stop
Changer
Sound
DVD Functions
Pause playback
Pause Playback
Select medium
Treble
Brightness
Continue playback
Stop playback
Bass
Contrast
Restart playback
Balance/Fader
Color
3D Sound
16:9 Optimized4:3Widescreen
i
The M shortcut button takes you directly
to the previously set disc mode (audio CD/DVD,
MP3-CD/DVD or video DVD). The number of
times you have to press the shortcut button de-
pends on the previously set mode.
Page 136 of 769
135 Control systems
COMAND video DVD
Switching to the next highest DVD menu level�
Press the L back button in the cen-
ter console.
or
�
Select the corresponding menu item in
the DVD menu.
or
�
Select a menu item of your choice from
the DVD menu.
�
Select the menu item “Go up” in the se-
lection menu.
Back to the film�
Press the L back button until you
can see the film.
or
�
Select the corresponding menu item in
the DVD menu.
or
�
Select a menu item of your choice from
the DVD menu.
�
Select the menu item “Back (to the
film)” in the selection menu.
Setting the language and audio format�
Select “Video” � “Video” � “Video
DVD”.
�
Show the menu system, if necessary
(�page 131).
�
Select “DVD-V” � “DVD Functions”.
�
Select “Menu Language” or “Audio Lan-
guage”.
In both cases a selection list will ap-
pear. The dotRin front of an entry
indicates the current language.
i
Depending on the DVD, it is possible the
menu items H and G either have no func-
tion or have no function in certain parts of the
DVD menu.
i
Depending on the DVD, it is possible the
menu item “Go up” either has no function or has
no function in certain parts of the DVD menu.
i
Depending on the DVD, it is possible the
menu item “Back (to the film)” either has no
function or has no function in certain parts of the
DVD menu.
i
This function is not available for all DVDs. If
it is available, you can set the language for the
DVD menu and the audio language and/or the
audio format. The number of settings you can
make is determined by the content of the DVD. It
may also be possible to make the settings in the
DVD menu (
�page 134).
��
Page 141 of 769
140 Control systemsCOMAND telephone*Activating telephone mode�
Select “Telephone” � “Telephone”.
or
�
Press s on telephone keypad.
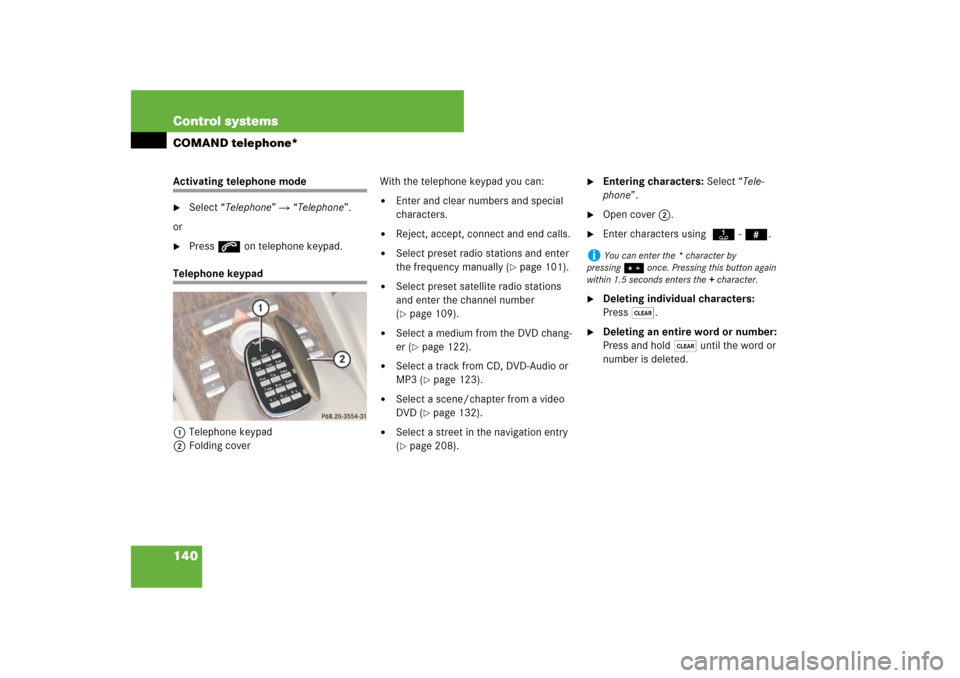
Telephone keypad
1Telephone keypad
2Folding coverWith the telephone keypad you can:
�
Enter and clear numbers and special
characters.
�
Reject, accept, connect and end calls.
�
Select preset radio stations and enter
the frequency manually (
�page 101).
�
Select preset satellite radio stations
and enter the channel number
(�page 109).
�
Select a medium from the DVD chang-
er (
�page 122).
�
Select a track from CD, DVD-Audio or
MP3 (
�page 123).
�
Select a scene/chapter from a video
DVD (
�page 132).
�
Select a street in the navigation entry
(�page 208).
�
Entering characters: Select “Tele-
phone”.
�
Open cover 2.
�
Enter characters using A- #.
�
Deleting individual characters:
Press*.
�
Deleting an entire word or number:
Press and hold * until the word or
number is deleted.
i
You can enter the * character by
pressing> once. Pressing this button again
within 1.5 seconds enters the + character.
Page 186 of 769
185 Control systems
COMAND navigation (introduction)
Updating
After you have loaded the DVD, you will
see a message to the effect that the disc
does not contain a recognizable audio for-
mat.�
Confirming message: Press n.
COMAND checks whether the map
software on the DVD is compatible with
the vehicle’s navigation system and
whether it is compatible with the cur-
rent system software.
Map software is compatible with the
navigation system and the current sys-
tem software
COMAND now checks whether the map
data on the DVD is already installed.
Map data is not yet installed
You will see a comparison of the version
statuses in the display and a prompt will
appear asking whether you want to contin-
ue with the update.
�
Select “Yes” or “No”.
If you select “No”, COMAND automati-
cally ejects the DVD and the map data
is not updated.�
Take DVD out of the slot.
If you select “Yes”, the map data is up-
dated.
Map data is already installed
You will see a message that the map data
is already installed and a prompt will ap-
pear asking you whether you want to con-
tinue with the update.
�
Select “Yes” or “No”.
If you select “No”, COMAND automati-
cally ejects the DVD and the map data
is not updated.�
Take DVD out of slot.
If you select “Yes”, the existing map
data is saved again.Updating the map data
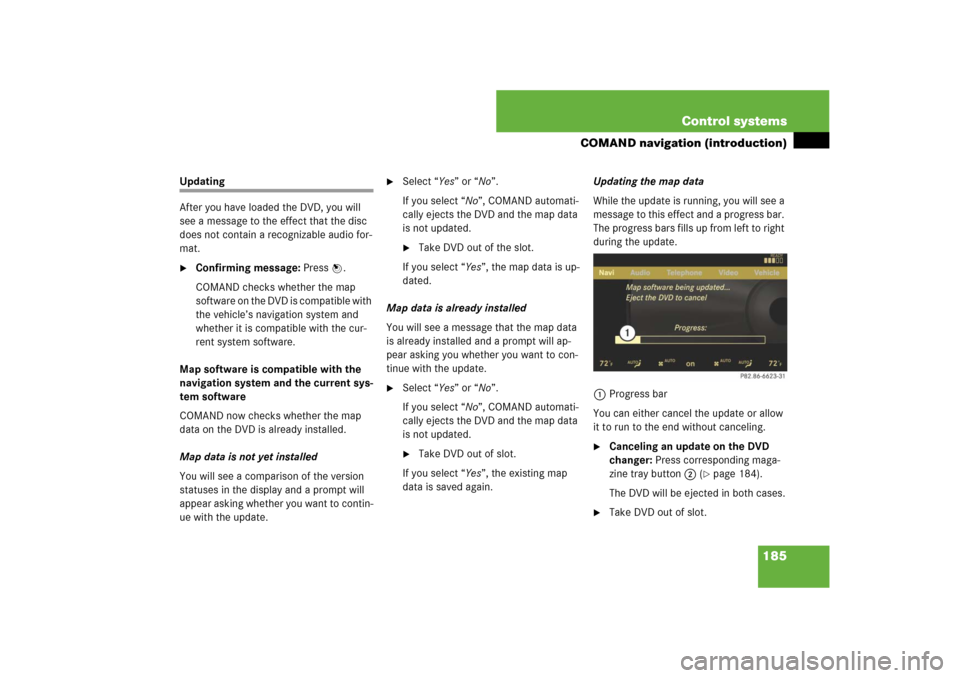
While the update is running, you will see a
message to this effect and a progress bar.
The progress bars fills up from left to right
during the update.
1Progress bar
You can either cancel the update or allow
it to run to the end without canceling.
�
Canceling an update on the DVD
changer: Press corresponding maga-
zine tray button 2 (
�page 184).
The DVD will be ejected in both cases.
�
Take DVD out of slot.
Page 258 of 769
257 Control systems
COMAND system settings
Setting the date�
Select “Vehicle” � “System Settings”
� “Time” � “Date”.
�
Selecting month, day or year:
Slideomp.
�
Setting value: Rotate ymz or
slideqmr.
�
Saving setting: Press n.
Setting the time/date format
�
Select “Vehicle” � “System Settings”
� “Time” � “Format”.
The format list appears. The dots R in
front of the list entries indicate the cur-
rent setting.
�
Changing format setting:
Select desired format.
�
Saving setting and exit the menu:
Slide omp.
Voice Control settings
Switching help window on or off�
Select “Vehicle”� “System Settings”
� “Voice Control”.
�
Select “Help Window”.
You can switch the help window on or
off. A checkmark appears when the
help window is switched on.
Individualization
Using individualization, you can fine-tune
Voice Control to your own voice and thus
improve voice recognition. The ability of
the system to recognize the commands of
other users does not deteriorate as a re-
sult.
Individualization consists of two parts. You
train the system to recognize digits in the
first part and specific commands in the
second part. Starting new individualization
�
Select “Vehicle” � “System Settings”
� “Voice Control” � “Start new indi-
vidualization”.
A prompt appears asking whether you
would like further information.
�
Select “Yes” or “No”.
If you select “No”, the first part of indi-
vidualization begins.
If you select “Yes”, an information dis-
play will be shown with audio instruc-
tion.�
Closing display: Select “OK”.
The first part of individualization be-
gins.
i
It is only possible to start individualization
with the vehicle stationary. After starting the
session, the system will guide you through the in-
dividualization by means of acoustic instruc-
tions.
��
Page 285 of 769
284 Control systemsInstrument cluster control systemMenus
Trip (
�page 286)
Navi (
�page 287)
Audio (
�page 289)
AMG
1 (�page 291)
1CL 63 AMG and CL 65 AMG only.Commands/submenusStandard display
Showing route guidance in-
structions, current direction
traveled
Selecting radio station
Gear currently engaged
Engine oil temperature
Vehicle supply voltage
Fuel consumption statistics since start
Selecting satellite radio
channel
RACETIMER
Fuel consumption statistics since last
reset
Operating DVD changer/
audio CD/ audio DVD/MP3
Overall analysis
Resetting fuel consumption statistics
Operating Video DVD
Lap analysis
Distance to emptyDigital speedometer
Page 290 of 769
289 Control systems
Instrument cluster control system
�
“Calculating Route”
COMAND is calculating a route. After-
ward, COMAND starts route guidance.
�
“Off Map”
The vehicle’s location is outside of the
digital map’s range. The vehicle is in an
off-map position (
�page 238).
�
“Off Mapped Road”
The vehicle is either on a road that has
not been digitized (
�page 238) or on
the side of a road, e.g. in a parking
space.
�
“No Route”
COMAND cannot calculate a route to
the selected destination.
�
“Direction of Dest.”
The vehicle has gone off the map dur-
ing route guidance (
�page 238).
Audio menu
The functions in the “Audio” menu operate
the audio equipment which you currently
have turned on.
If no audio equipment is currently turned
on, the message: “Audio OFF” is shown in
the multifunction display.
Selecting radio station�
Turn on COMAND and select “Radio”
(�page 98).
�
Press ( or & to select the
“Audio” menu.
�
Selecting a preset station: Briefly
press % or $.
�
Selecting a station using the search
function: Press and hold %
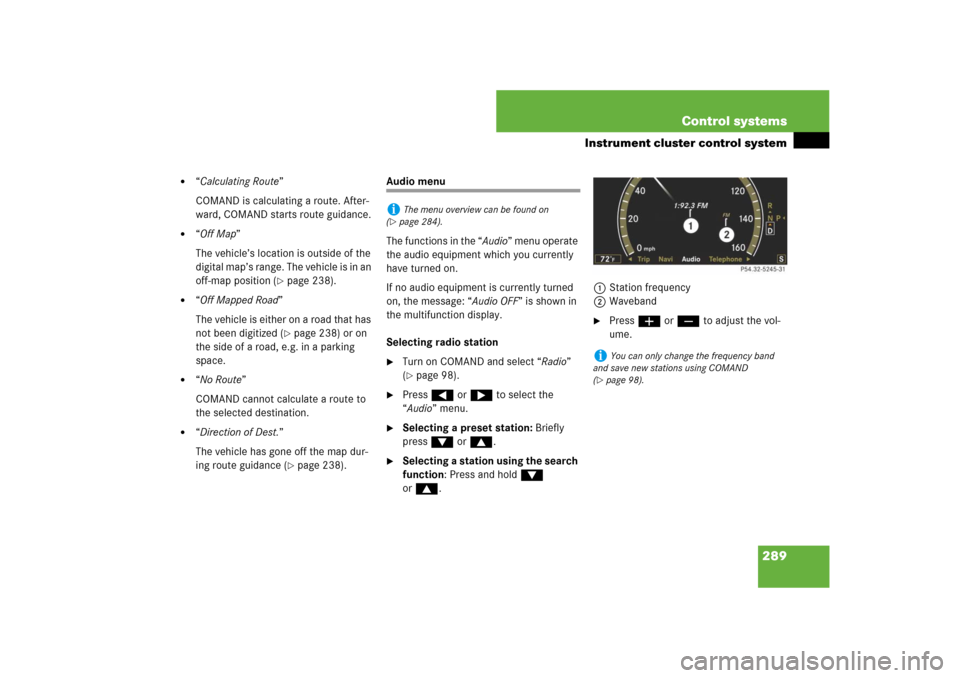
or$.1Station frequency
2Waveband
�
Press æ or ç to adjust the vol-
ume.
i
The menu overview can be found on
(
�page 284).
i
You can only change the frequency band
and save new stations using COMAND
(
�page 98).