Page 247 of 769
246 Control systemsCOMAND navigation system (real-time traffic)List for active route guidance
When route guidance is active, the list dis-
plays only the streets which are part of the
route and for which messages are present.
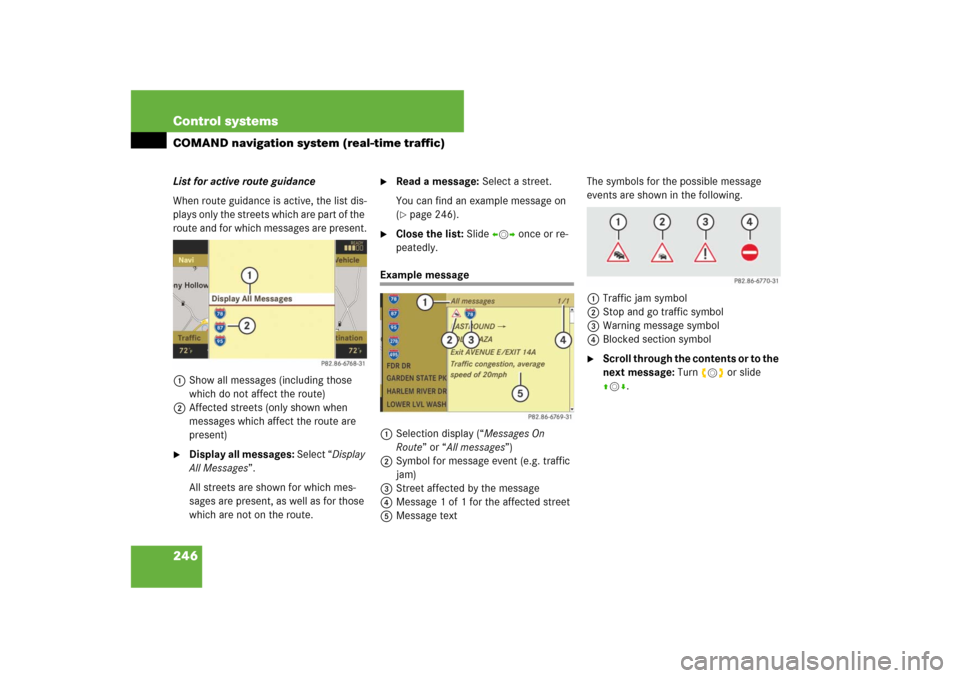
1Show all messages (including those
which do not affect the route)
2Affected streets (only shown when
messages which affect the route are
present)�
Display all messages: Select “Display
All Messages”.
All streets are shown for which mes-
sages are present, as well as for those
which are not on the route.
�
Read a message: Select a street.
You can find an example message on
(�page 246).
�
Close the list: Slide omp once or re-
peatedly.
Example message
1Selection display (“Messages On
Route” or “All messages”)
2Symbol for message event (e.g. traffic
jam)
3Street affected by the message
4Message 1 of 1 for the affected street
5Message textThe symbols for the possible message
events are shown in the following.
1Traffic jam symbol
2Stop and go traffic symbol
3Warning message symbol
4Blocked section symbol
�
Scroll through the contents or to the
next message: Turn ymz or slide
qmr.
Page 253 of 769
252 Control systemsCOMAND navigation system (destination memory)�
Closing message: Select “OK”.
Depending on which data is missing or
cannot be found on the digital map, you
must now either:
�
select a state (USA) or province (CDN)
�
or enter a city
�
or enter a street
�
or enter a house number
�
Selecting a state (USA) or province
(CDN): Select desired state (USA) or
province (CDN) from the list.
�
Entering a city: Proceed as described
for destination entry in the “Entering a
city” section (
�page 204).
�
Entering a street: Proceed as de-
scribed for destination entry in the “En-
tering a street” section (
�page 207).
�
Entering a house number: Proceed
as described for destination entry in
the “Entering a house number” section
(�page 212).
If all data is available and matches the
digital map data, you can save the ad-
dress.
�
Saving: Select “Save”.Displaying your own address
�
Select “Navi” � “Destination” �
“From Memory”.
The destination memory list appears ei-
ther with or without the input charac-
ters. Whether the input characters
appear depends on the number of en-
tries in the destination memory.
�
Press n.
i
In the address book entry, the city and
street must be spelled in the same way as the
destination entry so that the data matches the
digital map data.
In order for the state (USA) or province (CDN) to
match the map data, you may either enter the
entire name or the abbreviation in the address
book.
Examples:
�
Florida or FL
�
Colorado or CO
�
Alberta or AB
�
Ontario or ON
��
Page 256 of 769
255 Control systems
COMAND system settings
�COMAND system settings
Systems settings menu overviewDisplay settings
Switching the display on or off�
Switching off: Select “Vehicle” �
“Display OFF”.
�
Switching back on: Rotate ymz or
slideqmr.Setting the display design
�
Select “Vehicle” � “System Settings”
� “Display”.
�
Select “Day Mode”, “Night Mode” or
“Automatic”.
Time settings
Setting the time�
Select “Vehicle” � “System Settings”
� “Time” � “Time”.
�
Selecting hour or minute(s):
Slideomp.
i
The components and operating principles of
COMAND can be found on (
�page 83).
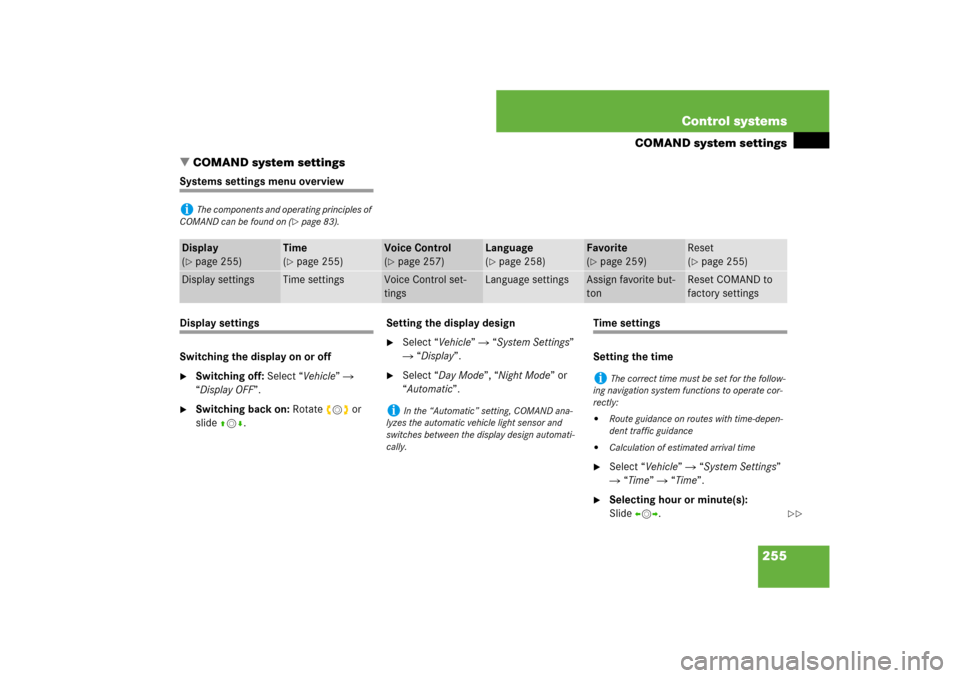
Display
(�page 255)
Time
(�page 255)
Voice Control
(�page 257)
Language
(�page 258)
Favorite
(�page 259)
Reset
(�page 255)
Display settings
Time settings
Voice Control set-
tings
Language settings
Assign favorite but-
ton
Reset COMAND to
factory settings
i
In the “Automatic” setting, COMAND ana-
lyzes the automatic vehicle light sensor and
switches between the display design automati-
cally.
i
The correct time must be set for the follow-
ing navigation system functions to operate cor-
rectly:
�
Route guidance on routes with time-depen-
dent traffic guidance
�
Calculation of estimated arrival time
��
Page 257 of 769
256 Control systemsCOMAND system settings�
Setting value: Rotate ymz or
slideqmr.
�
Saving setting: Press n.
Setting the time zone and switching be-
tween Daylight Saving Time and stan-
dard time
�
Setting time zone: Select “Vehicle” �
“System Settings” � “Time” � “Time
Zone”.
The country list appears. The dot R in
front of a list entry indicates the cur-
rent setting.
�
Select the country in which you are cur-
rently driving.
A time zone list may also be displayed,
depending on the country selected.
�
Select desired time zone.
Subsequent operation depends on:
�
whether your navigation system has
GPS reception
�
which country you have previously set
You may either:
�
manually switch between “Daylight
Savings Time (Summer)” and “Standard
time (Winter)” in a list
or
�
switch automatic Daylight Saving Time
to standard time changeover (and vice
versa) on or off
�
Switching manually: Select “Daylight
Savings Time (Summer)” or “Standard
time (Winter)”.
The dot R in front of a list entry indi-
cates the current setting.
�
Switching automatic changeover on
or off: Select “Automatic Daylight Sav-
ings Time”.
You have switched the function on or
off. A checkmark appears when the
function is switched on.
�
Saving setting and exit the menu:
Slide omp.
i
The increment value for setting the minutes
depends on the situation. If GPS reception is
available, it is 30 minutes. If GPS reception is not
available, it is one minute.
i
The correct time zone and Daylight Saving
Time/standard time must be set for the follow-
ing navigation system functions to operate cor-
rectly:
�
Route guidance on routes with time-depen-
dent traffic guidance
�
Calculation of estimated arrival time
i
Availability of the automatic daylight saving
time feature depends on the country selected.
i
If you have switched off the automatic
changeover function, you must change Daylight
Saving Time to standard time and vice versa
yourself.
��
Page 258 of 769
257 Control systems
COMAND system settings
Setting the date�
Select “Vehicle” � “System Settings”
� “Time” � “Date”.
�
Selecting month, day or year:
Slideomp.
�
Setting value: Rotate ymz or
slideqmr.
�
Saving setting: Press n.
Setting the time/date format
�
Select “Vehicle” � “System Settings”
� “Time” � “Format”.
The format list appears. The dots R in
front of the list entries indicate the cur-
rent setting.
�
Changing format setting:
Select desired format.
�
Saving setting and exit the menu:
Slide omp.
Voice Control settings
Switching help window on or off�
Select “Vehicle”� “System Settings”
� “Voice Control”.
�
Select “Help Window”.
You can switch the help window on or
off. A checkmark appears when the
help window is switched on.
Individualization
Using individualization, you can fine-tune
Voice Control to your own voice and thus
improve voice recognition. The ability of
the system to recognize the commands of
other users does not deteriorate as a re-
sult.
Individualization consists of two parts. You
train the system to recognize digits in the
first part and specific commands in the
second part. Starting new individualization
�
Select “Vehicle” � “System Settings”
� “Voice Control” � “Start new indi-
vidualization”.
A prompt appears asking whether you
would like further information.
�
Select “Yes” or “No”.
If you select “No”, the first part of indi-
vidualization begins.
If you select “Yes”, an information dis-
play will be shown with audio instruc-
tion.�
Closing display: Select “OK”.
The first part of individualization be-
gins.
i
It is only possible to start individualization
with the vehicle stationary. After starting the
session, the system will guide you through the in-
dividualization by means of acoustic instruc-
tions.
��
Page 260 of 769
259 Control systems
COMAND system settings
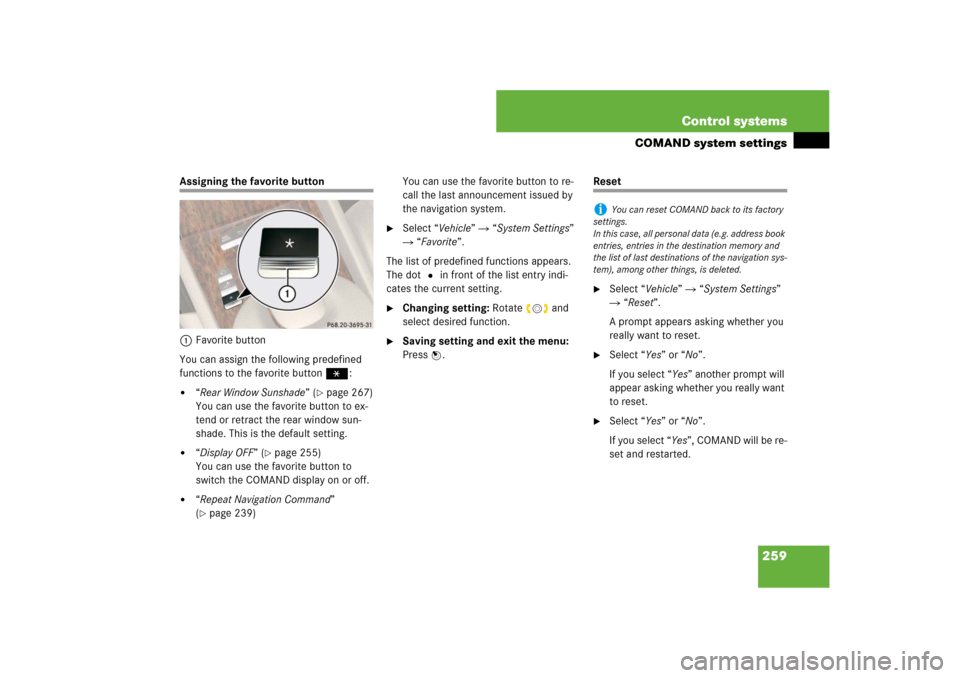
Assigning the favorite button
1Favorite button
You can assign the following predefined
functions to the favorite buttonP:�
“Rear Window Sunshade” (
�page 267)
You can use the favorite button to ex-
tend or retract the rear window sun-
shade. This is the default setting.
�
“Display OFF” (
�page 255)
You can use the favorite button to
switch the COMAND display on or off.
�
“Repeat Navigation Command”
(�page 239)You can use the favorite button to re-
call the last announcement issued by
the navigation system.
�
Select “Vehicle” � “System Settings”
� “Favorite”.
The list of predefined functions appears.
The dot R in front of the list entry indi-
cates the current setting.
�
Changing setting: Rotate ymz and
select desired function.
�
Saving setting and exit the menu:
Press n.
Reset�
Select “Vehicle” � “System Settings”
� “Reset”.
A prompt appears asking whether you
really want to reset.
�
Select “Yes” or “No”.
If you select “Yes” another prompt will
appear asking whether you really want
to reset.
�
Select “Yes” or “No”.
If you select “Yes”, COMAND will be re-
set and restarted.
i
You can reset COMAND back to its factory
settings.
In this case, all personal data (e.g. address book
entries, entries in the destination memory and
the list of last destinations of the navigation sys-
tem), among other things, is deleted.
Page 278 of 769
277 Control systems
COMAND seats
Exiting menu
There are several ways to exit the seat
menu.�
Press O again.
or
�
Press any shortcut button.
or
�
Select another main function from the
main menu line.
Lumbar support (CL 550)
To support the spine, you can adjust the
curvature of the front seat backrests.�
Press O.
The main area of the COMAND display
is active. A scale appears.
1Scale
2Cursor
3Current seat
4Current setting
�
Select seat (
�page 276).
�
Adjusting lumbar support:
Slideomp or rotate ymz until desired
setting is reached.
�
Confirming selection: Press n.
�
Switching to the bottom menu line:
Slide omp.
�
Confirming selection: Press n.
i
After you have pressed
O
, the seat last
adjusted is active.
Page 279 of 769
278 Control systemsCOMAND seatsDrive-dynamic multicontour seats*
Drive-dynamic multicontour seats allow
several individual support adjustments and
can automatically adjust lateral support to
your driving style (
�page 281).Multicontour adjustments
To support the spine, you can individually
adjust the backrest contour of the front
seats by regulating the air pressure in the
air chambers.
The settings are made on the COMAND
display.
You can adjust the following air chambers:
�
sides of seat cushion
�
sides of backrest
�
backrest curvature in lumbar area
�
backrest curvature in shoulder areaAdjusting sides of seat cushion
This function is used to adjust the air
chambers in the sides of the seat cushion.
�
Select seat (
�page 276).
�
Selecting “Seat sides”: Slide omp or
rotate ymz.
�
Confirming selection: Press n.
A scale appears.
i
If PRE-SAFE
® has been activated, the air
pressure in the air chambers (on the sides of the
seat cushion and backrest) of the drive-dynamic
multicontour seats is increased.
i
Whether adjustments are being made manu-
ally or automatically, noises may be heard from
air pumping into or releasing from the air
chambers.