Page 436 of 509
435 Practical hints
Replacing bulbs
1Bulb socket for turn signal lamp bulb
2Housing cover for parking and standing
lamp
3Housing cover for parking and standing
lamp
4Housing cover for high beam flasher
5Housing cover for Bi-Xenon headlamp6Bulb socket for parking and standing
lamp bulb
7Bulb holder for high beam flasher bulb
7Bulb holder for high beam bulbHigh beam bulb for high beam flasher
�Turn housing cover4 counterclock-
wise and remove it.
�Pull electric plug off the bulb.
�Pull out bulb holder7 with the bulb.
�Pull the bulb at its socket out of bulb
holder7.
�Insert the new bulb so that its socket
locates in the recess of bulb holder7
and is level to it.
�Reinsert bulb holder7 with the bulb in
the lamp.
�Connect electric plug on the bulb.
�Align housing cover4 and turn it
clockwise.
Page 437 of 509

436 Practical hints
Replacing bulbs
Front turn signal lamp bulb
1Mark
2Handle
3Bulb socket
�Turn bulb socket3 with handle2
counterclockwise and remove it.
�Press gently onto the bulb and turn
counterclockwise out of bulb
socket3.
�Press the new bulb gently into bulb
socket3 and turn clockwise until it
engages.
�Place bulb socket3 back into the
lamp. Handle2 must be in a horizon-
tal line and mark1 is on the upper
part.
�Turn bulb socket3 clockwise until it
engage.
Parking and standing lamp bulb
�Turn housing cover2 or3 counter-
clockwise and remove it.
�Pull out bulb socket6 with the bulb.
�Pull the bulb out of the bulb socket6.
�Press the new bulb into bulb socket6.
�Press bulb socket6 back into the
lamp.
�Align housing cover2 or3 and turn
it clockwise.Additional turn signal lamps
The additional turn signal lamps in the ex-
terior rear view mirrors have LEDs.
If a malfunction occurs or LEDs fail to func-
tion, the entire turn signal unit must be re-
placed. Have the additional turn signal unit
replaced at an authorized Mercedes-Benz
Center.
Front side marker lamp
Since replacing the side marker lamp bulbs
is a technically highly demanding process,
we recommend you have the side marker
lamp bulbs replaced at an authorized
Mercedes-Benz Center.Replacing bulbs for rear lamps
Before you start to replace a bulb for a rear
lamp, do the following first:
�Turn the exterior lamp switch to
positionM (
�page 108).
Page 438 of 509

437 Practical hints
Replacing bulbs
Tail lamp unit
�Open trunk lid.
�For driver side: Lift up the bottom and
pull out the trim panel covering the
driver side rear light.
�For passenger side: Open the fuse box
in the trunk (
�page 458).
1Tabs
2Connector
�Disconnect electrical connector2.
�Pull tabs1 in direction of arrows.
�Remove the bulb carrier.1Side marker lamp
2Rear fog lamp (driver’s side)/Side
marker lamp
3Backup lamp
4Brake lamp/tail lamp
5Parking and standing lamp, brake
lamp/tail lamp
6Turn signal lamp
�Press gently onto the respective bulb
and turn counterclockwise out of its
bulb socket.
Side marker lamp1: Turn the bulb
socket on backside of tail lamp unit
counterclockwise and removes side
marker lamp1 with bulb socket
�Press the new bulb gently into its bulb
socket and turn clockwise until it
engages.
Side marker lamp1: Turn the new
bulb with socket on backside of tail
lamp unit clockwise until it engages.
�Reinstall the bulb carrier.
Let tabs1 (
�page 437) engage.
�Connect the electrical connector2
(
�page 437) until it engage.
�Reinstall trim panel.
License plate lamp
Since replacing the license plate lamp
bulbs is a technically highly demanding
process, we recommend you have the li-
cense plate lamp bulbs replaced at an au-
thorized Mercedes-Benz Center.
Page 445 of 509

444 Practical hints
Flat tire
�Turn crank3 clockwise until jack 2
is fully seated in take-up bracket1
and the jack base evenly meets the
ground.
�Continue to turn crank 3 until the
wheel is a maximum of 1.2 in (3 cm)
from the ground.Removing the wheel
�Unscrew and remove the wheel bolts.
�Remove the wheel.
Mounting the Minispare wheel
�Clean contact surfaces of wheel and
wheel hub.
!Do not place wheel bolts in sand or dirt. This
could result in damage to the bolt and wheel hub
threads.
!To avoid paint damage, place wheel flat
against hub and hold it there while installing first
wheel bolt.
Warning!G
Always replace wheel bolts that are
damaged or rusted.
Never apply oil or grease to wheel bolts.
Damaged wheel hub threads should be
repaired immediately. Do not continue to
drive under these circumstances! Contact
an authorized Mercedes-Benz Center or call
Roadside Assistance.
Incorrect wheel bolts or improperly tight-
ened wheel bolts can cause the wheel to
come off. This could cause an accident.
Make sure you are using the correct wheel
bolts.
Warning!G
Only use genuine Mercedes-Benz wheel
bolts. Other wheel bolts may come loose.
Do not tighten the wheel bolts when the
vehicle is raised. Otherwise the vehicle
could fall off the jack.
��
Page 446 of 509

445 Practical hints
Flat tire
�Guide the Minispare wheel onto the
wheel hub and push it on.
�Insert wheel bolts and tighten them
slightly.
Lowering the vehicle
�Lower vehicle by turning crank
counterclockwise until vehicle is
resting fully on its own weight.
�Remove the jack.1 - 5 Wheel bolts
6 Wheel wrench
�Tighten the five wheel bolts evenly,
following the diagonal sequence
illustrated (1 to 5), until all bolts are
tight. Observe a tightening torque of
96 lb-ft (130 Nm).
Before storing the jack, it should be fully
collapsed, with handle folded in (storage
position).
�Store the jack and the other vehicle
tools in the designated storage space
underneath the trunk floor
(
�page 420).
Warning!G
Have the tightening torque checked after
changing a wheel. The wheels could come
loose if they are not tightened to a torque of
96 lb-ft (130 Nm).
iVehicles with TPMS (USA only):
Do not activate the tire inflation pressure
monitor (
�page 344) until a full size wheel/tire
with functioning sensor has been placed back
into service on the vehicle.
Page 451 of 509
450 Practical hints
Battery
Reconnecting the battery
�Turn off all electrical consumers.
�Remove SmartKey from starter switch.
Vehicles with KEYLESS-GO* (Canada
only):
�Open the driver’s door.
�Connect the battery positive lead and
fasten its cover (
�page 448).
�Connect the battery negative lead
(
�page 448).
�Make sure that the ventilation hose4
is attached to the battery.
�Reinstall filter box (�page 447).
!Always connect the starter battery in the or-
der described below. Otherwise, the vehicle’s
electronics could be damaged.
!Never invert the terminal connections.
!Make sure the battery has a plug where the
ventilation hose
4 is attached to it.
iThe following procedures must be carried
out following any interruption of battery power
(e.g. due to reconnecting):
�Reset the automatic exterior mirror fold in
function (
�page 99).
�Set the clock (�page 170).
Vehicles with COMAND*: see COMAND op-
erator’s manual.
Page 456 of 509
455 Practical hints
Towing the vehicle
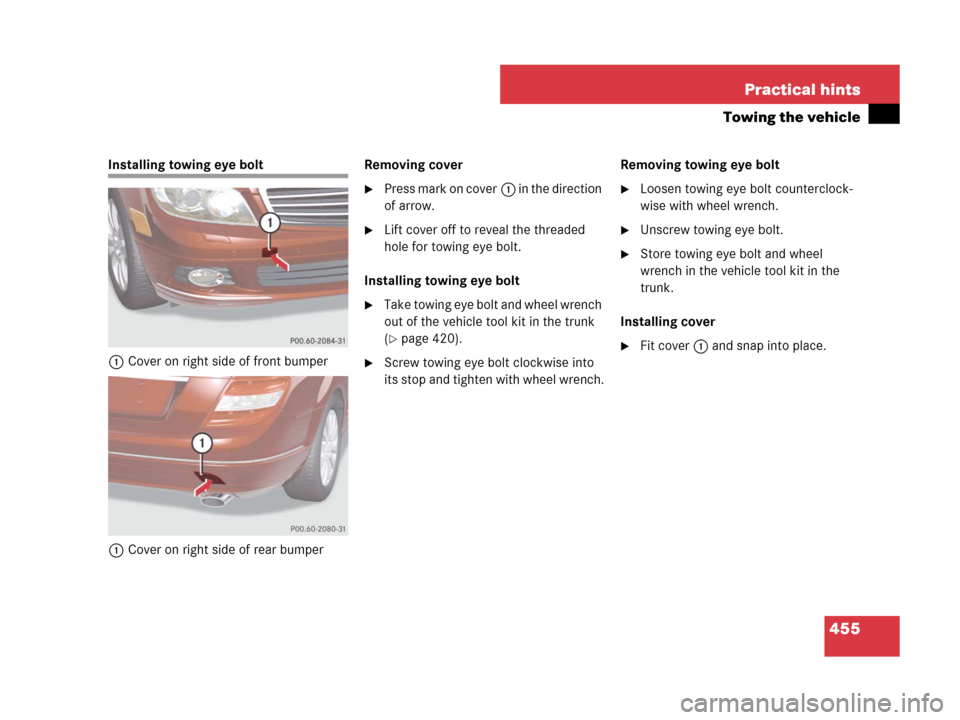
Installing towing eye bolt
1Cover on right side of front bumper
1Cover on right side of rear bumperRemoving cover
�Press mark on cover1 in the direction
of arrow.
�Lift cover off to reveal the threaded
hole for towing eye bolt.
Installing towing eye bolt
�Take towing eye bolt and wheel wrench
out of the vehicle tool kit in the trunk
(
�page 420).
�Screw towing eye bolt clockwise into
its stop and tighten with wheel wrench.Removing towing eye bolt
�Loosen towing eye bolt counterclock-
wise with wheel wrench.
�Unscrew towing eye bolt.
�Store towing eye bolt and wheel
wrench in the vehicle tool kit in the
trunk.
Installing cover
�Fit cover1 and snap into place.
Page 459 of 509
458 Practical hints
Fuses
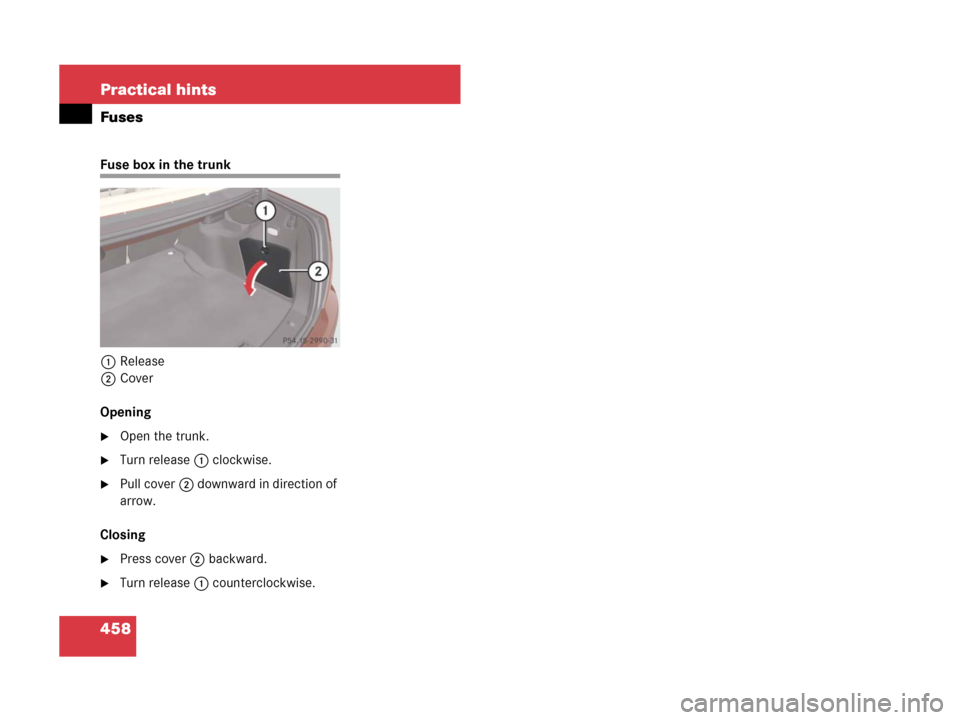
Fuse box in the trunk
1Release
2Cover
Opening
�Open the trunk.
�Turn release1 clockwise.
�Pull cover2 downward in direction of
arrow.
Closing
�Press cover2 backward.
�Turn release1 counterclockwise.