Page 406 of 509
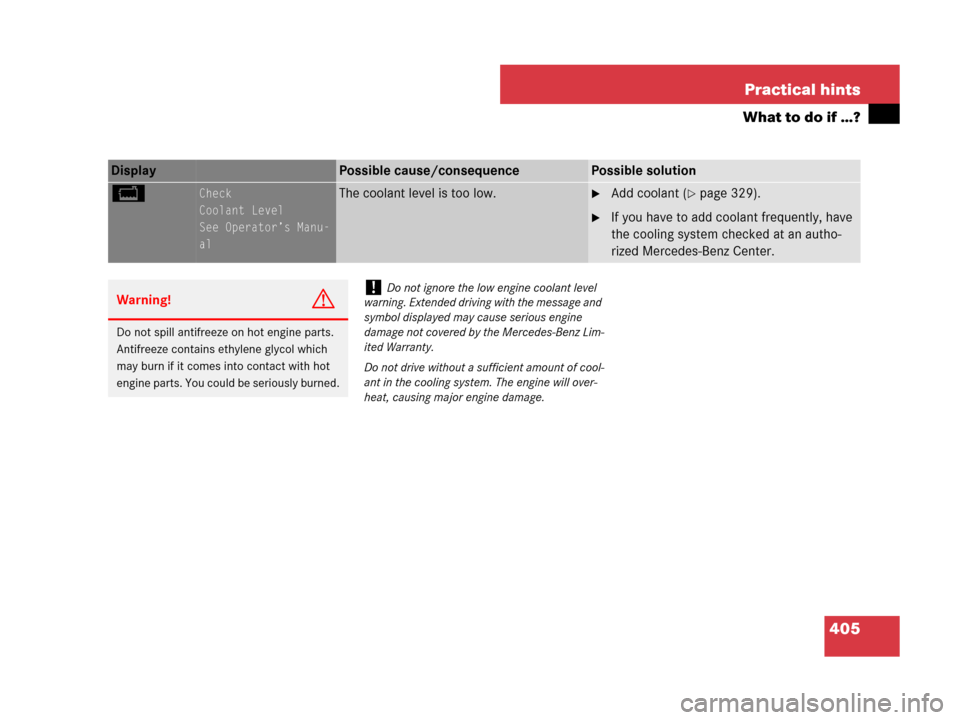
405 Practical hints
What to do if …?
Display Possible cause/consequencePossible solution
BCheck
Coolant Level
See Operator’s Manu-
alThe coolant level is too low.�Add coolant (�page 329).
�If you have to add coolant frequently, have
the cooling system checked at an autho-
rized Mercedes-Benz Center.
Warning!G
Do not spill antifreeze on hot engine parts.
Antifreeze contains ethylene glycol which
may burn if it comes into contact with hot
engine parts. You could be seriously burned.
!Do not ignore the low engine coolant level
warning. Extended driving with the message and
symbol displayed may cause serious engine
damage not covered by the Mercedes-Benz Lim-
ited Warranty.
Do not drive without a sufficient amount of cool-
ant in the cooling system. The engine will over-
heat, causing major engine damage.
Page 416 of 509

415 Practical hints
What to do if …?
When the message Check Engine Oil At
Next Refueling
appears while the engine
is running and at operating temperature,
the engine oil level has dropped to approx-
imately the minimum level.
When this occurs, the warning will first
come on intermittently and then stay on if
the oil level drops further.
Visually check for oil leaks. If no obvious oil
leaks are noted, continue to drive to the
nearest service station where the engine
oil should be topped to the required level
with an approved oil specified in the Facto-
ry Approved Service Products pamphlet.
For information on approved engine oils,
refer to the Factory Approved Service
Products pamphlet (USA only) or contact
an authorized Mercedes-Benz Center.
Display Possible cause/consequencePossible solution
ùCheck
Engine Oil
At Next RefuelingThe engine oil level has dropped to approx-
imately the minimum level.�Check the engine oil level (�page 327) and
add engine oil as required (
�page 328).
�If you must add engine oil frequently, have
the engine checked for possible leaks.
!The engine oil level warnings should not be
ignored. Extended driving with the symbol dis-
played could result in serious engine damage
that is not covered by the Mercedes-Benz Limit-
ed Warranty.
Page 417 of 509

416 Practical hints
What to do if …?
Display Possible cause/consequencePossible solution
=SRS Malfunction
Service RequiredThere is a malfunction in the supplemental
restraint systems. The air bags or emergen-
cy tensioning devices (ETDs) could deploy
unexpectedly or fail to activate in an acci-
dent.�Drive with added caution to the nearest
authorized Mercedes-Benz Center.
Front Left SRS
Malfunction
Service RequiredComponents of the driver’s supplemental
restraint system may not work properly.�Drive with added caution to the nearest au-
thorized Mercedes-Benz Center.
Front Right SRS
Malfunction
Service RequiredComponents of the front passenger’s sup-
plemental restraint system may not work
properly.�Drive with added caution to the nearest au-
thorized Mercedes-Benz Center.
Rear Left SRS
Malfunction
Service RequiredComponents of the left rear passenger’s
supplemental restraint system may not
work properly.�Drive with added caution to the nearest au-
thorized Mercedes-Benz Center.
Warning!G
In the event that a malfunction of the SRS is
indicated as outlined above, the SRS may
not be operational. For your safety, we
strongly recommend that you contact an
authorized Mercedes-Benz Center
immediately to have the system checked;
otherwise the SRS may not be deployed
when needed in an accident, which could re-
sult in serious or fatal injury, or it might de-
ploy unexpectedly and unnecessarily which
could result in an accident and/or injury to
you or to others.
Page 418 of 509

417 Practical hints
What to do if …?
Display Possible cause/consequencePossible solution
=Rear Center SRS
Malfunction
Service RequiredComponents of the center rear passenger’s
supplemental restraint system may not
work properly.�Drive with added caution to the nearest au-
thorized Mercedes-Benz Center.
Rear Right SRS
Malfunction
Service RequiredComponents of the right rear passenger’s
supplemental restraint system may not
work properly.�Drive with added caution to the nearest au-
thorized Mercedes-Benz Center.
Left Side Curtain
Airbag Malfunction
Service RequiredThe left side window curtain air bag may not
work properly.�Drive with added caution to the nearest au-
thorized Mercedes-Benz Center.
Right Side Curtain
Airbag Malfunction
Service RequiredThe right side window curtain air bag may
not work properly.�Drive with added caution to the nearest au-
thorized Mercedes-Benz Center.
Warning!G
In the event that a malfunction of the SRS is
indicated as outlined above, the SRS may
not be operational. For your safety, we
strongly recommend that you contact an
authorized Mercedes-Benz Center
immediately to have the system checked;
otherwise the SRS may not be deployed
when needed in an accident, which could re-
sult in serious or fatal injury, or it might de-
ploy unexpectedly and unnecessarily which
could result in an accident and/or injury to
you or to others.
Page 419 of 509

418 Practical hints
What to do if …?
Display Possible cause/consequencePossible solution
LTele Aid
InoperativeOne or more main functions of the Tele Aid*
system are malfunctioning.�Have the Tele Aid* system checked at an au-
thorized Mercedes-Benz Center.
HCorrect
Tire Pressure
(USA only)
The tire pressure is too low in one or more
tires.�Check and correct tire inflation pressure as
required (
�page 339).
Tire Press. Warning
Caution
Tire Malfunction
(USA only)
One or more tires are deflating.�Carefully bring the vehicle to a halt, avoiding
abrupt steering and braking maneuvers.
�If necessary, change the wheel (�page 440).
Check
Tire Pressure
(USA only)
The tire pressure in one or more tires is al-
ready below the minimum value.�Carefully bring the vehicle to a halt, avoiding
abrupt steering and braking maneuvers.
�Check and adjust tire pressure as required
(
�page 339).
�If necessary, change the wheel (�page 440).
Warning!G
Do not drive with a flat tire. A flat tire affects
the ability to steer or brake the vehicle. You
may lose control of the vehicle. Continued
driving with a flat tire will cause excessive
heat build-up and possibly a fire.
Page 422 of 509

421 Practical hints
Where will I find ...?
1Tab
2Removing
3Vehicle tool kit, jack and collapsible
wheel chock
4 Opening
5Tab
6Luggage bowl
�Removing: Lift up trunk floor cover
and engage trunk floor handle in upper
edge of trunk.
�Pull tab1 in direction of arrow2 and
lift up vehicle tool kit3.
You can now remove the vehicle tool
kit3 from luggage bowl6.
�Opening: Pull tab5 in direction of
arrow4 and open the vehicle tool kit
cover.
You can now remove the tools and
accessories from vehicle tool kit3.
�Closing: Store the tools and
accessories in vehicle tool kit3.
�Press the vehicle tool kit cover down
until it engage.
�Installing: Slide the vehicle tool kit3
into the recess in luggage bowl6.
�Press vehicle tool kit3 down until
tab1 engage in luggage bowl6.
�Disengage trunk floor handle from up-
per edge of trunk and lower trunk floor.Vehicle jack
!To prevent damage, always disengage trunk
floor handle from trunk lid and lower trunk floor
before closing the trunk.
Warning!G
The jack is designed exclusively for jacking
up the vehicle at the jack take-up brackets
built into both sides of the vehicle. To help
avoid personal injury, use the jack only to lift
the vehicle during a wheel change. Never
get beneath the vehicle while it is supported
by the jack. Keep hands and feet away from
the area under the lifted vehicle. Always
firmly depress the parking brake and block
wheels before raising vehicle with jack.
Do not release the parking brake while the
vehicle is raised. Be certain that the jack is
always vertical (plumb line) when in use,
especially on hills. Always try to use the jack
on level surface. Make sure the jack arm is
fully seated in the jack take-up bracket.
Always lower the vehicle onto sufficient
capacity jackstands before working under
the vehicle.
��
Page 428 of 509

have been triggered in an accident, the ac-
tive head restrain")
427 Practical hints
Resetting activated head restraints
�Resetting activated head restraints
If the active head restraints (front seats)
have been triggered in an accident, the ac-
tive head restraints must be reset. Other-
wise, the active head restraints cannot
offer any additional protection in the event
of another rear-end collision.
You can tell that the head restraints have
been triggered when they have been
moved forward and cannot be adjusted.
1Fold back
2Push back
3Push down�Push the head restraint cushion by the
bottom, back as far as it will go2.
�Push the head restraint cushion down
into the guide as far as it will go3.
�Fold the head restraint cushion by the
top, back firmly until it engages1.
�Repeat this procedure on the active
head restraints for second head re-
straint.
For information on active head restraints,
see “Active head restraints” (
�page 50).
For information on head restraint adjust-
ment, see “Adjusting rear head restraints”
(
�page 89).
Warning!G
For safety reasons, have the active head
restraints checked at an authorized
Mercedes-Benz Center after a rear-end
collision.
Warning!G
When pushing back the head restraint cush-
ion, take care that your fingers do not be-
come caught between the head restraint
cushion and the cover. Failing to do so may
lead to injury.
iFor your convenience, we recommend that
you have this work carried out at an authorized
Mercedes-Benz Center.
Page 429 of 509

428 Practical hints
Replacing SmartKey batteries
If the batteries in the SmartKey/SmartKey
with KEYLESS-GO* are discharged, the ve-
hicle can no longer be locked or unlocked.
It is recommended to have the batteries re-
placed at an authorized Mercedes-Benz
Center.Batteries contain materials that can harm
the environment if disposed of improperly.
Recycling of batteries is the preferred
method of disposal. Many states require
sellers of batteries to accept old batteries
for recycling.
Replacement batteries: Lithium, type
CR 2025 or equivalent.
�Remove the mechanical key from the
SmartKey (
�page 424).1Mechanical key
2Battery compartment
�Insert mechanical key 1 into opening.
�Press mechanical key 1 in direction of
arrow.
The battery compartment is unlatched.
�Pull battery compartment 2 out of the
housing.
Warning!G
Batteries contain poisonous and corrosive
substances. Therefore keep the batteries
out of reach of children.
If a battery is swallowed, seek medical help
immediately.
Warning!G
SmartKey batteries contain Perchlorate
material, which may require special handling
and regard for the environment. Check with
your local government’s disposal guidelines.
California residents, see
http://www.dtsc.ca.gov/HazardousWaste
/Perchlorate/index.cfm.
iWhen replacing batteries, make sure they
are clean and free of lint.
iWhen replacing batteries, always replace
both batteries. The required replacement batter-
ies are available at any authorized
Mercedes-Benz Center.