158 Navigation
Destination memory
�After entering the address, select
“Save”.
COMAND then saves the entry. A mes-
sage is displayed and then the Enter
Destination menu with the selected ad-
dress. “Start” is highlighted automati-
cally.
Using address book entry as home ad-
dress
�Switch to the destination memory list
without predictive speller if necessary
(
�page 157).
�To assign address for first time:
Press n and select “Assign to Address
Book Entry”.
or
�To change home address: Select
“Options”
K “Assign to Address Book
Entry”.
In both cases you will see either the list
or, if there are more than 8 address
book entries, the search menu with
search speller.
Select the desired address book entry.
Proceed as described in the “Searching
for an address book entry” section
(
�page 106).
i Under “Assigning a destination to an ad-
dress book entry” on (
�page 160) you will find
out how to link address book entries to data that
support navigation.
�To confirm selection: Press n.
Address assigned for first time:
COMAND saves the entry. A message is
displayed and then the Enter Destination
menu with the selected address. “Start” is
highlighted automatically.
To change address:
You will be prompted to confirm that you
wish to overwrite the “My Address”.
�Select “Yes” or “No”.
If you select “Yes” COMAND overwrites
the destination. A message is displayed
and then the Enter Destination menu
with the selected address. “Start” is
highlighted automatically.
If you select “No” the list reappears.Selecting home address for route guid-
ance
i If the “My Address” entry already contains
data that support navigation (Q symbol), you
can select this for route guidance.
If the symbol is missing, then first assign a desti-
nation to this entry (
�page 157).
�If necessary switch to navigation mode
and display menu system
(
�page 118).
�Select “Destination” K “From Memo-
ry”.
If there are more than 8 entries in the
destination memory, the destination
memory list with predictive speller is
displayed, otherwise the destination
memory list is displayed without
predictive speller (
�page 137).
�Destination memory list with
predictive speller: Slide qm repeat-
edly until the list appears without the
speller.
or
�Select B
�Press n.
�Destination memory list without
predictive speller: Press n.
160 Navigation
Destination memory
Selecting memory options
Saving destination without name
�Select “Save Without Name”.
COMAND saves the destination in the
destination memory and uses the ad-
dress as the destination name.
or
�Select “Save as My Address”.
COMAND saves the destination under
the “My Address” entry in the destina-
tion memory.
If the entry already contains data that
support navigation, you will be prompt-
ed to confirm that you wish to over-
write the previous destination address.
�Select “Yes” or “No”.
If you select “Yes” the message “Saving
Procedure Successful” appears, select-
ing “No” cancels the operation.
Saving destination with name
�Select “Save With Name”.
�Select desired category, e. g. “Home”.
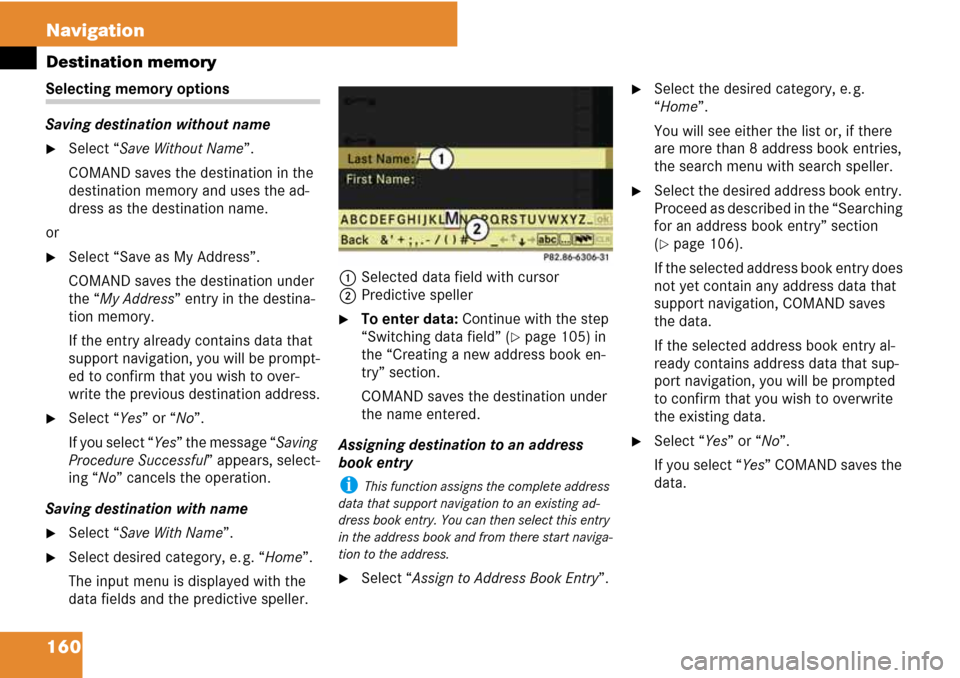
The input menu is displayed with the
data fields and the predictive speller.1Selected data field with cursor
2Predictive speller
�To enter data: Continue with the step
“Switching data field” (
�page 105) in
the “Creating a new address book en-
try” section.
COMAND saves the destination under
the name entered.
Assigning destination to an address
book entry
i This function assigns the complete address
data that support navigation to an existing ad-
dress book entry. You can then select this entry
in the address book and from there start naviga-
tion to the address.
�Select “Assign to Address Book Entry”.
�Select the desired category, e. g.
“Home”.
You will see either the list or, if there
are more than 8 address book entries,
the search menu with search speller.
�Select the desired address book entry.
Proceed as described in the “Searching
for an address book entry” section
(
�page 106).
If the selected address book entry does
not yet contain any address data that
support navigation, COMAND saves
the data.
If the selected address book entry al-
ready contains address data that sup-
port navigation, you will be prompted
to confirm that you wish to overwrite
the existing data.
�Select “Yes” or “No”.
If you select “Yes” COMAND saves the
data.