2008 Lexus GX470 battery
[x] Cancel search: batteryPage 29 of 312

BASIC FUNCTIONS
28
When starting the navigation system, the
current position is displayed first.
This screen displays the current vehicle
position and a map of the surrounding local
area.
The current vehicle position mark (1) ap-
pears in the center or bottom center of the
map screen.
A street name will appear on the bottom of
the screen, depending on the scale of the
map (
2).
You can return to this map screen that
shows your current position at any time
from any screen by pushing the “MAP/
VOICE” button.
While driving, the current vehicle position
mark is fixed on the screen and the map
moves.
The current position is automatically set as
the vehicle receives signals from the GPS
(Global Positioning System). If the current
position is not correct, it is automatically
corrected after the vehicle receives sig-
nals from the GPS.
INFORMATION
D After battery disconnection, or on
a new vehicle, the current position
may not be correct. As soon as the
system receives signals from the
GPS, the correct current position
is displayed.
D To correct the current position
manually, see page 112.
When any point on the map is touched,
that point moves to the center of the screen
and is shown by the cursor mark (
1).
Use the scroll feature to move the desired
point to the center of the screen for looking
at a point on the map that is different from
the current position of the vehicle.
If the finger is continuously held on the
screen, the map will continue scrolling in
that direction until the finger is removed.
A street name, city name, etc. of the
touched point will be shown, depending on
the scale of the map (
2). Distance from
the current position towill also be
shown (3).
After the screen is scrolled, the map re-
mains centered at the selected location
until another function is activated. The cur-
rent vehicle position mark will continue to
move along your actual route and may
move off the screen. When the “MAP/
VOICE” button is pushed, the current ve-
hicle position mark returns to the center of
the screen and the map moves as the ve-
hicle proceeds along the designated route.
INFORMATION
When the one −touch scroll feature is
used, the current vehicle position
mark may disappear from the screen.
Move the map with a one− touch scroll
again or push the “MAP/VOICE” but-
ton to return to the current vehicle
position map location display.
GX470_Navi_U (OM60D58U) 07/06/16
Map screen operation —
— Current position display — Screen scroll operation
(one−
touch scroll)
Page 118 of 312

OTHER FUNCTIONS
11 7
INFORMATION ITEMS
“ENGINE OIL”:Replace engine oil
“OIL FILTER”: Replace engine oil filter
“ROTATION”: Rotate tires
“TIRES”: Replace tires
“BATTERY”: Replace battery
“BRAKE PAD”: Replace brake linings
“WIPERS”: Replace wiper blades
“LLC”: Replace engine coolant
“BRAKE OIL”: Replace brake fluid
“ATF”: Replace ATF (Automatic Trans-
mission Fluid)
“SERVICE”: Scheduled maintenance
“AIR FILTER”: Replace air filter
“PERSONAL”: New information items
can be created separately from provided
ones.
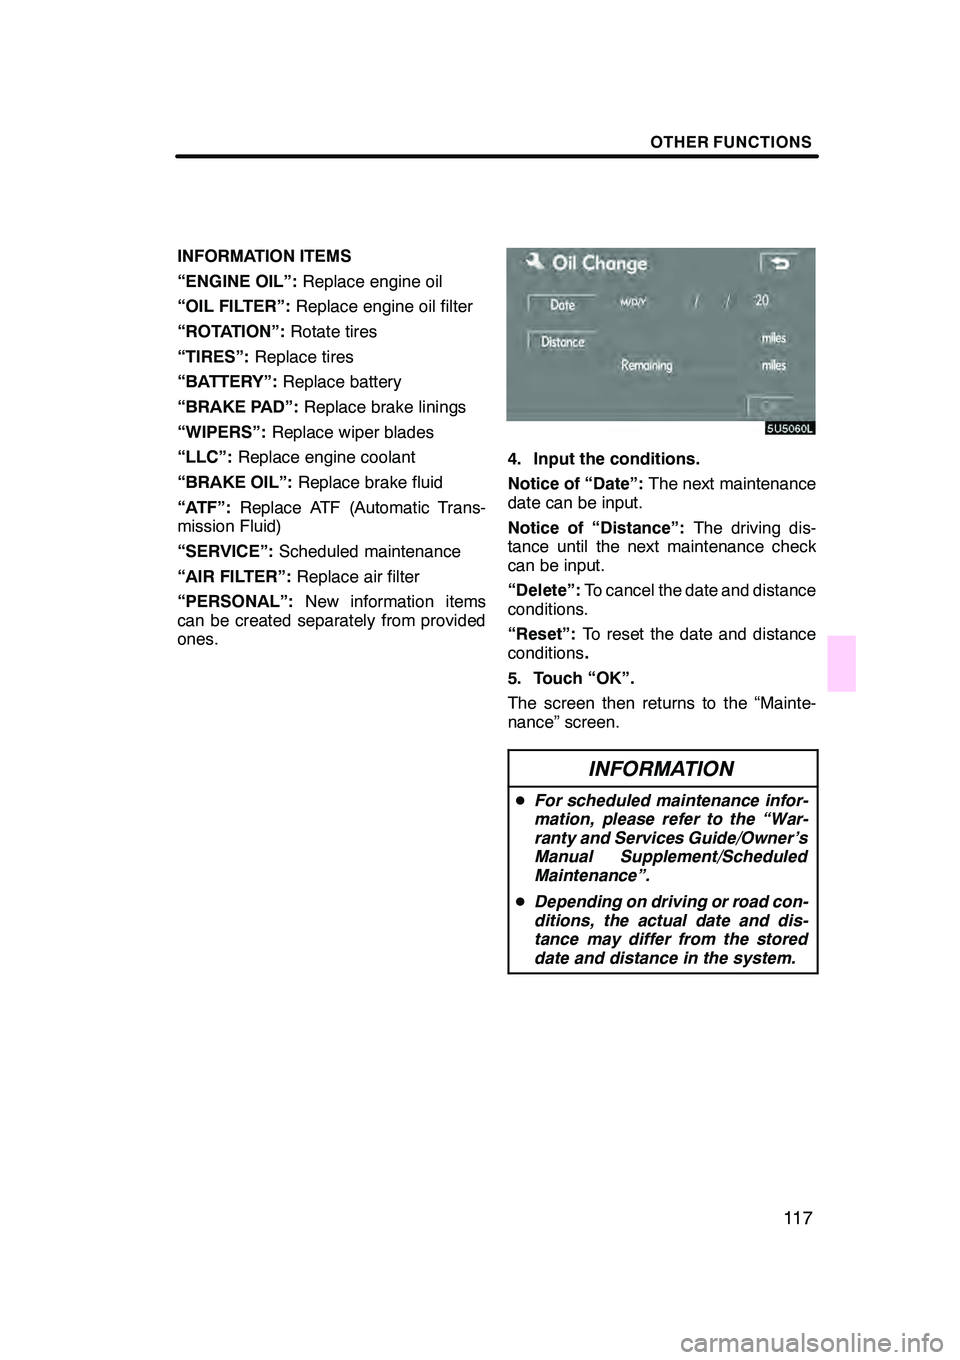
4. Input the conditions.
Notice of “Date”: The next maintenance
date can be input.
Notice of “Distance”: The driving dis-
tance until the next maintenance check
can be input.
“Delete”: To cancel the date and distance
conditions.
“Reset”: To reset the date and distance
conditions .
5. Touch “OK”.
The screen then returns to the “Mainte-
nance” screen.
INFORMATION
D For scheduled maintenance infor-
mation, please refer to the “War-
ranty and Services Guide/Owner’s
Manual Supplement/Scheduled
Maintenance”.
D Depending on driving or road con-
ditions, the actual date and dis-
tance may differ from the stored
date and distance in the system.
GX470_Navi_U (OM60D58U) 07/06/16
Page 128 of 312

OTHER FUNCTIONS
127
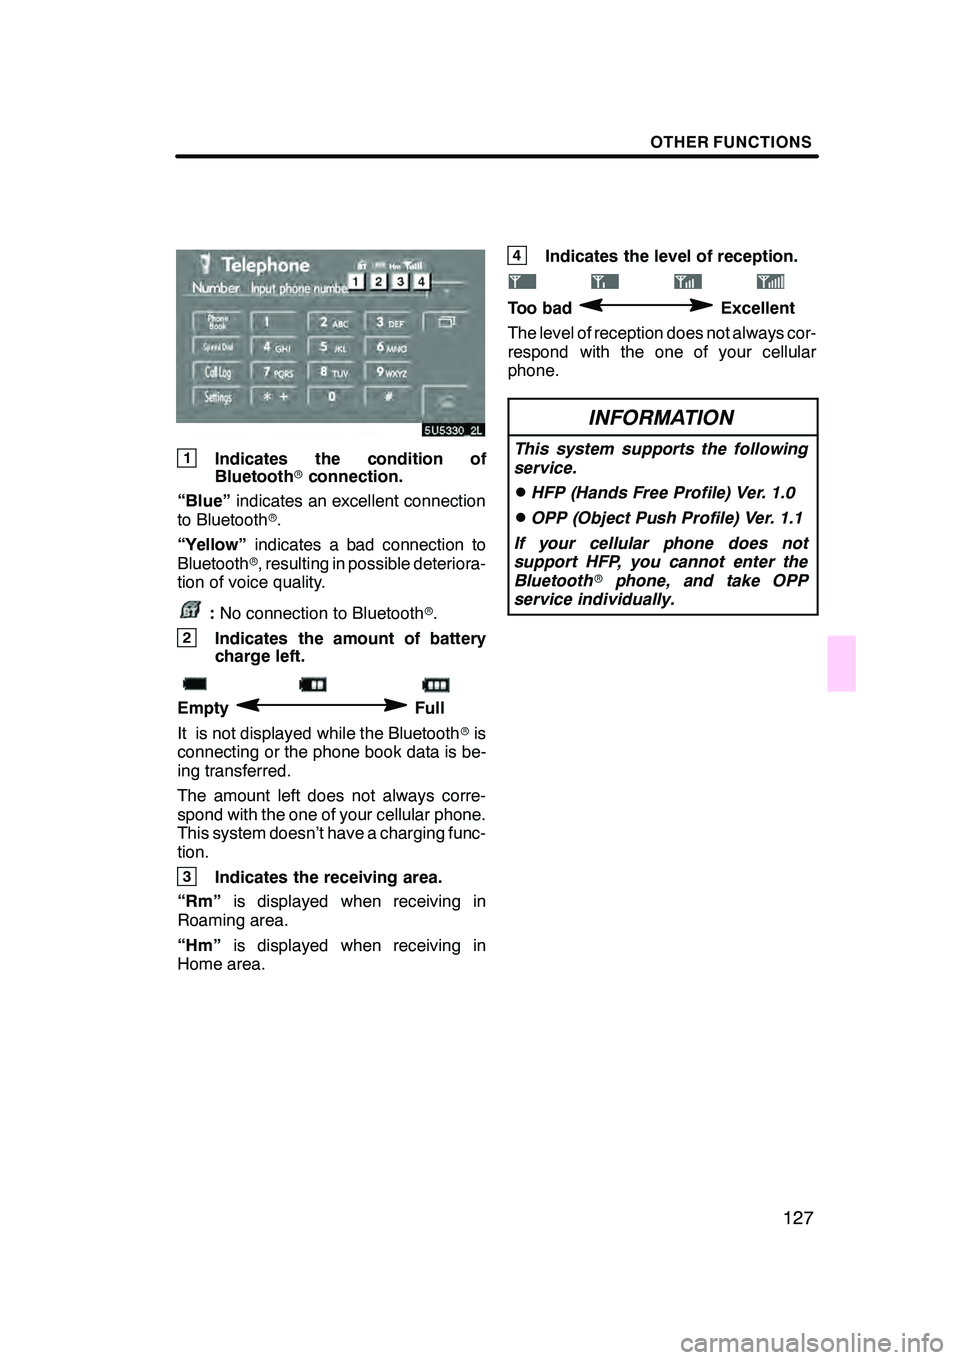
1Indicates the condition of
Bluetoothrconnection.
“Blue” indicates an excellent connection
to Bluetooth r.
“Yellow” indicates a bad connection to
Bluetooth r, resulting in possible deteriora-
tion of voice quality.
: No connection to Bluetooth r.
2Indicates the amount of battery
charge left.
EmptyFull
It is not displayed while the Bluetooth ris
connecting or the phone book data is be-
ing transferred.
The amount left does not always corre-
spond with the one of your cellular phone.
This system doesn’t have a charging func-
tion.
3Indicates the receiving area.
“Rm” is displayed when receiving in
Roaming area.
“Hm” is displayed when receiving in
Home area.
4Indicates the level of reception.
Too badExcellent
The level of reception does not always cor-
respond with the one of your cellular
phone.
INFORMATION
This system supports the following
service.
DHFP (Hands Free Profile) Ver. 1.0
DOPP (Object Push Profile) Ver. 1.1
If your cellular phone does not
support HFP, you cannot enter the
Bluetooth rphone, and take OPP
service individually.
GX470_Navi_U (OM60D58U) 07/06/16
Page 186 of 312

AUDIO/VIDEO SYSTEM
185
7“DISC·AUX” button
Push this button to turn the DVD
changer or DVD player on. For de-
tails, see pages 187, 211 and 237.
8“TAPE” button
Push this button to turn the cassette
tape player on. For details, see
pages 187 and 204.
9“FM” button
Push this button to choose an FM sta-
tion. For details, see pages 187 and
192.
10“AM·SAT” button
Push this button to choose either an
AM or SAT station. For details, see
pages 187, 192 and 198.
11“PWR·VOL” knob
Push this knob to turn the audio sys-
tem on and off, and turn it to adjust the
volume. For details, see page 186.
12“SEEK·TRACK” button
Push“”or “”button to seek up
or down for a station, or to access a
desired program, track, file or chap-
ter. For details, see pages 194, 200,
212, 216, 224 and 234.
13button for the cassette tape
Push this button to stop and eject the
cassette tape. For details, see page
204. This section describes some of the basic
features on Lexus audio/video systems.
Some information may not pertain to your
system.
Your audio/video system works when the
engine switch is in the “ACC” or “ON” posi-
tion.
NOTICE
To prevent the battery from being dis-
charged, do not leave the audio/video
system on longer than necessary
when the engine is not running.
GX470_Navi_U (OM60D58U) 07/06/16
Using your audio/video
system —
— Some basics
Page 194 of 312

AUDIO/VIDEO SYSTEM
193
Turn the knob clockwise to step up the
station band or counterclockwise to
step down.
Your radio automatically changes to stereo
reception when a stereo broadcast is re-
ceived. “ST” appears on the screen. If the
signal becomes weak, the radio reduces
the amount of channel separation to pre-
vent the weak signal from creating noise.
If the signal becomes extremely weak, the
radio switches from stereo to mono recep-
tion. In this case, “ST” disappears from the
screen.
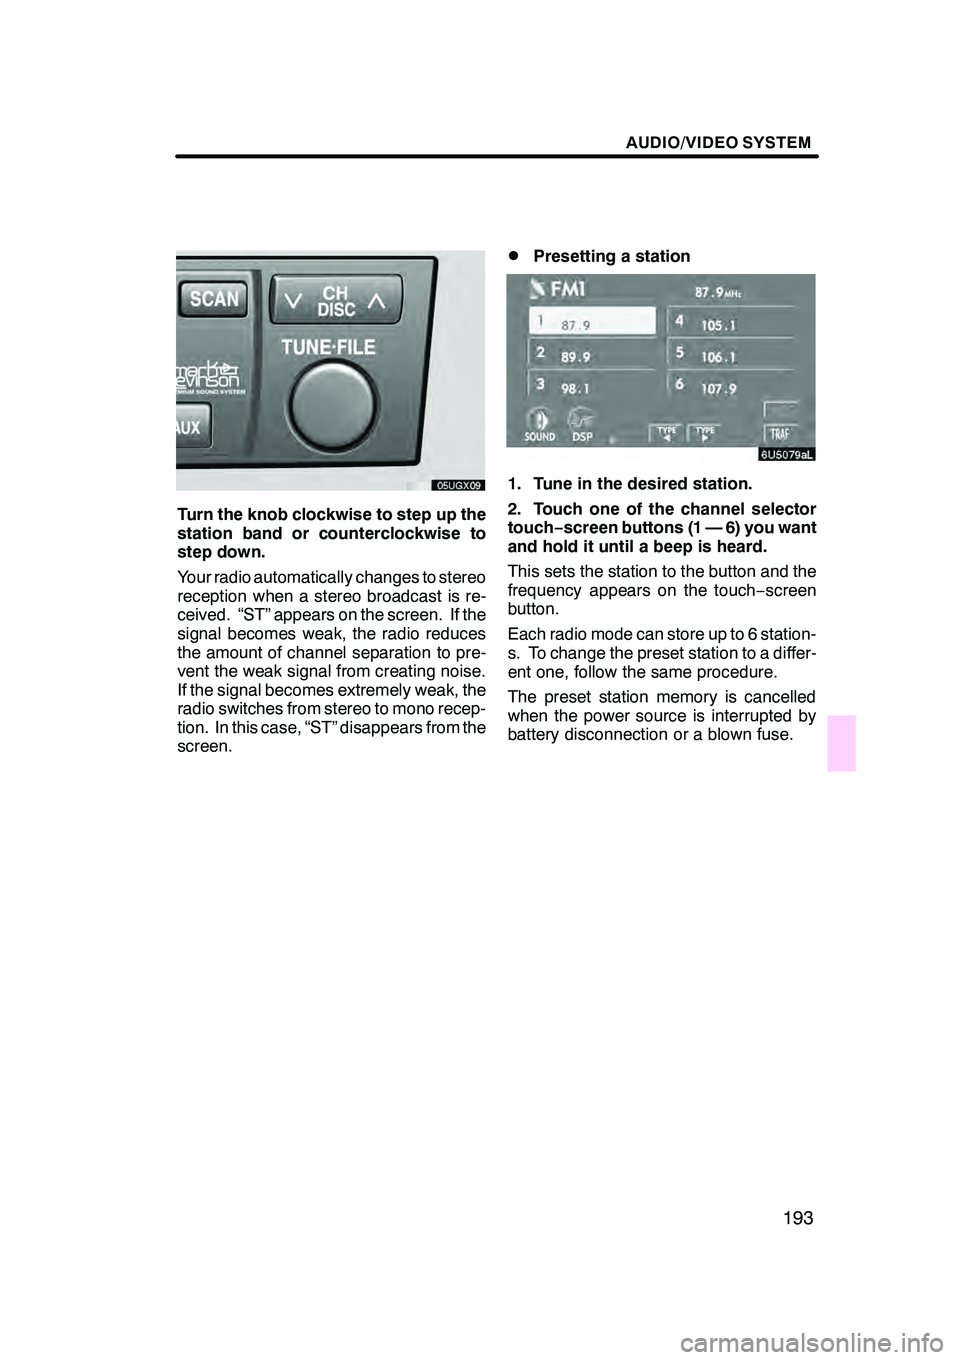
DPresetting a station
1. Tune in the desired station.
2. Touch one of the channel selector
touch−screen buttons (1 — 6) you want
and hold it until a beep is heard.
This sets the station to the button and the
frequency appears on the touch −screen
button.
Each radio mode can store up to 6 station-
s. To change the preset station to a differ-
ent one, follow the same procedure.
The preset station memory is cancelled
when the power source is interrupted by
battery disconnection or a blown fuse.
GX470_Navi_U (OM60D58U) 07/06/16
Page 200 of 312

AUDIO/VIDEO SYSTEM
199
D
Channel category
Touch either
“TYPEA”or “TYPE "”to go
to the next or previous category.
DPresetting a channel
1. Tune in the desired channel.
2. Touch one of the channel selector
touch− screen buttons (1 — 6) and hold
it until a beep is heard.
This sets the channel to the button and the
name and number of the channel appears
on the touch− screen button.
Each SAT mode can store up to 6 stations.
To change the preset channel to a different
one, follow the same procedure.
The preset channel memory is cancelled
when the power source is interrupted by
battery disconnection or a blown fuse.
GX470_Navi_U (OM60D58U) 07/06/16
Page 276 of 312

AIR CONDITIONING
275
The automatic air conditioning auto-
matically maintains the set tempera-
ture.
In the automatic operation mode, the air
conditioning selects the most suitable fan
speed, air flow, air intake and on−off the air
conditioning according to the temperature.
The ignition switch must be in the “ON”
position.
“CLIMATE”: Push this button to display
touch− screen buttons for automatic air
conditioning controls.
NOTICE
To prevent the battery from being dis-
charged, do not leave the air condi-
tioning on longer than necessary
when the engine is not running.
(a) Climate control
SETTING OPERATION −automatic con-
trol
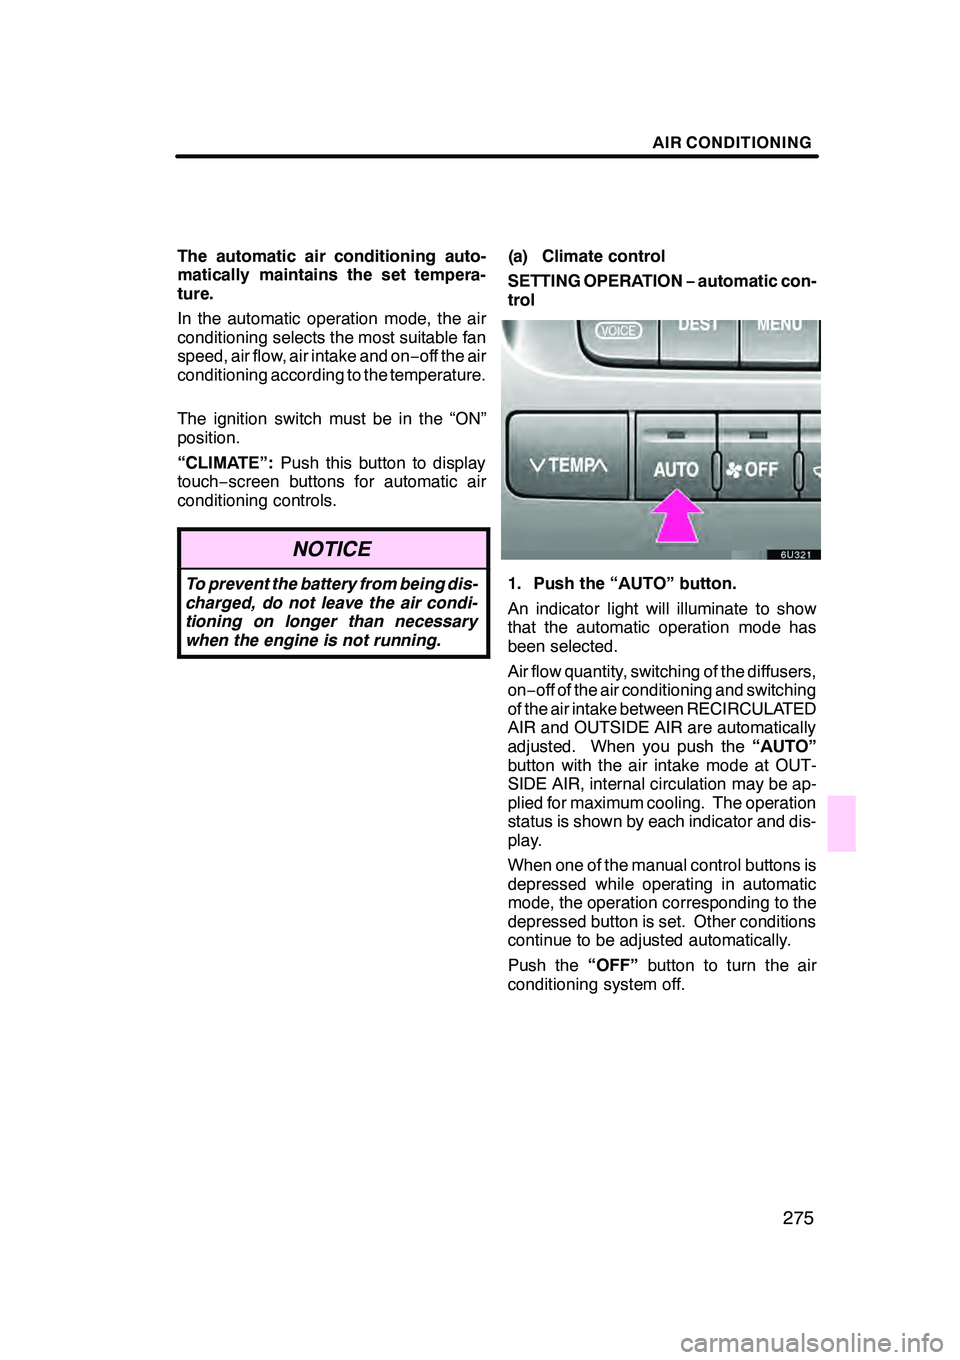
1. Push the “AUTO” button.
An indicator light will illuminate to show
that the automatic operation mode has
been selected.
Air flow quantity, switching of the diffusers,
on− off of the air conditioning and switching
of the air intake between RECIRCULATED
AIR and OUTSIDE AIR are automatically
adjusted. When you push the “AUTO”
button with the air intake mode at OUT-
SIDE AIR, internal circulation may be ap-
plied for maximum cooling. The operation
status is shown by each indicator and dis-
play.
When one of the manual control buttons is
depressed while operating in automatic
mode, the operation corresponding to the
depressed button is set. Other conditions
continue to be adjusted automatically.
Push the “OFF”button to turn the air
conditioning system off.
GX470_Navi_U (OM60D58U) 07/06/16
Page 285 of 312

AIR CONDITIONING
284
(a) Rear cooler ON−OFF
To turn the rear cooler on, push the
“REAR COOL” button with front air
conditioning on. To turn the rear cooler
off, push the button once again.
When you turn the rear cooler on with the
front air conditioning off, the cooling device
is not operated.
(b) Air flow control
The fan speed can be set to your de-
sired speed by pushing the appropriate
side of the fan speed control button.
“AUTO” mode: The fan speed is automat-
ically adjusted only when the air flow set-
ting of the front air conditioning is in the
panel mode.
(c) Temperature control
The temperature of the cooled air can
be adjusted between 10_F( 5 _C) of
the temperature of the front air condi-
tioning system. Push the left side of the
button to lower the temperature.
NOTICE
To prevent the battery from being dis-
charged, do not leave the rear cooler
on longer than necessary when the
engine is not running.
GX470_Navi_U (OM60D58U) 07/06/16