Page 9 of 24
267
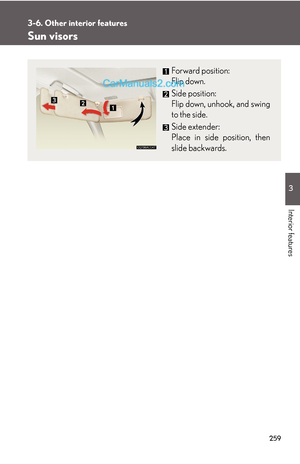
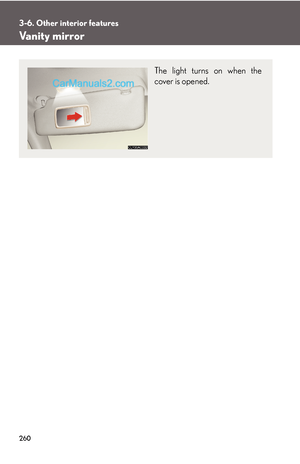
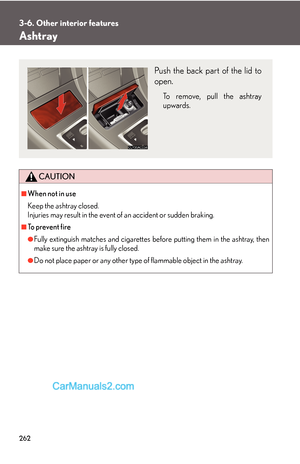
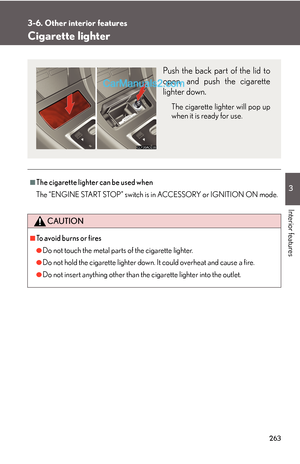
3-6. Other interior features
3
Interior features
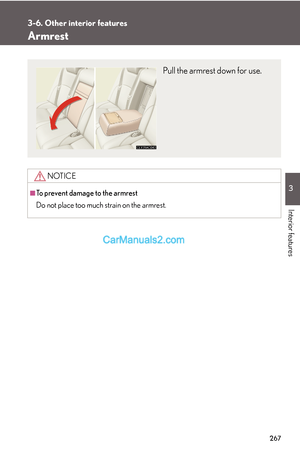
Armrest
NOTICE
■To prevent damage to the armrest
Do not place too much strain on the armrest.
Pull the armrest down for use.
Page 10 of 24
268
3-6. Other interior features
Rear sunshade (if equipped)
■The rear sunshade can be used when
The “ENGINE START STOP” switch is in IGNITION ON mode.
■Reverse operation feature
The rear sunshade automatically lowers when the shift lever is shifted into R. The
rear sunshade rises when the shift lever is shifted out of R and vehicle speed
reaches 9 mph (15 km/h).
■When the reverse operation feature does not operate
The rear sunshade may not lower or rise automatically. In this case, press the switch
to lower or raise the rear sunshade.
The rear sunshade can be raised and lowered by operating the switch
shown below.
Type A
Raise/lower
Type B
Page 11 of 24
269
3-6. Other interior features
3
Interior features
CAUTION
■When the rear sunshade is being raised or lowered
Do not place fingers or other objects in the fastener section or in the opening.
They may get caught, causing injury.
NOTICE
■To prevent the battery from being discharged
Do not operate the rear sunshade when the engine is not running.
■To ensure normal operation of the sunshade
Observe the following precautions.
●Do not place excessive load on the motor or other components.
●Do not place objects where they may hinder opening and closing operations.
●Do not attach items to the rear sunshade.
●Keep the opening clean and clear of obstructions.
●Do not operate the rear sunshade continuously over long periods of time.
Page 12 of 24
270
3-6. Other interior features
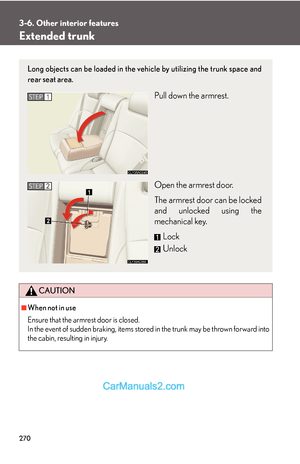
Extended trunk
CAUTION
■When not in use
Ensure that the armrest door is closed.
In the event of sudden braking, items stored in the trunk may be thrown forward into
the cabin, resulting in injury.
Long objects can be loaded in the vehicle by utilizing the trunk space and
rear seat area.
Pull down the armrest.
Open the armrest door.
The armrest door can be locked
and unlocked using the
mechanical key.
Lock
UnlockSTEP1
STEP2
Page 13 of 24
271
3-6. Other interior features
3
Interior features
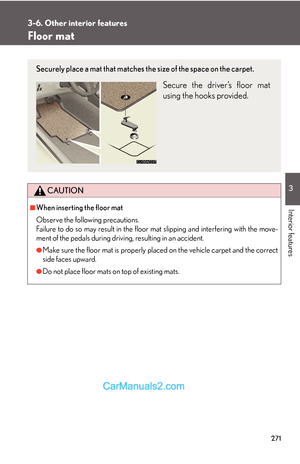
Floor mat
CAUTION
■When inserting the floor mat
Observe the following precautions.
Failure to do so may result in the floor mat slipping and interfering with the move-
ment of the pedals during driving, resulting in an accident.
●Make sure the floor mat is properly placed on the vehicle carpet and the correct
side faces upward.
●Do not place floor mats on top of existing mats.
Securely place a mat that matches the size of the space on the carpet.
Secure the driver’s floor mat
using the hooks provided.
Page 14 of 24
272
3-6. Other interior features
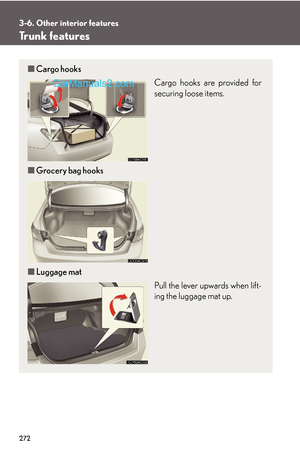
Trunk features
■Cargo hooks
Cargo hooks are provided for
securing loose items.
■Grocery bag hooks
■Luggage mat
Pull the lever upwards when lift-
ing the luggage mat up.
Page 15 of 24
273
3-6. Other interior features
3
Interior features
CAUTION
■When the cargo hooks are not in use
To avoid injury, always return the cargo hooks to their positions when they are not in
use.
NOTICE
■When closing the trunk
Do not leave the luggage mat lever hooked on the edge of the trunk.
The luggage mat may get damaged.
The lever can be hooked on the
edge of the trunk.
Page 16 of 24
274
3-6. Other interior features
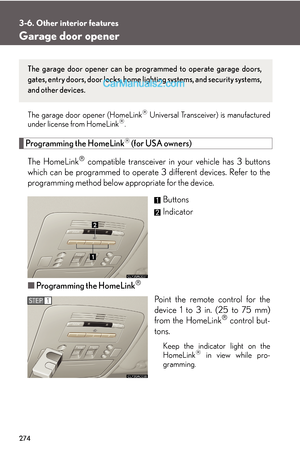
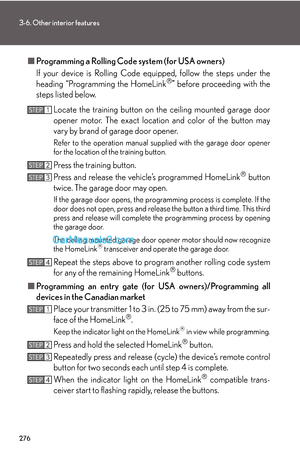
Garage door opener
The garage door opener (HomeLink® Universal Transceiver) is manufactured
under license from HomeLink®.
Programming the HomeLink® (for USA owners)
The HomeLink
® compatible transceiver in your vehicle has 3 buttons
which can be programmed to operate 3 different devices. Refer to the
programming method below appropriate for the device.
Buttons
Indicator
■Programming the HomeLink
®
Point the remote control for the
device 1 to 3 in. (25 to 75 mm)
from the HomeLink
® control but-
tons.
Keep the indicator light on the
HomeLink® in view while pro-
gramming.
The garage door opener can be programmed to operate garage doors,
gates, entry doors, door locks, home lighting systems, and security systems,
and other devices.
STEP1


■The rear sunshade can be used when
The “ENGINE START STOP” switch is in IGNITION ON mode.
■Reverse operation feature
The rear suns")


 is manufactured
under license from HomeLink®.
Programming the HomeLink® (for USA owners)")