2008 KIA Sedona sound system
[x] Cancel search: sound systemPage 189 of 339
Features of your vehicle
180 3
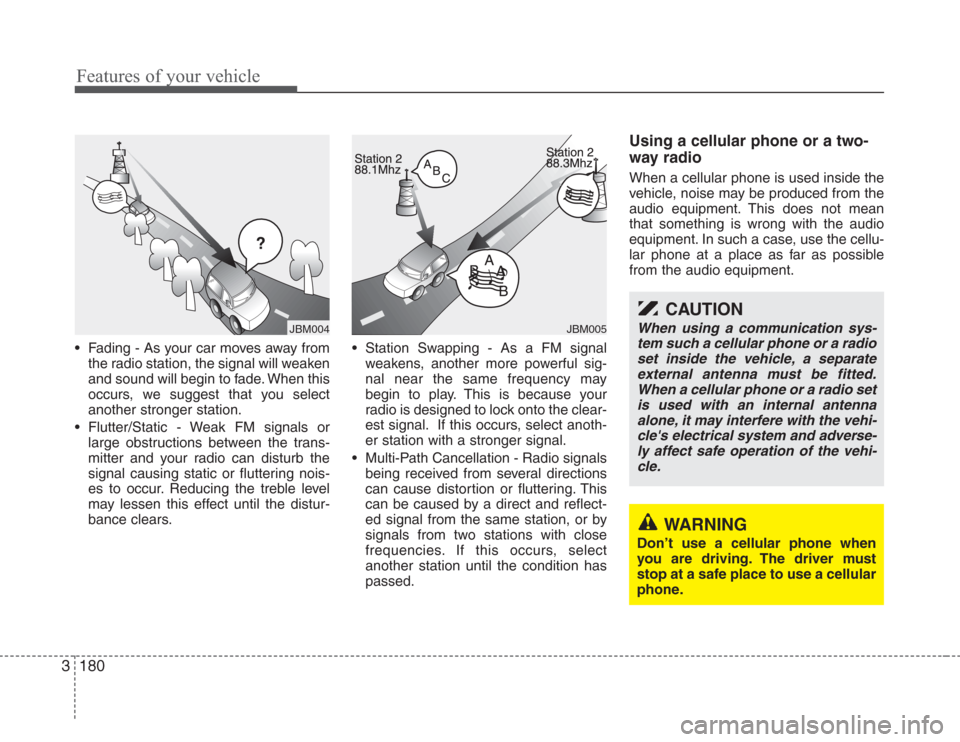
• Fading - As your car moves away from
the radio station, the signal will weaken
and sound will begin to fade. When this
occurs, we suggest that you select
another stronger station.
• Flutter/Static - Weak FM signals or
large obstructions between the trans-
mitter and your radio can disturb the
signal causing static or fluttering nois-
es to occur. Reducing the treble level
may lessen this effect until the distur-
bance clears.• Station Swapping - As a FM signal
weakens, another more powerful sig-
nal near the same frequency may
begin to play. This is because your
radio is designed to lock onto the clear-
est signal. If this occurs, select anoth-
er station with a stronger signal.
• Multi-Path Cancellation - Radio signals
being received from several directions
can cause distortion or fluttering. This
can be caused by a direct and reflect-
ed signal from the same station, or by
signals from two stations with close
frequencies. If this occurs, select
another station until the condition has
passed.
Using a cellular phone or a two-
way radio
When a cellular phone is used inside the
vehicle, noise may be produced from the
audio equipment. This does not mean
that something is wrong with the audio
equipment. In such a case, use the cellu-
lar phone at a place as far as possible
from the audio equipment.
¢¢¢
JBM004JBM005
CAUTION
When using a communication sys-
tem such a cellular phone or a radio
set inside the vehicle, a separate
external antenna must be fitted.
When a cellular phone or a radio set
is used with an internal antenna
alone, it may interfere with the vehi-
cle's electrical system and adverse-
ly affect safe operation of the vehi-
cle.
WARNING
Don’t use a cellular phone when
you are driving. The driver must
stop at a safe place to use a cellular
phone.
Page 196 of 339
3187
Features of your vehicle
6. CD EJECT Button
When the button is pressed with a CD
loaded, the CD will eject.
Forcing to eject : To force to eject a CD,
press this button for more than 3 sec-
onds.
(Do this only when a CD is jammed and
you can not eject it in the normal way -
e.g.) in case that you have inserted 2
CDs by mistake)
7 . RANDOM (RDM) Button
With random, you can listen to the tracks
in random, rather than sequential order.
To use random, do the following:
Press the RDM button to listen to record-
ed tracks in random sequence. Press
RDM again to cancel or turn the power
OFF then ON. The unit defaults to playing
tracks in sequential order.
✽
NOTICE
• To assure proper operation of the unit,
keep the vehicle interior temperature
within a normal range by using the
vehicle's air conditioning or heating
system.
• When replacing the fuse, replace it
with a fuse having the correct capaci-
ty.
• All stored bookmarks are all erased
when the car battery is disconnected
or power to the vehicle is lost. If this
occurs, the bookmarks will have to be
reset.
• This equipment is designed to be used
only in a 12 volt DC battery system
with negative ground.
• This unit is made of precision parts.
Do not attempt to disassemble or
adjust any parts.
• When driving your vehicle, be sure to
keep the volume of the unit set low
enough to allow you to hear sounds
coming from the outside.
• Do not expose this equipment (includ-
ing the speakers and CD) to water or
excessive moisture.
✽
NOTICE
• Do not insert warped or poor quality
discs into the CD player as damage to
the unit may occur.
• Do not insert anything like coins into
the player slot as damage to the unit
may occur.
• Do not place beverages close to the
audio system. The playback mecha-
nism may be damaged if you spill
them.
• Do not strike or allow anything to
impact the audio system, damage to
the system mechanisms could occur.
• Off-road or rough surface driving
may cause the compact disc to skip.
Do not use the compact disc when
driving in such conditions as damage
to the compact disc face could occur.
• Do not attempt to grab or pull the
compact disc out while the disc is
being pulled into the audio unit by the
self-loading mechanism. Damage to
the audio unit and compact disc could
occur.
• Avoid using recorded compact discs in
your audio unit. Original compact
discs are recommended for best
results.
Page 199 of 339
Features of your vehicle
190 3
7 . AUDIO CONTROL / TUNE Select
Button
7 -1. AUDIO
Pressing the changes the BASS, MID-
RANGE, TREBLE, FADER and BAL-
ANCE TUNE mode.
The mode selected is shown on the dis-
play.
After selecting each mode, rotate the
Audio control knob clockwise or counter-
clockwise.
BASS Control
To increase the BASS, rotate the knob
clockwise, while to decrease the BASS,
rotate the knob counterclockwise.
MID-RANGE Control
To increase the MID-RANGE, rotate the
knob clockwise, while to decrease the
MID-RANGE, rotate the knob counter-
clockwise.
TREBLE Control
To increase the TREBLE, rotate the knob
clockwise, while to decrease the TRE-
BLE, rotate the knob counterclockwise.
FADER Control
Turn the control knob clockwise to
emphasize rear speaker sound (front
speaker sound will be attenuated). When
the control knob is turned counterclock-
wise, front speaker sound will be empha-
sized (rear speaker sound will be attenu-
ated).
BALANCE Control
Rotate the knob clockwise to emphasize
right speaker sound (left speaker sound
will be attenuated). When the control
knob is turned counter clockwise, left
speaker sound will be emphasized (right
speaker sound will be attenuated).
7 -2. TUNE Select Knob
Rotate the knob clockwise to increase
the frequency and turn the knob counter-
clockwise to reduce the frequency.
✽
NOTICE
• Do not place beverages close to the
audio system. The playback mecha-
nism may be damaged if you spill
them.
• Do not strike or allow anything to
impact the audio system, damage to
the system mechanisms could occur.
Page 203 of 339
Features of your vehicle
194 3
10. CD SCAN Button
• To playback the first 10 seconds of
each track, press the CD SCAN button
more than 0.8 seconds.
• To playback the first 10 seconds of
each track in the selected folder, press
the CD SCAN button within 0.8 sec-
onds. (MP3 CD only)
• Press the CD SCAN button again with-
in 10 sec. when you have reached the
desired track.
11. FILE SEARCH Knob
(TUNE Select Knob)
• You can skip the track (file) by turning
the FILE SEARCH knob clockwise or
counterclockwise.
After selecting the desired track (file),
press the FILE SEARCH knob to play-
back the track (file).
If you do not press the FILE SEARCH
knob within five seconds, the search
will stop.
12. FOLDER SEARCH (FLDR)
Button
• You can move through the folder by
pushing the FLDR button to up ( )
and down( ).
• After moving the desired folder, press
the FILE SEARCH knob to play back in
the selected folder. If you do not press
the FILE SEARCH knob within 5 sec-
onds, the folder searching function will
be released. It can not be operated in a
single folder.
13. INFO Button
While playing CD(MP3), If this button is
pressed repeatedly, the played file infor-
mation will be displayed in the following
order.
FILE NAME
➟ SONG TITLE ➟ ARTIST
NAME
➟ ALBUM TITLE ➟ FOLDER
NAME
➟ TOTAL FILE ➟ MARK
ADDRESS
➟ FILE NAME
“NO DATA” wil be displayed in case that
there is no information on the selected
item.
✽
NOTICE
• To assure proper operation of the unit,
keep the vehicle interior temperature
within a normal range by using the
vehicle's air conditioning or heating
system.
• When replacing the fuse, replace it
with a fuse having the correct capacity.
• All stored bookmarks are all erased
when the car battery is disconnected
or power to the vehicle is lost. If this
occurs, the bookmarks will have to be
reset.
• This equipment is designed to be used
only in a 12 volt DC battery system
with negative ground.
• This unit is made of precision parts.
Do not attempt to disassemble or
adjust any parts.
• When driving your vehicle, be sure to
keep the volume of the unit set low
enough to allow you to hear sounds
coming from the outside.
• Do not expose this equipment (includ-
ing the speakers and tape) to water or
excessive moisture.
Page 207 of 339
Features of your vehicle
198 3
A total of 18 stations can be pro-
grammed by selecting one AM and two
FM station per button.
• When completed, any preset station
may be recalled by selecting AM, FM1
or FM2 band and the appropriate sta-
tion button.
7 . AUDIO CONTROL / TUNE Select
Button
7 -1. AUDIO
Pressing the changes the BASS, MID-
RANGE, TREBLE, FADER and BAL-
ANCE and SURROUND mode.
The mode selected is shown on the dis-
play.
After selecting each mode, rotate the
Audio control knob clockwise or counter-
clockwise.
BASS Control
To increase the BASS, rotate the knob
clockwise, while to decrease the BASS,
rotate the knob counterclockwise.
MID-RANGE Control
To increase the MID-RANGE, rotate the
knob clockwise, while to decrease the
MID-RANGE, rotate the knob counter-
clockwise.
TREBLE Control
To increase the TREBLE, rotate the knob
clockwise, while to decrease the TRE-
BLE, rotate the knob counterclockwise.
FADER Control
Turn the control knob clockwise to empha-
size rear speaker sound (front speaker
sound will be attenuated). When the con-
trol knob is turned counterclockwise, front
speaker sound will be emphasized (rear
speaker sound will be attenuated).
BALANCE Control
Rotate the knob clockwise to emphasize
right speaker sound (left speaker sound
will be attenuated). When the control
knob is turned counter clockwise, left
speaker sound will be emphasized (right
speaker sound will be attenuated).
SURROUND Control
(if equipped with RSE)
To turn on the SURROUND, rotate the
knob clockwise, while to turn off the
SURROUND, rotate the knob counter-
clockwise. The surround sound is not
consistent when cycling from radio to CD
or DVD. Therefore, the SURROUND
ON/OFF control should be selected,
whenever you change to other audio
modes (AM/FM, CD, AUX).
7 -2. TUNE Select Knob
Rotate the knob clockwise to increase
the frequency and turn the knob counter-
clockwise to reduce the frequency.
✽
NOTICE
• Do not place beverages close to the
audio system. The audio system mech-
anism may be damaged if you spill
them.
• Do not strike or allow anything to
impact the audio system, damage to
the system mechanisms could occur.
Page 212 of 339
3203
Features of your vehicle
12. DISC UP/DOWN Button
• By pressing "DISC "/"DISC "
while CD changer is playing you can
move backward or forward to the next
disc and playback automatically
begins.
• If any of the slots do not contain a CD,
your car audio will skip the empty slot
and play only those that contain a CD.
When switching CD’s, the LCD dis-
plays the selected CD’s number.
13. FILE SEARCH Knob
(TUNE Select Knob)
• You can skip the track (file) by turning
the FILE SEARCH knob clockwise or
counterclockwise.
After selecting the desired track (file),
press the FILE SEARCH knob to play-
back the track (file).
If you do not press the FILE SEARCH
knob within five seconds, the search
will stop.
14. FOLDER SEARCH (FLDR)
Button
• You can move through the folder by
pushing the FLDR button to up ( )
and down( ).
• After moving the desired folder, press
the FILE SEARCH knob to play back in
the selected folder. If you do not press
the FILE SEARCH knob within 5 sec-
onds, the folder searching function will
be released. It can not be operated in a
single folder.
15. INFO Button
While playing CD(MP3), If this button is
pressed repeatedly, the played file infor-
mation will be displayed in the following
order.
FILE NAME
➟ SONG TITLE ➟ ARTIST
NAME
➟ ALBUM TITLE ➟ FOLDER
NAME
➟ TOTAL FILE ➟ MARK
ADDRESS
➟ FILE NAME
“NO DATA” wil be displayed in case that
there is no information on the selected
item.
✽
NOTICE
• To assure proper operation of the unit,
keep the vehicle interior temperature
within a normal range by using the
vehicle's air conditioning or heating
system.
• When replacing the fuse, replace it
with a fuse having the correct capaci-
ty.
• Stored bookmarks are all erased when
the car battery is disconnected or
power to the vehicle is lost. If this
occurs, the bookmarks will have to be
reset.
• This equipment is designed to be used
only in a 12 volt DC battery system
with negative ground.
• This unit is made of precision parts.
Do not attempt to disassemble or
adjust any parts.
• When driving your vehicle, be sure to
keep the volume of the unit set low
enough to allow you to hear sounds
coming from the outside.
• Do not expose this equipment (includ-
ing the speakers and tape) to water or
excessive moisture.
Page 214 of 339
3205
Features of your vehicle
Welcome
The Rear Seat Entertainment (RSE)
System is a compact, built-in, easy-to-use
entertainment system designed to provide
family fun while you are on the road. Enjoy
great quality sound from the vehicle
speakers, or have a private, quiet viewing
with the wireless headphones.
The display unit is mounted to the ceiling
in the rear passenger area of the vehicle,
allowing rear-seat passengers to play
DVD movies, video CDs or music CDs.
Users may also plug in a game platform or
VHS player. Headphones, game car-
tridges and other accessories can be kept
neatly out of the way in the 3rd-row arm-
rest compartment.
System Overview
The RSE System includes a mounted
color monitor with a built-in audio/video
control panel and a DVD player. It also
includes a remote control and two (2)
sets of battery-operated wireless head-
phones (batteries are included).
Connections / Setup
The RSE system is designed to make
your time on the road more enjoyable.
Please follow these instructions carefully
to get the most out of your RSE.
✽
NOTICE
RSE operation is prevented during the
first 2 seconds after the ignition switch is
turned to ignition on or accessory mode.
The RSE system is already set up and
ready for use. The system is always
“awake” when the vehicle's ignition is
turned on or when the vehicle is in
“accessory power mode.”
REAR SEAT ENTERTAINMENT SYSTEM (IF EQUIPPED)
CAUTION
• Refrain from using food or drinks
near the RSE, the wireless head-
phones or the remote control.
• Direct sunlight may interfere with
the headphone's operation and
performance.
• Normal RSE operation cannot be
guaranteed with unofficial dupli-
cated discs.
• In order to prevent inadvertent
battery discharge, the RSE will
remain in standby mode when
ignition switch is turn to ignition
ON or accessory mode.
• Use of rear seat entertainment
system without the engine run-
ning will reduce battery power.
CAUTION
Disclaimer: The RSE system is pro-
grammed to the regional display
formats for your region (NTSC or
PAL). Please note that your RSE will
not read DVDs from a different
region.
Page 249 of 339
417
Driving your vehicle
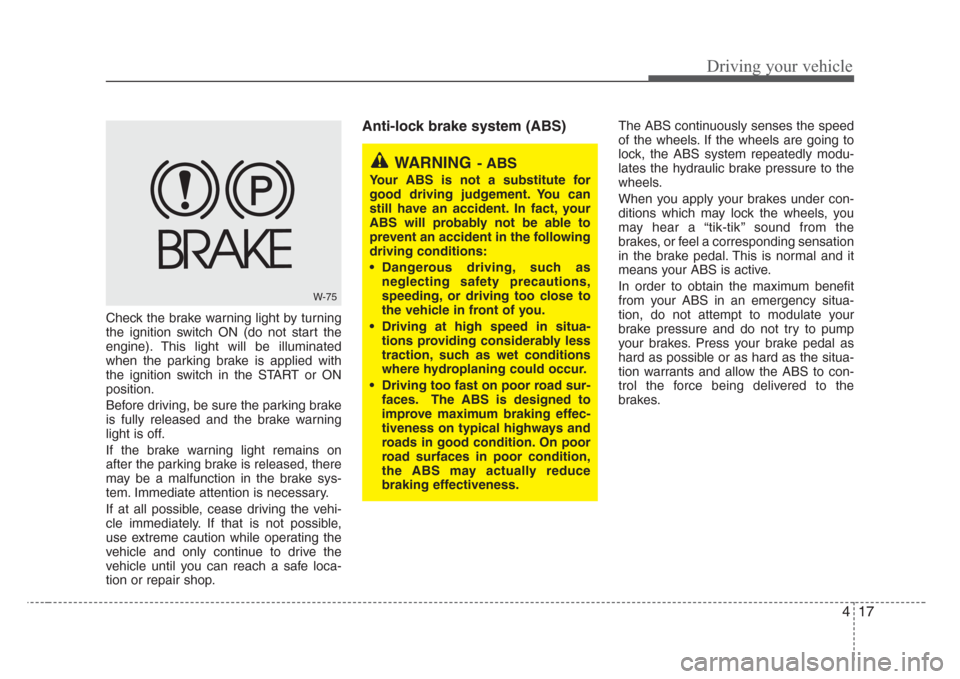
Check the brake warning light by turning
the ignition switch ON (do not start the
engine). This light will be illuminated
when the parking brake is applied with
the ignition switch in the START or ON
position.
Before driving, be sure the parking brake
is fully released and the brake warning
light is off.
If the brake warning light remains on
after the parking brake is released, there
may be a malfunction in the brake sys-
tem. Immediate attention is necessary.
If at all possible, cease driving the vehi-
cle immediately. If that is not possible,
use extreme caution while operating the
vehicle and only continue to drive the
vehicle until you can reach a safe loca-
tion or repair shop.
Anti-lock brake system (ABS) The ABS continuously senses the speed
of the wheels. If the wheels are going to
lock, the ABS system repeatedly modu-
lates the hydraulic brake pressure to the
wheels.
When you apply your brakes under con-
ditions which may lock the wheels, you
may hear a “tik-tik’’ sound from the
brakes, or feel a corresponding sensation
in the brake pedal. This is normal and it
means your ABS is active.
In order to obtain the maximum benefit
from your ABS in an emergency situa-
tion, do not attempt to modulate your
brake pressure and do not try to pump
your brakes. Press your brake pedal as
hard as possible or as hard as the situa-
tion warrants and allow the ABS to con-
trol the force being delivered to the
brakes.
W-75
WARNING- ABS
Your ABS is not a substitute for
good driving judgement. You can
still have an accident. In fact, your
ABS will probably not be able to
prevent an accident in the following
driving conditions:
• Dangerous driving, such as
neglecting safety precautions,
speeding, or driving too close to
the vehicle in front of you.
• Driving at high speed in situa-
tions providing considerably less
traction, such as wet conditions
where hydroplaning could occur.
• Driving too fast on poor road sur-
faces. The ABS is designed to
improve maximum braking effec-
tiveness on typical highways and
roads in good condition. On poor
road surfaces in poor condition,
the ABS may actually reduce
braking effectiveness.