2008 KIA Rio lock
[x] Cancel search: lockPage 75 of 219

Knowing your vehicle
66 3
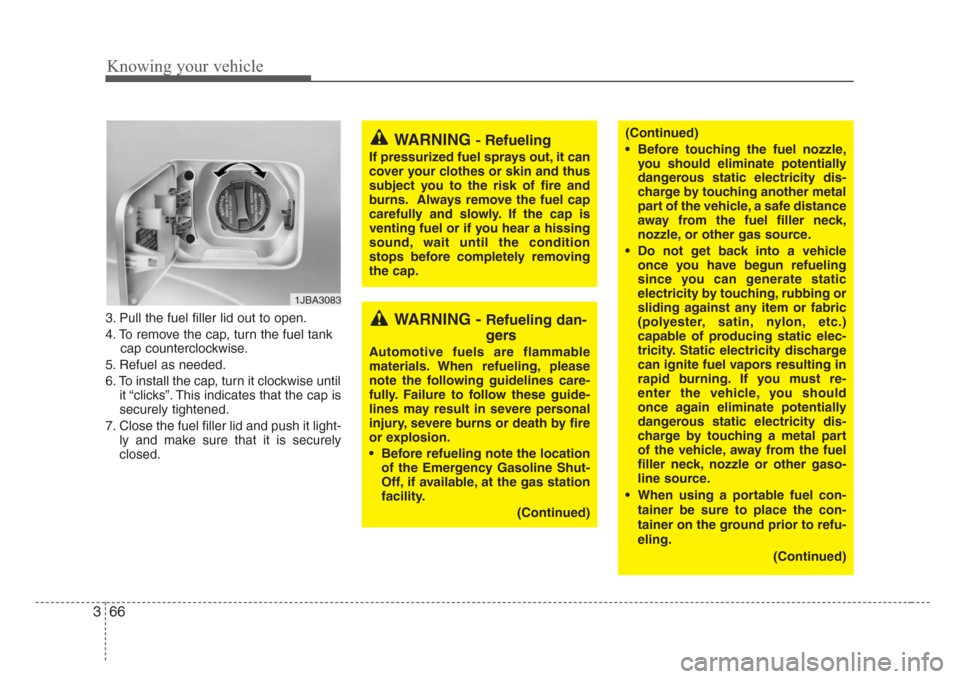
3. Pull the fuel filler lid out to open.
4. To remove the cap, turn the fuel tank
cap counterclockwise.
5. Refuel as needed.
6. To install the cap, turn it clockwise until
it “clicks”. This indicates that the cap is
securely tightened.
7. Close the fuel filler lid and push it light-
ly and make sure that it is securely
closed.
1JBA3083
WARNING - Refueling
If pressurized fuel sprays out, it can
cover your clothes or skin and thus
subject you to the risk of fire and
burns.Always remove the fuel cap
carefully and slowly. If the cap is
venting fuel or if you hear a hissing
sound, wait until the condition
stops before completely removing
the cap.
WARNING - Refueling dan-
gers
Automotive fuels are flammable
materials. When refueling, please
note the following guidelines care-
fully. Failure to follow these guide-
lines may result in severe personal
injury,severe burns or death by fire
or explosion.
• Before refueling note the location
of the Emergency Gasoline Shut-
Off, if available, at the gas station
facility.
(Continued)
(Continued)
• Before touching the fuel nozzle,
you should eliminate potentially
dangerous static electricity dis-
charge by touching another metal
part of the vehicle, a safe distance
away from the fuel filler neck,
nozzle, or other gas source.
• Do not get back into a vehicle
once you have begun refueling
since you can generate static
electricity by touching, rubbing or
sliding against any item or fabric
(polyester,satin, nylon, etc.)
capable of producing static elec-
tricity. Static electricity discharge
can ignite fuel vapors resulting in
rapid burning. If you must re-
enter the vehicle, you should
once again eliminate potentially
dangerous static electricity dis-
charge by touching a metal part
of the vehicle, away from the fuel
filler neck, nozzle or other gaso-
line source.
• When using a portable fuel con-
tainer be sure to place the con-
tainer on the ground prior to refu-
eling.
(Continued)
Page 80 of 219

371
Knowing your vehicle
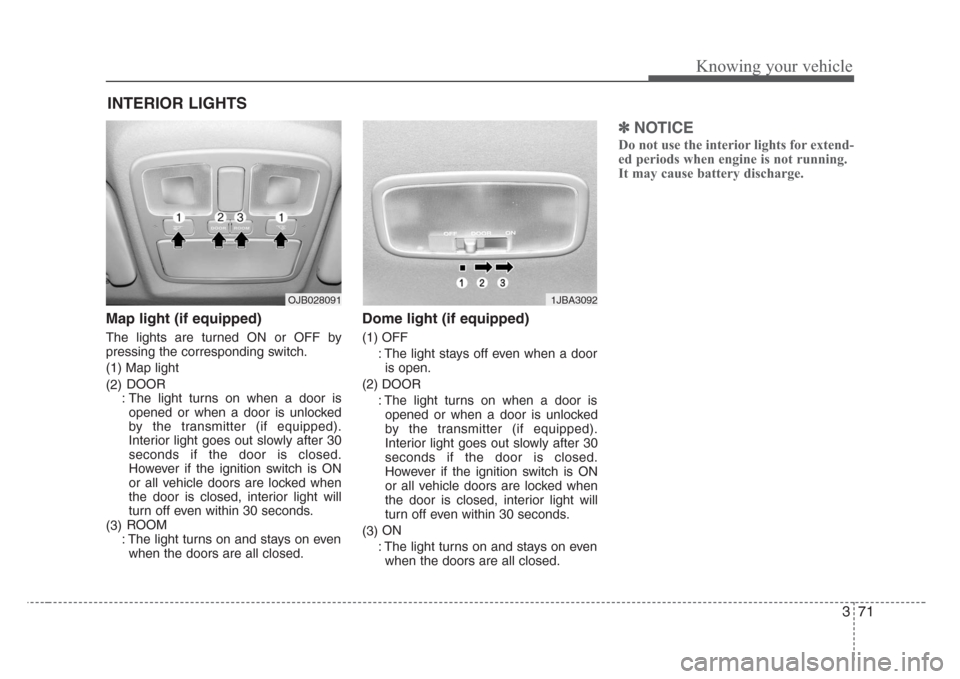
Map light (if equipped)
The lights are turned ON or OFF by
pressing the corresponding switch.
(1) Map light
(2)DOOR
: The light turns on when a door is
opened or when a door is unlocked
by the transmitter (if equipped).
Interior light goes out slowly after 30
seconds if the door is closed.
However if the ignition switch is ON
or all vehicle doors are locked when
the door is closed, interior light will
turn off even within 30 seconds.
(3)ROOM
: The light turns on and stays on even
when the doors are all closed.
Dome light (if equipped)
(1) OFF
: The light stays off even when a door
is open.
(2) DOOR
: The light turns on when a door is
opened or when a door is unlocked
by the transmitter (if equipped).
Interior light goes out slowly after 30
seconds if the door is closed.
However if the ignition switch is ON
or all vehicle doors are locked when
the door is closed, interior light will
turn off even within 30 seconds.
(3)ON
: The light turns on and stays on even
when the doors are all closed.
✽
NOTICE
Do not use the interior lights for extend-
ed periods when engine is not running.
It may cause battery discharge.
INTERIOR LIGHTS
1JBA3092OJB028091
Page 84 of 219

375
Knowing your vehicle
✽
NOTICE
• Use the power outlet when the engine
is running, and remove a plug from
the power outlet after using the elec-
tric appliance. Using the power outlet
excessively or while the engine is not
running or leaving appliances plugged
into the power outlet when not in use
will cause battery discharge
• Only use the electric appliances which
are less than 12V and 10A in electric
capacity.
• Adjust the air-conditioner or heater to
the lowest operation level when you
have to use the power socket while
using air-conditioner or heater.
• Close the cover when not in use.
• Some electronic devices can cause
electronic interference when plugged
into a vehicle’s power outlet. These
devices may cause excessive audio
static and malfunctions in other elec-
tronic systems or devices used in your
vehicle.
Digital clock (if equipped)
Whenever the battery terminals or mem-
ory fuse are disconnected, you must
reset the time.
When the ignition switch is in the ACC or
ON position, the clock buttons operates
as follows:• HOUR:
Pressing the “H” button with your fin-
ger, a pencil or similar object will
advance the time displayed by one
hour.
• MINUTE:
Pressing the “M” button with your fin-
ger, a pencil or similar object will
advance the time displayed by one
minute.
•RESET:
To clear away minutes, press the “R”
button with your finger, a pencil or sim-
ilar object. Then the clock will be set
precisely on the hour.
For example, if the “R” button is
pressed while the time is between 9:01
and 9:29, the display will be reset to
9:00.
9:01 ~ 9:29 ➾9:00
9:30 ~ 9:59 ➾10:00
1JBN3103A
Page 87 of 219

Knowing your vehicle
78 3
3. Insert the emergency handle (provided
with the vehicle) and turn the handle
clockwise to open or counterclockwise
to close.
Resetting the sunroof
Whenever the vehicle battery is discon-
nected or discharged, or you use the
emergency handle to operate the sun-
roof, you have to reset your sunroof sys-
tem as follows:
1. Turn the ignition key to the ON posi-
tion.
2. Set the sunroof to the maximum TILT-
UP position using the corresponding
sunroof switch.
3. Then, release it.
4. Press and hold the TILT UP button
once again until the sunroof has
returned to the original position of TILT
UP after it is raised a little higher than
the maximum TILT UP position. This
may take several seconds.
When this is complete, the sunroof
system is reset.
To keep items from shifting in the trunk,
you can use the four rings located in the
trunk to attach the cargo net.
1JBA3112
1JBA3113
1JBA3216
4 Door
5 Door
LUGGAGE NET (IF EQUIPPED)
Page 90 of 219

381
Knowing your vehicle
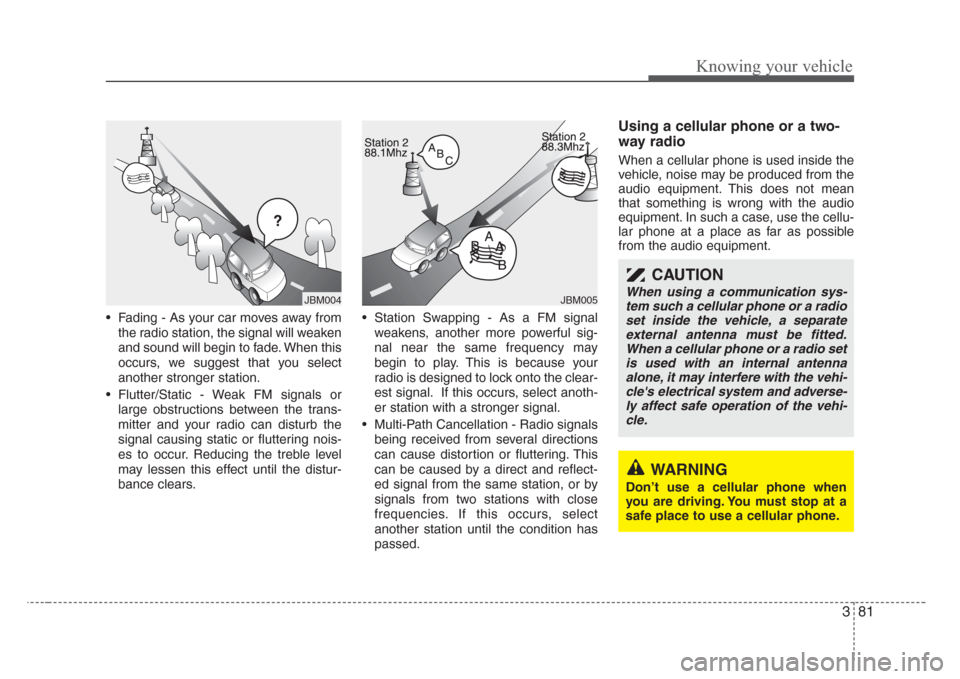
• Fading - As your car moves away from
the radio station, the signal will weaken
and sound will begin to fade. When this
occurs, we suggest that you select
another stronger station.
• Flutter/Static - Weak FM signals or
large obstructions between the trans-
mitter and your radio can disturb the
signal causing static or fluttering nois-
es to occur. Reducing the treble level
may lessen this effect until the distur-
bance clears.• Station Swapping - As a FM signal
weakens, another more powerful sig-
nal near the same frequency may
begin to play. This is because your
radio is designed to lock onto the clear-
est signal. If this occurs, select anoth-
er station with a stronger signal.
• Multi-Path Cancellation - Radio signals
being received from several directions
can cause distortion or fluttering. This
can be caused by a direct and reflect-
ed signal from the same station, or by
signals from two stations with close
frequencies. If this occurs, select
another station until the condition has
passed.
Using a cellular phone or a two-
way radio
When a cellular phone is used inside the
vehicle, noise may be produced from the
audio equipment. This does not mean
that something is wrong with the audio
equipment. In such a case, use the cellu-
lar phone at a place as far as possible
from the audio equipment.
¢¢¢
JBM004JBM005
CAUTION
When using a communication sys-
tem such a cellular phone or a radio
set inside the vehicle, a separate
external antenna must be fitted.
When a cellular phone or a radio set
is used with an internal antenna
alone, it may interfere with the vehi-
cle's electrical system and adverse-
ly affect safe operation of the vehi-
cle.
WARNING
Don’t use a cellular phone when
you are driving. You must stop at a
safe place to use a cellular phone.
Page 93 of 219

Knowing your vehicle
84 3
1. POWER ON-OFF Control Knob
The radio unit may be operated when the
ignition key is in the “ACC”or “ON” posi-
tion. Press the knob to switch the power
on. The LCD shows the radio frequency in
radio mode, and displays the CD track in
CD mode. To switch the power off, press
the knob again.
VOLUME Control
Rotate the knob clockwise to increase
the volume and turn the knob counter-
clockwise to reduce the volume.
2. BAND Selector
FM Selection Button
Pressing the button changes the
FM1 and FM2 bands.
AM Selection Button
Pressing the button selects the
AM band. AM mode is displayed on LCD.
3. TUNE/MODE Select Knob
Rotate the knob clockwise to increase
the frequency and turn the knob counter-
clockwise to reduce the frequency.
Mode Select Knob
Pressing the MODE knob changes the
BASS, MIDDLE, TREBLE, FADER and
BALANCE mode.
The mode selected is shown on the dis-
play.
After selecting the desired mode, rotate
the mode select knob clockwise or coun-
terclockwise to adjust.
BASS Control
To increase the BASS, rotate the knob
clockwise, to decrease the BASS, rotate
the knob counterclockwise.
MID Control
To increase the MID, rotate the knob
clockwise, to decrease the MID, rotate
the knob counterclockwise.
TREBLE Control
To increase the TREBLE, rotate the knob
clockwise, to decrease the TREBLE,
rotate the knob counterclockwise.
FAD (Fader Control)
Rotate the control knob clockwise to
emphasize rear speaker sound (front
speaker sound will be attenuated). When
the control knob is turned counterclock-
wise, front speaker sound will be empha-
sized (rear speaker sound will be attenu-
ated).
BALANCE Control
Rotate the knob clockwise to emphasize
right speaker sound (left speaker sound
will be attenuated). When the control
knob is turned counterclockwise, left
speaker sound will be emphasized (right
speaker sound will be attenuated).
AM
FM
Page 100 of 219

391
Knowing your vehicle
1. POWER ON-OFF Control Knob
• The radio unit may be operated when
the ignition key is in the "ACC" or "ON"
position. Press the button to switch the
power on. The LCD shows the radio
frequency in the radio mode, CD/ MP3
track in the CD/MP3 mode. To switch
the power off, press the button again.
• Push the FM/AM or CD/MP3 to turn on
that function without pushing Power
ON-OFF control knob.
VOLUME Control
Rotate the knob clockwise to increase
the volume and turn the knob counter-
clockwise to reduce the volume.
2. BAND Select Button
Pressing the FM/AM button changes the
AM, FM1 and FM2 bands. The mode
selected is shown on the display.
3. RADIO SCAN Button
When you press the button, frequency is
changed and the next channel is
received automatically.
To stay on a station, press the CD SCAN
button again.
4. EQ Button
Press the EQ button to select the CLAS-
SIC, POP, ROCK, JAZZ and OFF MODE
for the desired tone quality. Each press of
the button changes the display as fol-
lows;
5. AUTO SEEK Select Button
(Automatic Channel Selection)
Press the AUTO SEEK select button.
When the side is pressed, the unit
will automatically tune to the next higher
frequency and when the side is
pressed, it will automatically tune to the
next lower frequency.
6. PRESET STATION Select
Buttons
Six stations for AM, FM1 and FM2
respectively can be preset in the elec-
tronic memory circuit.
HOW TO PRESET STATIONS
Six AM and twelve FM stations may be
programmed into the memory of the
radio.Then, by simply pressing the AM/FM
band select button and/or one of the six
station select buttons, you may recall any
of these stations instantly. To program the
stations, follow these steps:
• Press AM/FM selector to set the band
for AM, FM1 and FM2.
• Select the desired station to be stored
by seek or manual tuning.
• Determine the preset station select
button you wish to use to access that
station.
• Press and hold the station select button
for more than 0.8 seconds. A select but-
ton indicator will show in the display indi-
cating which select button you have
depressed. The frequency display will
flash after it has been stored in to the
memory. You should then release the but-
ton, and proceed to program the next
desired station. A total of 18 stations can
be programmed by selecting one AM and
two FM station per button.
• When completed, any preset station
may be recalled by selecting AM, FM1
or FM2 band and the appropriate sta-
tion button.
CLASSIC➟POP➟ROCK➟JAZZ➟OFF
Page 101 of 219

Knowing your vehicle
92 3
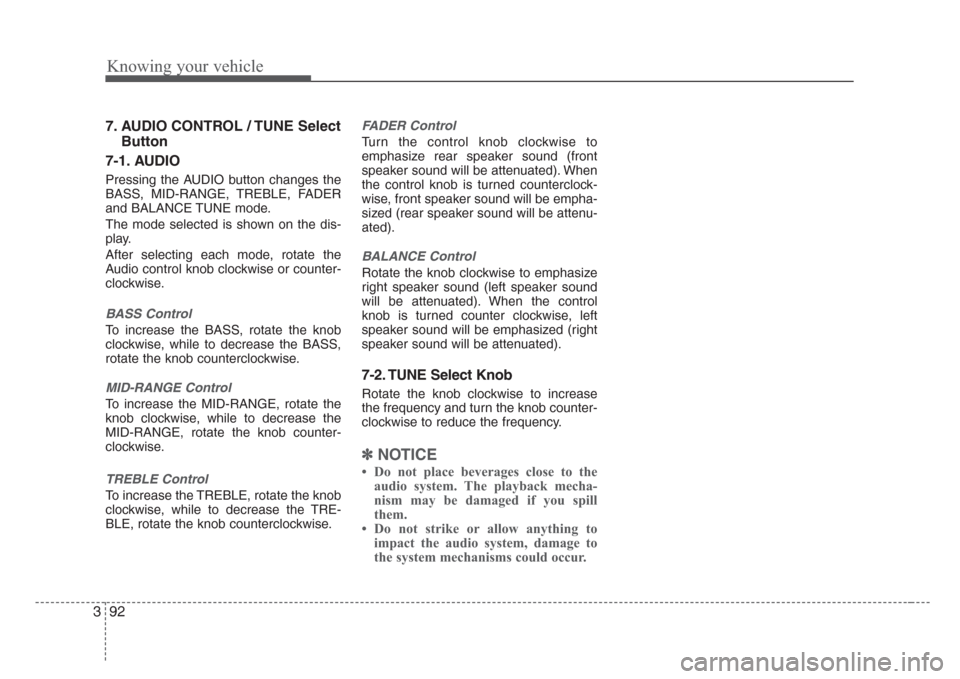
7. AUDIO CONTROL / TUNE Select
Button
7-1. AUDIO
Pressing the AUDIO button changes the
BASS, MID-RANGE, TREBLE, FADER
and BALANCE TUNE mode.
The mode selected is shown on the dis-
play.
After selecting each mode, rotate the
Audio control knob clockwise or counter-
clockwise.
BASS Control
To increase the BASS, rotate the knob
clockwise, while to decrease the BASS,
rotate the knob counterclockwise.
MID-RANGE Control
To increase the MID-RANGE, rotate the
knob clockwise, while to decrease the
MID-RANGE, rotate the knob counter-
clockwise.
TREBLE Control
To increase the TREBLE, rotate the knob
clockwise, while to decrease the TRE-
BLE, rotate the knob counterclockwise.
FADER Control
Turn the control knob clockwise to
emphasize rear speaker sound (front
speaker sound will be attenuated). When
the control knob is turned counterclock-
wise, front speaker sound will be empha-
sized (rear speaker sound will be attenu-
ated).
BALANCE Control
Rotate the knob clockwise to emphasize
right speaker sound (left speaker sound
will be attenuated). When the control
knob is turned counter clockwise, left
speaker sound will be emphasized (right
speaker sound will be attenuated).
7-2. TUNE Select Knob
Rotate the knob clockwise to increase
the frequency and turn the knob counter-
clockwise to reduce the frequency.
✽
NOTICE
• Do not place beverages close to the
audio system. The playback mecha-
nism may be damaged if you spill
them.
• Do not strike or allow anything to
impact the audio system, damage to
the system mechanisms could occur.