2008 KIA Opirus ECU
[x] Cancel search: ECUPage 144 of 283

413
Driving your vehicle
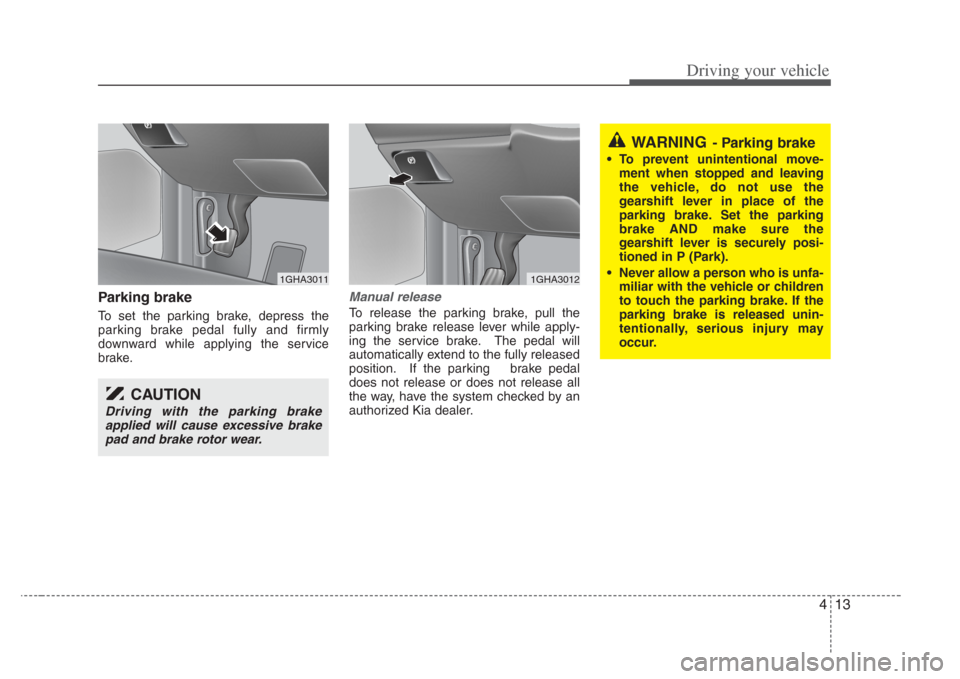
Parking brake
To set the parking brake, depress the
parking brake pedal fully and firmly
downward while applying the service
brake.
Manual release
To release the parking brake, pull the
parking brake release lever while apply-
ing the service brake. The pedal will
automatically extend to the fully released
position. If the parking brake pedal
does not release or does not release all
the way, have the system checked by an
authorized Kia dealer.
CAUTION
Driving with the parking brakeapplied will cause excessive brakepad and brake rotor wear.
1GHA30111GHA3012
WARNING- Parking brake
• To prevent unintentional move- ment when stopped and leaving
the vehicle, do not us e the
gear shift lever in place of the
parking brake. Set the parking
brake AND make s ure the
gear shift lever is securely posi-
tioned in P (Park).
• Never allow a per son who is unfa-
miliar with the vehicle or children
to touch the parking brake. If the
parking brake is released unin-
tentionally, serious injury may
occur.
Page 162 of 283

431
Driving your vehicle
Trunk lid open
warning
This warning light activates when the
trunk is not closed securely.
Low fuel level
warning
This warning light indicates the fuel tank
is nearly empty. The warning light will
come on when the fuel level has dropped
to about 9 liters. Refuel as soon as pos-
sible.
Door open
display
This warning light illuminates when a
door is not closed securely with the igni-
tion in any position. And the door open
display will illuminate the corresponding
position light which door is not closed
securely.
Immobilizer indicator
(if equipped)
This light illuminates when the immobiliz-
er key is inserted and turned to the ON
position to start the engine.
If this light turns off or blinks when the
ignition switch is in the ON position
before starting the engine, have the sys-
tem checked by an authorized Kia
Dealer.
Headlight high beam
indicator
This indicator illuminates when the head-
lights are on and in the high beam posi-
tion or when the turn signal lever is pulled
into the Flash-to-Pass position.
Malfunction indicator
(if equipped)
This indicator light is part of the Engine
Control System which monitors various
emission control system components. If
this light illuminates while driving, it indi-
cates that a potential problem has been
detected somewhere in the emission
control system.
Generally, your vehicle will continue to be
drivable and will not need towing, but
have the system checked by an
Authorized Kia Dealer as soon as possi-
ble.
✽NOTICE
A loose fuel filler cap may cause the On
Board Diagnostic System Malfunction
Indicator Light ( ) in the instrument
panel to illuminate unnecessarily.
Always make sure that the fuel filler cap
is tight.
TRUNK
OPEN!
LOW
FUEL
DOOR
OPEN!
Page 199 of 283

515
Driving tips
If you carry items inside your vehicle
- like suitcases, tools, packages, or
anything else - they are moving as
fast as the vehicle. If you have to stop
or turn quickly, or if there is a crash,
the items will keep going and can
cause an injury if they strike the driv-
er or a passenger.This section will guide you in the
proper loading of your vehicle and/or
trailer, to keep your loaded vehicle
weight within its design rating capa-
bility, with or without a trailer.
Properly loading your vehicle will
provide maximum return of the vehi-
cle design performance. Before load-
ing your vehicle, familiarize yourself
with the following terms for determin-
ing your vehicle's weight ratings, with
or without a trailer, from the vehicle's
specifications and the compliance
label:
Base curb weight
This is the weight of the vehicle
including a full tank of fuel and all
standard equipment. It does not
include passengers, cargo, or option-
al equipment.
Vehicle curb weight
This is the weight of your new vehicle
when you picked it up from your deal-
er plus any aftermarket equipment.
Cargo weight
This figure includes all weight added
to the Base Curb Weight, including
cargo and optional equipment.GAW (Gross axle weight)
This is the total weight placed on
each axle (front and rear) - including
vehicle curb weight and all payload.
GAWR (Gross axle weight rating)
This is the maximum allowable
weight that can be carried by a single
axle (front or rear). These numbers
are shown on the compliance label.
The total load on each axle must
never exceed its GAWR.
GVW (Gross vehicle weight)
This is the Base Curb Weight plus
actual Cargo Weight plus passen-
gers.
GVWR (Gross vehicle weight rating)
This is the maximum allowable
weight of the fully loaded vehicle
(including all options, equipment,
passengers and cargo). The GVWR
is shown on the compliance label
located on the driver’s door sill.
WARNING - Loose cargo
Items you carry ins ide your
vehicle can s trike and injure
occupants in a sudden stop or
turn, or in a crash.
• Put items in the cargo area of your vehicle. Try to spread the
weight evenly.
• Never stack items, like suit-
cas es,in side the vehicle
above the top s of the seats.
• Do not leave an uns ecured
child restraint in your vehicle.
• When you carry s omething
inside the vehicle, secure it.
• Do not drive with a seat folded
down unless necessary.
WEIGHT OF THE VEHICLE
Page 203 of 283

519
Driving tips
Safety chains
You should always attach chains
between your vehicle and your trailer.
Cross the safety chains under the tongue
of the trailer so that the tongue will not
drop to the road if it becomes separated
from the hitch.
Instructions about safety chains may be
provided by the hitch manufacturer or by
the trailer manufacturer. Follow the man-
ufacturer’s recommendation for attaching
safety chains. Always leave just enough
slack so you can turn with your trailer.
And, never allow safety chains to drag on
the ground.
Trailer brakes
If your trailer weighs more than 454 kg
(1000 lbs.) loaded, then it needs its own
brakes and they must be adequate. Be
sure to read and follow the instructions
for the trailer brakes so you’ll be able to
install, adjust and maintain them proper-
ly.
• Don’t tap into your vehicle's brake sys-tem.
Driving with a trailer
Towing a trailer requires a certain
amount of experience. Before setting out
for the open road, you must get to know
your trailer. Acquaint yourself with the
feel of handling and braking with the
added weight of the trailer. And always
keep in mind that the vehicle you are
driving is now a good deal longer and not
nearly so responsive as your vehicle is
by itself.
Before you start, check the trailer hitch
and platform, safety chains, electrical
connector(s), lights, tires and mirror
adjustment. If the trailer has electric
brakes, start your vehicle and trailer mov-
ing and then apply the trailer brake con-
troller by hand to be sure the brakes are
working. This lets you check your electri-
cal connection at the same time.
During your trip, check occasionally to be
sure that the load is secure, and that the
lights and any trailer brakes are still work-
ing.
WARNING
Do not use a trailer with its own
brakes unless you are absolutely
certain that you have properly set
up the brake system. This i s not a
task for amateur s.Use an experi-
enced, competent trailer shop for
this work.
Page 209 of 283

525
Driving tips
HOMELINK® WIRELESS CONTROL SYSTEM (IF EQUIPPED)
Your new mirror comes with an integrat-
ed HomeLink Universal Transceiver,
which allows you to program the mirror to
activate your garage door(s), estate gate,
home lighting, etc. The mirror actually
learns the codes from your various exist-
ing transmitters.
MMSA5007
Homelink buttons Glare detection sensor
Indicator lightWARNING
• When programming the
HomeLink® Wireless Control
System, you may be operating a
garage door or gate operator.
Make sure that people and
objects are out of the way of the
moving door or gate to prevent
potential harm or damage.
• Do not use HomeLink with any garage door opener that lacks the
safety stop and rever se feature as
required by federal safety stan-
dards. (This includes any garage
door opener model manufactured
before April 1, 1982.) A garage
door opener which cannot detect
an object, signaling the door to
stop and rever se, does not meet
current federal safety standards.
Using a garage door opener with-
out these features increases risk
of serious injury or death. For
more information, call 1-800-355-
3515 or on the internet at
www.homelink.com.
(Continued)
(Continued)
• Retain the original tran smitter for
future programming procedures
(i.e., new vehicle purcha se). It is
also suggested that upon the sale
of the vehicle, the programmed
HomeLink button s be erased for
security purposes (follow step 1
in the “Programming” portion of
this text).
Page 212 of 283

Driving tips
285
6. Return to the vehicle and firmly pressand release the programmed
HomeLink button up to three times.
The rolling code equipped device
should now recognize the HomeLink
signal and activate when the
HomeLink button is pressed. The
remaining two buttons may now be
programmed if this has not previously
been done. Refer to the
“Programming” portion of this text.Operating HomeLink
To operate, simply press the pro-
grammed HomeLink button. Activation
will now occur for the trained product
(garage door, security system, entry door
lock, estate gate, or home or office light-
ing). For convenience, the hand-held
transmitter of the device may also be
used at any time. The HomeLink
Wireless Controls System (once pro-
grammed) or the original hand-held
transmitter may be used to activate the
device (e.g. garage door, entry door lock,
etc.). In the event that there are still pro-
gramming difficulties, contact HomeLink
at 1-800-355-3515 or on the internet at
www.homelink.com.
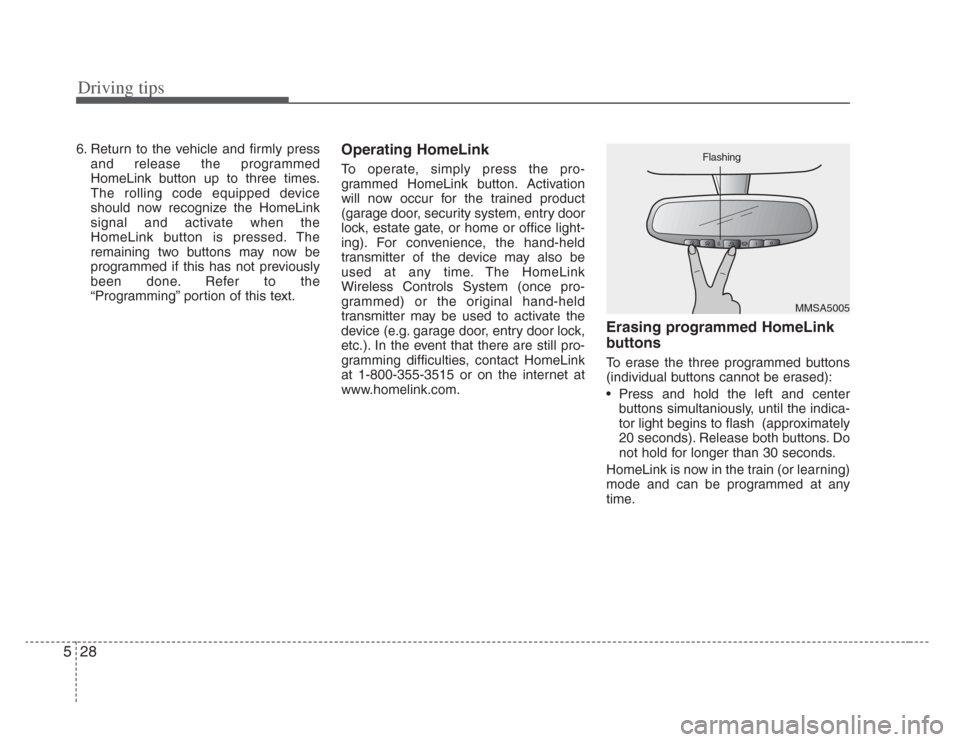
Erasing programmed HomeLink
buttons
To erase the three programmed buttons
(individual buttons cannot be erased):
• Press and hold the left and centerbuttons simultaniously, until the indica-
tor light begins to flash (approximately
20 seconds). Release both buttons. Do
not hold for longer than 30 seconds.
HomeLink is now in the train (or learning)
mode and can be programmed at any
time.
MMSA5005
Flashing
Page 220 of 283

67
In case of an emergency
If you do not have a spare, use a fuse ofthe same rating from a circuit you maynot need for operating the vehicle, suchas the radio or room lamp fuse.
If the headlights or other electrical com-
ponents do not work and the fuses are
OK, check the fuse block in the engine
compartment. If a fuse is blown, it must
be replaced. To check the fuse or relay in the engine
compartment, remove the engine com-
partment shroud.
1. Turn the ignition switch and all other
switches off.
2. Remove the fuse box cover by remov- ing the bolt on the cover and unhook-
ing the tab on one end and tilting the
cover back toward the other end.
3. Check the fuses. If one is blown, replace it with a new one of the same
rating.
✽NOTICE
After checking the fuse box in the engine
compartment, securely install the fuse
box cover. If not, electrical failures may
occur from water leaking in.
1GHA403A1GHA404OGH056001
Engine compartment
➀
➁
➀
Junction Box
➁ Main Fuse
Page 222 of 283

69
In case of an emergency
Description Fus e rating Protected component
1 FUEL PUMP 20A Fuel pump
2 H/LP (LO-LH) 15A Headlight (low-left)
3 ABS 10A Anti-lock brake system
4 IGN COIL 15A Ignition coil
5 A/CON COMP 10A Air-conditioner compressor
6 ATM 20A Automatic transaxle control relay
7 MAIN 20A Engine control unit relay
8 O2 SNSR 15A Oxygen sensor
9 EGR 15A
Power train control system sensors
10 HORN 15A Horn
11 TAIL 20A Tail light
12 SUNROOF 20A Sun roof
13 P/SEAT (RH) 20A Power seat (right)
14 FOG LP (FR) 15A Fog light (front)
15 H/LP (HI) 15A Headlight (high)
16 SPARE 30A spare fuse
17 SPARE 20A spare fuse
18 SPARE 15A spare fuse
19 SPARE 10A spare fuse
20 P/SEAT (LH) 30A Power seat (left)
21 AMP 20A Radio amplifier
22 DRL* 15A Daytime running light
Engine compartment
Description Fus e rating Protected component
23 H/LP (LO-RH) 15A Headlight (low beam-right)
24 I/P B+ 30A All electrical system
25 ECU 10A Engine control unit
26 INJECTOR 10A Injector
27 ECS * 15A Electronic control suspension
BLOWER 40A Blower motor
IGN 1 30A Ignition switch
ABS 2 30A Anti-lock brake system
ABS 1 30A Anti-lock brake system
IGN 2 30A Ignition switch
S/WARM 30A Seat warmer
H/LP (LO-LH) - Headlight relay (low beam-left)
FUEL PUMP - Fuel pump relay
HORN - Horn relay
START - Start motor relay
A/CON - Air conditioner relay
H/LP (HI) - Headlight relay (high beam)
FOG LP (FR) - Fog light relay (front)
TAIL LP - Taillight relay
WIPER - Wiper relay
BATT 60A Alternator, Battery
ALT 150A Alternator
COOLING 60A Cooling fan
* : if equipped