Page 96 of 327
Knowing your vehicle
86
3
1 23456789
Map light
Front (if equipped)
The lights are turned ON or OFF by
pressing the corresponding switch. Dome light (if equipped)
(1) OFF - The light stays off even
when a door is open.
(2) DOOR - The light turns on when a door is opened or when a door is
unlocked by the transmitter (if
equipped). Interior light goes out
slowly after 30 seconds if the
door is closed. However if the
ignition switch is ON or all vehicle
doors are locked when the door is
closed, interior light will turn off
even within 30 seconds. (3) ON - The light turns on and stays
on even when the doors are allclosed.
INTERIOR LIGHTS
1LDA2113
OLD026111
OLD026112
Type A
Type B
Page 100 of 327
Knowing your vehicle
90
3
1 23456789
Cigarette lighter
Front
To operate the cigarette lighter, press
it in and release it. When it is heated,
it automatically pops out ready for
use.
If the engine is not running, the igni-
tion switch must be in the ACC posi-
tion for the lighter to operate.
✽✽
NOTICE
Page 102 of 327
Knowing your vehicle
92
3
1 23456789
Rear (if equipped)
To use the cup holders in rear seat,
pull the rear cup holder cover (
1) out.
Push the cover to close after use.
✽✽ NOTICE
Do not place heavy cups or cans in cup holders. Cup holders could bedamaged.
Sunvisor
Use the sunvisor to shield direct light
through the front or side windows.
To use a sunvisor, pull it downward. To use a sunvisor for a side window,
pull it downward, unsnap it from the
bracket (
1) and swing it to the side.
To use the vanity mirror, pull down
the visor and pull up the mirror cover
(driver’s side) ( 2).
OLD028153
1LDN2151
OLD028151
Driver’s side
Passenger’s side
Page 114 of 327

Knowing your vehicle
104
3
1 23456789
Care of cassette tapes (if equipped)
Because the thickness of a cas-
sette tape with the total playback
time of over 60 minutes (C-60) are
too thin, we suggest that you do
not use any of them to avoid hav-ing tapes being tangled.
To achieve better sound quality, periodically clean the tape head
using a cotton stick with colorlessalcohol (once per month).
If a tape is too loose, fasten it to reel by winding with objects like a pencil.
Because dust or foreign objects on a cassette tape may damage the
playback head, always store tapes
in their cases when not in use.
Make sure cassette tapes are kept away from magnetic devices (TV,stereo system, etc) in order to
achieve better sound quality.
Be certain that no objects or sub-stances other than cassette tapes are
inserted into the cassette tape player.
Because tape media can be dis- torted when exposed to direct sun-
light, Do not leave cassette tapes
on the seats, dashboard or near
the back windshield. Care of disc (if equipped)
If the temperature inside the car is too
high, open the car windows for venti-
lation before using your car audio.
It is illegal to copy and use MP3/WMA/AAC/WAVE files without
permission(If equipped with M465,use only MP3/WMA, If equipped
with M445, use only CD-DA). Use
CDs that are created only by lawful
means.
Do not apply volatile agents such as benzene and thinner, normal
cleaners and magnetic sprays
made for analogue disc onto CDs.
To prevent the disc surface from getting damaged. Hold and carry
CDs by the edges or the edges of
the center hole only.
Clean the disc surface with a piece of soft cloth before playback (wipe it
from the center to the outside edge.).
Do not damage the disc surface or attach pieces of sticky tape orpaper onto it.
Make sure on undesirable matter other than CDs are inserted into
the CD player (Do not insert morethan one CD at a time). Keep CDs in their cases after use
to protect them from scratches or
dirt.
Depending on the type of CD- R/CD-RW CDs, certain CDs may
not operate normally according to
manufacturing companies or mak-
ing and recording methods. In such
circumstances, if you still continue
to use those CDs, they may cause
the malfunction of your car audiosystem.
✽✽ NOTICE - Playing an
Incompatible Copy-Protected
Audio CD
Some copy-protected CDs, which do not comply with the internationalaudio CD standards(Red Book),
may not play on your car audio.Please note that if you try to play
copyprotected CDs and the CD
player of your car audio is not per-
forming to your expectation, thismay be caused by those CDs and nota defect in the device itself. Please
replace those CDs.
Page 136 of 327
1 23456789Ignition switch / 4-2
Starting the engine / 4-4Manual transaxle / 4-7Automatic transaxle / 4-8Brake system / 4-14
Steering wheel / 4-20
Cruise control / 4-23
Traction control system / 4-26
Instrument cluster / 4-29Gauges / 4-31
Warnings and indicators / 4-37Lighting / 4-45
Wipers and washers / 4-51
Defroster / 4-53
Hazard warning flasher / 4-54
Manual climate control system / 4-55
Automatic climate control system / 4-64
Windshield defrosting and defogging / 4-75
Driving your vehicle
Page 137 of 327

Driving your vehicle
2
4
1 23456789
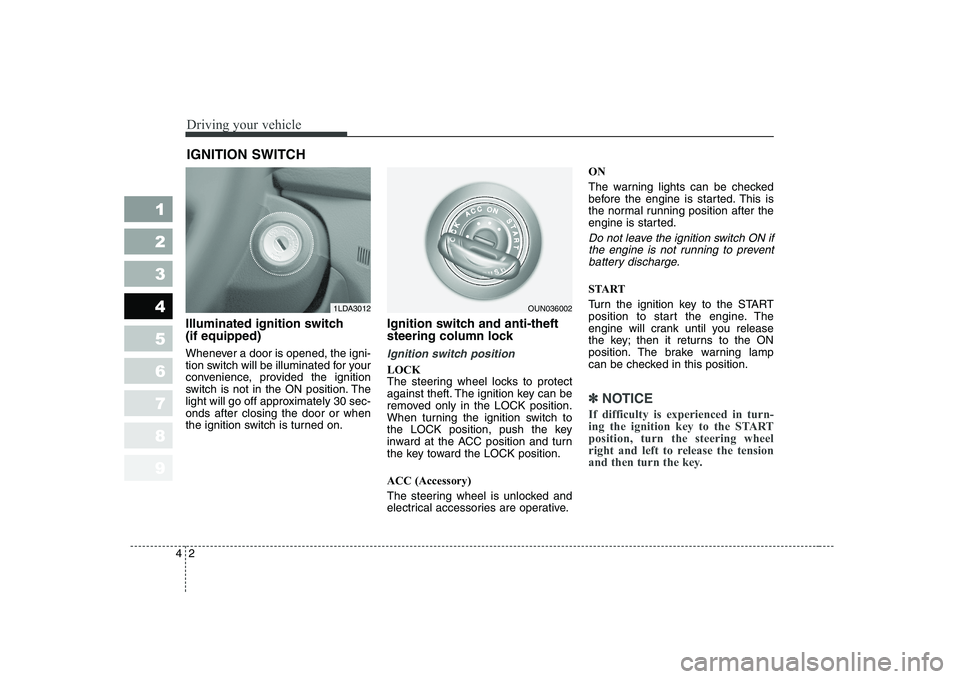
Illuminated ignition switch (if equipped)
Whenever a door is opened, the igni-
tion switch will be illuminated for your
convenience, provided the ignition
switch is not in the ON position. The
light will go off approximately 30 sec-onds after closing the door or when
the ignition switch is turned on. Ignition switch and anti-theft
steering column lock
Ignition switch position
LOCK
The steering wheel locks to protect
against theft. The ignition key can be
removed only in the LOCK position.
When turning the ignition switch to
the LOCK position, push the key
inward at the ACC position and turn
the key toward the LOCK position. ACC (Accessory)
The steering wheel is unlocked and
electrical accessories are operative.ON
The warning lights can be checked
before the engine is started. This is
the normal running position after the
engine is started.
Do not leave the ignition switch ON if
the engine is not running to preventbattery discharge.
START
Turn the ignition key to the START
position to start the engine. The
engine will crank until you release
the key; then it returns to the ON
position. The brake warning lamp
can be checked in this position.
✽✽
NOTICE
If difficulty is experienced in turn-
ing the ignition key to the STARTposition, turn the steering wheel
right and left to release the tension
and then turn the key.
IGNITION SWITCH
1LDA3012OUN036002
Page 140 of 327

45
1 23456789
Driving your vehicle
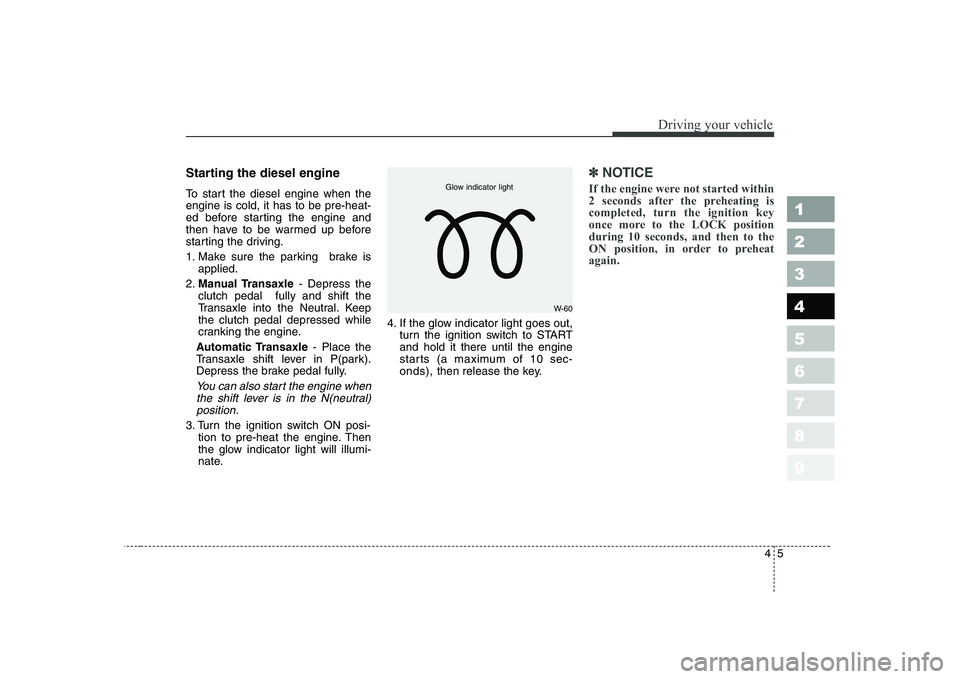
Starting the diesel engine
To start the diesel engine when the engine is cold, it has to be pre-heat-
ed before starting the engine and
then have to be warmed up before
starting the driving.
1. Make sure the parking brake isapplied.
2. Manual Transaxle - Depress the
clutch pedal fully and shift the
Transaxle into the Neutral. Keepthe clutch pedal depressed while
cranking the engine.
Automatic Transaxle - Place the
Transaxle shift lever in P(park).
Depress the brake pedal fully.
You can also start the engine when
the shift lever is in the N(neutral) position.
3. Turn the ignition switch ON posi- tion to pre-heat the engine. Then
the glow indicator light will illumi-
nate. 4. If the glow indicator light goes out,
turn the ignition switch to STARTand hold it there until the engine
starts (a maximum of 10 sec-onds), then release the key.
✽✽
NOTICE
If the engine were not started within
2 seconds after the preheating iscompleted, turn the ignition key
once more to the LOCK positionduring 10 seconds, and then to the
ON position, in order to preheatagain.
W-60
Glow indicator light
Page 142 of 327

47
1 23456789
Driving your vehicle
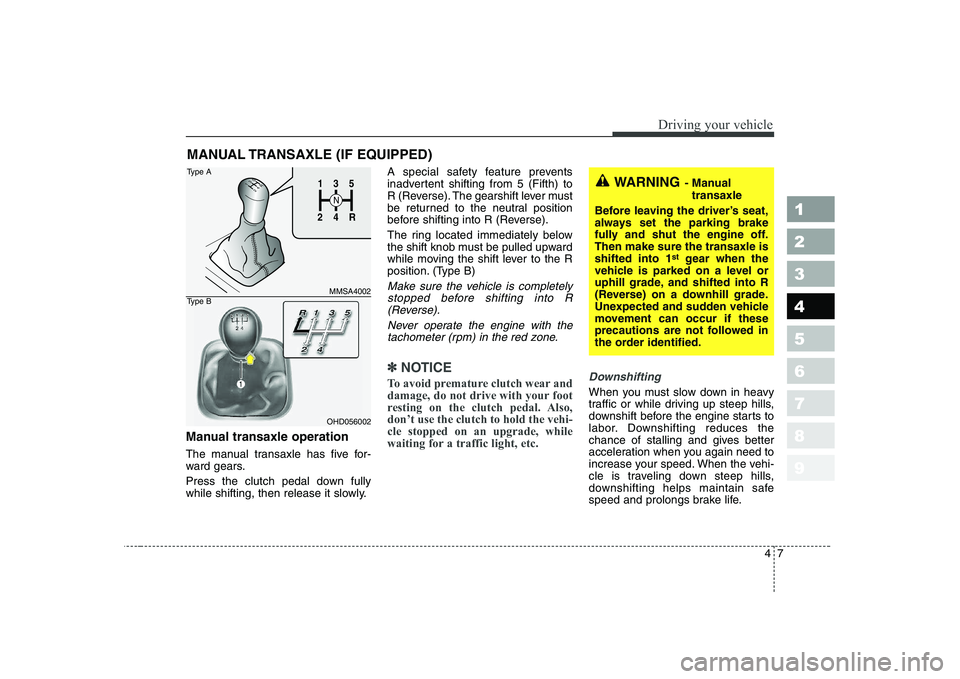
Manual transaxle operation
The manual transaxle has five for-
ward gears.
Press the clutch pedal down fully
while shifting, then release it slowly.A special safety feature prevents
inadvertent shifting from 5 (Fifth) to
R (Reverse). The gearshift lever must
be returned to the neutral position
before shifting into R (Reverse).
The ring located immediately below
the shift knob must be pulled upward
while moving the shift lever to the R
position. (Type B)
Make sure the vehicle is completely
stopped before shifting into R (Reverse).
Never operate the engine with thetachometer (rpm) in the red zone.
✽✽ NOTICE
To avoid premature clutch wear and
damage, do not drive with your foot
resting on the clutch pedal. Also,don’t use the clutch to hold the vehi-cle stopped on an upgrade, while
waiting for a traffic light, etc.Downshifting
When you must slow down in heavy
traffic or while driving up steep hills,
downshift before the engine starts to
labor. Downshifting reduces the
chance of stalling and gives better
acceleration when you again need to
increase your speed. When the vehi-
cle is traveling down steep hills,
downshifting helps maintain safe
speed and prolongs brake life.
MANUAL TRANSAXLE (IF EQUIPPED)
WARNING
- Manual
transaxle
Before leaving the driver’s seat,
always set the parking brake
fully and shut the engine off.Then make sure the transaxle isshifted into 1 st
gear when the
vehicle is parked on a level or
uphill grade, and shifted into R
(Reverse) on a downhill grade.
Unexpected and sudden vehicle
movement can occur if these
precautions are not followed in
the order identified.1
2 4
R
3
S
N
135
R
4
2
MMSA4002
OHD056002
Type A
Type B