Page 3823 of 4083

TM-276
< DISASSEMBLY AND ASSEMBLY >
ASSEMBLY
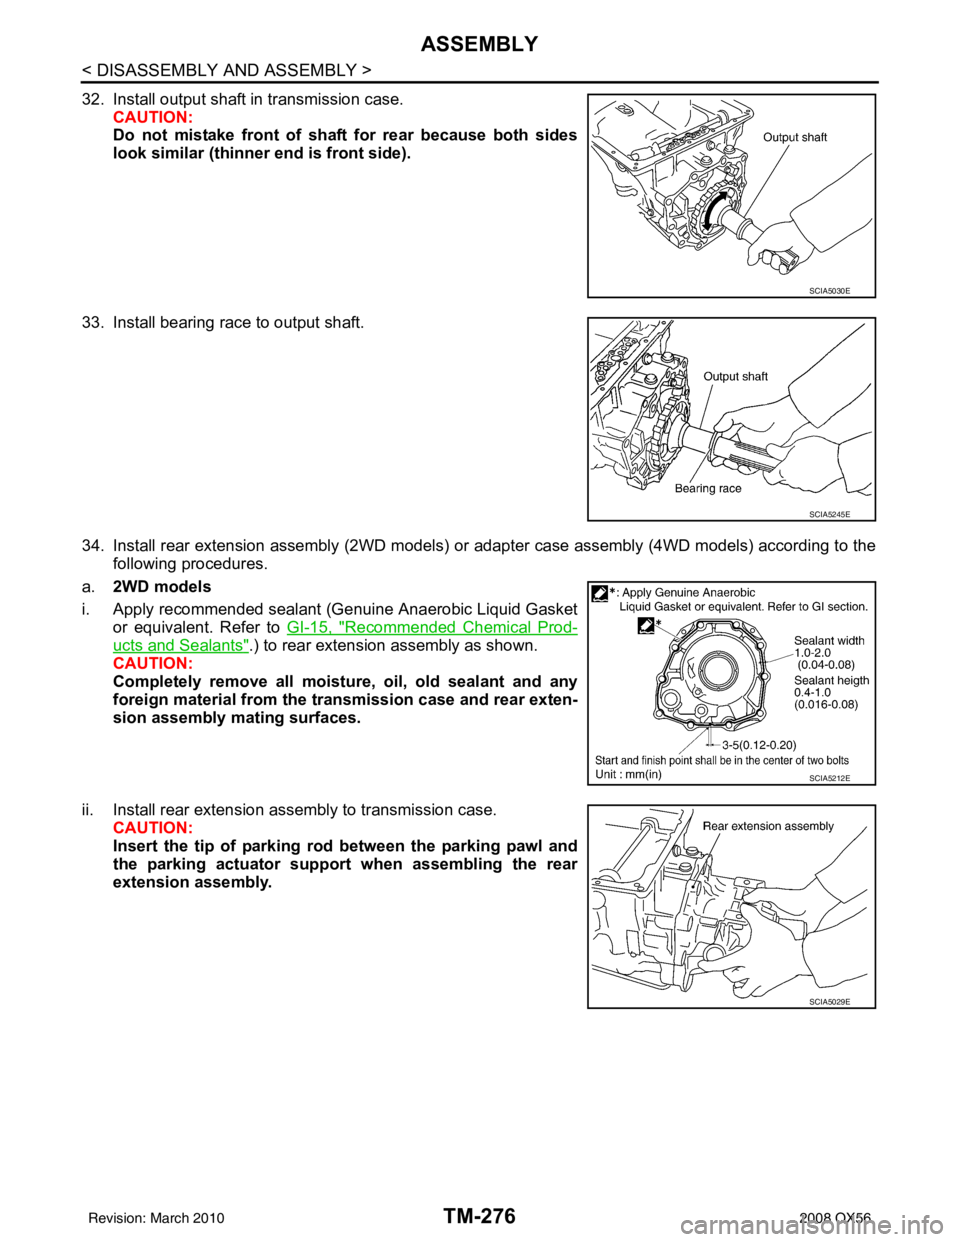
32. Install output shaft in transmission case.CAUTION:
Do not mistake front of shaft for rear because both sides
look similar (thinner end is front side).
33. Install bearing race to output shaft.
34. Install rear extension assembly (2WD models) or adapter case assembly (4WD models) according to the following procedures.
a. 2WD models
i. Apply recommended sealant (Genuine Anaerobic Liquid Gasket or equivalent. Refer to GI-15, "
Recommended Chemical Prod-
ucts and Sealants".) to rear extension assembly as shown.
CAUTION:
Completely remove all moisture, oil, old sealant and any
foreign material from the tr ansmission case and rear exten-
sion assembly mating surfaces.
ii. Install rear extension assembly to transmission case. CAUTION:
Insert the tip of parking rod between the parking pawl and
the parking actuator support when assembling the rear
extension assembly.
SCIA5030E
SCIA5245E
SCIA5212E
SCIA5029E
Revision: March 2010 2008 QX56
Page 3824 of 4083

ASSEMBLYTM-277
< DISASSEMBLY AND ASSEMBLY >
CEF
G H
I
J
K L
M A
B
TM
N
O P
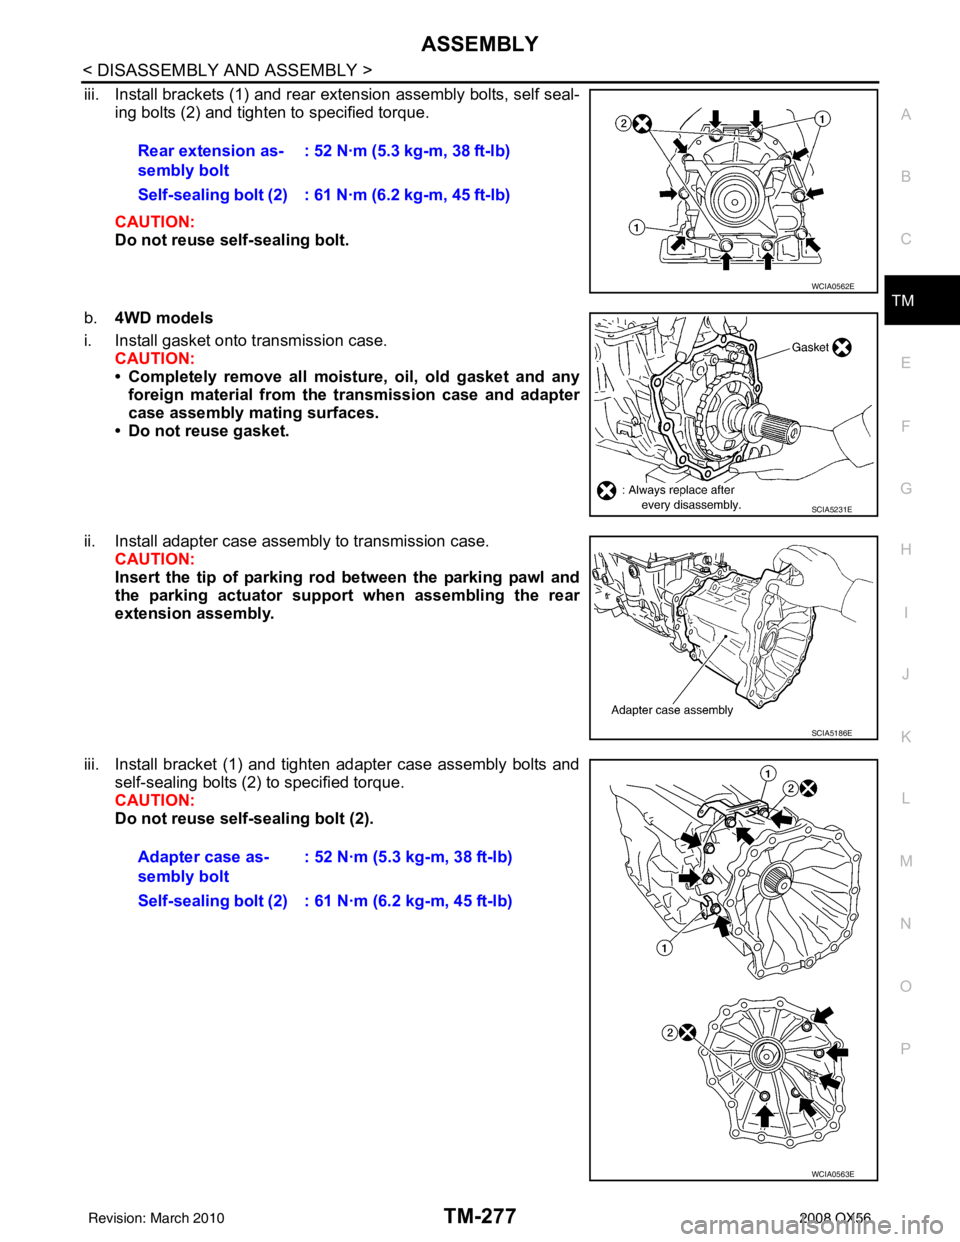
iii. Install brackets (1) and rear extension assembly bolts, self seal- ing bolts (2) and tighten to specified torque.
CAUTION:
Do not reuse self-sealing bolt.
b. 4WD models
i. Install gasket onto transmission case. CAUTION:
• Completely remove all moistu re, oil, old gasket and any
foreign material from the transmission case and adapter
case assembly mating surfaces.
• Do not reuse gasket.
ii. Install adapter case assembly to transmission case. CAUTION:
Insert the tip of parking rod between the parking pawl and
the parking actuator support when assembling the rear
extension assembly.
iii. Install bracket (1) and tighten adapter case assembly bolts and self-sealing bolts (2) to specified torque.
CAUTION:
Do not reuse self-sealing bolt (2).Rear extension as-
sembly bolt
: 52 N·m (5.3 kg-m, 38 ft-lb)
Self-sealing bolt (2) : 61 N·m (6.2 kg-m, 45 ft-lb)
WCIA0562E
SCIA5231E
SCIA5186E
Adapter case as-
sembly bolt : 52 N·m (5.3 kg-m, 38 ft-lb)
Self-sealing bolt (2) : 61 N·m (6.2 kg-m, 45 ft-lb)
WCIA0563E
Revision: March 2010 2008 QX56
Page 3830 of 4083
ASSEMBLYTM-283
< DISASSEMBLY AND ASSEMBLY >
CEF
G H
I
J
K L
M A
B
TM
N
O P
b. Measure dimension “L”.
c. Calculate dimension “J”.
2. Measure dimensions “M
1” and “M2” and then calculate dimen-
sion “M”.
a. Place bearing race and needle bearing on oil pump assembly.
b. Measure dimension “M
1”.
c. Measure dimension “M
2”.
“J”: Distance between oil
pump fitting surface of
transmission case and need le bearing mating surface
of front sun gear.
J = K – L
SCIA5352E
SCIA3125E
SCIA3124E
SCIA3126E
SCIA3127E
Revision: March 2010 2008 QX56
Page 3832 of 4083

ASSEMBLYTM-285
< DISASSEMBLY AND ASSEMBLY >
CEF
G H
I
J
K L
M A
B
TM
N
O P
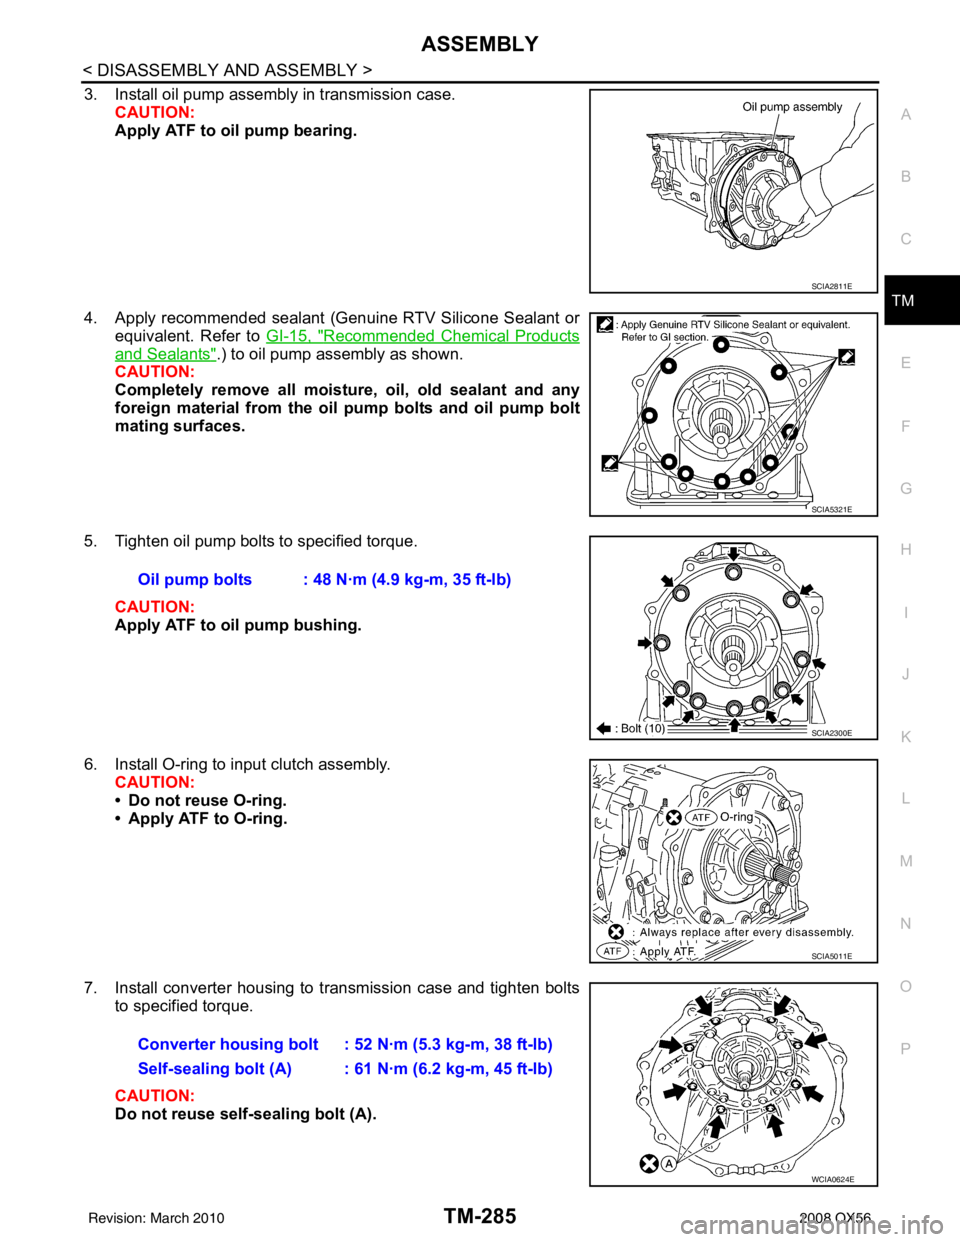
3. Install oil pump assembly in transmission case. CAUTION:
Apply ATF to oil pump bearing.
4. Apply recommended sealant (Genuine RTV Silicone Sealant or equivalent. Refer to GI-15, "
Recommended Chemical Products
and Sealants".) to oil pump assembly as shown.
CAUTION:
Completely remove all moistu re, oil, old sealant and any
foreign material from the oil pump bolts and oil pump bolt
mating surfaces.
5. Tighten oil pump bolts to specified torque. CAUTION:
Apply ATF to oil pump bushing.
6. Install O-ring to input clutch assembly. CAUTION:
• Do not reuse O-ring.
• Apply ATF to O-ring.
7. Install converter housing to transmission case and tighten bolts to specified torque.
CAUTION:
Do not reuse self-sealing bolt (A).
SCIA2811E
SCIA5321E
Oil pump bolts : 48 N·m (4.9 kg-m, 35 ft-lb)
SCIA2300E
SCIA5011E
Converter housing bolt : 52 N·m (5.3 kg-m, 38 ft-lb)
Self-sealing bolt (A) : 61 N·m (6.2 kg-m, 45 ft-lb)
WCIA0624E
Revision: March 2010 2008 QX56
Page 3837 of 4083
TM-290
< DISASSEMBLY AND ASSEMBLY >
ASSEMBLY
17. Install oil pan to transmission case. Refer to TM-199, "Oil Pan".
18. Install torque converter.
a. Pour ATF into torque converter. NOTE:
• Approximately 2 liters (2-1/8 US qt. 1-3/4 Imp qt) of fluid isrequired for a new torque converter.
• When reusing old torque converter, add the same amount of fluid as was drained.
b. Install torque converter while aligning notches of torque con- verter with notches of oil pump.
CAUTION:
Install torque converter while rotating it.
c. Measure distance "A" to make sure that torque converter is in proper position.
SAT428DA
SCIA5010E
Distance "A" : 24.0 mm (0.94 in) or more
SCIA5694E
Revision: March 2010 2008 QX56