2008 Hyundai Santa Fe Low side
[x] Cancel search: Low sidePage 117 of 355
1
FEATURES OF YOUR HYUNDAI
105
1. Press and hold the
button for more
than 6 seconds. When the compass
memory is cleared a "C" will appear in
the display.
2. To calibrate the compass, drive the
vehicle in 2 complete circles at less than
5 MPH (8 Km/h) or until the compass
heading appears.
!
Integrated HomeLink
® Wireless
Control System
The HomeLink
® Wireless Control System
provides a convenient way to replace up to
three hand-held radio-frequency (RF)
transmitters with a single built-in device.
This innovative feature will learn the radio
frequency codes of most current transmit-
ters to operate devices such as gate op-
erators, garage door openers, entry door
locks, security systems, even home light-
ing. Both standard and rolling code-
equipped transmitters can be programmed
by following the outlined procedures.
CAUTION:
Before programming HomeLink
® to a
garage door opener or gate operator,
make sure that people and objects are
out of the way of the device to prevent
potential harm or damage. Do not use
HomeLink
® with any garage door opener
that lacks the safety stop and reverse
features as required by U.S. federal
safety standards (this includes any ga-
rage door opener model manufactured
before April 1, 1982). A garage door that
cannot detect an object - signaling the
door to stop and reverse - does not meet
current U.S. federal safety standards.
Using a garage door opener without these
features increases the risk of serious
injury or death.Programming HomeLink
®
NOTE:o When programming a garage door
opener, it is advised to park the ve-
hicle outside of the garage.
o It is recommended that a new battery
be placed in the hand-held transmit-
ter of the device being programmed
to HomeLink
® for quicker training and
accurate transmission of the radio-
frequency signal.
o Some vehicles may require the igni-
tion switch to be turned to the second
(or "accessories") position for pro-
gramming and/or operation of
HomeLink.
o In the event that there are still pro-
gramming difficulties or questions
after following the programming steps
listed below, contact HomeLink
® at:
www.homelink.com or 1-800-355-
3515.
Retain the original transmitter of the RF
device you are programming for use in
other vehicles as well as for future
HomeLink
® programming. It is also sug-
gested that upon the sale of the vehicle, the
programmed HomeLink
® buttons be
erased for security purposes.
CAUTION:
Be sure the area is free of traffic, pedes-
trians, and obstructions.
!
Additional HomeLink
® information can be
found at: www.homelink.com or by calling
1-800-355-3515.
Page 118 of 355

1FEATURES OF YOUR HYUNDAI
106
Standard Programming
To train most devices, follow these instruc-
tions:
1. For first-time programming, press and
hold the two outside buttons, HomeLink
®
Channel 1 and Channel 3 Buttons, until
the indicator light begins to flash (after
20 seconds). Release both buttons. Do
not hold the buttons for longer than 30
seconds.
2. Position the end of your hand-held trans-
mitter 1-3 inches (5-14 cm) away from
the HomeLink
® buttons while keeping
the indicator light in view.
3. Simultaneously press and hold both
the HomeLink® and hand-held trans-
mitter button. DO NOT release the but-
tons until step 4 has been completed.
4. While continuing to hold the buttons the
red Indicator Status LED will flash slowly
and then rapidly after HomeLink
® suc-
cessfully trains to the frequency signal
from the hand-held transmitter. Release
both buttons.5. Press and hold the just-trained
HomeLink
® button and observe the red
Status Indicator LED. If the indicator
light stays on constantly, programming
is complete and your device should
activate when the HomeLink
® button is
pressed and released.
6. To program the remaining two
HomeLink
® buttons, follow steps 2
through 5.
Rolling Code Programming
Rolling code devices which are "code-
protected" and manufactured after 1996
may be determined by the following:
o Reference the device owner's manual
for verification.
o The handheld transmitter appears to
program the HomeLink Universal Trans-
ceiver but does not activate the device.
o Press and hold the trained HomeLink
button. The device has the rolling code
feature if the indicator light flashes rap-
idly and then turns solid after 2 seconds.
To train rolling code devices, follow these
instructions:1. At the garage door opener receiver
(motor-head unit) in the garage, locate
the "learn" or "smart" button. This can
usually be found where the hanging
antenna wire is attached to the motor-
head unit. Exact location and color of
the button may vary by garage door
opener brand. If there is difficulty locat-
ing the training button, reference the
device owner's manual or please visit
our Web site at www.homelink.com.
2. Firmly press and release the "learn" or
"smart" button (which activates the "train-
ing light").
NOTE:There are 30 seconds in which to initiate
step3.
3. Return to the vehicle and firmly press,
hold for two seconds and then release
the desired HomeLink
® button. Repeat
the "press/hold/release" sequence a
second time to complete the program-
ming. (Some devices may require you
to repeat this sequence a third time to
complete the programming.)
Page 121 of 355
1
FEATURES OF YOUR HYUNDAI
109
!
!TAIL GATEB540A01CM-AAT
WARNING:
The tail gate should always be kept com-
pletely closed while the vehicle is in
motion. If it is left open or ajar, poisonous
exhaust gases may enter the car result-
ing in serious illness or death to the
occupants. See additional warnings con-
cerning exhaust gases on page 2-2.
o The tail gate is opened by pulling the
outside handle up, raising the tail gate
manually.
o To close, lower the tail gate, then press
down on it until it is closed. To be sure
the tail gate is fully closed, always try to
pull it up again without using the outside
handle.
WARNING:
o Whenever leaving vehicle or parking
always set the parking brake as far as
possible and fully engage the vehicle's
transaxle into the park position. Ve-
hicles not fully engaged in park with
the parking brake set are at risk for
moving inadvertently and injuring
yourself or others.
o To prevent unintentional movement
when stopped and leaving the vehicle,
do not use the gearshift lever in place
of the parking brake. Set the parking
brake AND make sure the gearshift
lever is securely positioned in 1st
(First) gear or R (Reverse) for manual
transaxle equipped vehicles and in P
(Park) for automatic transaxle
equipped vehicles.
o Never allow a person who is unfamil-
iar with the vehicle or children to touch
the parking brake. If the parking brake
is released unintentionally, serious
injury may occur.
LUGGAGE COMPARTMENT
OCM052123L
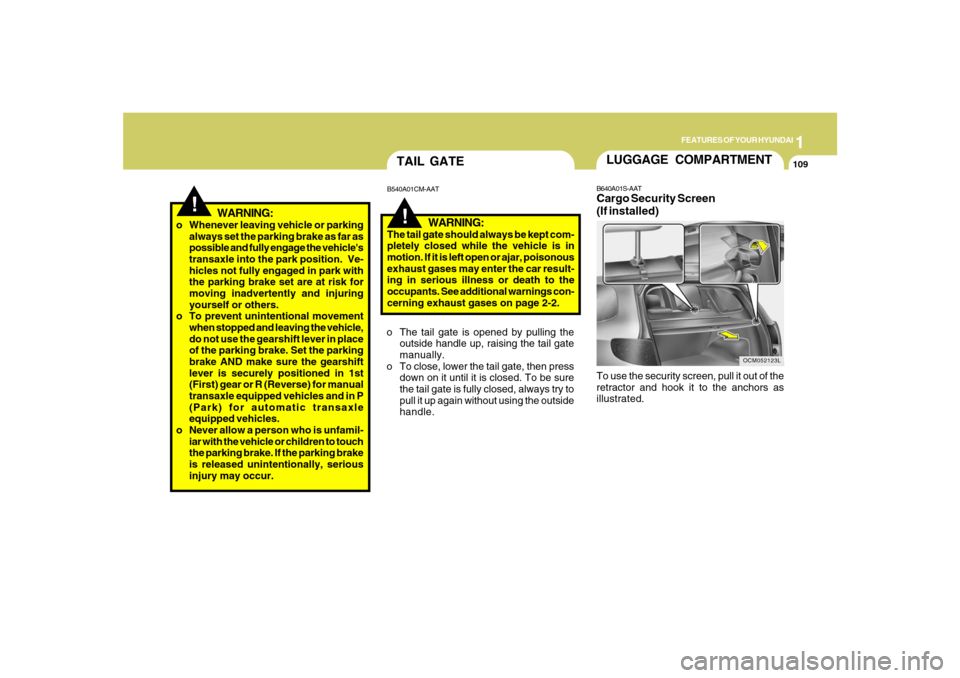
B640A01S-AATCargo Security Screen
(If installed)To use the security screen, pull it out of the
retractor and hook it to the anchors as
illustrated.
Page 122 of 355
1FEATURES OF YOUR HYUNDAI
110
!
CAUTION:
To prevent damage to the goods or the
vehicle, care should be taken when car-
rying fragile or bulky objects in the lug-
gage compartment.
!
WARNING:
Avoid eye injury. DO NOT overstretch.
The luggage net ALWAYS keep your
face and body out of its recoil path. DO
NOT use when the strap has visible signs
of wear or damage.
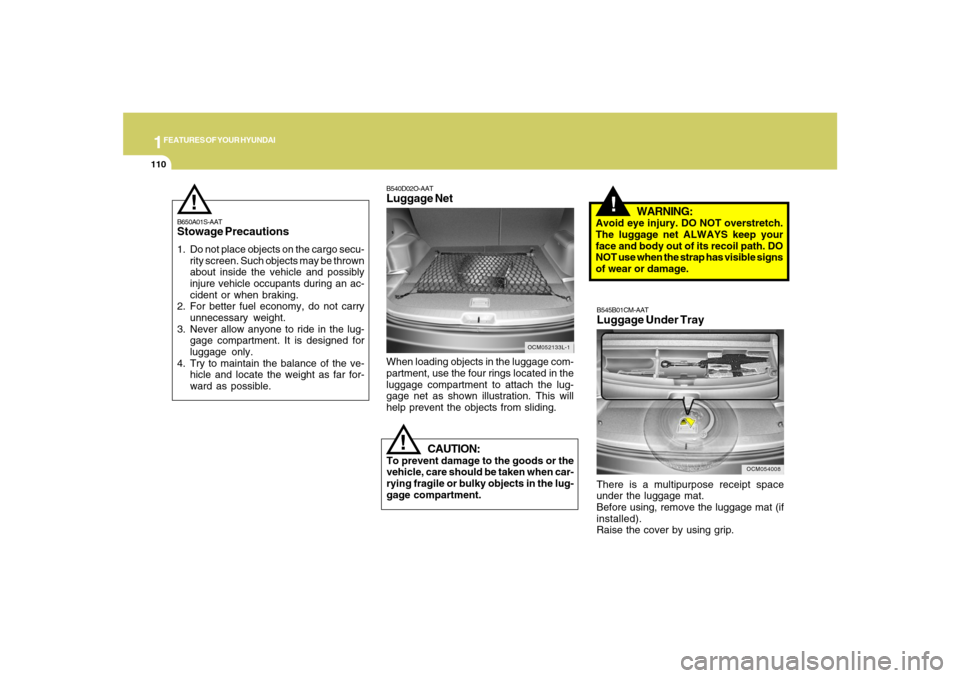
When loading objects in the luggage com-
partment, use the four rings located in the
luggage compartment to attach the lug-
gage net as shown illustration. This will
help prevent the objects from sliding.
OCM052133L-1
B540D02O-AATLuggage Net
B650A01S-AATStowage Precautions1. Do not place objects on the cargo secu-
rity screen. Such objects may be thrown
about inside the vehicle and possibly
injure vehicle occupants during an ac-
cident or when braking.
2. For better fuel economy, do not carry
unnecessary weight.
3. Never allow anyone to ride in the lug-
gage compartment. It is designed for
luggage only.
4. Try to maintain the balance of the ve-
hicle and locate the weight as far for-
ward as possible.
!
OCM054008
B545B01CM-AATLuggage Under TrayThere is a multipurpose receipt space
under the luggage mat.
Before using, remove the luggage mat (if
installed).
Raise the cover by using grip.
Page 124 of 355
1FEATURES OF YOUR HYUNDAI
112
HIGH-MOUNTED REAR
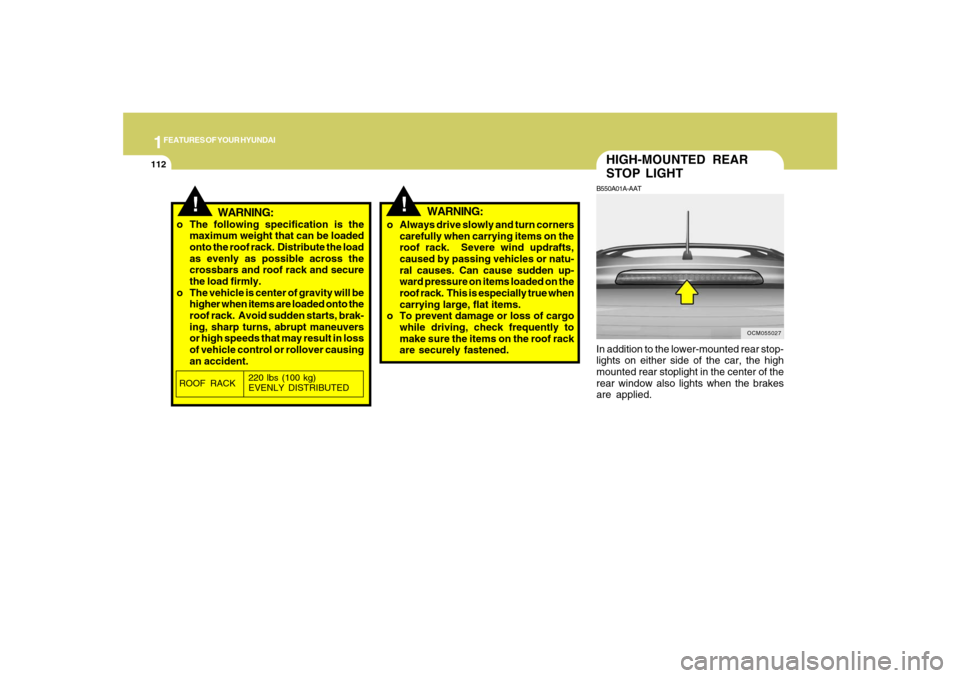
STOP LIGHTB550A01A-AATIn addition to the lower-mounted rear stop-
lights on either side of the car, the high
mounted rear stoplight in the center of the
rear window also lights when the brakes
are applied.
OCM055027
!
!
WARNING:
o The following specification is the
maximum weight that can be loaded
onto the roof rack. Distribute the load
as evenly as possible across the
crossbars and roof rack and secure
the load firmly.
o The vehicle is center of gravity will be
higher when items are loaded onto the
roof rack. Avoid sudden starts, brak-
ing, sharp turns, abrupt maneuvers
or high speeds that may result in loss
of vehicle control or rollover causing
an accident.o Always drive slowly and turn corners
carefully when carrying items on the
roof rack. Severe wind updrafts,
caused by passing vehicles or natu-
ral causes. Can cause sudden up-
ward pressure on items loaded on the
roof rack. This is especially true when
carrying large, flat items.
o To prevent damage or loss of cargo
while driving, check frequently to
make sure the items on the roof rack
are securely fastened.ROOF RACK220 lbs (100 kg)
EVENLY DISTRIBUTED
WARNING:
Page 125 of 355
1
FEATURES OF YOUR HYUNDAI
113
!
WARNING:
OCM052014
REMOTE FUEL-FILLER LID
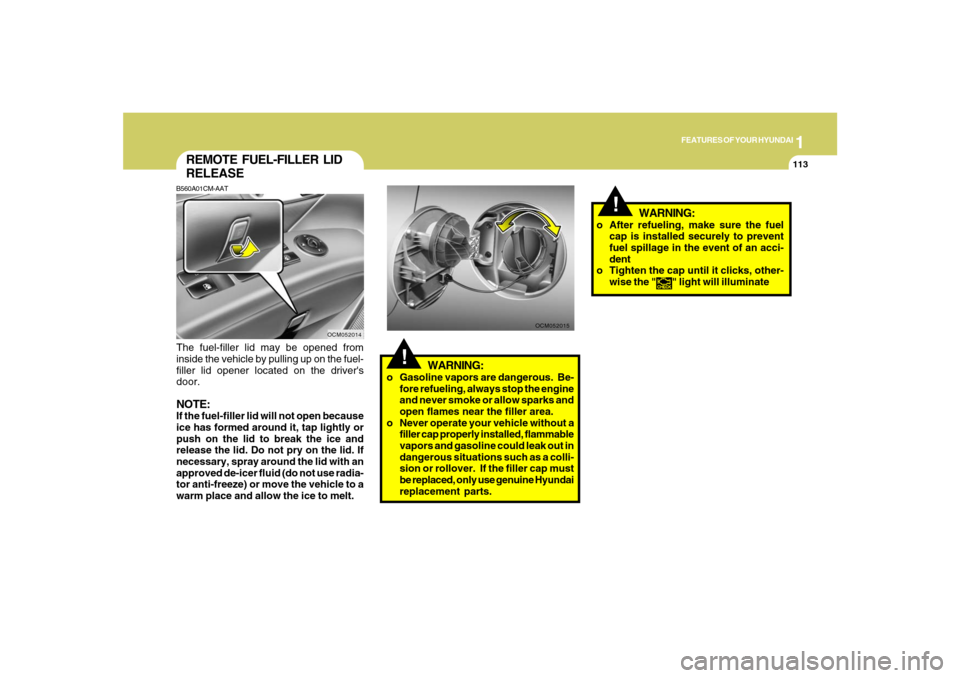
RELEASEB560A01CM-AATThe fuel-filler lid may be opened from
inside the vehicle by pulling up on the fuel-
filler lid opener located on the driver's
door.NOTE:If the fuel-filler lid will not open because
ice has formed around it, tap lightly or
push on the lid to break the ice and
release the lid. Do not pry on the lid. If
necessary, spray around the lid with an
approved de-icer fluid (do not use radia-
tor anti-freeze) or move the vehicle to a
warm place and allow the ice to melt.
OCM052015
!
WARNING:
o Gasoline vapors are dangerous. Be-
fore refueling, always stop the engine
and never smoke or allow sparks and
open flames near the filler area.
o Never operate your vehicle without a
filler cap properly installed, flammable
vapors and gasoline could leak out in
dangerous situations such as a colli-
sion or rollover. If the filler cap must
be replaced, only use genuine Hyundai
replacement parts.o After refueling, make sure the fuel
cap is installed securely to prevent
fuel spillage in the event of an acci-
dent
o Tighten the cap until it clicks, other-
wise the "
" light will illuminate
Page 127 of 355
1
FEATURES OF YOUR HYUNDAI
115
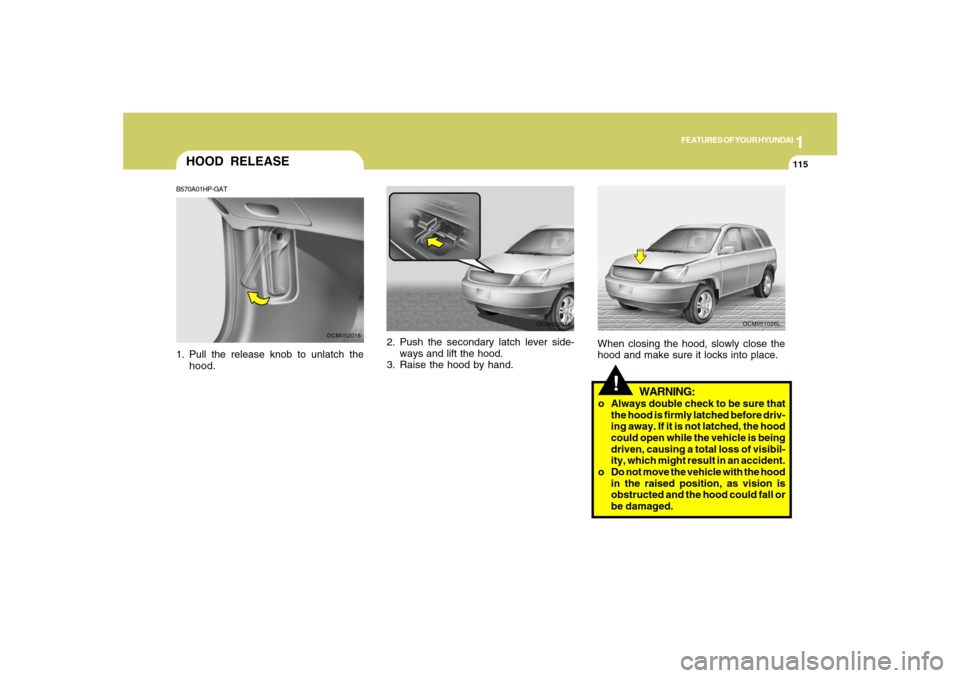
2. Push the secondary latch lever side-
ways and lift the hood.
3. Raise the hood by hand.
OCM052019
HOOD RELEASEB570A01HP-GAT1. Pull the release knob to unlatch the
hood.
OCM052018
!
WARNING:
o Always double check to be sure that
the hood is firmly latched before driv-
ing away. If it is not latched, the hood
could open while the vehicle is being
driven, causing a total loss of visibil-
ity, which might result in an accident.
o Do not move the vehicle with the hood
in the raised position, as vision is
obstructed and the hood could fall or
be damaged.When closing the hood, slowly close the
hood and make sure it locks into place.
OCM051026L
Page 137 of 355
1
FEATURES OF YOUR HYUNDAI
125
FEATURES OF YOUR HYUNDAI
125125125125
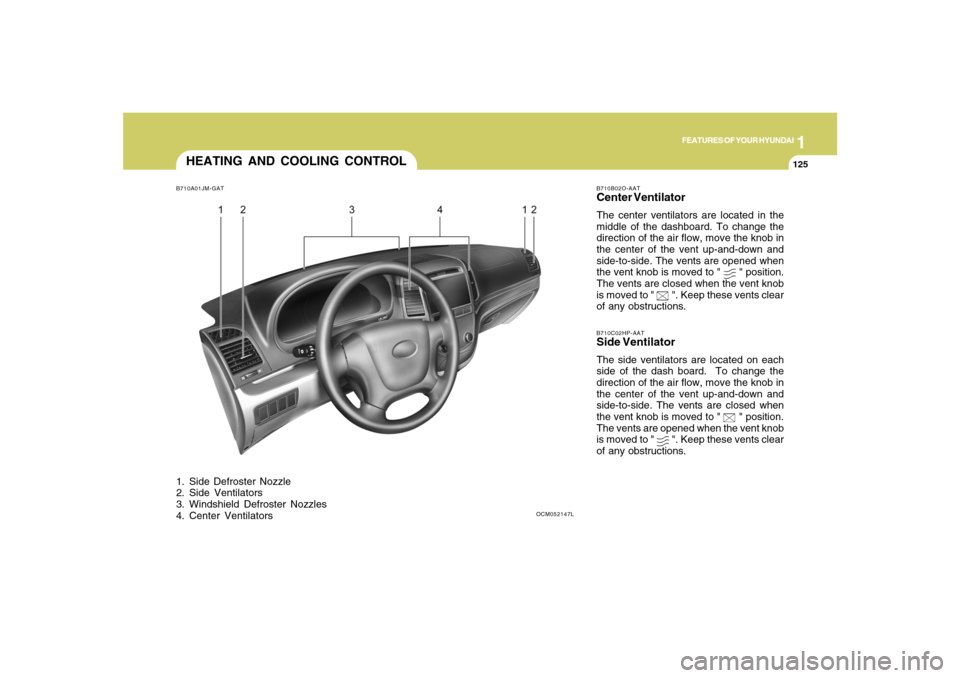
HEATING AND COOLING CONTROLB710A01JM-GAT1. Side Defroster Nozzle
2. Side Ventilators
3. Windshield Defroster Nozzles
4. Center Ventilators
B710B02O-AATCenter VentilatorThe center ventilators are located in the
middle of the dashboard. To change the
direction of the air flow, move the knob in
the center of the vent up-and-down and
side-to-side. The vents are opened when
the vent knob is moved to "
" position.
The vents are closed when the vent knob
is moved to "
". Keep these vents clear
of any obstructions.
B710C02HP-AATSide VentilatorThe side ventilators are located on each
side of the dash board. To change the
direction of the air flow, move the knob in
the center of the vent up-and-down and
side-to-side. The vents are closed when
the vent knob is moved to "
" position.
The vents are opened when the vent knob
is moved to "
". Keep these vents clear
of any obstructions.
OCM052147L