2008 Hyundai Santa Fe door lock
[x] Cancel search: door lockPage 105 of 355
1
FEATURES OF YOUR HYUNDAI
93
INTERIOR LIGHT
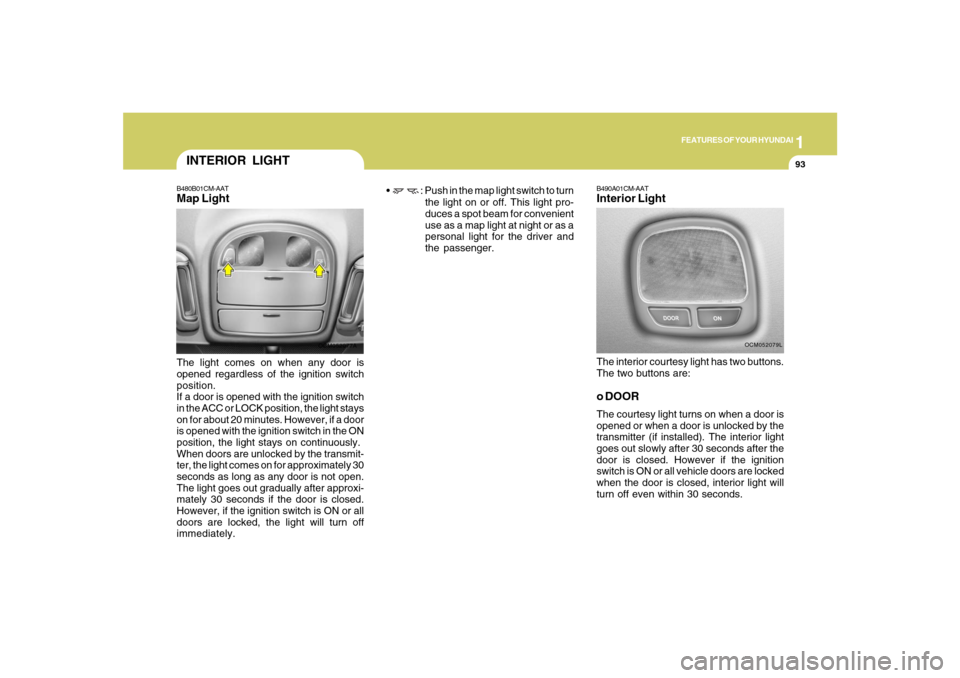
B490A01CM-AATInterior LightThe interior courtesy light has two buttons.
The two buttons are:o DOORThe courtesy light turns on when a door is
opened or when a door is unlocked by the
transmitter (if installed). The interior light
goes out slowly after 30 seconds after the
door is closed. However if the ignition
switch is ON or all vehicle doors are locked
when the door is closed, interior light will
turn off even within 30 seconds.
OCM052079L
B480B01CM-AATMap LightThe light comes on when any door is
opened regardless of the ignition switch
position.
If a door is opened with the ignition switch
in the ACC or LOCK position, the light stays
on for about 20 minutes. However, if a door
is opened with the ignition switch in the ON
position, the light stays on continuously.
When doors are unlocked by the transmit-
ter, the light comes on for approximately 30
seconds as long as any door is not open.
The light goes out gradually after approxi-
mately 30 seconds if the door is closed.
However, if the ignition switch is ON or all
doors are locked, the light will turn off
immediately.
OCM052077A
: Push in the map light switch to turn
the light on or off. This light pro-
duces a spot beam for convenient
use as a map light at night or as a
personal light for the driver and
the passenger.
Page 106 of 355
1FEATURES OF YOUR HYUNDAI94
SUNGLASS HOLDER!
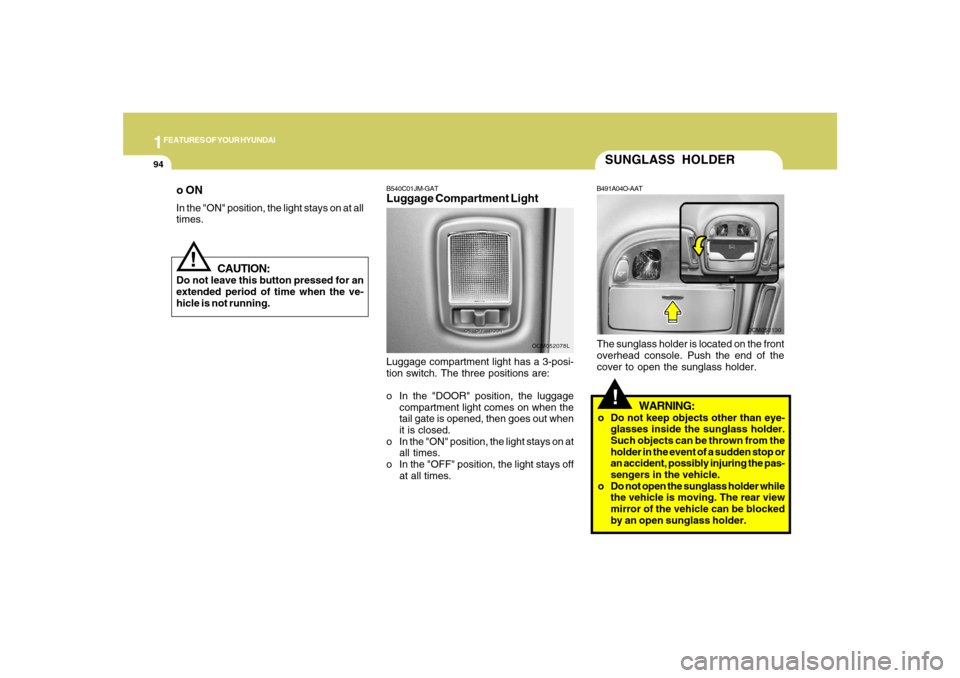
B491A04O-AATThe sunglass holder is located on the front
overhead console. Push the end of the
cover to open the sunglass holder.
WARNING:
o Do not keep objects other than eye-
glasses inside the sunglass holder.
Such objects can be thrown from the
holder in the event of a sudden stop or
an accident, possibly injuring the pas-
sengers in the vehicle.
o Do not open the sunglass holder while
the vehicle is moving. The rear view
mirror of the vehicle can be blocked
by an open sunglass holder.
B540C01JM-GATLuggage Compartment LightLuggage compartment light has a 3-posi-
tion switch. The three positions are:
o In the "DOOR" position, the luggage
compartment light comes on when the
tail gate is opened, then goes out when
it is closed.
o In the "ON" position, the light stays on at
all times.
o In the "OFF" position, the light stays off
at all times.
OCM052078L
OCM052130
o ONIn the "ON" position, the light stays on at all
times.
!
CAUTION:
Do not leave this button pressed for an
extended period of time when the ve-
hicle is not running.
Page 107 of 355
1
FEATURES OF YOUR HYUNDAI
95
!
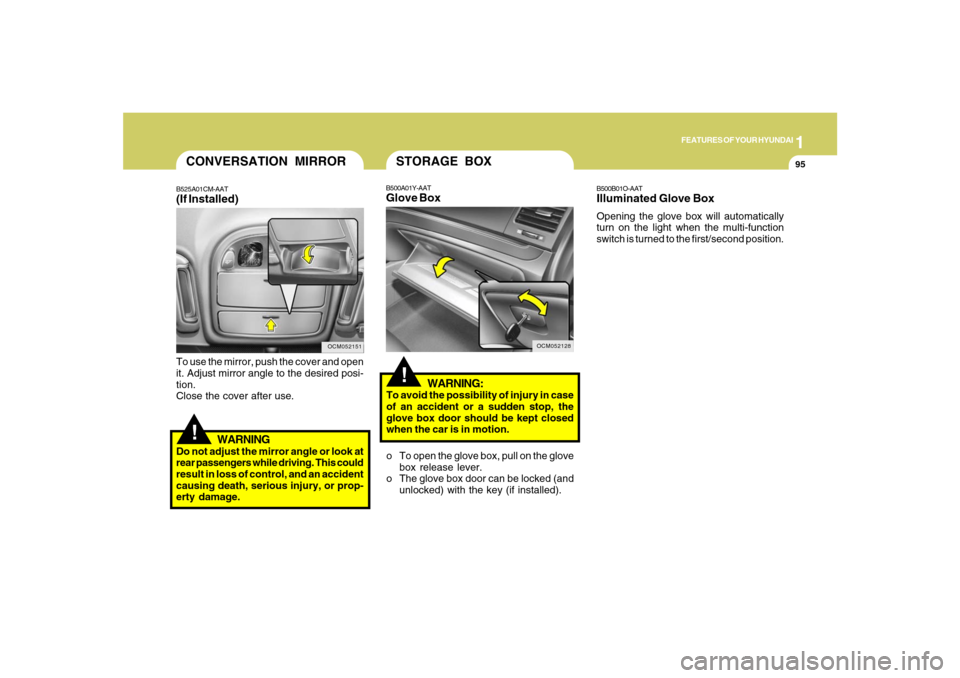
To use the mirror, push the cover and open
it. Adjust mirror angle to the desired posi-
tion.
Close the cover after use.
WARNING
Do not adjust the mirror angle or look at
rear passengers while driving. This could
result in loss of control, and an accident
causing death, serious injury, or prop-
erty damage.CONVERSATION MIRRORB525A01CM-AAT(If Installed)
OCM052151
OCM052128
!
WARNING:
To avoid the possibility of injury in case
of an accident or a sudden stop, the
glove box door should be kept closed
when the car is in motion.
B500B01O-AATIlluminated Glove BoxOpening the glove box will automatically
turn on the light when the multi-function
switch is turned to the first/second position.
B500A01Y-AATGlove BoxSTORAGE BOXo To open the glove box, pull on the glove
box release lever.
o The glove box door can be locked (and
unlocked) with the key (if installed).
Page 117 of 355
1
FEATURES OF YOUR HYUNDAI
105
1. Press and hold the
button for more
than 6 seconds. When the compass
memory is cleared a "C" will appear in
the display.
2. To calibrate the compass, drive the
vehicle in 2 complete circles at less than
5 MPH (8 Km/h) or until the compass
heading appears.
!
Integrated HomeLink
® Wireless
Control System
The HomeLink
® Wireless Control System
provides a convenient way to replace up to
three hand-held radio-frequency (RF)
transmitters with a single built-in device.
This innovative feature will learn the radio
frequency codes of most current transmit-
ters to operate devices such as gate op-
erators, garage door openers, entry door
locks, security systems, even home light-
ing. Both standard and rolling code-
equipped transmitters can be programmed
by following the outlined procedures.
CAUTION:
Before programming HomeLink
® to a
garage door opener or gate operator,
make sure that people and objects are
out of the way of the device to prevent
potential harm or damage. Do not use
HomeLink
® with any garage door opener
that lacks the safety stop and reverse
features as required by U.S. federal
safety standards (this includes any ga-
rage door opener model manufactured
before April 1, 1982). A garage door that
cannot detect an object - signaling the
door to stop and reverse - does not meet
current U.S. federal safety standards.
Using a garage door opener without these
features increases the risk of serious
injury or death.Programming HomeLink
®
NOTE:o When programming a garage door
opener, it is advised to park the ve-
hicle outside of the garage.
o It is recommended that a new battery
be placed in the hand-held transmit-
ter of the device being programmed
to HomeLink
® for quicker training and
accurate transmission of the radio-
frequency signal.
o Some vehicles may require the igni-
tion switch to be turned to the second
(or "accessories") position for pro-
gramming and/or operation of
HomeLink.
o In the event that there are still pro-
gramming difficulties or questions
after following the programming steps
listed below, contact HomeLink
® at:
www.homelink.com or 1-800-355-
3515.
Retain the original transmitter of the RF
device you are programming for use in
other vehicles as well as for future
HomeLink
® programming. It is also sug-
gested that upon the sale of the vehicle, the
programmed HomeLink
® buttons be
erased for security purposes.
CAUTION:
Be sure the area is free of traffic, pedes-
trians, and obstructions.
!
Additional HomeLink
® information can be
found at: www.homelink.com or by calling
1-800-355-3515.
Page 119 of 355

1
FEATURES OF YOUR HYUNDAI
107
4. Press and hold the just-trained
HomeLink
® button and observe the red
Status Indicator LED. If the indicator
light stays on constantly, programming
is complete and your device should
activate.
5. To program the remaining two
HomeLink® buttons, follow either steps
1 through 4 above for other Rolling
Code devices or steps 2 through 5 in
Standard Programming for standard
devices.
Gate Operator & Canadian Programming
During programming, your handheld trans-
mitter may automatically stop transmitting.
Continue to press the Integrated
HomeLink
® Wireless Control System but-
ton (note steps 2 through 4 in the Standard
Programming portion of this document)
while you press and re-press ("cycle") your
handheld transmitter every two seconds
until the frequency signal has been learned.
The indicator light will flash slowly and
then rapidly after several seconds upon
successful training.Operating HomeLink
®
To operate, simply press and release the
programmed HomeLink
® button. Activa-
tion will now occur for the trained device
(i.e. garage door opener, gate operator,
security system, entry door lock, home/
office lighting, etc.). For convenience, the
hand-held transmitter of the device may
also be used at any time.
Reprogramming a Single HomeLink
®
Button
To program a new device to a previously
trained HomeLink
® button, follow these
steps:
1. Press and hold the desired HomeLink
®
button. Do NOT release until step 4 has
been completed.
2. When the indicator light begins to flash
slowly (after 20 seconds), position the
handheld transmitter 1 to 3 inches away
from the HomeLink
® surface.
3. Press and hold the handheld transmit-
ter button. The HomeLink
® indicator light
will flash, first slowly and then rapidly.
4. When the indicator light begins to flash
rapidly, release both buttons.5. Press and hold the just-trained
HomeLink
® button and observe the red
Status Indicator LED. If the indicator
light stays on constantly, programming
is complete and your new device should
activate.
Erasing HomeLink
® Buttons
Individual buttons cannot be erased. How-
ever, to erase all three programmed but-
tons:
1. Press and hold the two outer HomeLink
®
buttons until the indicator light begins to
flash-after 20 seconds.
2. Release both buttons. Do not hold for
longer than 30 seconds.
The Integrated HomeLink
® Wireless Con-
trol System is now in the training (learn)
mode and can be programmed at any time
following the appropriate steps in the Pro-
gramming sections above.
Page 131 of 355
1
FEATURES OF YOUR HYUNDAI
119
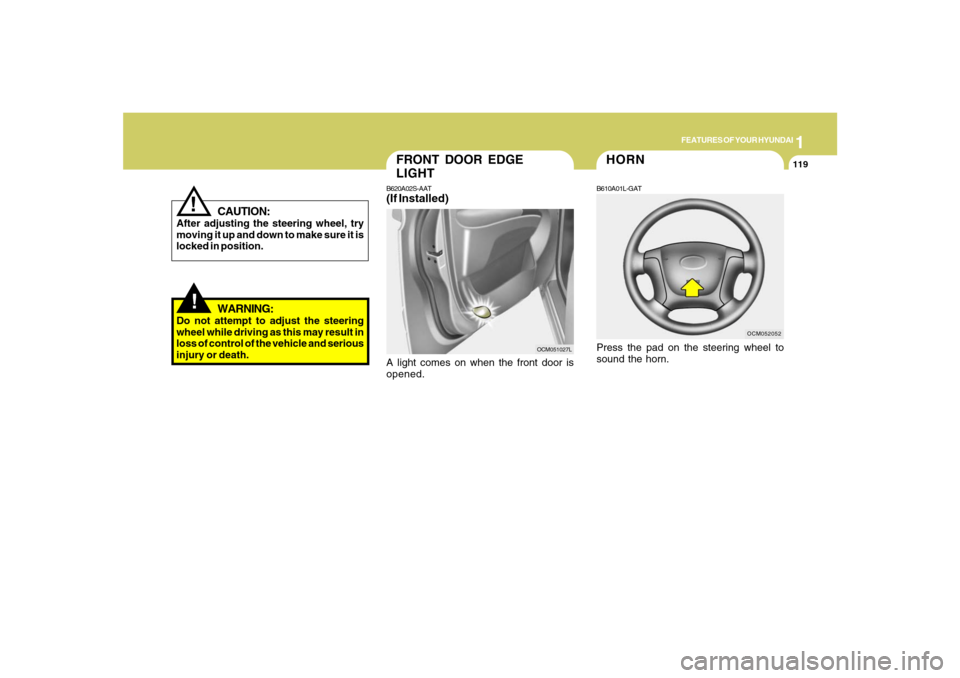
FRONT DOOR EDGE
LIGHTB620A02S-AAT(If Installed)A light comes on when the front door is
opened.
OCM051027L
!
CAUTION:
After adjusting the steering wheel, try
moving it up and down to make sure it is
locked in position.
!
WARNING:
Do not attempt to adjust the steering
wheel while driving as this may result in
loss of control of the vehicle and serious
injury or death.
OCM052052
HORNB610A01L-GATPress the pad on the steering wheel to
sound the horn.
Page 215 of 355
2
DRIVING YOUR HYUNDAI
4
!
BEFORE STARTING THE
ENGINEC020A01CM-AATBefore you start the engine, you should
always:
1. Look around the vehicle to be sure
there are no flat tires, puddles of oil,
water or other indications of possible
trouble.
2. After entering the car, check to be sure
the parking brake is engaged.
3. Check that all windows, and lights are
clean.
4. Check that the interior and exterior mir-
rors are clean and in position.
5. Check your seat, seatback and head-
rest to be sure they are in their proper
positions.
6. Lock all the doors.
7. Fasten your seat belt and be sure that all
other occupants have fastened theirs.
8. Turn off all lights and accessories that
are not needed.
9. When you turn the ignition switch to
"ON", check that all appropriate warn-
ing lights are operating and that you
have sufficient fuel.
10. Check the operation of warning lights
and all bulbs when key is in the "ON"
position.
!
WARNING:
Your vehicle is equipped with tires de-
signed to provide for safe ride and han-
dling capability.
Do not use a size and type of tire and
wheel that is different from the one that
is originally installed on your vehicle. It
can affect the safety and performance
of your vehicle, which could lead to han-
dling failure or rollover and serious in-
jury.
When replacing the tires, be sure to equip
all four tires with the tire and wheel of the
same size, type, tread, brand and load-
carrying capacity.
WARNING:
o All passengers must be properly
belted whenever the vehicle is mov-
ing. Refer to pages: 1-27 through 1-
33 for more information on their proper
use.
o Always check the surrounding areas
near your vehicle for people, espe-
cially children, before putting a car
into 'drive.'
o Always wear appropriate shoes when
operating your vehicle. Unsuitable
shoes (high heels, ski boots, etc.) may
interfere with your ability to use the
brake and accelerator pedal, and the
clutch (if installed).
!
WARNING:
When you intend to park or stop the
vehicle with the engine on, be careful not
to depress the accelerator pedal for a
long period of time. It may overheat the
engine or exhaust system and cause
fire.
Page 269 of 355
3
WHAT TO DO IN AN EMERGENCY
21
IF YOU LOSE YOUR KEYSD120A01CM-AATIf you lose your keys, many Hyundai deal-
ers can make you a new key if you have
your key number. If you lock the keys inside
your car and you cannot obtain a new key,
many Hyundai dealers can use special
tools to open the door for you.
Information about immobilizer keys (if in-
stalled) will be found on page 1-4.
!
CAUTION:
If the car is being towed with all four
wheels on the ground, it can be towed
only from the front. Be sure that the
transaxle is in neutral. If your vehicle is
equipped with an automatic transaxle,
do not tow at speeds greater than 30 mph
(50 km/h) and for more than 15 miles (25
km).
Be sure the steering is unlocked by plac-
ing the key in the "ACC" position. A
driver must be in the towed vehicle to
operate the steering and brakes. (3)Attach a tow cable, chain or strap to the
towing hook on the rear bumper.
NOTE:o To avoid serious damage to your AWD
vehicle, limit the towing to 10 mph (15
km/h) and not for more than 1 mile (1.5
km) at ANY TIME.
o Before towing, check the level of the
automatic transaxle fluid. If it is below
the 75°C range on the dipstick, add
fluid. If you cannot add fluid, a towing
dolly must be used.
CAUTION:
If the Engine is not running, the power
assist for the brakes and steering will
not work so steering and braking will be
much harder than usual.
!