2008 Hyundai Santa Fe battery
[x] Cancel search: batteryPage 211 of 355
1
FEATURES OF YOUR HYUNDAI
199
FEATURES OF YOUR HYUNDAI
199199199199
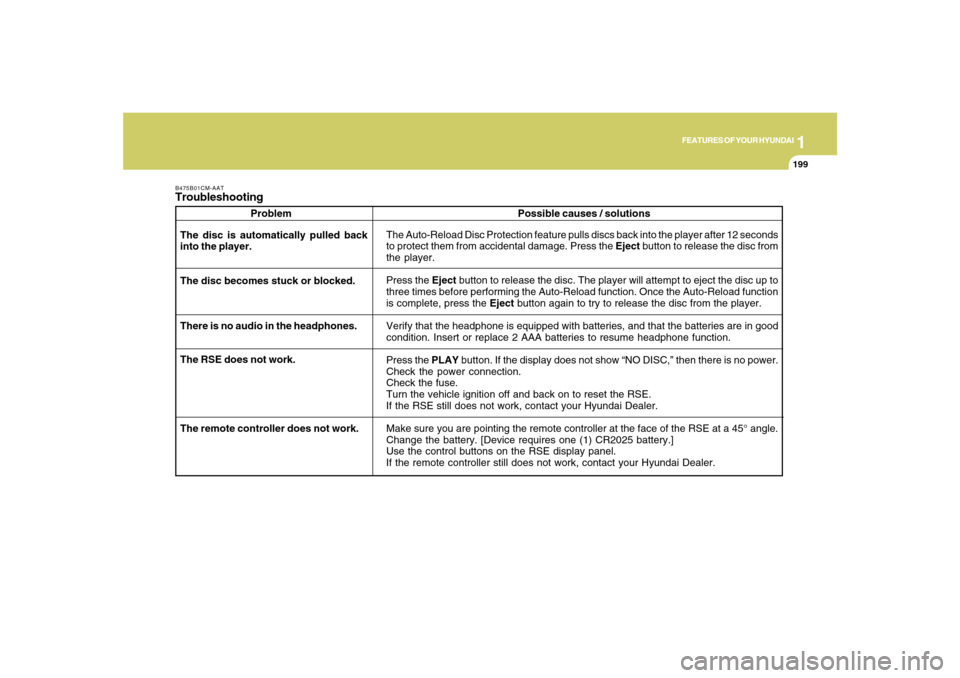
B475B01CM-AATTroubleshooting
Problem
The Auto-Reload Disc Protection feature pulls discs back into the player after 12 seconds
to protect them from accidental damage. Press the Eject button to release the disc from
the player.
Press the Eject button to release the disc. The player will attempt to eject the disc up to
three times before performing the Auto-Reload function. Once the Auto-Reload function
is complete, press the Eject button again to try to release the disc from the player.
Verify that the headphone is equipped with batteries, and that the batteries are in good
condition. Insert or replace 2 AAA batteries to resume headphone function.
Press the PLAY button. If the display does not show “NO DISC,” then there is no power.
Check the power connection.
Check the fuse.
Turn the vehicle ignition off and back on to reset the RSE.
If the RSE still does not work, contact your Hyundai Dealer.
Make sure you are pointing the remote controller at the face of the RSE at a 45° angle.
Change the battery. [Device requires one (1) CR2025 battery.]
Use the control buttons on the RSE display panel.
If the remote controller still does not work, contact your Hyundai Dealer. The disc is automatically pulled back
into the player.
The disc becomes stuck or blocked.
There is no audio in the headphones.
The RSE does not work.Possible causes / solutions
The remote controller does not work.
Page 216 of 355
2
DRIVING YOUR HYUNDAI
5
TO START THE ENGINEC030A02E-AATCombination Ignition Switcho If your Hyundai is equipped with a manual
transaxle, place the shift lever in neutral
and depress the clutch pedal fully.
o If your Hyundai has an automatic
transaxle, place the shift lever in "P"
(park).
o To start the engine, insert the ignition
key and turn it to the "START" position.
Release it as soon as the engine starts.
Do not hold the key in the "START"
position for more that 15 seconds.
NOTE:o The engine will not start if the clutch
pedal is not depressed fully (Manual
Transaxle) or the shift lever is not in
"P" or "N" Position (Automatic
Transaxle).
o The ignition key cannot be turned from
"ACC" position to "LOCK" position
unless the shift lever is in the "P"
(Park) position or the negative bat-
tery terminal is disconnected from
the battery. To remove the key, al-
ways confirm that the shift lever is
securely positioned in "P" (Park) (For
Automatic Transaxle).
o For additional information about start-
ing, see page 2-6.
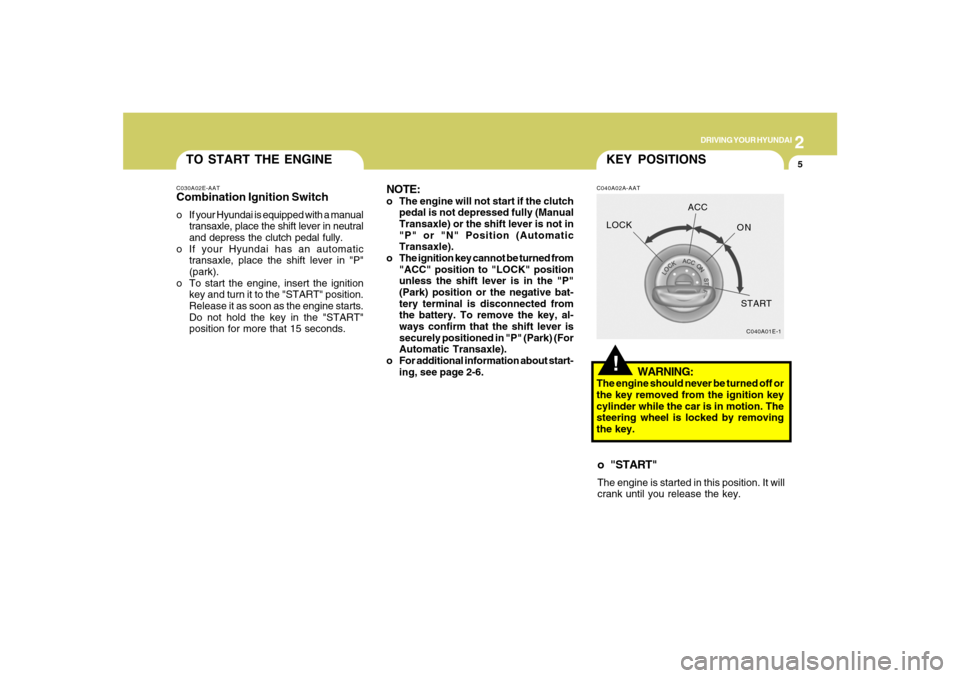
!KEY POSITIONSC040A02A-AAT
WARNING:
The engine should never be turned off or
the key removed from the ignition key
cylinder while the car is in motion. The
steering wheel is locked by removing
the key.o "START"The engine is started in this position. It will
crank until you release the key.
C040A01E-1
LOCKACC
ON
START
Page 217 of 355
2
DRIVING YOUR HYUNDAI
6
C070C01E-1
LOCKACC
ON
START
C050A01E-1
STARTING!
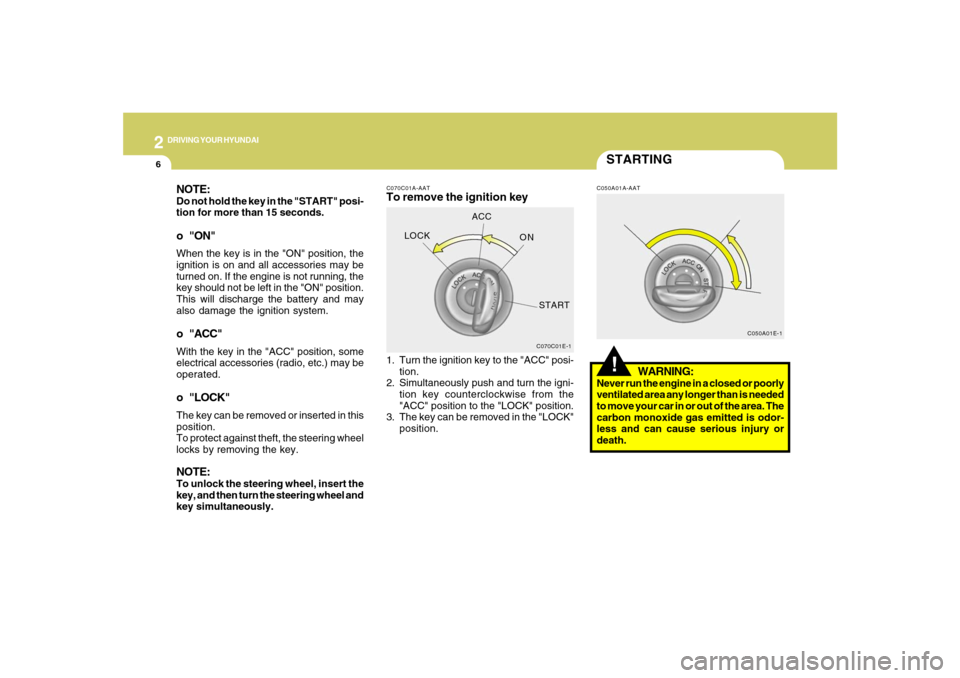
C070C01A-AATTo remove the ignition key
C050A01A-AAT
1. Turn the ignition key to the "ACC" posi-
tion.
2. Simultaneously push and turn the igni-
tion key counterclockwise from the
"ACC" position to the "LOCK" position.
3. The key can be removed in the "LOCK"
position.
WARNING:
Never run the engine in a closed or poorly
ventilated area any longer than is needed
to move your car in or out of the area. The
carbon monoxide gas emitted is odor-
less and can cause serious injury or
death.
NOTE:Do not hold the key in the "START" posi-
tion for more than 15 seconds.o "ON"When the key is in the "ON" position, the
ignition is on and all accessories may be
turned on. If the engine is not running, the
key should not be left in the "ON" position.
This will discharge the battery and may
also damage the ignition system.o "ACC"With the key in the "ACC" position, some
electrical accessories (radio, etc.) may be
operated.o "LOCK"The key can be removed or inserted in this
position.
To protect against theft, the steering wheel
locks by removing the key.NOTE:To unlock the steering wheel, insert the
key, and then turn the steering wheel and
key simultaneously.
Page 221 of 355
2
DRIVING YOUR HYUNDAI
10
CAUTION:
Never shift into "R" or "P" position while
the vehicle is moving.
!
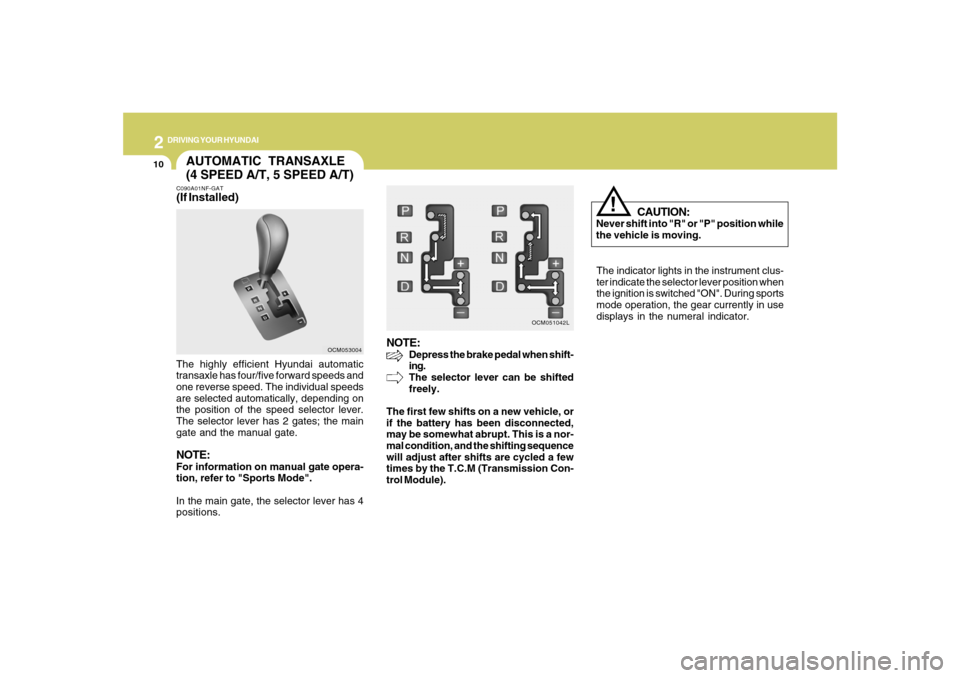
The indicator lights in the instrument clus-
ter indicate the selector lever position when
the ignition is switched "ON". During sports
mode operation, the gear currently in use
displays in the numeral indicator.
AUTOMATIC TRANSAXLE
(4 SPEED A/T, 5 SPEED A/T)C090A01NF-GAT(If Installed)The highly efficient Hyundai automatic
transaxle has four/five forward speeds and
one reverse speed. The individual speeds
are selected automatically, depending on
the position of the speed selector lever.
The selector lever has 2 gates; the main
gate and the manual gate.NOTE:For information on manual gate opera-
tion, refer to "Sports Mode".
In the main gate, the selector lever has 4
positions.
NOTE:
Depress the brake pedal when shift-
ing.
The selector lever can be shifted
freely.
The first few shifts on a new vehicle, or
if the battery has been disconnected,
may be somewhat abrupt. This is a nor-
mal condition, and the shifting sequence
will adjust after shifts are cycled a few
times by the T.C.M (Transmission Con-
trol Module).
OCM053004OCM051042L
Page 236 of 355

2
DRIVING YOUR HYUNDAI
25
C160D01A-AATCheck Battery and CablesWinter puts additional burdens on the
battery system. Visually inspect the battery
and cables as described in Section 6. The
level of charge in your battery can be
checked by your Hyundai dealer or a ser-
vice station.
C160F01A-AATCheck Spark Plugs and Ignition
SystemInspect your spark plugs as described in
Section 6 and replace them if necessary.
Also check all ignition wiring and compo-
nents to be sure they are not cracked, worn
or damaged in any way.C160E01A-AATChange to "Winter Weight" Oil if
NecessaryIn some climates it is recommended that a
lower viscosity "winter weight" oil be used
during cold weather. See Section 9 for
recommendations. If you aren't sure what
weight oil you should use, consult your
Hyundai dealer.
C160G01A-GATTo Keep Locks from FreezingTo keep the locks from freezing, squirt an
approved de-icer fluid or glycerine into the
key opening. If a lock is covered with ice,
squirt it with an approved de-icing fluid to
remove the ice. If the lock is frozen inter-
nally, you may be able to thaw it out by
using a heated key. Handle the heated key
with care to avoid injury.NOTE:The proper temperature for using the
immobilizer key is from -40°F (-40°C) to
176°F (80°C). If you heat the immobilizer
key over 80°C to open the frozen lock, it
may cause damage to the transponder
in its head.
C160C01A-AATUse High Quality Ethylene Glycol
CoolantYour Hyundai is delivered with high qual-
ity ethylene glycol coolant in the cooling
system. It is the only type of coolant that
should be used because it helps prevent
corrosion in the cooling system, lubricates
the water pump and prevents freezing. Be
sure to replace or replenish your coolant in
accordance with the maintenance sched-
ule in Section 5. Before winter, have your
coolant tested to assure that its freezing
point is sufficient for the temperatures an-
ticipated during the winter.
Page 250 of 355
32WHAT TO DO IN AN EMERGENCY
IF THE ENGINE WILL NOT
START!
D010A01A-AAT
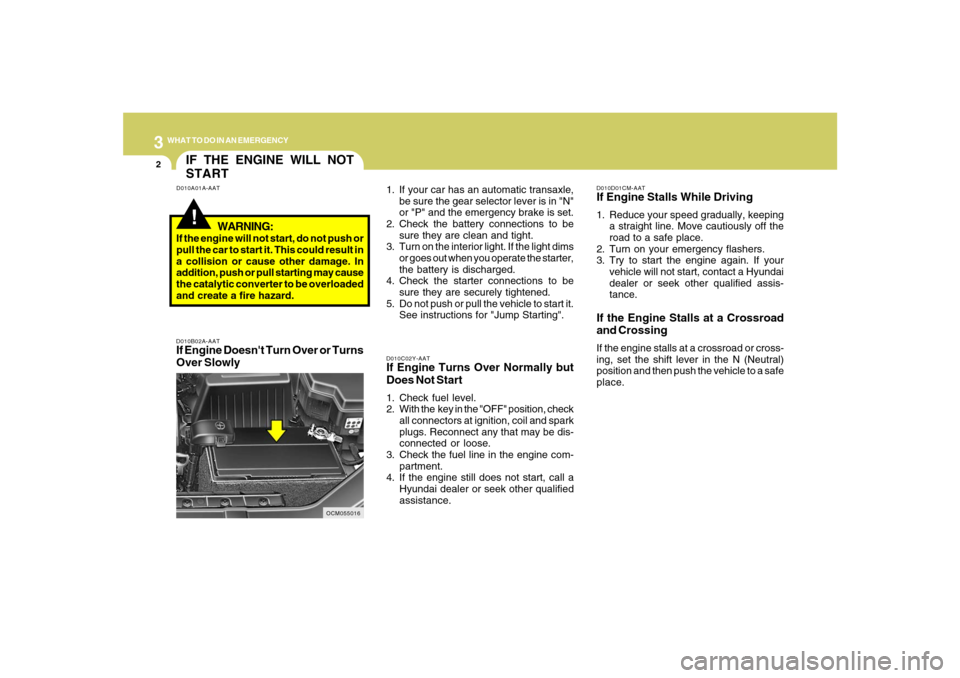
D010B02A-AATIf Engine Doesn't Turn Over or Turns
Over Slowly
D010C02Y-AATIf Engine Turns Over Normally but
Does Not Start1. Check fuel level.
2. With the key in the "OFF" position, check
all connectors at ignition, coil and spark
plugs. Reconnect any that may be dis-
connected or loose.
3. Check the fuel line in the engine com-
partment.
4. If the engine still does not start, call a
Hyundai dealer or seek other qualified
assistance.
D010D01CM-AATIf Engine Stalls While Driving1. Reduce your speed gradually, keeping
a straight line. Move cautiously off the
road to a safe place.
2. Turn on your emergency flashers.
3. Try to start the engine again. If your
vehicle will not start, contact a Hyundai
dealer or seek other qualified assis-
tance.If the Engine Stalls at a Crossroad
and CrossingIf the engine stalls at a crossroad or cross-
ing, set the shift lever in the N (Neutral)
position and then push the vehicle to a safe
place.
WARNING:
If the engine will not start, do not push or
pull the car to start it. This could result in
a collision or cause other damage. In
addition, push or pull starting may cause
the catalytic converter to be overloaded
and create a fire hazard.
OCM055016
1. If your car has an automatic transaxle,
be sure the gear selector lever is in "N"
or "P" and the emergency brake is set.
2. Check the battery connections to be
sure they are clean and tight.
3. Turn on the interior light. If the light dims
or goes out when you operate the starter,
the battery is discharged.
4. Check the starter connections to be
sure they are securely tightened.
5. Do not push or pull the vehicle to start it.
See instructions for "Jump Starting".
Page 251 of 355
3
WHAT TO DO IN AN EMERGENCY
3
JUMP STARTING!
o If you should accidentally get acid on
your skin or in your eyes, immediately
remove any contaminated clothing and
flush the area with clear water for at
least 15 minutes. Then promptly obtain
medical attention. If you must be trans-
ported to an emergency facility, con-
tinue to apply water to the affected area
with a sponge or cloth.
o The gas produced by the battery during
the jump-start operation is highly explo-
sive. Do not smoke or allow a spark or
an open flame in the vicinity.
o The battery being used to provide the
jump start must be 12-volt. If you cannot
determine that it is a 12-volt battery, do
not attempt to use it for the jump start.
o To jump start a car with a discharged
battery, follow this procedure exactly:
1. If the booster battery is installed in an-
other vehicle, be sure the two vehicles
are not touching.
2. Turn off all unnecessary lights and ac-
cessories in both vehicles.
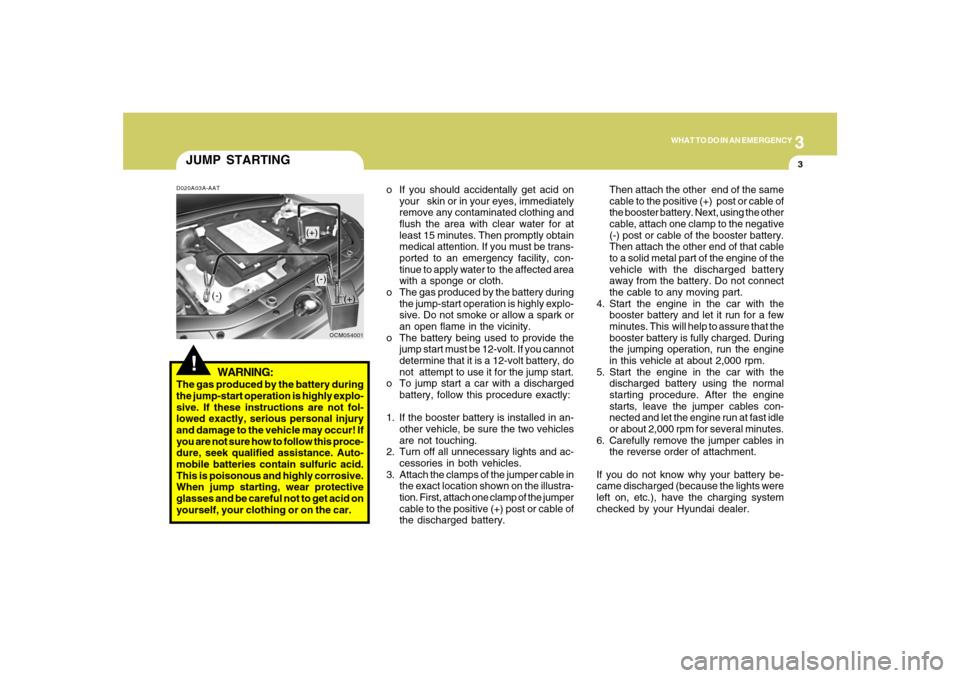
3. Attach the clamps of the jumper cable in
the exact location shown on the illustra-
tion. First, attach one clamp of the jumper
cable to the positive (+) post or cable of
the discharged battery.Then attach the other end of the same
cable to the positive (+) post or cable of
the booster battery. Next, using the other
cable, attach one clamp to the negative
(-) post or cable of the booster battery.
Then attach the other end of that cable
to a solid metal part of the engine of the
vehicle with the discharged battery
away from the battery. Do not connect
the cable to any moving part.
4. Start the engine in the car with the
booster battery and let it run for a few
minutes. This will help to assure that the
booster battery is fully charged. During
the jumping operation, run the engine
in this vehicle at about 2,000 rpm.
5. Start the engine in the car with the
discharged battery using the normal
starting procedure. After the engine
starts, leave the jumper cables con-
nected and let the engine run at fast idle
or about 2,000 rpm for several minutes.
6. Carefully remove the jumper cables in
the reverse order of attachment.
If you do not know why your battery be-
came discharged (because the lights were
left on, etc.), have the charging system
checked by your Hyundai dealer.
D020A03A-AAT
WARNING:
The gas produced by the battery during
the jump-start operation is highly explo-
sive. If these instructions are not fol-
lowed exactly, serious personal injury
and damage to the vehicle may occur! If
you are not sure how to follow this proce-
dure, seek qualified assistance. Auto-
mobile batteries contain sulfuric acid.
This is poisonous and highly corrosive.
When jump starting, wear protective
glasses and be careful not to get acid on
yourself, your clothing or on the car.
OCM054001
(-)
(+)
(+)(-)
Page 274 of 355
4
CORROSION PREVENTION AND APPEARANCE CARE
5
E030D01A-AATWhen to Wax AgainYou should polish and wax the car again
when water no longer beads on a clean
surface but spreads out over a larger area.
E030C01A-AATPolishing and WaxingAlways wash and dry the car before polish-
ing or waxing or using a combination
cleaner and wax. Use a good quality com-
mercial product and follow the
manufacturer's directions on the container.
Polish and wax the bright trim pieces as
well as the paint.E030B01A-AATSpot CleaningDon't use gasoline, strong solvents or cor-
rosive cleaning agents. These can dam-
age the finish of the car. To remove road
tar, use turpentine on a clean, soft cloth. Be
gentle.
To remove dead insects or tree sap, use
warm water and mild soap or car-washing
solution. Soak the spot and rub gently. If
the paint has lost its luster, use a commer-
cial car-cleaning polish.
E030E01A-AATMaintaining BumpersSpecial precautions must be observed to
preserve the appearance of the bumpers
on your Hyundai. They are:
o Be careful not to spill battery electrolyte
or hydraulic brake fluid on the bumpers.
If you do, wash it off immediately with
clear water.
o Be gentle when cleaning the bumper
surfaces. They are made of soft plastic
and the surface can be damaged if
mistreated. Do not use abrasive clean-
ers. Use warm water and mild soap or
car-washing solution.
o Do not expose the bumpers to high tem-
peratures. For example, if you have
your car repainted, do not leave the
bumpers on the car if the car is going to
be placed in a high-temperature paint
booth.
!
CAUTION:
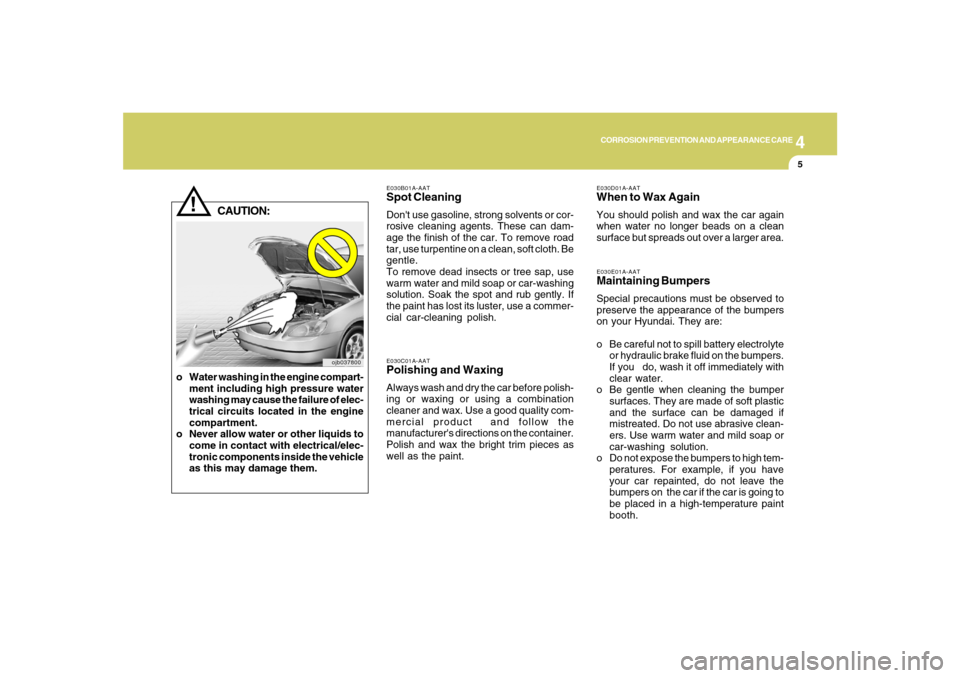
o Water washing in the engine compart-
ment including high pressure water
washing may cause the failure of elec-
trical circuits located in the engine
compartment.
o Never allow water or other liquids to
come in contact with electrical/elec-
tronic components inside the vehicle
as this may damage them.
ojb037800