2008 Hyundai Santa Fe light
[x] Cancel search: lightPage 263 of 355
3
WHAT TO DO IN AN EMERGENCY
15
!
Wheels and wheel covers may have
sharp edges. Handle them carefully
to avoid possible severe injury. Be-
fore putting the wheel into place, be
sure that there is nothing on the hub
or wheel (such as mud, tar, gravel,
etc.) that interferes with the wheel
from fitting solidly against the hub. If
there is, remove it. If there is not
good contact on the mounting sur-
face between the wheel and hub, the
wheel nuts could come loose and
cause the loss of a wheel. Loss of a
wheel may result in loss of control of
the vehicle. This may cause serious
injury or death.WARNING:
!
WARNING:
If the vehicle has been driven re-
cently, some pieces may be very hot.
Use caution.
OCM053104L
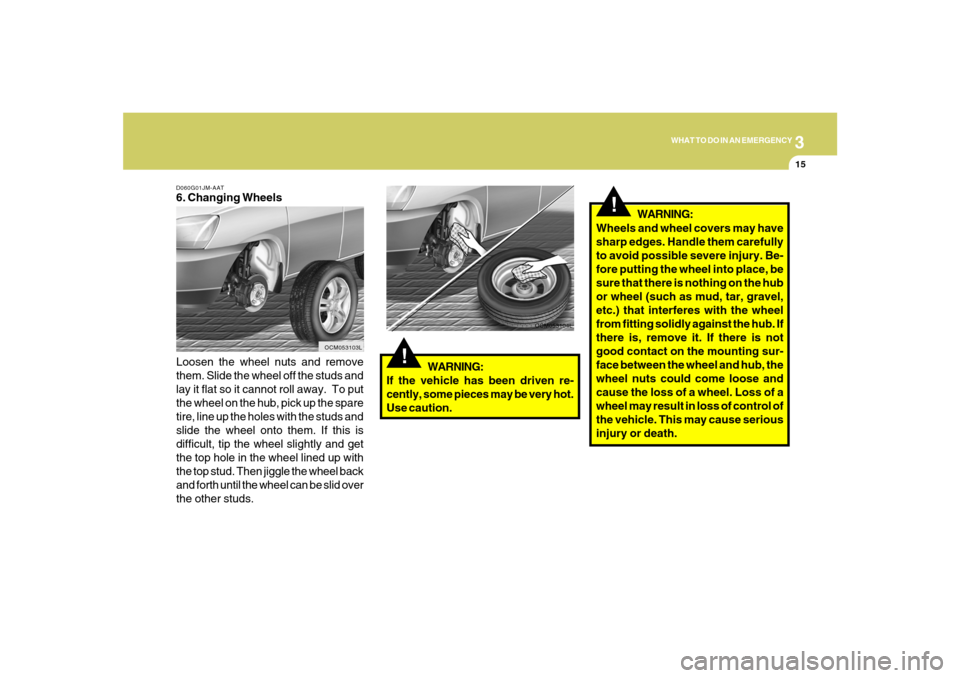
D060G01JM-AAT6. Changing Wheels
Loosen the wheel nuts and remove
them. Slide the wheel off the studs and
lay it flat so it cannot roll away. To put
the wheel on the hub, pick up the spare
tire, line up the holes with the studs and
slide the wheel onto them. If this is
difficult, tip the wheel slightly and get
the top hole in the wheel lined up with
the top stud. Then jiggle the wheel back
and forth until the wheel can be slid over
the other studs.
OCM053103L
Page 275 of 355
4
CORROSION PREVENTION AND APPEARANCE CARE6
E040D01A-AATCleaning the Seat BeltsTo clean the seat belts, use a cloth or
sponge with mild soap or detergent and
warm water. Do not use strong detergents,
dye, bleach or abrasive materials on the
seat belts as this may weaken the fabric.
While cleaning the belts, inspect them for
excessive wear, cuts, fraying or other signs
of damage and replace them if necessary.E040C01A-AATCleaning the CarpetsUse a foam-type carpet cleaner. Cleaners
of this type are available in aerosol cans in
liquid form or powder. Read the instruc-
tions and follow them exactly. Using a
vacuum cleaner with the appropriate at-
tachment, remove as much dirt from the
carpets as possible. Apply the foam follow-
ing the manufacturer's directions, then rub
in overlapping circles. Do not add water.
These cleaners work best when the carpet
is kept as dry as possible.
E040B01A-AATTo Clean the Leather Upholstery
(If installed)In the normal course of use, leather uphol-
stered surfaces will, like any material, pick-
up dust and dirt. This dust and dirt must be
cleaned off or it may work into the surface
of the leather, causing damage.
Fine leather needs care, and should be
cleaned when necessary. Washing leather
thoroughly with soap and water will keep
your leather lustrous, beautiful and ensure
you have many years of wear.
Take a piece of cheese cloth and using any
mild soap and lukewarm water, work up a
good lather. Thoroughly wash the leather.
Wipe clean with a slightly damp cloth and
dry with soft cloth. Do this as often as the
leather becomes soiled.
During tanning operations, sufficient oils
are incorporated through processing that
none need be applied during the life of the
leather. Oil applied to the finished surface
will in no way help the leather and may do
more harm than good. Varnishes and fur-
niture polishes should never be used un-
der any conditions.
CLEANING THE INTERIORE040A01A-AATCleaning the upholstery and interior
trimVinyl
Remove dust and loose dirt from vinyl with
a whisk broom or vacuum cleaner. Clean
vinyl surfaces with a vinyl cleaner.
Fabric
Remove dust and loose dirt from fabric
with a whisk broom or vacuum cleaner.
Clean with a mild soap solution recom-
mended for upholstery or carpets. Re-
move fresh spots immediately with a fabric
spot cleaner. If fresh spots do not receive
immediate attention, the fabric can be
stained and its color can be affected. Also,
its fire-resistant properties can be reduced
if the material is not properly maintained.
CAUTION:
Using anything but recommended clean-
ers and procedures may affect the
fabric’s appearance and fire-resistant
properties.
!
Page 287 of 355
6
Engine Compartment .................................................... 6-2
General Checks ............................................................ 6-4
Checking the Engine Oil ............................................... 6-5
Checking the Engine Coolant ........................................ 6-7
Changing the Air Cleaner Filter ..................................... 6-8
Windshield Wiper Blades .............................................. 6-9
Checking the Transaxle Oil (Manual) .........................6-11
Checking the Transaxle Fluid (Automatic)..................6-12
Checking the Brakes ..................................................6-14
Air Conditioning Care..................................................6-15
Changing the Climate Control Air Filter .......................6-16
Checking and Replacing Fuses..................................6-17
Checking the Battery..................................................6-20
Power Steering Fluid Level .........................................6-23
Replacement of Light Bulbs ........................................6-24
Bulb Wattage ...............................................................6-31
Fuse Panel Description...............................................6-32
6
DO-IT-YOURSELF MAINTENANCE
Page 290 of 355
6
DO-IT-YOURSELF MAINTENANCE
4
GENERAL CHECKS
G020C01A-AATVehicle InteriorThe following should be checked each
time when the vehicle is driven:
o Lights operation
o Windshield wiper operation
o Horn operation
o Defroster, heating system operation
(and air conditioning, if installed)
o Steering operation and condition
o Mirror condition and operation
o Turn signal operation
o Accelerator pedal operation
o Brake operation, including parking
brake
o Manual transaxle operation, including
clutch operation
o Automatic transaxle operation, includ-
ing "Park" mechanism operation
o Seat control condition and operation
o Seat belt condition and operation
o Sunvisor operation
If you notice anything that does not operate
correctly or appears to be functioning cor-
rectly, inspect it carefully and seek assis-
tance from your Hyundai dealer if service
is needed.
G020B01A-AATVehicle ExteriorThe following should be checked monthly:
o Overall appearance and condition
o Wheel condition and wheel nut torque
o Exhaust system condition
o Light condition and operation
o Windshield glass condition
o Wiper blade condition
o Paint condition and body corrosion
o Fluid leaks
o Door and hood lock condition
o Tire pressure and condition
(including spare tire)
G020A01A-AATEngine CompartmentThe following should be checked regu-
larly:
o Engine oil level and condition
o Transaxle fluid level and condition
o Brake fluid level
o Clutch fluid level
o Engine coolant level
o Windshield washer fluid level
o Accessory drive belt condition
o Engine coolant hose condition
o Fluid leaks (on or below components)
o Power steering fluid level
o Battery condition
o Air filter condition
Page 300 of 355
6
DO-IT-YOURSELF MAINTENANCE
14
CHECKING THE BRAKES!
G120B01A-AATChecking the Brake Fluid Level
WARNING:Use caution when handling brake fluid. It
can damage your vision if it gets into
your eyes. It will also damage your
vehicle's paint if spilled on it and not
removed immediately.G120A01A-AAT
CAUTION:
Because brakes are essential to the
safe operation of the car, it is suggested
that they be checked and inspected by
your Hyundai dealer. The brakes should
be checked and inspected for wear at
those intervals specified in the vehicle
maintenance schedule in Section 5.
!
G120C02A-AATRecommended Brake FluidUse only hydraulic brake fluid conforming
to DOT 3 or DOT 4 specifications in your
braking system. Follow the instructions
printed on the container.
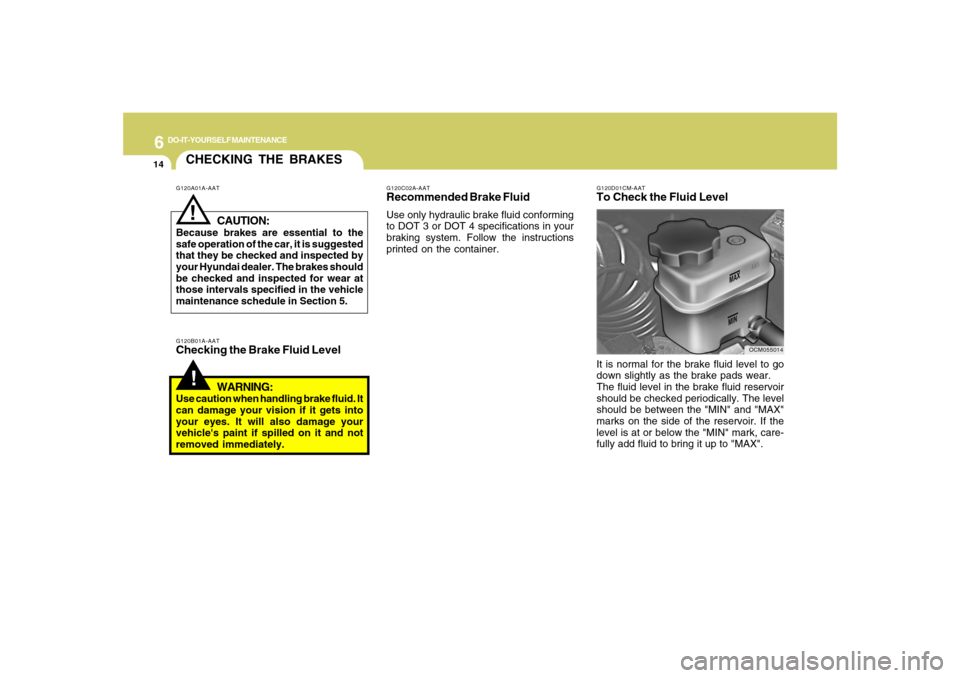
G120D01CM-AATTo Check the Fluid Level
OCM055014
It is normal for the brake fluid level to go
down slightly as the brake pads wear.
The fluid level in the brake fluid reservoir
should be checked periodically. The level
should be between the "MIN" and "MAX"
marks on the side of the reservoir. If the
level is at or below the "MIN" mark, care-
fully add fluid to bring it up to "MAX".
Page 304 of 355
6
DO-IT-YOURSELF MAINTENANCE
18
!
CAUTION:
When replacing a fusible link, never use
anything but a new fusible link with the
same or lower amperage rating. Never
use a piece of wire or a higher-rated
fusible link. This could result in serious
damage and create a fire hazard.
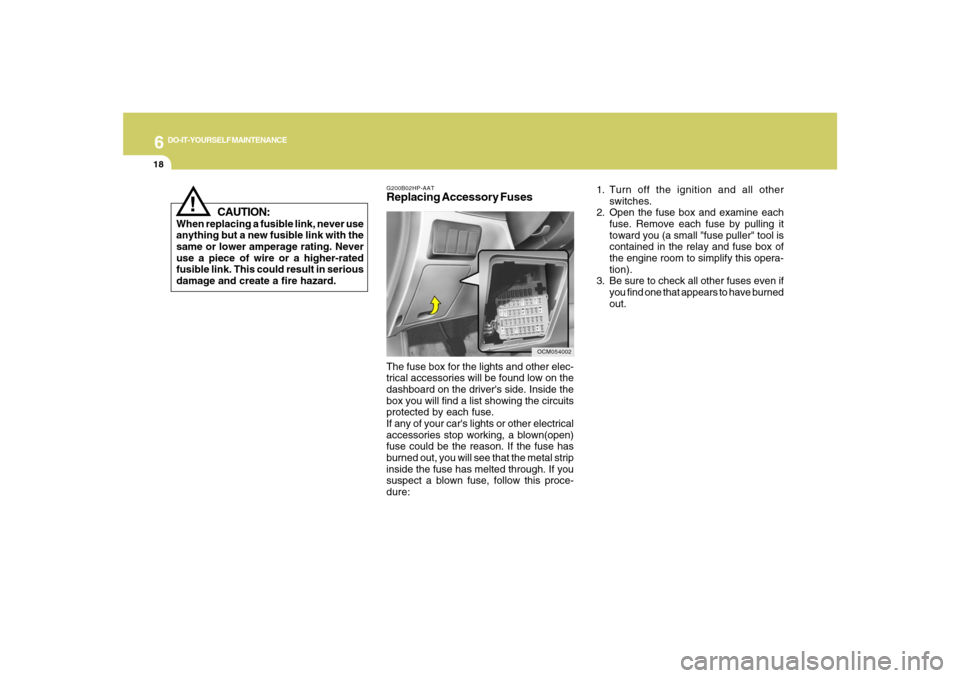
G200B02HP-AATReplacing Accessory Fuses
OCM054002
The fuse box for the lights and other elec-
trical accessories will be found low on the
dashboard on the driver's side. Inside the
box you will find a list showing the circuits
protected by each fuse.
If any of your car's lights or other electrical
accessories stop working, a blown(open)
fuse could be the reason. If the fuse has
burned out, you will see that the metal strip
inside the fuse has melted through. If you
suspect a blown fuse, follow this proce-
dure:1. Turn off the ignition and all other
switches.
2. Open the fuse box and examine each
fuse. Remove each fuse by pulling it
toward you (a small "fuse puller" tool is
contained in the relay and fuse box of
the engine room to simplify this opera-
tion).
3. Be sure to check all other fuses even if
you find one that appears to have burned
out.
Page 305 of 355
6
DO-IT-YOURSELF MAINTENANCE
19
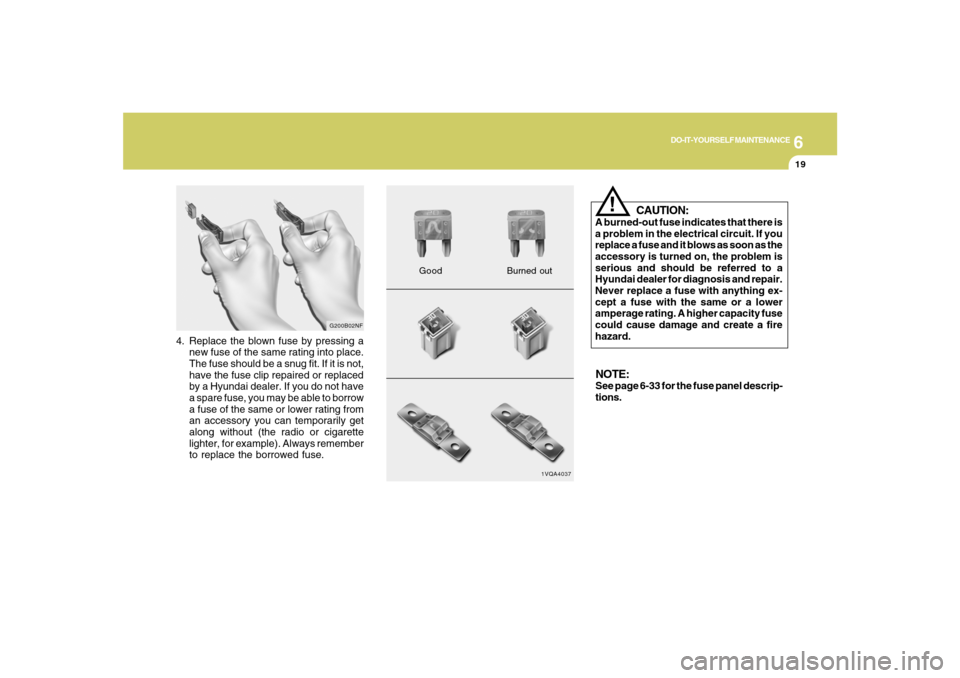
4. Replace the blown fuse by pressing a
new fuse of the same rating into place.
The fuse should be a snug fit. If it is not,
have the fuse clip repaired or replaced
by a Hyundai dealer. If you do not have
a spare fuse, you may be able to borrow
a fuse of the same or lower rating from
an accessory you can temporarily get
along without (the radio or cigarette
lighter, for example). Always remember
to replace the borrowed fuse.
G200B02NF
1VQA4037
GoodBurned out
CAUTION:
A burned-out fuse indicates that there is
a problem in the electrical circuit. If you
replace a fuse and it blows as soon as the
accessory is turned on, the problem is
serious and should be referred to a
Hyundai dealer for diagnosis and repair.
Never replace a fuse with anything ex-
cept a fuse with the same or a lower
amperage rating. A higher capacity fuse
could cause damage and create a fire
hazard.
!
NOTE:See page 6-33 for the fuse panel descrip-
tions.
Page 306 of 355
6
DO-IT-YOURSELF MAINTENANCE
20
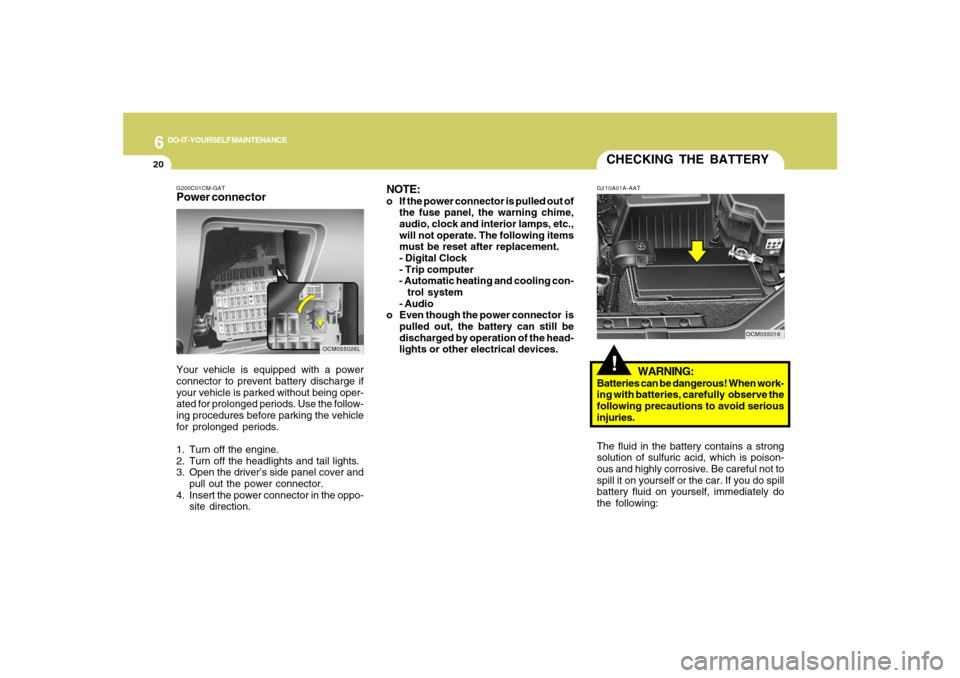
G200C01CM-GATPower connectorNOTE:
o If the power connector is pulled out of
the fuse panel, the warning chime,
audio, clock and interior lamps, etc.,
will not operate. The following items
must be reset after replacement.
- Digital Clock
- Trip computer
- Automatic heating and cooling con-
trol system
- Audio
o Even though the power connector is
pulled out, the battery can still be
discharged by operation of the head-
lights or other electrical devices.
Your vehicle is equipped with a power
connector to prevent battery discharge if
your vehicle is parked without being oper-
ated for prolonged periods. Use the follow-
ing procedures before parking the vehicle
for prolonged periods.
1. Turn off the engine.
2. Turn off the headlights and tail lights.
3. Open the driver’s side panel cover and
pull out the power connector.
4. Insert the power connector in the oppo-
site direction.
OCM055026L
CHECKING THE BATTERY!
G210A01A-AAT
WARNING:
Batteries can be dangerous! When work-
ing with batteries, carefully observe the
following precautions to avoid serious
injuries.
The fluid in the battery contains a strong
solution of sulfuric acid, which is poison-
ous and highly corrosive. Be careful not to
spill it on yourself or the car. If you do spill
battery fluid on yourself, immediately do
the following:
OCM055016