2008 HYUNDAI ENTOURAGE warning
[x] Cancel search: warningPage 91 of 393
375
Features of your vehicle
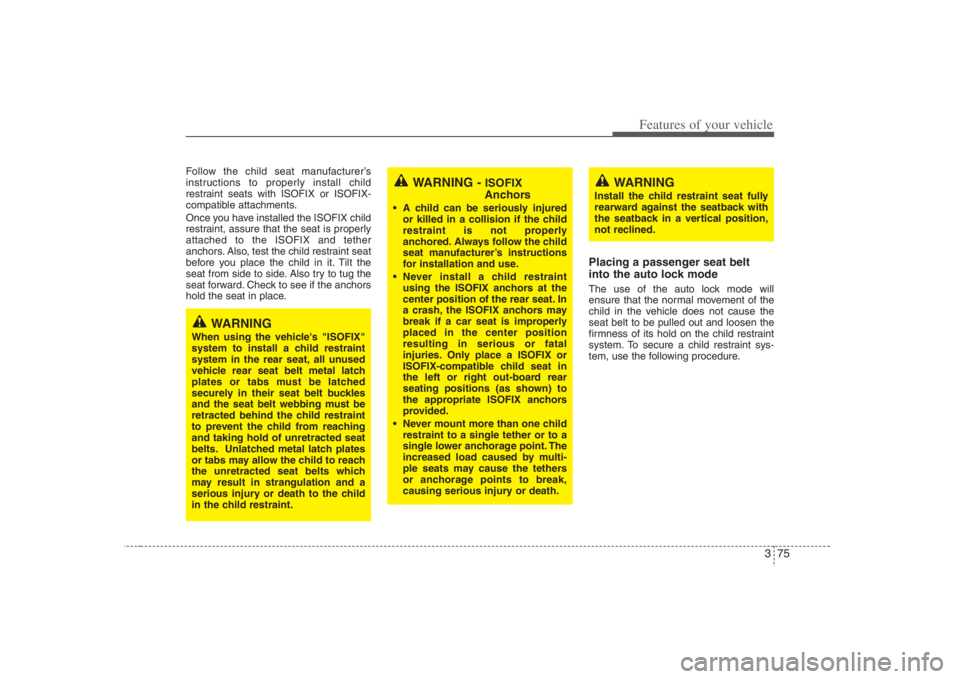
Follow the child seat manufacturer’s
instructions to properly install child
restraint seats with ISOFIX or ISOFIX-
compatible attachments.
Once you have installed the ISOFIX child
restraint, assure that the seat is properly
attached to the ISOFIX and tether
anchors. Also, test the child restraint seat
before you place the child in it. Tilt the
seat from side to side. Also try to tug the
seat forward. Check to see if the anchors
hold the seat in place.
Placing a passenger seat belt
into the auto lock mode The use of the auto lock mode will
ensure that the normal movement of the
child in the vehicle does not cause the
seat belt to be pulled out and loosen the
firmness of its hold on the child restraint
system. To secure a child restraint sys-
tem, use the following procedure.
WARNING -
ISOFIX
Anchors
A child can be seriously injured
or killed in a collision if the child
restraint is not properly
anchored. Always follow the child
seat manufacturer’s instructions
for installation and use.
Never install a child restraint
using the ISOFIX anchors at the
center position of the rear seat. In
a crash, the ISOFIX anchors may
break if a car seat is improperly
placed in the center position
resulting in serious or fatal
injuries. Only place a ISOFIX or
ISOFIX-compatible child seat in
the left or right out-board rear
seating positions (as shown) to
the appropriate ISOFIX anchors
provided.
Never mount more than one child
restraint to a single tether or to a
single lower anchorage point. The
increased load caused by multi-
ple seats may cause the tethers
or anchorage points to break,
causing serious injury or death.
WARNING
Install the child restraint seat fully
rearward against the seatback with
the seatback in a vertical position,
not reclined.
WARNING
When using the vehicle's "ISOFIX"
system to install a child restraint
system in the rear seat, all unused
vehicle rear seat belt metal latch
plates or tabs must be latched
securely in their seat belt buckles
and the seat belt webbing must be
retracted behind the child restraint
to prevent the child from reaching
and taking hold of unretracted seat
belts. Unlatched metal latch plates
or tabs may allow the child to reach
the unretracted seat belts which
may result in strangulation and a
serious injury or death to the child
in the child restraint.
Page 92 of 393
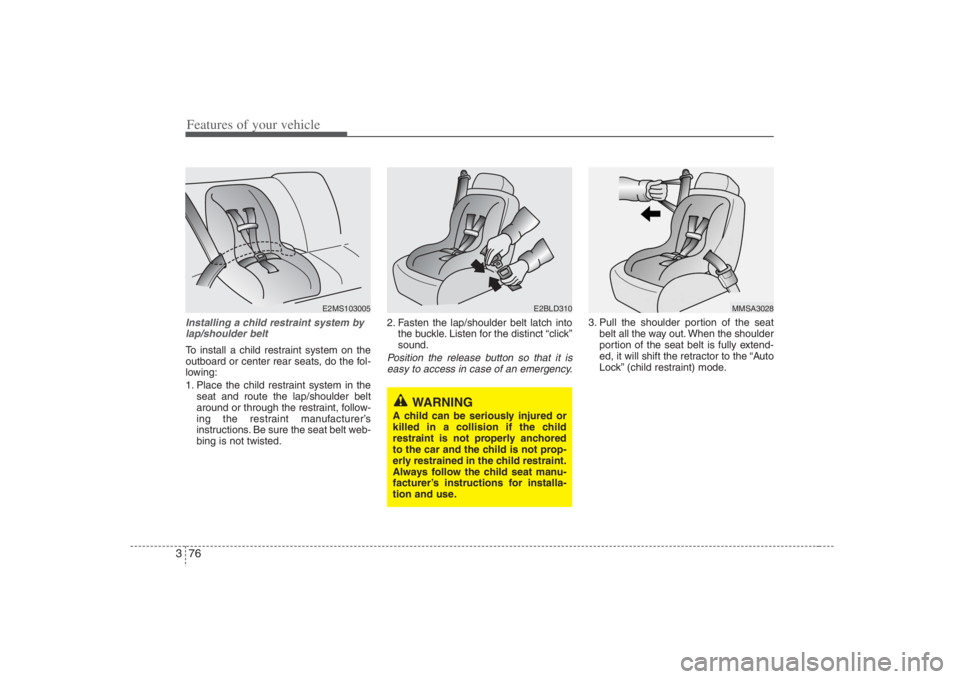
Features of your vehicle76 3Installing a child restraint system by
lap/shoulder beltTo install a child restraint system on the
outboard or center rear seats, do the fol-
lowing:
1. Place the child restraint system in the
seat and route the lap/shoulder belt
around or through the restraint, follow-
ing the restraint manufacturer’s
instructions. Be sure the seat belt web-
bing is not twisted.2. Fasten the lap/shoulder belt latch into
the buckle. Listen for the distinct “click”
sound.
Position the release button so that it is
easy to access in case of an emergency.
3. Pull the shoulder portion of the seat
belt all the way out. When the shoulder
portion of the seat belt is fully extend-
ed, it will shift the retractor to the “Auto
Lock” (child restraint) mode.
E2MS103005
E2BLD310
MMSA3028
WARNING
A child can be seriously injured or
killed in a collision if the child
restraint is not properly anchored
to the car and the child is not prop-
erly restrained in the child restraint.
Always follow the child seat manu-
facturer’s instructions for installa-
tion and use.
Page 93 of 393

377
Features of your vehicle
4. Slowly allow the shoulder portion of
the seat belt to retract and listen for an
audible “clicking” or “ratcheting” sound.
This indicates that the retractor is in
the “Auto Lock” mode. If no distinct
sound is heard, repeat steps 3 and 4.5. Remove as much slack from the belt
as possible by pushing down on the
child restraint system while feeding the
shoulder belt back into the retractor.
6. Push and pull on the child restraint
system to confirm that the seat belt is
holding it firmly in place. If it is not,
release the seat belt and repeat steps
2 through 6.
7. Double check that the retractor is in
the “Auto Lock” mode by attempting to
pull more of the seat belt out of the
retractor. If you cannot, the retractor is
in the “Auto Lock” mode.
To remove the child restraint, press the
release button on the buckle and then
pull the lap/shoulder belt out of the
restraint and allow the seat belt to retract
fully.When the seat belt is allowed to
retract to its fully stowed position, the
retractor will automatically switch
from the “Auto Lock” mode to the
emergency lock mode for normal
adult usage.
MMSA3029
MMSA3030
WARNING
- Auto lock
mode
The lap/shoulder belt automatically
returns to the “emergency lock
mode” whenever the belt is allowed
to retract fully. Therefore, the pre-
ceding seven steps must be fol-
lowed each time a child restraint is
installed.
If the retractor is not in the
Automatic Locking mode, the child
restraint can move when your vehi-
cle turns or stops suddenly. A child
can be seriously injured or killed if
the child restraint is not properly
anchored to the car, including set-
ting the retractor to the Automatic
Locking mode.
Page 96 of 393
Features of your vehicle80 3
✽
✽
NOTICE• Be sure to read information about the
SRS on the labels provided on the sun
visor and in the glove box.
• Advanced air bags are combined with
pre-tensioner seat belts to help pro-
vide enhanced occupant protection in
frontal crashes. Front air bags are not
intended to deploy in collisions in
which sufficient protection can be
provided by the pre-tensioner seat
belt.
• If you are considering modification of
your vehicle due to a disability, please
contact the Hyundai Customer
Assistance Center at 1-800-633-5151.
CAUTION
If a seat track position sensor or an
occupant classification system is
not working properly, the SRS air
bag warning light on the instru-
ment panel will illuminate because
the SRS air bag warning light is
connected with the seat track posi-
tion sensor and the occupant clas-
sification system. If the SRS air bag
warning light does not illuminate
when the ignition key is turned to
the "ON" position, remains illumi-
nated after approximately 6 sec-
onds when the ignition key is
turned to the "ON" position, or if it
illuminates while the vehicle is
being driven, have an authorized
Hyundai dealer inspect the
advanced SRS air bag system as
soon as possible.
AIR
BAG
WARNING
Modification to the seat structure
can adversely affect the seat
track position sensor and cause
the air bag to deploy at a different
level than should be provided.
Do not place any objects under-
neath the front seats as they
could damage the seat track posi-
tion sensor or interfere with the
occupant classification system.
Do not place any objects that may
cause magnetic fields near the
front seat. These may cause a
malfunction of the seat track
position sensor.
Page 97 of 393
381
Features of your vehicle
WARNING
Always use seat belts and child
restraints – every trip, every time,
everyone! Air bags inflate with con-
siderable force and in the blink of
an eye. Seat belts help keep occu-
pants in proper position to obtain
maximum benefit from the air bag.
Even with advanced air bags,
improperly and unbelted occupants
can be severely injured when the air
bag inflates. Always follow the pre-
cautions about seat belts, air bags
and occupant safety contained in
this manual.
To reduce the chance of serious or
fatal injuries and receive the maxi-
mum safety benefit from your
restraint system:
Never place a child in any child or
booster seat in the front seat (see
child restraints 3-71).
ABC – Always Buckle Children in
the back seat. It is the safest
place for children of any age to
ride.
Front and side impact air bags
can injure occupants improperly
positioned in the front seats.
(Continued)
(Continued)
Move your seat as far back as
practical from the front air bags,
while still maintaining control of
the vehicle.
Never sit or lean unnecessarily
close to the front or side air bags
Never lean against the door or
center console – always sit in an
upright position.
Do not allow a passenger to ride
in the front seat when the “PAS-
SENGER AIR BAG OFF” indicator
is illuminated, because the air
bag will not deploy in the event of
a moderate or severe frontal
crash.
Never place objects over or near
any air bag module (front or side
impact air bags), because these
objects can injure passengers in
a crash.
Never place covers, blankets or
aftermarket seat warmers on the
passenger seat as these may
interfere with the occupant classi-
fication system.
(Continued)
(Continued)
Do not tamper or disconnect SRS
wiring or other components.
Injuries could result from inadver-
tent deployment or failure of the
air bag to deploy in a crash.
If the SRS air bag warning light
(see page 3-119) remains illumi-
nated while the vehicle is being
driven, have an authorized
Hyundai dealer inspect the air
bag system as soon as possible.
Air bags can only be used once –
have an authorized Hyundai deal-
er replace the air bag immediately
after deployment.
The SRS is designed to deploy
the front air bags only when an
impact is sufficiently severe and
when the impact angle is less
than 30° from the forward longitu-
dinal axis of the vehicle. The front
air bags will not deploy in side,
rear or rollover impacts.
Additionally, the air bags will only
deploy once. Seat belts must be
worn at all times.
(Continued)
Page 99 of 393
383
Features of your vehicle
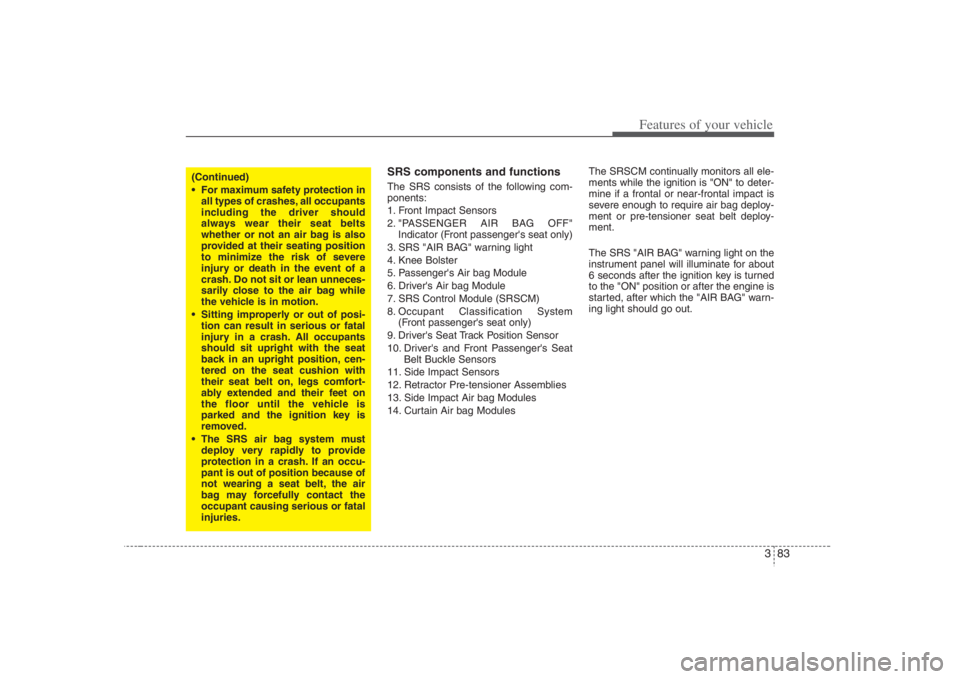
SRS components and functionsThe SRS consists of the following com-
ponents:
1. Front Impact Sensors
2. "PASSENGER AIR BAG OFF"
Indicator (Front passenger's seat only)
3. SRS "AIR BAG" warning light
4. Knee Bolster
5. Passenger's Air bag Module
6. Driver's Air bag Module
7. SRS Control Module (SRSCM)
8. Occupant Classification System
(Front passenger's seat only)
9. Driver's Seat Track Position Sensor
10. Driver's and Front Passenger's Seat
Belt Buckle Sensors
11. Side Impact Sensors
12. Retractor Pre-tensioner Assemblies
13. Side Impact Air bag Modules
14. Curtain Air bag ModulesThe SRSCM continually monitors all ele-
ments while the ignition is "ON" to deter-
mine if a frontal or near-frontal impact is
severe enough to require air bag deploy-
ment or pre-tensioner seat belt deploy-
ment.
The SRS "AIR BAG" warning light on the
instrument panel will illuminate for about
6 seconds after the ignition key is turned
to the "ON" position or after the engine is
started, after which the "AIR BAG" warn-
ing light should go out.
(Continued)
For maximum safety protection in
all types of crashes, all occupants
including the driver should
always wear their seat belts
whether or not an air bag is also
provided at their seating position
to minimize the risk of severe
injury or death in the event of a
crash. Do not sit or lean unneces-
sarily close to the air bag while
the vehicle is in motion.
Sitting improperly or out of posi-
tion can result in serious or fatal
injury in a crash. All occupants
should sit upright with the seat
back in an upright position, cen-
tered on the seat cushion with
their seat belt on, legs comfort-
ably extended and their feet on
the floor until the vehicle is
parked and the ignition key is
removed.
The SRS air bag system must
deploy very rapidly to provide
protection in a crash. If an occu-
pant is out of position because of
not wearing a seat belt, the air
bag may forcefully contact the
occupant causing serious or fatal
injuries.
Page 101 of 393
385
Features of your vehicle
1VQA2077
B240B05L
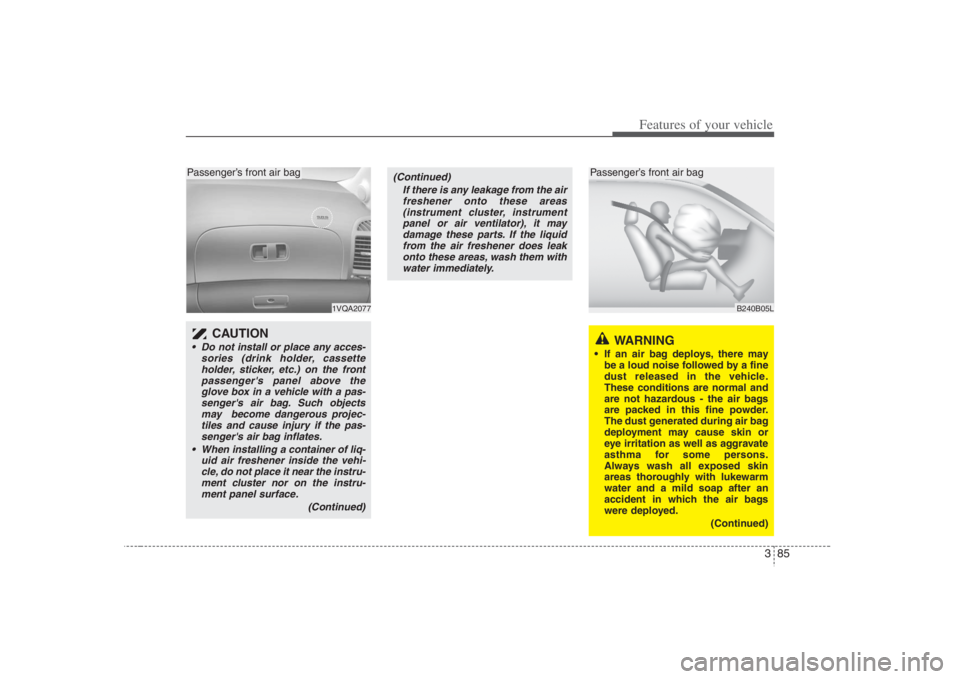
CAUTION
Do not install or place any acces-
sories (drink holder, cassette
holder, sticker, etc.) on the front
passenger's panel above the
glove box in a vehicle with a pas-
senger's air bag. Such objects
may become dangerous projec-
tiles and cause injury if the pas-
senger's air bag inflates.
When installing a container of liq-
uid air freshener inside the vehi-
cle, do not place it near the instru-
ment cluster nor on the instru-
ment panel surface.
(Continued)
(Continued)
If there is any leakage from the air
freshener onto these areas
(instrument cluster, instrument
panel or air ventilator), it may
damage these parts. If the liquid
from the air freshener does leak
onto these areas, wash them with
water immediately.
WARNING
If an air bag deploys, there may
be a loud noise followed by a fine
dust released in the vehicle.
These conditions are normal and
are not hazardous - the air bags
are packed in this fine powder.
The dust generated during air bag
deployment may cause skin or
eye irritation as well as aggravate
asthma for some persons.
Always wash all exposed skin
areas thoroughly with lukewarm
water and a mild soap after an
accident in which the air bags
were deployed.
(Continued)
Passenger’s front air bag
Passenger’s front air bag
Page 102 of 393
Features of your vehicle86 3
Occupant classification systemYour vehicle is equipped with an occu-
pant classification system in the front
passenger's seat.
The occupant classification system is
designed to detect the presence of a
properly-seated front passenger and
determine if the passenger's front air bag
should be enabled (may inflate) or not.
The driver's front air bag is not affected
or controlled by the occupant classifica-
tion system.If the front passenger seat is occupied by
a person that the system determines to
be of adult size, and he/she sits properly
(sitting upright with the seatback in an
upright position, centered on the seat
cushion with their seat belt on, legs com-
fortably extended and their feet on the
floor), the "PASSENGER AIR BAG OFF"
indicator will be turned off and the front
passenger's air bag will be able to inflate,
if necessary, in frontal crashes.
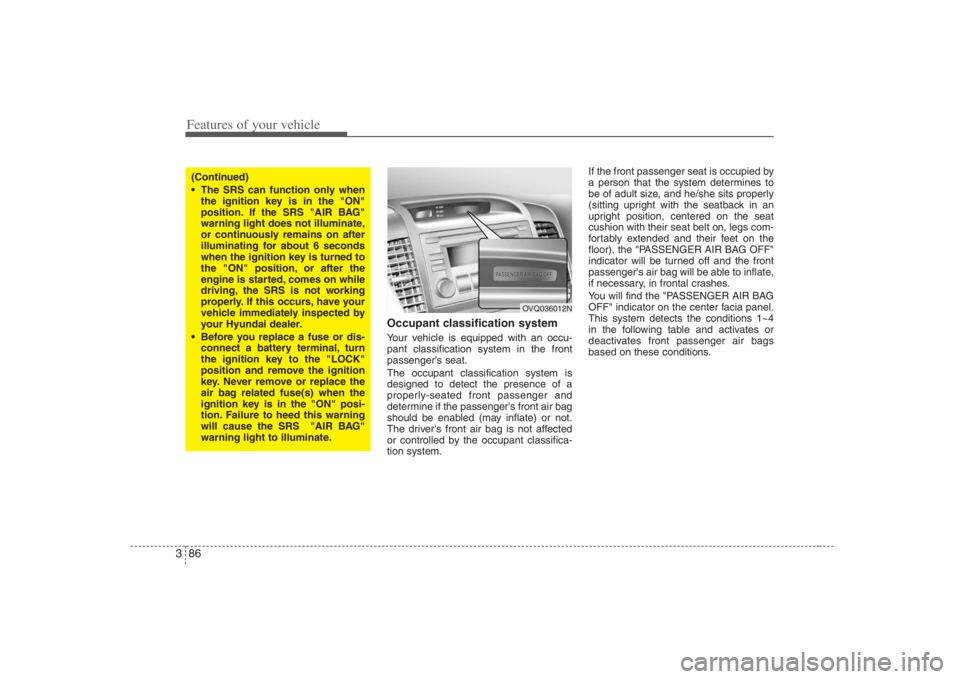
You will find the "PASSENGER AIR BAG
OFF" indicator on the center facia panel.
This system detects the conditions 1~4
in the following table and activates or
deactivates front passenger air bags
based on these conditions.
(Continued)
The SRS can function only when
the ignition key is in the "ON"
position. If the SRS "AIR BAG"
warning light does not illuminate,
or continuously remains on after
illuminating for about 6 seconds
when the ignition key is turned to
the "ON" position, or after the
engine is started, comes on while
driving, the SRS is not working
properly. If this occurs, have your
vehicle immediately inspected by
your Hyundai dealer.
Before you replace a fuse or dis-
connect a battery terminal, turn
the ignition key to the "LOCK"
position and remove the ignition
key. Never remove or replace the
air bag related fuse(s) when the
ignition key is in the "ON" posi-
tion. Failure to heed this warning
will cause the SRS "AIR BAG"
warning light to illuminate.
OVQ036012N