2008 HYUNDAI ENTOURAGE engine
[x] Cancel search: enginePage 75 of 393
359
Features of your vehicle
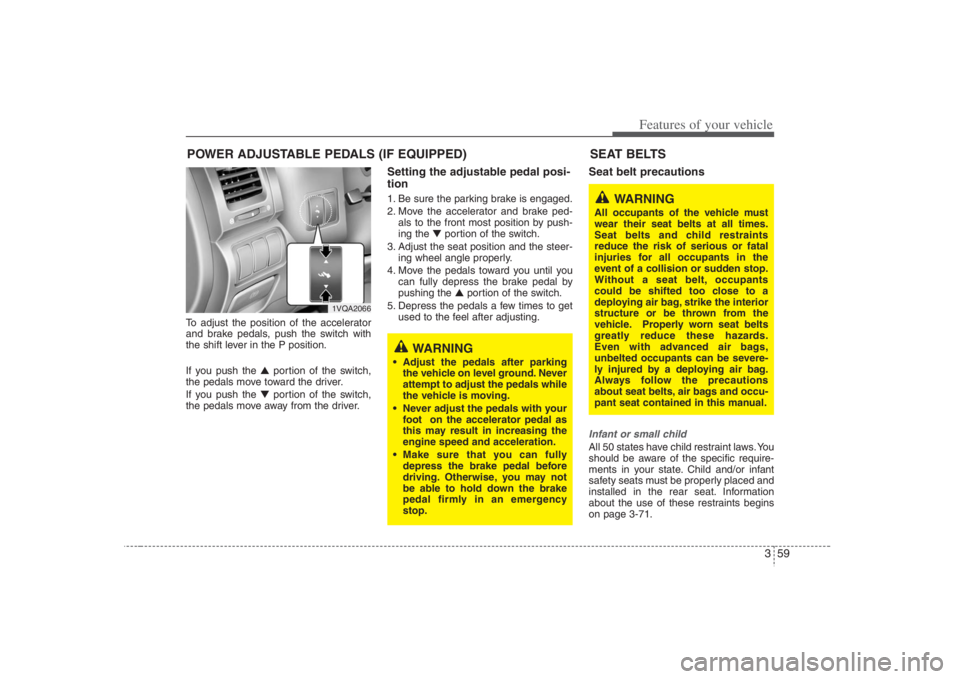
To adjust the position of the accelerator
and brake pedals, push the switch with
the shift lever in the P position.
If you push the ▲portion of the switch,
the pedals move toward the driver.
If you push the ▼portion of the switch,
the pedals move away from the driver.
Setting the adjustable pedal posi-
tion1. Be sure the parking brake is engaged.
2. Move the accelerator and brake ped-
als to the front most position by push-
ing the ▼portion of the switch.
3. Adjust the seat position and the steer-
ing wheel angle properly.
4. Move the pedals toward you until you
can fully depress the brake pedal by
pushing the ▲portion of the switch.
5. Depress the pedals a few times to get
used to the feel after adjusting.
Seat belt precautionsInfant or small childAll 50 states have child restraint laws. You
should be aware of the specific require-
ments in your state. Child and/or infant
safety seats must be properly placed and
installed in the rear seat. Information
about the use of these restraints begins
on page 3-71.
POWER ADJUSTABLE PEDALS (IF EQUIPPED)
1VQA2066
WARNING
Adjust the pedals after parking
the vehicle on level ground. Never
attempt to adjust the pedals while
the vehicle is moving.
Never adjust the pedals with your
foot on the accelerator pedal as
this may result in increasing the
engine speed and acceleration.
Make sure that you can fully
depress the brake pedal before
driving. Otherwise, you may not
be able to hold down the brake
pedal firmly in an emergency
stop.
SEAT BELTS
WARNING
All occupants of the vehicle must
wear their seat belts at all times.
Seat belts and child restraints
reduce the risk of serious or fatal
injuries for all occupants in the
event of a collision or sudden stop.
Without a seat belt, occupants
could be shifted too close to a
deploying air bag, strike the interior
structure or be thrown from the
vehicle. Properly worn seat belts
greatly reduce these hazards.
Even with advanced air bags,
unbelted occupants can be severe-
ly injured by a deploying air bag.
Always follow the precautions
about seat belts, air bags and occu-
pant seat contained in this manual.
Page 99 of 393
383
Features of your vehicle
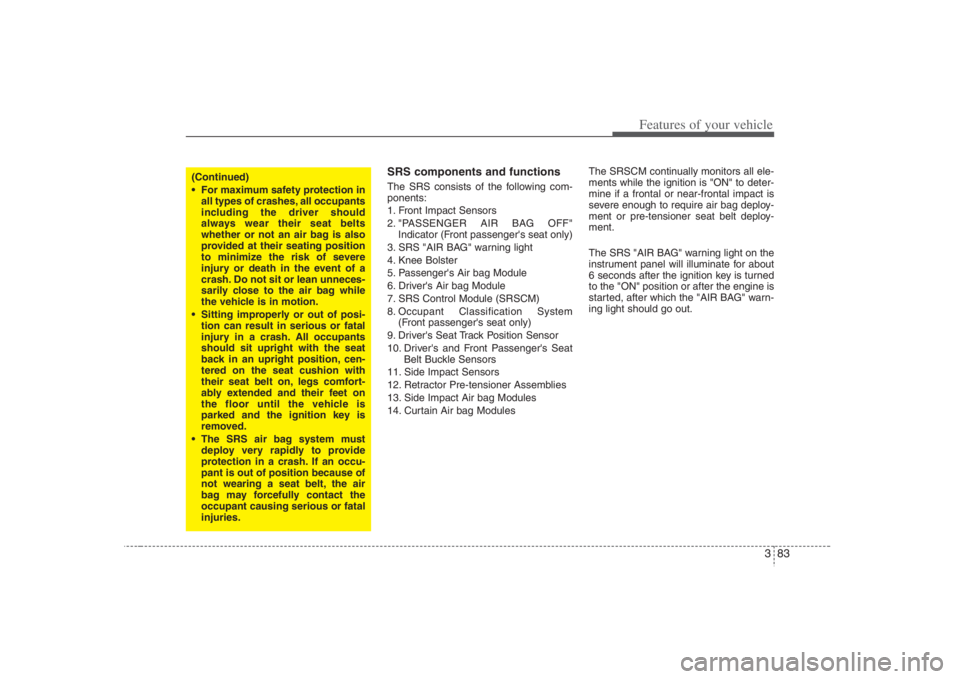
SRS components and functionsThe SRS consists of the following com-
ponents:
1. Front Impact Sensors
2. "PASSENGER AIR BAG OFF"
Indicator (Front passenger's seat only)
3. SRS "AIR BAG" warning light
4. Knee Bolster
5. Passenger's Air bag Module
6. Driver's Air bag Module
7. SRS Control Module (SRSCM)
8. Occupant Classification System
(Front passenger's seat only)
9. Driver's Seat Track Position Sensor
10. Driver's and Front Passenger's Seat
Belt Buckle Sensors
11. Side Impact Sensors
12. Retractor Pre-tensioner Assemblies
13. Side Impact Air bag Modules
14. Curtain Air bag ModulesThe SRSCM continually monitors all ele-
ments while the ignition is "ON" to deter-
mine if a frontal or near-frontal impact is
severe enough to require air bag deploy-
ment or pre-tensioner seat belt deploy-
ment.
The SRS "AIR BAG" warning light on the
instrument panel will illuminate for about
6 seconds after the ignition key is turned
to the "ON" position or after the engine is
started, after which the "AIR BAG" warn-
ing light should go out.
(Continued)
For maximum safety protection in
all types of crashes, all occupants
including the driver should
always wear their seat belts
whether or not an air bag is also
provided at their seating position
to minimize the risk of severe
injury or death in the event of a
crash. Do not sit or lean unneces-
sarily close to the air bag while
the vehicle is in motion.
Sitting improperly or out of posi-
tion can result in serious or fatal
injury in a crash. All occupants
should sit upright with the seat
back in an upright position, cen-
tered on the seat cushion with
their seat belt on, legs comfort-
ably extended and their feet on
the floor until the vehicle is
parked and the ignition key is
removed.
The SRS air bag system must
deploy very rapidly to provide
protection in a crash. If an occu-
pant is out of position because of
not wearing a seat belt, the air
bag may forcefully contact the
occupant causing serious or fatal
injuries.
Page 102 of 393
Features of your vehicle86 3
Occupant classification systemYour vehicle is equipped with an occu-
pant classification system in the front
passenger's seat.
The occupant classification system is
designed to detect the presence of a
properly-seated front passenger and
determine if the passenger's front air bag
should be enabled (may inflate) or not.
The driver's front air bag is not affected
or controlled by the occupant classifica-
tion system.If the front passenger seat is occupied by
a person that the system determines to
be of adult size, and he/she sits properly
(sitting upright with the seatback in an
upright position, centered on the seat
cushion with their seat belt on, legs com-
fortably extended and their feet on the
floor), the "PASSENGER AIR BAG OFF"
indicator will be turned off and the front
passenger's air bag will be able to inflate,
if necessary, in frontal crashes.
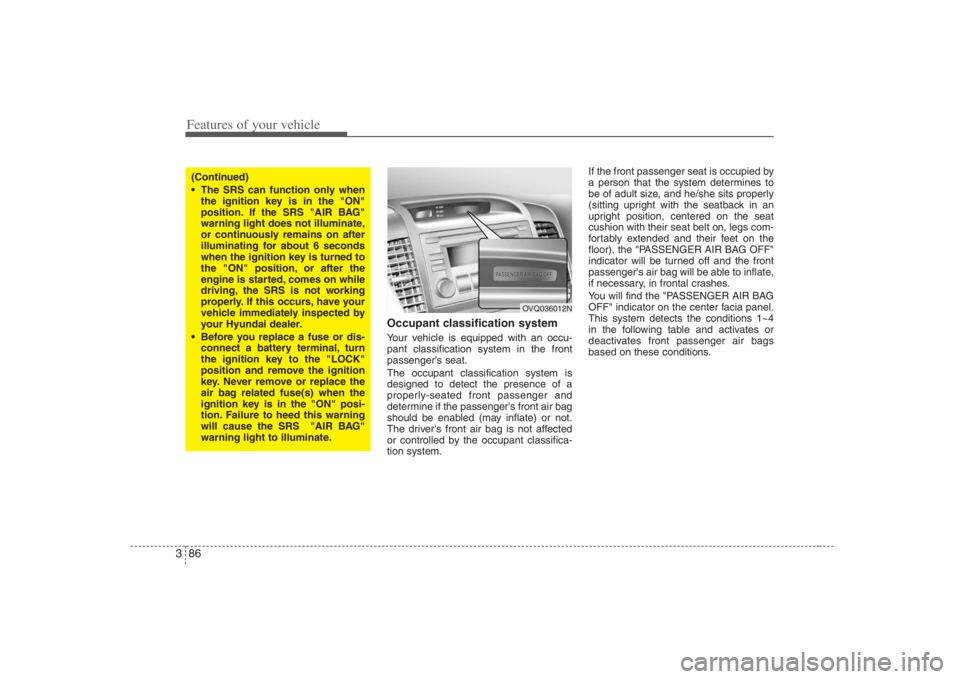
You will find the "PASSENGER AIR BAG
OFF" indicator on the center facia panel.
This system detects the conditions 1~4
in the following table and activates or
deactivates front passenger air bags
based on these conditions.
(Continued)
The SRS can function only when
the ignition key is in the "ON"
position. If the SRS "AIR BAG"
warning light does not illuminate,
or continuously remains on after
illuminating for about 6 seconds
when the ignition key is turned to
the "ON" position, or after the
engine is started, comes on while
driving, the SRS is not working
properly. If this occurs, have your
vehicle immediately inspected by
your Hyundai dealer.
Before you replace a fuse or dis-
connect a battery terminal, turn
the ignition key to the "LOCK"
position and remove the ignition
key. Never remove or replace the
air bag related fuse(s) when the
ignition key is in the "ON" posi-
tion. Failure to heed this warning
will cause the SRS "AIR BAG"
warning light to illuminate.
OVQ036012N
Page 105 of 393
389
Features of your vehicle
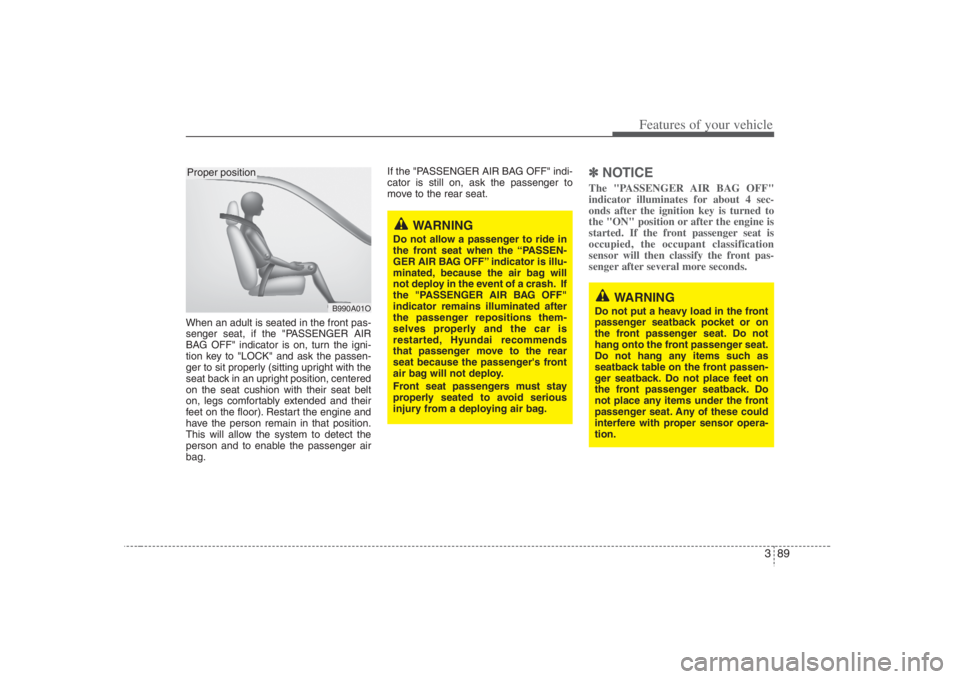
When an adult is seated in the front pas-
senger seat, if the "PASSENGER AIR
BAG OFF" indicator is on, turn the igni-
tion key to "LOCK" and ask the passen-
ger to sit properly (sitting upright with the
seat back in an upright position, centered
on the seat cushion with their seat belt
on, legs comfortably extended and their
feet on the floor). Restart the engine and
have the person remain in that position.
This will allow the system to detect the
person and to enable the passenger air
bag.If the "PASSENGER AIR BAG OFF" indi-
cator is still on, ask the passenger to
move to the rear seat.
✽ ✽
NOTICEThe "PASSENGER AIR BAG OFF"
indicator illuminates for about 4 sec-
onds after the ignition key is turned to
the "ON" position or after the engine is
started. If the front passenger seat is
occupied, the occupant classification
sensor will then classify the front pas-
senger after several more seconds.
B990A01O
Proper position
WARNING
Do not allow a passenger to ride in
the front seat when the “PASSEN-
GER AIR BAG OFF” indicator is illu-
minated, because the air bag will
not deploy in the event of a crash. If
the "PASSENGER AIR BAG OFF"
indicator remains illuminated after
the passenger repositions them-
selves properly and the car is
restarted, Hyundai recommends
that passenger move to the rear
seat because the passenger's front
air bag will not deploy.
Front seat passengers must stay
properly seated to avoid serious
injury from a deploying air bag.
WARNING
Do not put a heavy load in the front
passenger seatback pocket or on
the front passenger seat. Do not
hang onto the front passenger seat.
Do not hang any items such as
seatback table on the front passen-
ger seatback. Do not place feet on
the front passenger seatback. Do
not place any items under the front
passenger seat. Any of these could
interfere with proper sensor opera-
tion.
Page 110 of 393
Features of your vehicle94 3SRS CareThe SRS is virtually maintenance-free
and so there are no parts you can safely
service by yourself. If the SRS "AIR BAG"
warning light does not illuminate, or con-
tinuously remains on, have your vehicle
immediately inspected by your Hyundai
dealer.
Any work on the SRS system, such as
removing, installing, repairing, or any
work on the steering wheel must be per-
formed by a qualified Hyundai technician.
Improper handling of the SRS system
may result in serious personal injury.
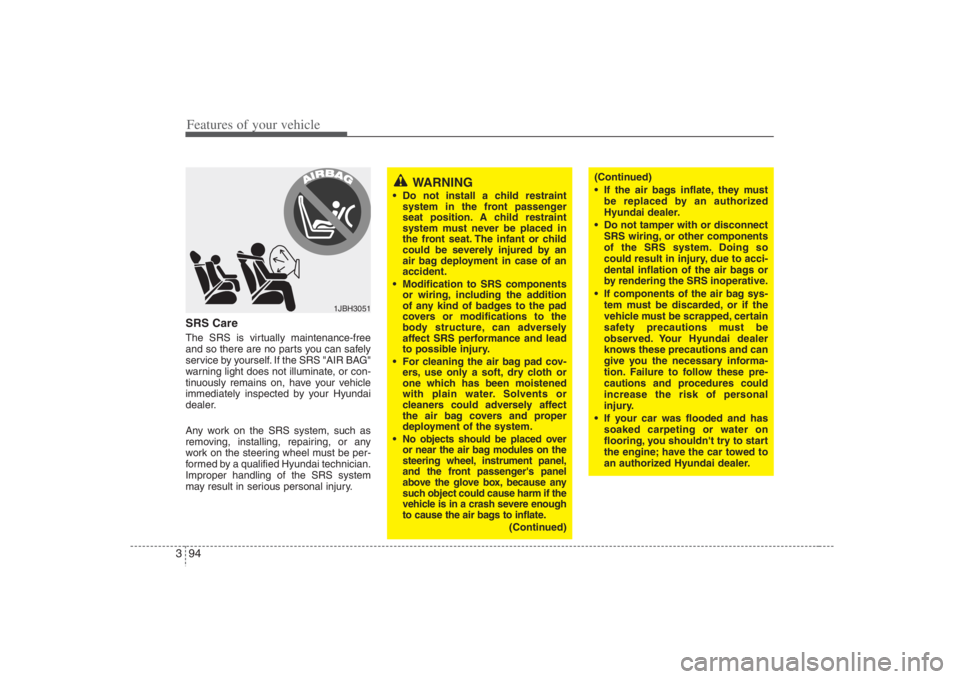
WARNING
Do not install a child restraint
system in the front passenger
seat position. A child restraint
system must never be placed in
the front seat. The infant or child
could be severely injured by an
air bag deployment in case of an
accident.
Modification to SRS components
or wiring, including the addition
of any kind of badges to the pad
covers or modifications to the
body structure, can adversely
affect SRS performance and lead
to possible injury.
For cleaning the air bag pad cov-
ers, use only a soft, dry cloth or
one which has been moistened
with plain water. Solvents or
cleaners could adversely affect
the air bag covers and proper
deployment of the system.
No objects should be placed over
or near the air bag modules on the
steering wheel, instrument panel,
and the front passenger's panel
above the glove box, because any
such object could cause harm if the
vehicle is in a crash severe enough
to cause the air bags to inflate.
(Continued)
1JBH3051
(Continued)
If the air bags inflate, they must
be replaced by an authorized
Hyundai dealer.
Do not tamper with or disconnect
SRS wiring, or other components
of the SRS system. Doing so
could result in injury, due to acci-
dental inflation of the air bags or
by rendering the SRS inoperative.
If components of the air bag sys-
tem must be discarded, or if the
vehicle must be scrapped, certain
safety precautions must be
observed. Your Hyundai dealer
knows these precautions and can
give you the necessary informa-
tion. Failure to follow these pre-
cautions and procedures could
increase the risk of personal
injury.
If your car was flooded and has
soaked carpeting or water on
flooring, you shouldn't try to start
the engine; have the car towed to
an authorized Hyundai dealer.
Page 118 of 393
Features of your vehicle102 3Power steeringPower steering uses energy from the
engine to assist you in steering the vehi-
cle. If the engine is off or if the power
steering system becomes inoperative,
the vehicle may still be steered, but it will
require increased steering effort.
Should you notice any change in the
effort required to steer during normal
vehicle operation, have the power steer-
ing checked by an Authorized Hyundai
Dealer.
✽ ✽
NOTICEIf the vehicle is parked for extended
periods outside in cold weather (below
14°F/-10°C), the power steering may
require increased effort when the engine
is first started. This is caused by
increased fluid viscosity due to the cold
weather and does not indicate a mal-
function.
When this happens, increase the engine
RPM by depressing accelerator until the
RPM reaches 1,500 rpm then release or
let the engine idle for two or three min-
utes to warm up the fluid.
STEERING WHEEL
CAUTION
Never hold the steering wheel
against a stop (extreme right or
left turn) for more than 5 seconds
with the engine running. Holding
the steering wheel for more than
5 seconds in either position may
cause damage to the power steer-
ing pump.
If the power steering drive belt
breaks or if the power steering
pump malfunctions, the steering
effort will greatly increase.
Page 121 of 393

3 105
Features of your vehicle
Outside rearview mirror heater
(if equipped) The outside rearview mirror heater is
actuated in connection with the rear win-
dow defroster. To heat the outside
rearview mirror glass, push the button for
the rear window defroster.
The rearview mirror heater (and rear win-
dow defroster) will not operate unless the
engine is running.
The outside rearview mirror glass will be
heated for defrosting or defogging and
will give you improved rear vision in
inclement weather conditions. Push the
button again to turn the heater off. The
outside rearview mirror heater automati-
cally turns off after 20 minutes.
Electric remote control The electric remote control mirror switch
allows you to adjust the position of the
left and right outside rearview mirrors. To
adjust the position of either mirror, move
the selection switch lever (1) to R or L to
select the right side mirror or the left side
mirror, then press a corresponding point
( ) on the mirror adjustment control to
position the selected mirror up, down, left
or right.
After adjustment, put the selection switch
lever into neutral position to prevent the
inadvertent adjustment.
CAUTION
The mirrors stop moving when
they reach the maximum adjust-
ing angles, but the motor contin-
ues to operate while the switch is
depressed. Do not depress the
switch longer than necessary, the
motor may be damaged.
Do not attempt to adjust the out-
side rearview mirror by hand.
Doing so may damage the mirror.
1VQA2108
Page 123 of 393
3 107
Features of your vehicle
Day/night rearview mirror Adjust the rearview mirror to center on
the view through the rear window. Make
this adjustment before you start driving.
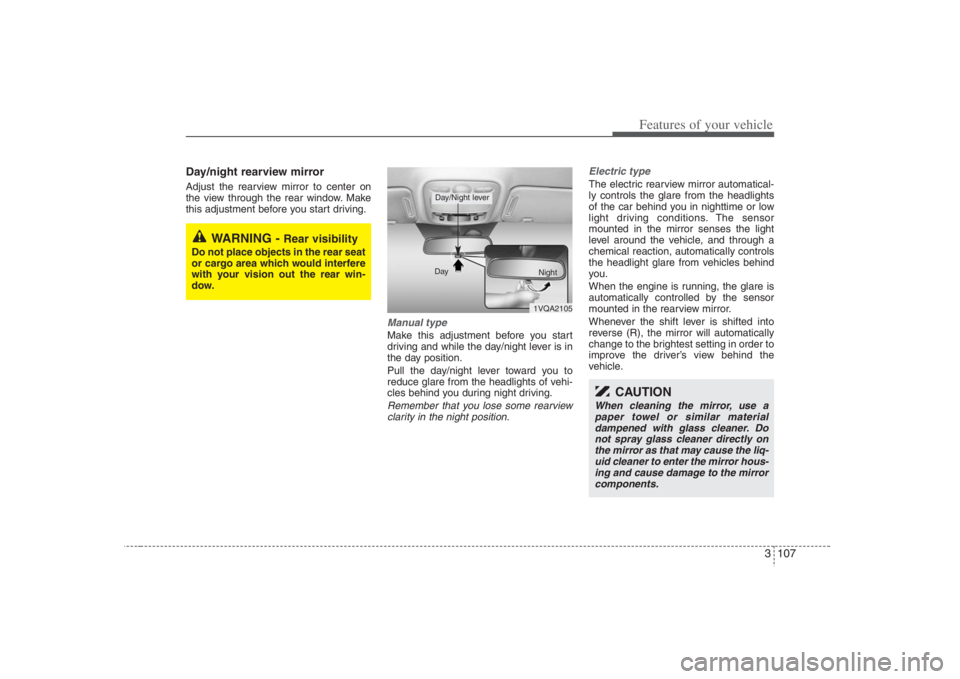
Manual type Make this adjustment before you start
driving and while the day/night lever is in
the day position.
Pull the day/night lever toward you to
reduce glare from the headlights of vehi-
cles behind you during night driving.Remember that you lose some rearview
clarity in the night position.Electric type
The electric rearview mirror automatical-
ly controls the glare from the headlights
of the car behind you in nighttime or low
light driving conditions. The sensor
mounted in the mirror senses the light
level around the vehicle, and through a
chemical reaction, automatically controls
the headlight glare from vehicles behind
you.
When the engine is running, the glare is
automatically controlled by the sensor
mounted in the rearview mirror.
Whenever the shift lever is shifted into
reverse (R), the mirror will automatically
change to the brightest setting in order to
improve the driver’s view behind the
vehicle.
WARNING -
Rear visibility
Do not place objects in the rear seat
or cargo area which would interfere
with your vision out the rear win-
dow.
1VQA2105 Day
Night
Day/Night lever
CAUTION
When cleaning the mirror, use a
paper towel or similar material
dampened with glass cleaner. Do
not spray glass cleaner directly on
the mirror as that may cause the liq-
uid cleaner to enter the mirror hous-
ing and cause damage to the mirror
components.