2008 Hyundai Azera Parking
[x] Cancel search: ParkingPage 13 of 345
F11
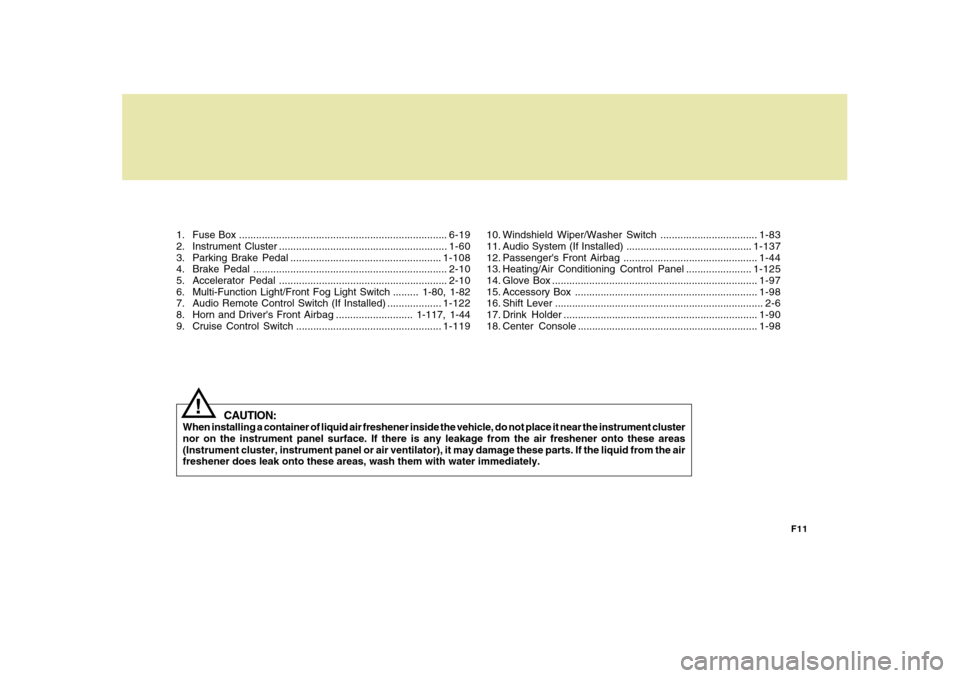
1. Fuse Box .........................................................................6-19
2. Instrument Cluster ...........................................................1-60
3. Parking Brake Pedal .....................................................1-108
4. Brake Pedal ....................................................................2-10
5. Accelerator Pedal ...........................................................2-10
6. Multi-Function Light/Front Fog Light Switch ......... 1-80, 1-82
7. Audio Remote Control Switch (If Installed) ...................1-122
8. Horn and Driver's Front Airbag ........................... 1-117, 1-44
9. Cruise Control Switch ...................................................1-119
CAUTION:
When installing a container of liquid air freshener inside the vehicle, do not place it near the instrument cluster
nor on the instrument panel surface. If there is any leakage from the air freshener onto these areas
(Instrument cluster, instrument panel or air ventilator), it may damage these parts. If the liquid from the air
freshener does leak onto these areas, wash them with water immediately.
!
10. Windshield Wiper/Washer Switch ..................................1-83
11. Audio System (If Installed) ............................................1-137
12. Passenger's Front Airbag ...............................................1-44
13. Heating/Air Conditioning Control Panel .......................1-125
14. Glove Box ........................................................................1-97
15. Accessory Box ................................................................1-98
16. Shift Lever ......................................................................... 2-6
17. Drink Holder ....................................................................1-90
18. Center Console ...............................................................1-98
Page 14 of 345
YOUR VEHICLE AT A GLANCE
F12
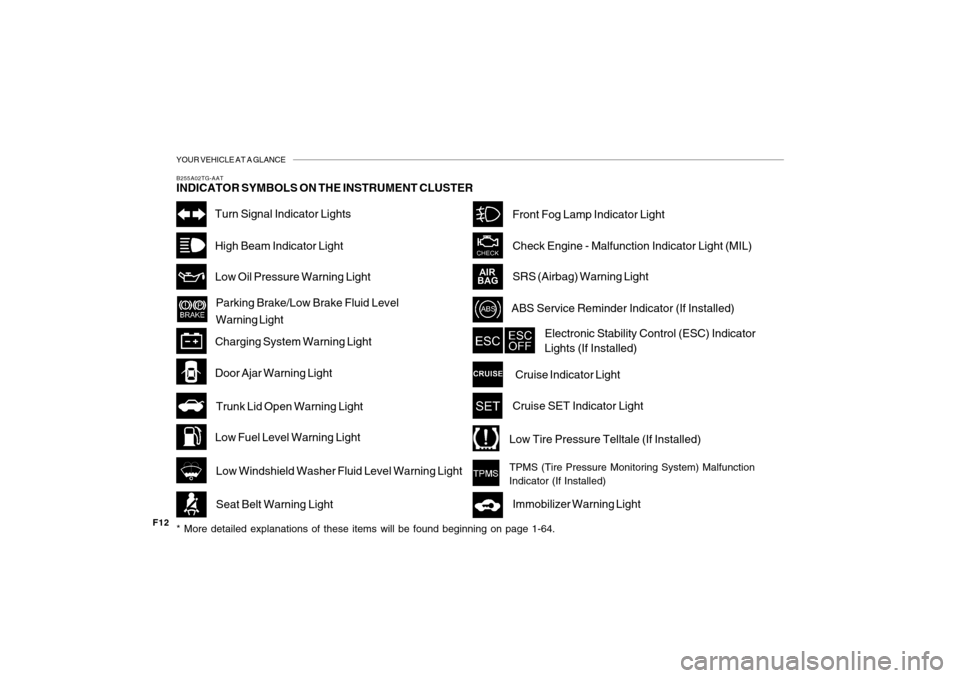
B255A02TG-AATINDICATOR SYMBOLS ON THE INSTRUMENT CLUSTER* More detailed explanations of these items will be found beginning on page 1-64.
Turn Signal Indicator LightsHigh Beam Indicator LightLow Oil Pressure Warning LightParking Brake/Low Brake Fluid Level
Warning Light
Charging System Warning LightDoor Ajar Warning LightTrunk Lid Open Warning LightLow Fuel Level Warning Light
Low Windshield Washer Fluid Level Warning LightSeat Belt Warning Light
Front Fog Lamp Indicator LightCheck Engine - Malfunction Indicator Light (MIL)SRS (Airbag) Warning LightABS Service Reminder Indicator (If Installed)
Electronic Stability Control (ESC) Indicator
Lights (If Installed)Cruise Indicator LightCruise SET Indicator LightLow Tire Pressure Telltale (If Installed)TPMS (Tire Pressure Monitoring System) Malfunction
Indicator (If Installed)Immobilizer Warning Light
Page 18 of 345
1FEATURES OF YOUR HYUNDAI4
!
One side of the key has the Hyundai
logo and the other side has an "S"
symbol.
Leaving your sub key with a parking
attendant will ensure that your vehicle's
trunk, trunk lid release, glove box com-
partment and rear trunk access may not
be unlocked in your absence.
CAUTION:
o If you make your own duplicate key,
you will not be able to cancel the sys-
tem or start the engine.
o When starting the engine, do not use
the key with other immobilizer keys in
close proximity; otherwise, the en-
gine may not start or may stop soon
after it starts.
Keep each key separated from one
another.
o Do not install the metal accessories
near the key or ignition switch.
The engine may not start for the metal
accessories may interrupt the tran-
sponder signal from normally trans-
mitting.
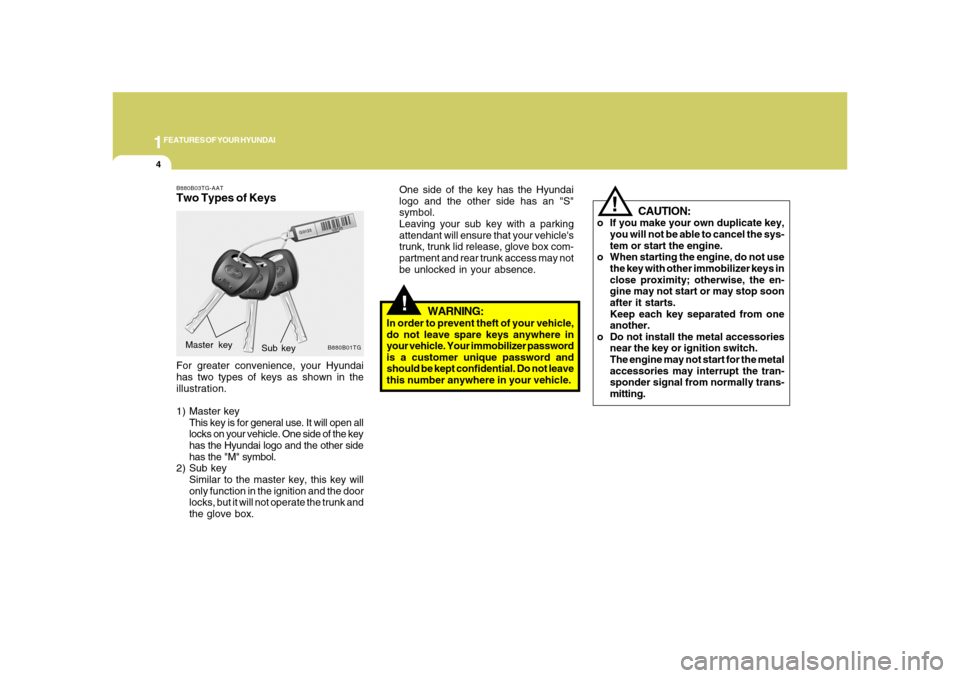
B880B03TG-AATTwo Types of KeysFor greater convenience, your Hyundai
has two types of keys as shown in the
illustration.
1) Master key
This key is for general use. It will open all
locks on your vehicle. One side of the key
has the Hyundai logo and the other side
has the "M" symbol.
2) Sub key
Similar to the master key, this key will
only function in the ignition and the door
locks, but it will not operate the trunk and
the glove box.
B880B01TG
Sub key Master key
!
WARNING:
In order to prevent theft of your vehicle,
do not leave spare keys anywhere in
your vehicle. Your immobilizer password
is a customer unique password and
should be kept confidential. Do not leave
this number anywhere in your vehicle.
Page 19 of 345
1
FEATURES OF YOUR HYUNDAI
5
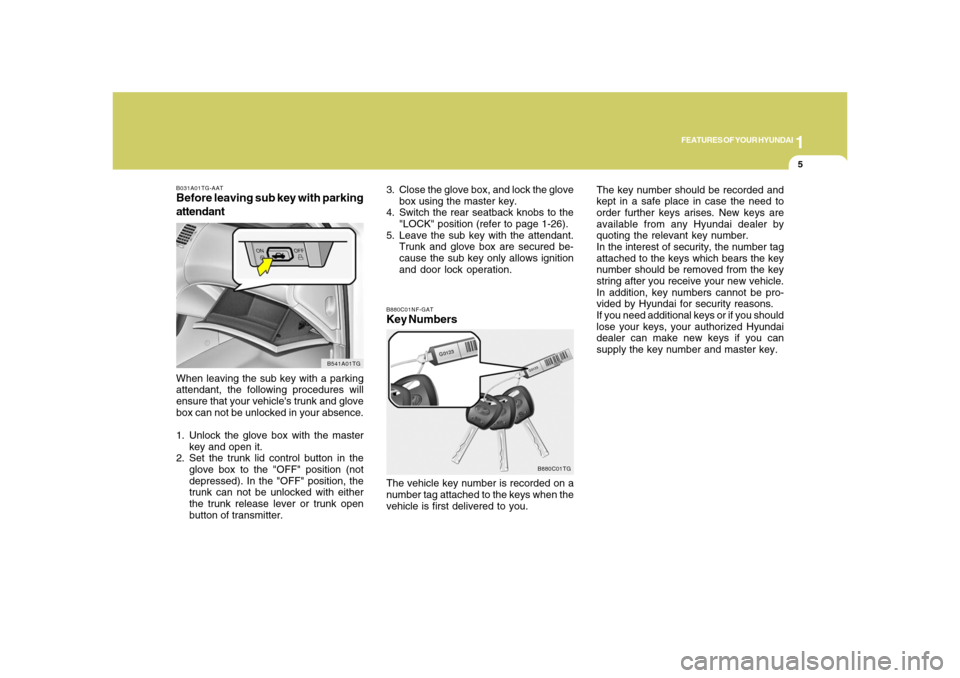
B031A01TG-AATBefore leaving sub key with parking
attendantWhen leaving the sub key with a parking
attendant, the following procedures will
ensure that your vehicle's trunk and glove
box can not be unlocked in your absence.
1. Unlock the glove box with the master
key and open it.
2. Set the trunk lid control button in the
glove box to the "OFF" position (not
depressed). In the "OFF" position, the
trunk can not be unlocked with either
the trunk release lever or trunk open
button of transmitter.
B541A01TG
3. Close the glove box, and lock the glove
box using the master key.
4. Switch the rear seatback knobs to the
"LOCK" position (refer to page 1-26).
5. Leave the sub key with the attendant.
Trunk and glove box are secured be-
cause the sub key only allows ignition
and door lock operation.B880C01NF-GATKey NumbersThe vehicle key number is recorded on a
number tag attached to the keys when the
vehicle is first delivered to you.
B880C01TG
The key number should be recorded and
kept in a safe place in case the need to
order further keys arises. New keys are
available from any Hyundai dealer by
quoting the relevant key number.
In the interest of security, the number tag
attached to the keys which bears the key
number should be removed from the key
string after you receive your new vehicle.
In addition, key numbers cannot be pro-
vided by Hyundai for security reasons.
If you need additional keys or if you should
lose your keys, your authorized Hyundai
dealer can make new keys if you can
supply the key number and master key.
Page 37 of 345
1
FEATURES OF YOUR HYUNDAI
23
!
CAUTION:
In the following conditions, the I.M.S will
not memorize a position.
1. When the "1" or "2" button is not
pushed within five seconds.
2. When the seat is being adjusted.
3. When the key is not in the "ON" posi-
tion.
4. When the shift lever is positioned in
other than "P" position.To memorize a position1. Place the shift lever into "P" while the
ignition switch is ON.
2. Adjust the driver's seat, outside rear-
view mirrors and steering wheel (with
electric tilt and telescopic column) to the
desired position.
3. Push the "SET" button on the I.M.S until
the signal beeps.
4. Within five seconds, push button "1" or
"2" until the signal beeps twice. The
beep sounds mean that the positions
are memorized in the I.M.S.
!
To activate the memorized position1. Place the shift lever into "P" while the
ignition switch is ON.
2. When you push button "1" or "2", the
driving position will be automatically
adjusted to the position recorded for
that button.
CAUTION:
In the following conditions, the I.M.S will
not activate.
1. When the key is in the "OFF" positon.
2. When the vehicle is running above
1.86 MPH (3 km/h).
3. When the seat is being adjusted.
4. When the shift lever is positioned in
other than "P" position.
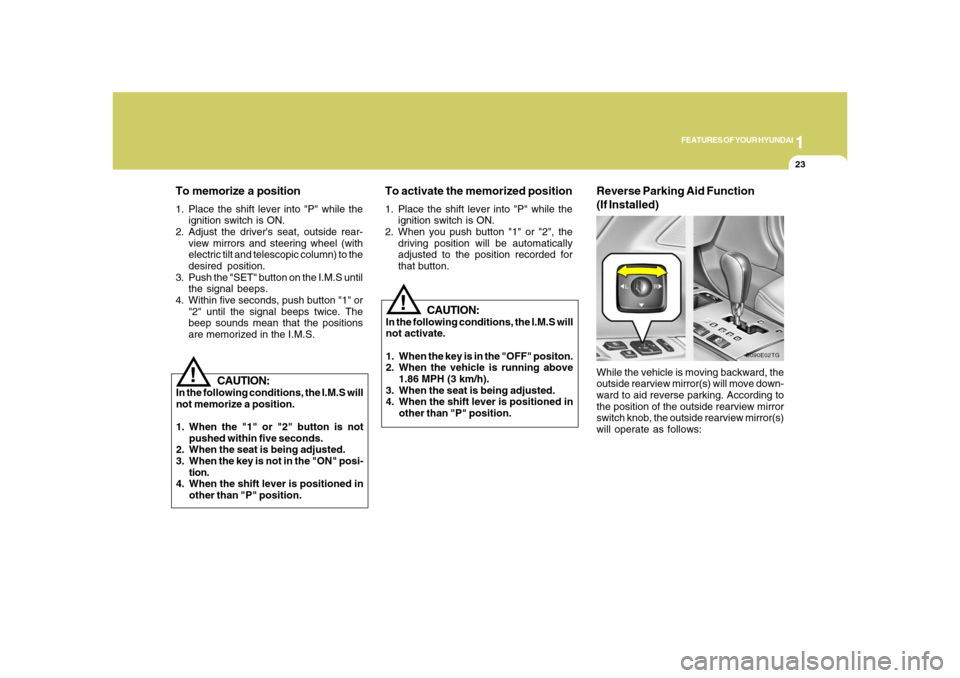
Reverse Parking Aid Function
(If Installed)While the vehicle is moving backward, the
outside rearview mirror(s) will move down-
ward to aid reverse parking. According to
the position of the outside rearview mirror
switch knob, the outside rearview mirror(s)
will operate as follows:
B090E02TG
Page 75 of 345

1
FEATURES OF YOUR HYUNDAI
61
1. Check Engine - Malfunction Indicator Light (MIL)
2. Low Oil Pressure Warning Light
3. Charging System Warning Light
4. SRS (Airbag) Warning Light
5. Tachometer
6. Turn Signal Indicator Lights
7. High Beam Indicator Light
8. Electronic Stability Control (ESC) Indicator Lights
(If Installed)
9. Automatic Transaxle Position Indicator Light
10. CRUISE Indicator Light
11. Front Fog Lamp Indicator Light
12. Cruise SET Indicator Light
13. Speedometer14. Low Windshield Washer Fluid Level Warning Light
15. Trunk Lid Open Warning Light
16. Low Tire Pressure Telltale (If Installed)
17. Immobilizer Warning Light
18. TPMS (Tire Pressure Monitoring System) Malfunction Indicator
(If Installed)
19. Coolant Temperature Gauge
20. ABS Service Reminder Indicator (SRI) (If Installed)
21. Door Ajar Warning Light
22. Seat Belt Warning Light (Driver's side)
23. Odometer/Trip Computer
24. Parking Brake/Low Brake Fluid Level Warning Light
25. Low Fuel Warning Light
26. Fuel Gauge
Page 77 of 345

1
FEATURES OF YOUR HYUNDAI
63
1. Check Engine - Malfunction Indicator Light (MIL)
2. Charging System Warning Light
3. Low Oil Pressure Warning Light
4. Parking Brake/Low Brake Fluid Level Warning Light
5. Tachometer
6. Door Ajar Warning Light
7. Turn Signal Indicator Lights
8. Odometer/Trip Computer/Warning Text
9. Speedometer
10. Trunk Lid Open Warning Light
11. CRUISE Indicator Light
12. Cruise SET Indicator Light
13. Immobilizer Warning Light
14. Coolant Temperature Gauge15. Low Windshield Washer Fluid Level Warning Light
16. SRS (Airbag) Warning Light
17. ABS Service Reminder Indicator (SRI) (If Installed)
18. Electronic Stability Control (ESC) Indicator Lights
(If Installed)
19. Seat Belt Warning Light (Driver's side)
20. High Beam Indicator Light
21. Automatic Transaxle Position Indicator Light
22. Front Fog Lamp Indicator Light
23. Low Tire Pressure Telltale (If Installed)
24. TPMS (Tire Pressure Monitoring System) Malfunction Indicator
(If Installed)
25. Low Fuel Warning Light
26. Fuel Gauge
Page 79 of 345
1
FEATURES OF YOUR HYUNDAI
65
!
B260H02A-AAT
Parking Brake/Low Brake
Fluid Level Warning Light
Your Hyundai is equipped with dual-di-
agonal braking systems. This means you
still have braking on two wheels even if
one of the dual systems should fail. With
only one of the dual systems working,
more than normal pedal travel and greater
pedal pressure are required to stop the
car. Also, the car will not stop in as short a
distance with only half of the brake system
working. If the brakes fail while you are
driving, shift to a lower gear for additional
engine braking and stop the car as soon as
it is safe to do so.
WARNING:
If you suspect brake trouble, have your
brakes checked by a Hyundai dealer as
soon as possible. Driving your car with
a problem in either the brake electrical
system or brake hydraulic system is
dangerous, and could result in a serious
injury or death.
Warning Light OperationThe parking brake/brake fluid level warn-
ing light should come on when the parking
brake is applied and the ignition switch is
turned to "ON" or "START". After the engine
is started, the light should go out when the
parking brake is released.
If the parking brake is not applied, the
warning light should come on when the
ignition switch is turned to "ON" or "START",
then go out when the engine starts. If the
light comes on at any other time, you should
slow the vehicle and bring it to a complete
stop in a safe location off the roadway.
The brake fluid level warning light indi-
cates that the brake fluid level in the brake
master cylinder is low and hydraulic brake
fluid conforming to DOT 3 or DOT 4 speci-
fications should be added. After adding
fluid, if no other trouble is found, the car
should be immediately and carefully driven
to a Hyundai dealer for inspection. If further
trouble is experienced, the vehicle should
not be driven at all but taken to a dealer by
a professional towing service.