2008 Hyundai Azera warning lights
[x] Cancel search: warning lightsPage 101 of 345
1
FEATURES OF YOUR HYUNDAI
87
FRONT/REAR WINDOW
DEFROSTER SWITCH
B380A02TG-A B380A02HP-AAT
(If Installed)The front/rear window defroster is turned
on by pushing in on the switch. At the same
time, the front/rear window defroster indi-
cator light on the switch is turned on. To
turn the defroster off, push in on the switch
a second time. The front/rear window de-
froster automatically turns itself off after
about 20 minutes. To restart the defroster
cycle, push in on the switch again after it
has turned itself off.
CAUTION:
Do not clean the inner side of the front/
rear window glass with an abrasive type
of glass cleaner or use a scraper to
remove the foreign deposits from the
inner surface of the glass as this may
cause damage to the defroster elements.
!
NOTE:The engine must be running for the front/
rear window defroster to operate.
HAZARD WARNING SYS-
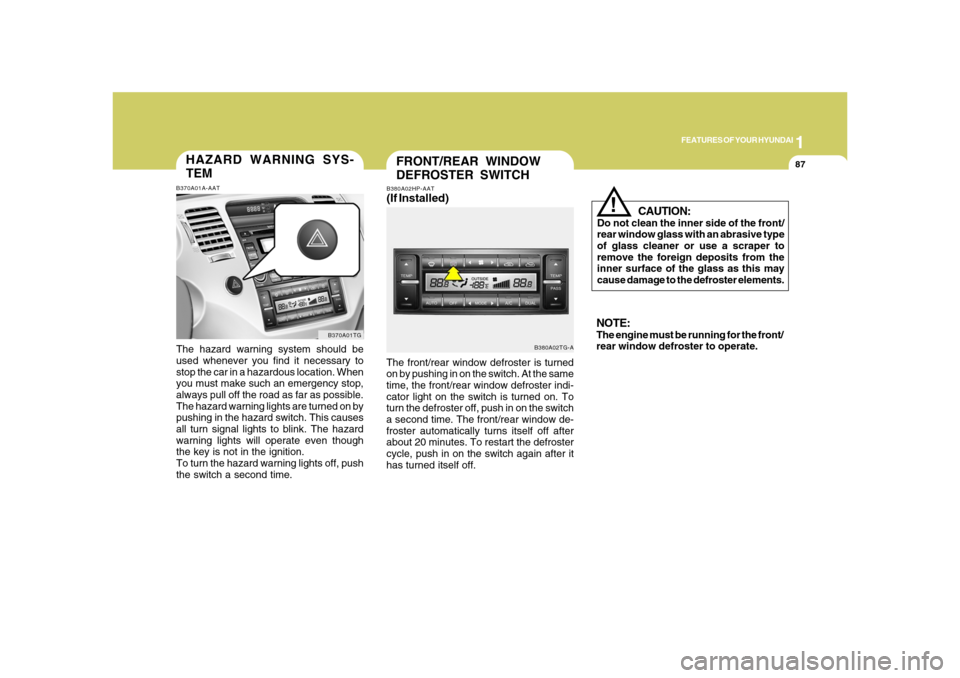
TEMB370A01A-AATThe hazard warning system should be
used whenever you find it necessary to
stop the car in a hazardous location. When
you must make such an emergency stop,
always pull off the road as far as possible.
The hazard warning lights are turned on by
pushing in the hazard switch. This causes
all turn signal lights to blink. The hazard
warning lights will operate even though
the key is not in the ignition.
To turn the hazard warning lights off, push
the switch a second time.
B370A01TG
Page 126 of 345
1FEATURES OF YOUR HYUNDAI
112
HIGH-MOUNTED REAR
STOP LIGHTB550A02Y-AATIn addition to the lower-mounted rear stop
lights on either side of the car, the high
mounted rear stop light in the center of the
rear window also lights when the brakes
are applied.
B550A01TG-A
!
WARNING:
o Gasoline vapors are dangerous. Be-
fore refueling, always stop the engine
and never smoke or allow sparks and
open flames near the filler area.
o Never operate your vehicle without a
filler cap properly installed, flammable
vapors and gasoline could leak out in
dangerous situations such as a colli-
sion or rollover. If the filler cap must
be replaced, only use genuine Hyundai
replacement parts.
HTG2023
REMOTE FUEL-FILLER LID
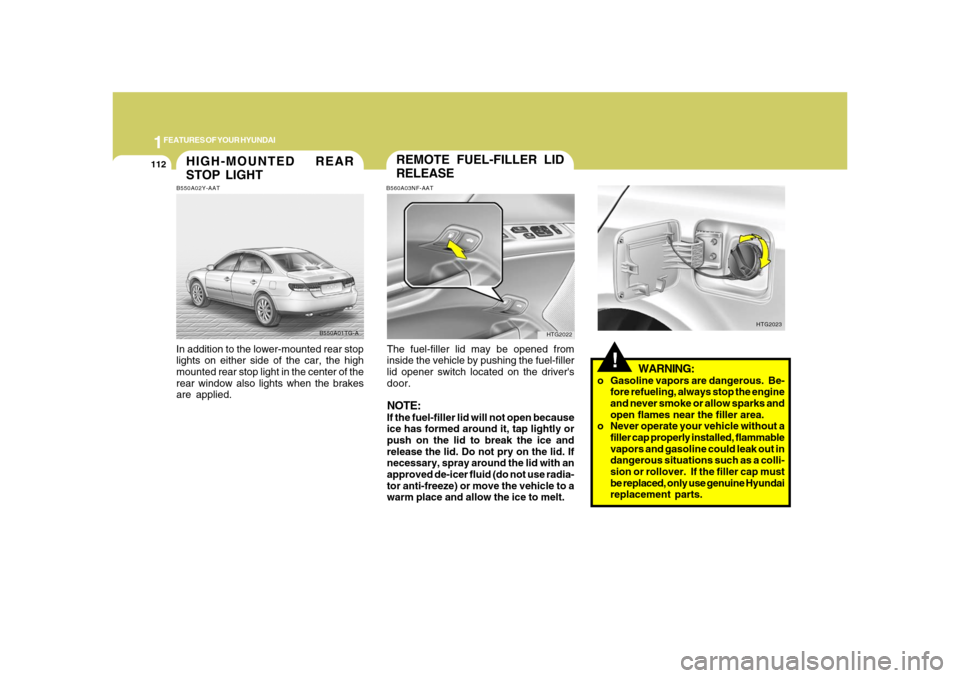
RELEASEB560A03NF-AATThe fuel-filler lid may be opened from
inside the vehicle by pushing the fuel-filler
lid opener switch located on the driver's
door.NOTE:If the fuel-filler lid will not open because
ice has formed around it, tap lightly or
push on the lid to break the ice and
release the lid. Do not pry on the lid. If
necessary, spray around the lid with an
approved de-icer fluid (do not use radia-
tor anti-freeze) or move the vehicle to a
warm place and allow the ice to melt.
HTG2022
Page 216 of 345
2
DRIVING YOUR HYUNDAI
3
!
!
PROPOSITION 65 WARNING:
Engine exhaust and a wide variety of
automobile components and parts, in-
cluding components found in the interior
furnishings in a vehicle, contain or emit
chemicals known to the State of Califor-
nia to cause cancer and birth defects
and reproductive harm. In addition, cer-
tain fluids contained in vehicles and cer-
tain products of component wear con-
tain or emit chemicals known to the State
of California to cause cancer and birth
defects or other reproductive harm.
BEFORE STARTING
THE ENGINEC020A01TG-AATBefore you start the engine, you should
always:
1. Look around the vehicle to be sure
there are no flat tires, puddles of oil,
water or other indications of possible
trouble.
2. After entering the car, check to be sure
the parking brake is engaged.
3. Check that all windows and lights are
clean.
4. Check that the interior and exterior
mirrors are clean and in position.
5. Check your seat, seatback and head-
rest to be sure they are in their proper
positions.
6. Lock all the doors.
7. Fasten your seat belt and be sure that
all other occupants have fastened
theirs.
8. Turn off all lights and accessories that
are not needed.
9. When you turn the ignition switch to
"ON", check that all appropriate warn-
ing lights are operating and that you
have sufficient fuel.
10. Check the operation of warning lights
and all bulbs when key is in the "ON"
position.
WARNING:
o Always wear appropriate shoes when
operating your vehicle. Unsuitable
shoes (high heels, ski boots, etc.) may
interfere with your ability to use the
brake and accelerator pedal.
o All passengers must be properly
belted whenever the vehicle is mov-
ing. Refer to pages: 1-27 through 1-
34 for more information on their proper
use.
o Always check the surrounding areas
near your vehicle for people, espe-
cially children, before putting a car
into 'drive'.
Page 218 of 345
2
DRIVING YOUR HYUNDAI
5
!
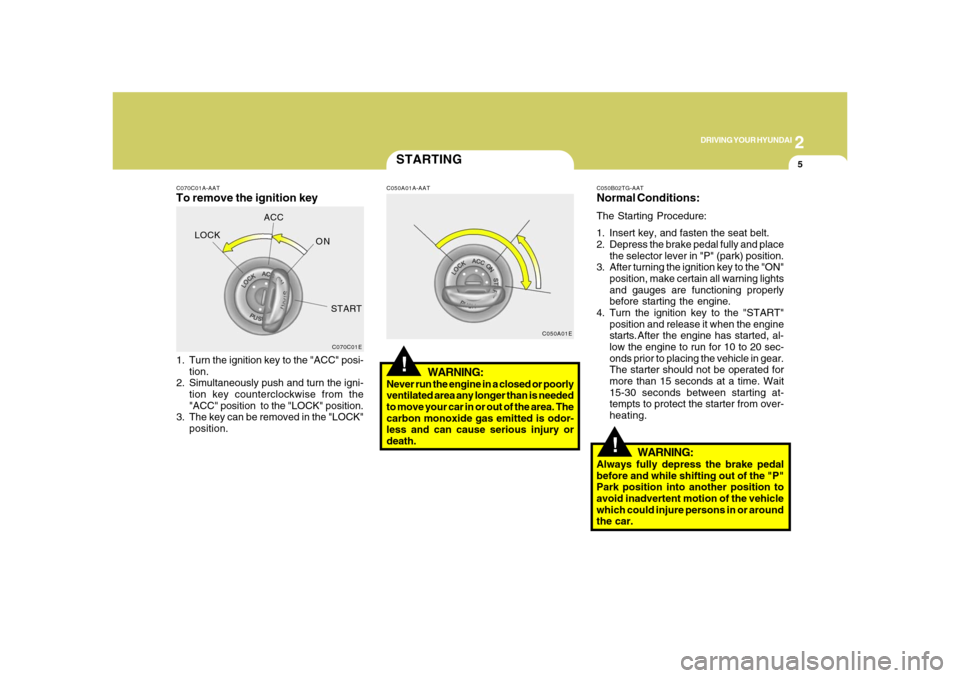
C070C01A-AATTo remove the ignition key1. Turn the ignition key to the "ACC" posi-
tion.
2. Simultaneously push and turn the igni-
tion key counterclockwise from the
"ACC" position to the "LOCK" position.
3. The key can be removed in the "LOCK"
position.
C070C01E
LOCKACC
ON
START
STARTING!
C050A01A-AAT
WARNING:
Never run the engine in a closed or poorly
ventilated area any longer than is needed
to move your car in or out of the area. The
carbon monoxide gas emitted is odor-
less and can cause serious injury or
death.
C050A01EC050B02TG-AAT
Normal Conditions:The Starting Procedure:
1. Insert key, and fasten the seat belt.
2. Depress the brake pedal fully and place
the selector lever in "P" (park) position.
3. After turning the ignition key to the "ON"
position, make certain all warning lights
and gauges are functioning properly
before starting the engine.
4. Turn the ignition key to the "START"
position and release it when the engine
starts.After the engine has started, al-
low the engine to run for 10 to 20 sec-
onds prior to placing the vehicle in gear.
The starter should not be operated for
more than 15 seconds at a time. Wait
15-30 seconds between starting at-
tempts to protect the starter from over-
heating.
WARNING:
Always fully depress the brake pedal
before and while shifting out of the "P"
Park position into another position to
avoid inadvertent motion of the vehicle
which could injure persons in or around
the car.
Page 232 of 345
2
DRIVING YOUR HYUNDAI
19
!
!
WARNING:
USE OF LIGHTSC180A01A-AATCheck your lights regularly for correct op-
eration and always keep them clean. When
driving during the day in conditions of poor
visibility, it is helpful to drive with head-
lights on low beam. This enables you to be
seen, as well as to see.
HIGHER SPEED MOTORINGC170A02A-AATPre-Trip Inspections1. Tires:
Adjust the tire inflation pressures to speci-
fication. Low tire inflation pressures will
result in overheating and possible failure
of the tires.
Avoid using worn or damaged tires which
may result in reduced traction or tire fail-
ure.NOTE:Never exceed the maximum tire infla-
tion pressure shown on the tires.
WARNING:
o Underinflated or overinflated tires can
cause poor handling, loss of vehicle
control, and sudden tire failure lead-
ing to accidents, injuries, and even
death. Always check tires are prop-
erly inflated before driving. Refer to
pages 2-23 and 8-3 for proper tire
pressures and further information.o Driving on tires with no or insufficient
tread is dangerous. Worn-out tires
can result in loss of vehicle control,
collisions, injury, and even death.
Worn-out tires should be replaced as
soon as possible and should never be
used for driving. Always check tire
tread before driving your car. Refer to
8-12 for further information and tread
limits.
2. Fuel, engine coolant and engine oil:
High speed travel consumes more fuel
than urban motoring. Do not forget to check
both engine coolant and engine oil.
3. Drive belt:
A loose or damaged drive belt may result
in overheating of the engine.
Page 235 of 345
2
DRIVING YOUR HYUNDAI
22
!
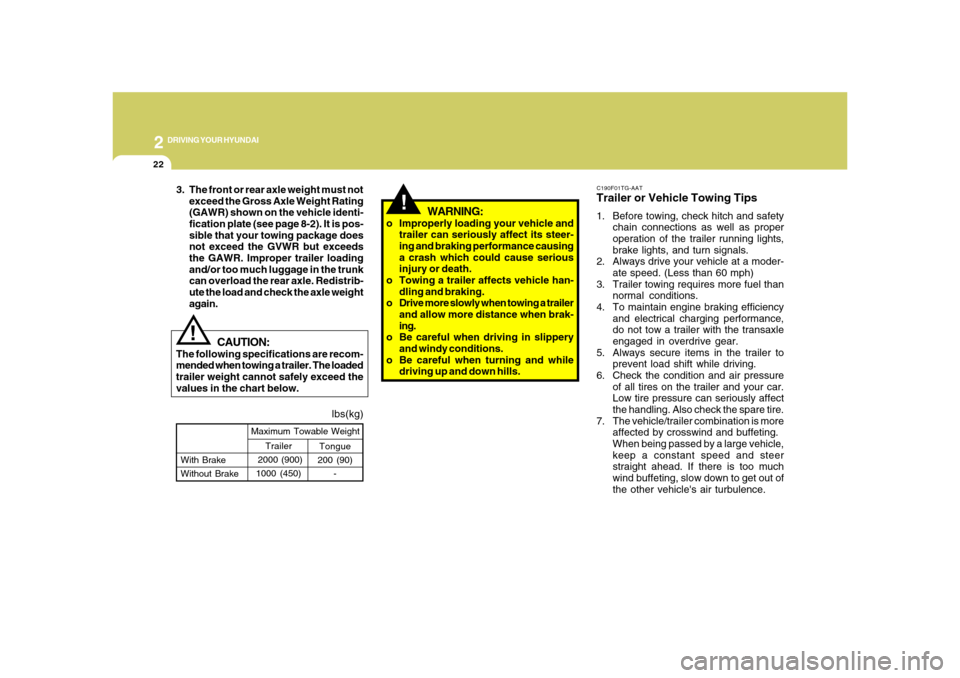
lbs(kg)
!
Tongue
200 (90)
- With Brake
Without BrakeMaximum Towable Weight
Trailer
2000 (900)
1000 (450)
CAUTION:
The following specifications are recom-
mended when towing a trailer. The loaded
trailer weight cannot safely exceed the
values in the chart below.
WARNING:
o Improperly loading your vehicle and
trailer can seriously affect its steer-
ing and braking performance causing
a crash which could cause serious
injury or death.
o Towing a trailer affects vehicle han-
dling and braking.
o Drive more slowly when towing a trailer
and allow more distance when brak-
ing.
o Be careful when driving in slippery
and windy conditions.
o Be careful when turning and while
driving up and down hills. 3. The front or rear axle weight must not
exceed the Gross Axle Weight Rating
(GAWR) shown on the vehicle identi-
fication plate (see page 8-2). It is pos-
sible that your towing package does
not exceed the GVWR but exceeds
the GAWR. Improper trailer loading
and/or too much luggage in the trunk
can overload the rear axle. Redistrib-
ute the load and check the axle weight
again.
C190F01TG-AATTrailer or Vehicle Towing Tips1. Before towing, check hitch and safety
chain connections as well as proper
operation of the trailer running lights,
brake lights, and turn signals.
2. Always drive your vehicle at a moder-
ate speed. (Less than 60 mph)
3. Trailer towing requires more fuel than
normal conditions.
4. To maintain engine braking efficiency
and electrical charging performance,
do not tow a trailer with the transaxle
engaged in overdrive gear.
5. Always secure items in the trailer to
prevent load shift while driving.
6. Check the condition and air pressure
of all tires on the trailer and your car.
Low tire pressure can seriously affect
the handling. Also check the spare tire.
7. The vehicle/trailer combination is more
affected by crosswind and buffeting.
When being passed by a large vehicle,
keep a constant speed and steer
straight ahead. If there is too much
wind buffeting, slow down to get out of
the other vehicle's air turbulence.
Page 244 of 345
3
WHAT TO DO IN AN EMERGENCY
3
JUMP STARTING!
o If you should accidentally get acid on
your skin or in your eyes, immediately
remove any contaminated clothing and
flush the area with clean water for at
least 15 minutes. Then promptly obtain
medical attention. If you must be trans-
ported to an emergency facility, con-
tinue to apply water to the affected area
with a sponge or cloth.
o The gas produced by the battery during
the jump-start operation is highly explo-
sive. Do not smoke or allow a spark or
an open flame in the vicinity.
o The battery being used to provide the
jump start must be 12-volt. If you cannot
determine that it is a 12-volt battery, do
not attempt to use it for the jump start.
o To jump start a car with a discharged
battery, follow this procedure exactly:
1. If the booster battery is installed in an-
other vehicle, be sure the two vehicles
are not touching.
2. Turn off all unnecessary lights and
acces-sories in both vehicles.
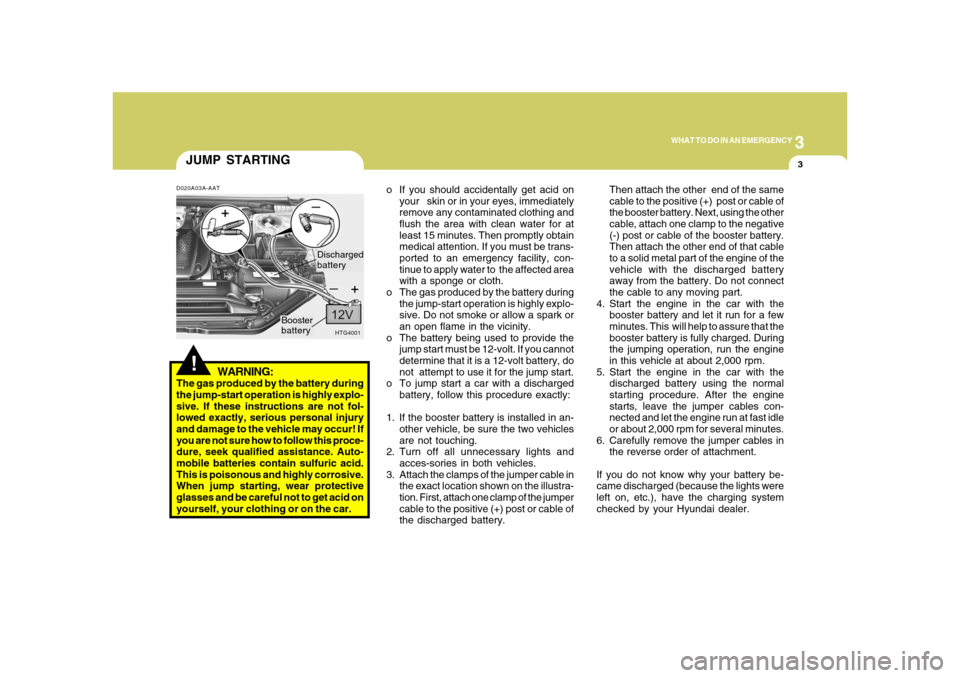
3. Attach the clamps of the jumper cable in
the exact location shown on the illustra-
tion. First, attach one clamp of the jumper
cable to the positive (+) post or cable of
the discharged battery.Then attach the other end of the same
cable to the positive (+) post or cable of
the booster battery. Next, using the other
cable, attach one clamp to the negative
(-) post or cable of the booster battery.
Then attach the other end of that cable
to a solid metal part of the engine of the
vehicle with the discharged battery
away from the battery. Do not connect
the cable to any moving part.
4. Start the engine in the car with the
booster battery and let it run for a few
minutes. This will help to assure that the
booster battery is fully charged. During
the jumping operation, run the engine
in this vehicle at about 2,000 rpm.
5. Start the engine in the car with the
discharged battery using the normal
starting procedure. After the engine
starts, leave the jumper cables con-
nected and let the engine run at fast idle
or about 2,000 rpm for several minutes.
6. Carefully remove the jumper cables in
the reverse order of attachment.
If you do not know why your battery be-
came discharged (because the lights were
left on, etc.), have the charging system
checked by your Hyundai dealer.
D020A03A-AAT
WARNING:
The gas produced by the battery during
the jump-start operation is highly explo-
sive. If these instructions are not fol-
lowed exactly, serious personal injury
and damage to the vehicle may occur! If
you are not sure how to follow this proce-
dure, seek qualified assistance. Auto-
mobile batteries contain sulfuric acid.
This is poisonous and highly corrosive.
When jump starting, wear protective
glasses and be careful not to get acid on
yourself, your clothing or on the car.
HTG4001
Booster
batteryDischarged
battery
Page 296 of 345
6
DO-IT-YOURSELF MAINTENANCE
20
!
CAUTION:
An open fuse indicates that there is a
problem in the electrical circuit. If you
replace a fuse and it blows as soon as the
accessory is turned on, the problem is
serious and should be referred to a
Hyundai dealer for diagnosis and repair.
Never replace a fuse with anything ex-
cept a fuse with the same or a lower
amperage rating. A higher capacity fuse
could cause damage and create a fire
hazard.NOTE:See page 6-33 for the fuse panel descrip-
tions.
G200C01CM-GATPower ConnectorNOTE:
o If the power connector is pulled up
from the fuse panel, the warning chime,
audio, clock and interior lamps, etc.,
will not operate. The following items
must be reset after replacement.
- Digital Clock
- Trip computer
- Automatic heating and cooling con-
trol system
- Audio
o Even though the power connector is
pulled up, the battery can still be dis-
charged by operation of the head-
lights or other electrical devices.
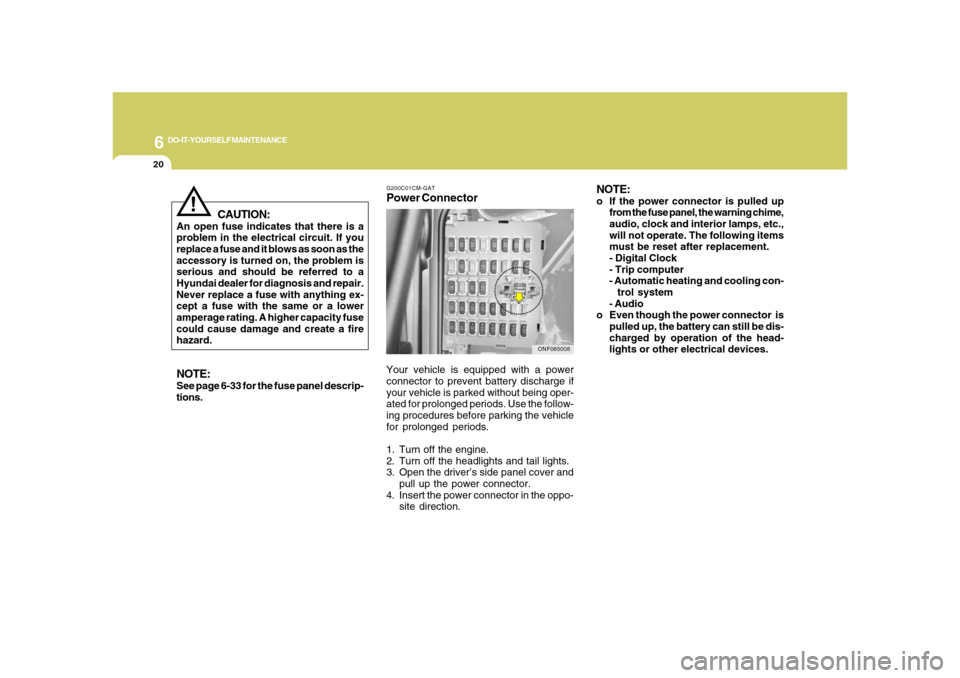
Your vehicle is equipped with a power
connector to prevent battery discharge if
your vehicle is parked without being oper-
ated for prolonged periods. Use the follow-
ing procedures before parking the vehicle
for prolonged periods.
1. Turn off the engine.
2. Turn off the headlights and tail lights.
3. Open the driver’s side panel cover and
pull up the power connector.
4. Insert the power connector in the oppo-
site direction.
ONF065008