Page 165 of 329
�Ý�Û
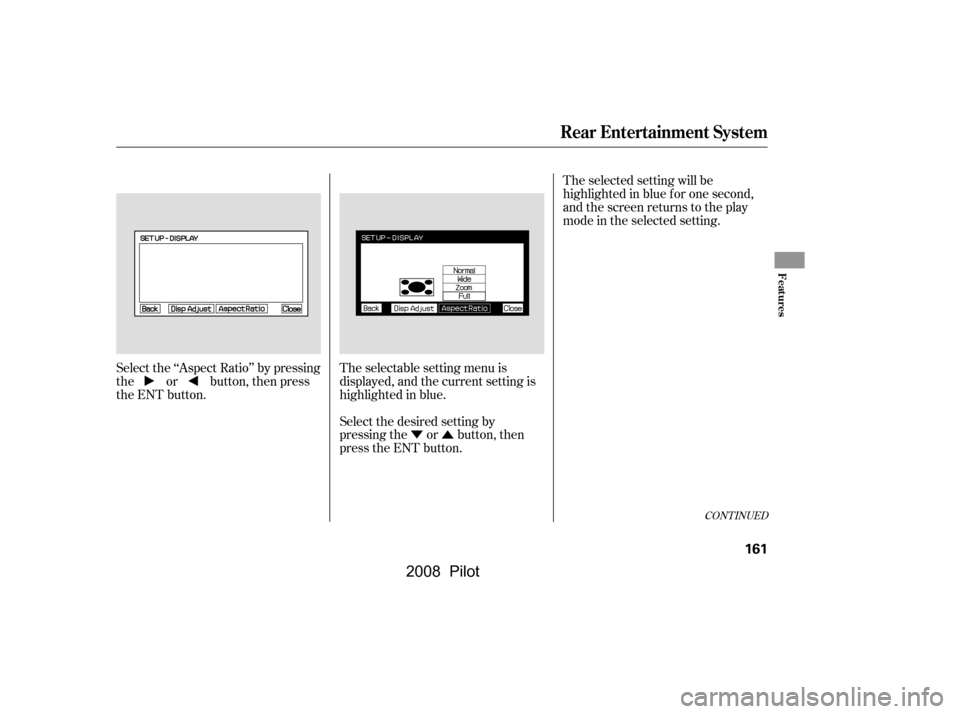
Select the ‘‘Aspect Ratio’’ by pressing
the or button, then press
the ENT button.
The selectable setting menu is
displayed, and the current setting is
highlighted in blue.
Select the desired setting by
pressing the or button, then
press the ENT button.The selected setting will be
highlighted in blue f or one second,
and the screen returns to the play
mode in the selected setting.
CONT INUED
Rear Entertainment System
Features
161
�\f���—�\f���—�\f���y�
�
�����������y���
�(���+�����\f�y�\f�
�����y
2008 Pilot
Page 183 of 329

position. The system then begins to
check the vehicle direction and
illuminates the appropriate icon")
The direction and center position
icons come on when you turn the
ignition switch to the ON (II)
position. The system then begins to
check the vehicle direction and
illuminates the appropriate icon(s).The compass can be af f ected by
driving near power lines or stations,
across bridges, through tunnels,
over railroad crossings, past large
vehicles, or driving near large
objects that cause magnetic
interference. It can also be affected
by accessories such as antennas and
roof racks that are mounted by
magnets.
Your vehicle has a compass in the
rear view mirror. The compass
indicates the vehicle direction with
illuminated letters; N (north), S
(south), W (west), and E (east). The
center blue icon in the compass is
always on. It serves as a ref erence
point.
To turn the compass on or of f , press
the compass button on the back of
the rear view mirror.The compass mirror has a light
sensor behind the right side of the
rear view mirror. Make sure the
extended sun visor or an accessory is
not covering the sensor.
If equipped
Compass Function
Compass
Features
179
COMPASS
BUTTON
CENTER ICON
REAR VIEW MIRROR
�\f���—�\f���—�\f���y�
�
�����������y���
�(���+�����\f�y�\f�
�����y
2008 Pilot
Page 184 of 329

The compass may need to be
manually calibrated af ter exposure to
a strong magnetic field. If the
compassseemstocontinuallyshow
the wrong direction, do this.Drivethevehicleslowlyincircles
at less than 5 mph (8 km/h) until
the center icon turns blue. This
icon also turns blue by continuing
to drive the vehicle under normal
driving conditions. When you see
an actual heading on the compass,
calibration is completed.
In most areas, there is a variation
between magnetic north and true
north. Zone selection is required so
the compass can compensate f or this
variation. To check and select the
zone, do this: Find the zone f or your area on the
zone map (see page ). Each
zone number (1 through 15)
corresponds to a compass zone on
the table (see page ). Press and hold the compass
button f or about 3 seconds. When
all of the direction icons begin to
blink, release the button.
The blue direction icon(s) blink
and show the current zone.
If the zone is incorrect, press and
release the compass button
repeatedly to get to the correct
number.
The compass will return to the
normal display about 4 seconds
af ter you stop adjusting a zone
number.
Do this procedure in an open
area, away f rom buildings, power
lines, and other vehicles.
With the blue center icon
displayed, press and hold the
compass button for about 6
seconds. When the center icon
turns red, release the button. 2.
1. 2.
3.
4.
1. 5.
181
181
Compass Calibration
Compass Zone Selection
Compass
180
NOTE:
�\f���—�\f���—�\f���y�
�
�������\f���y���
�(���+�����\f�y�\f�
�����y
2008 Pilot
Page 248 of 329
Fluid Locations
244
ENGINE OIL DIPSTICK
(Orange loop)
WASHER FLUID
(Blue cap)ENGINE OIL FILL CAP
ENGINE COOLANT
RESERVOIR
POWER STEERING FLUID
(Red cap) BRAKE FLUID
(Gray cap)
AUTOMATIC
TRANSMISSION
FLUID DIPSTICK
(Yellow loop)
RADIATOR CAP
�\f���—�\f���—�\f���y�
�
�������
�
�y���
�(���+�����\f�y�\f�������y
2008 Pilot

WASHER FLUID
(Blue cap)ENGINE OIL FILL CAP
ENGINE COOLANT
RESERVOIR
POWER STEERING FLUID
(Red cap) BRAKE FLUID
(Gray cap)
AUTOMATIC
TRANSMI")