2008 FORD FREESTYLE ECU
[x] Cancel search: ECUPage 254 of 352
P (Park)
This position locks the transaxle and prevents the front wheels from
turning.
To put your vehicle in gear:
•Depress the brake pedal
•Move the gearshift lever into the desired gear
To put your vehicle in P (Park):
•Come to a complete stop
•Move the gearshift lever and securely latch it in P (Park)
Always set the parking brake fully and make sure the gearshift is
latched in P (Park). Turn the ignition to the LOCK position and
remove the key whenever you leave your vehicle.
R (Reverse)
With the gearshift lever in R (Reverse), the vehicle will move backward.
Always come to a complete stop before shifting into and out of R
(Reverse).
N (Neutral)
With the gearshift lever in N (Neutral), the vehicle can be started and is
free to roll. Hold the brake pedal down while in this position.
D (Drive) with Overdrive
The normal driving position for the best fuel economy. Transaxle
operates in gears one through six.
2008 Taurus X(219)
Owners Guide (post-2002-fmt)
USA(fus)
Driving
254
ProCarManuals.com
Page 265 of 352
Using roadside assistance
Complete the roadside assistance identification card and place it in your
wallet for quick reference. In the United States, this card is found in the
Owner Guide portfolio in the glove compartment. In Canada, the card is
found in theCustomer Information Guidein the glove compartment.
U.S. Ford or Mercury vehicle customers who require roadside assistance,
call 1–800–241–3673; Lincoln vehicle customers call 1–800–521–4140.
Canadian customers who require roadside assistance, call
1–800–665–2006.
If you need to arrange roadside assistance for yourself, Ford Motor
Company will reimburse a reasonable amount and for towing to the
nearest dealership within 35 miles. To obtain reimbursement information,
U.S. Ford or Mercury vehicles customers call 1–800–241–3673; Lincoln
vehicle customers call 1–800–521–4140. Customers will be asked to
submit their original receipts.
Canadian customers who need to obtain reimbursement information, call
1–800–665–2006.
Roadside coverage beyond basic warranty
In the United States, you may purchase additional roadside assistance
coverage beyond this period through the Ford Auto Club by contacting
your authorized dealer or by calling 1–800–FORD–CLUB.
Similarly in Canada, for uninterrupted Roadside Assistance coverage, you
may purchase extended coverage prior to your Basic Warranty’s Roadside
Assistance expiring. For more information and enrollment, contact
1–877–294–2582 or visit our website at www.ford.ca.
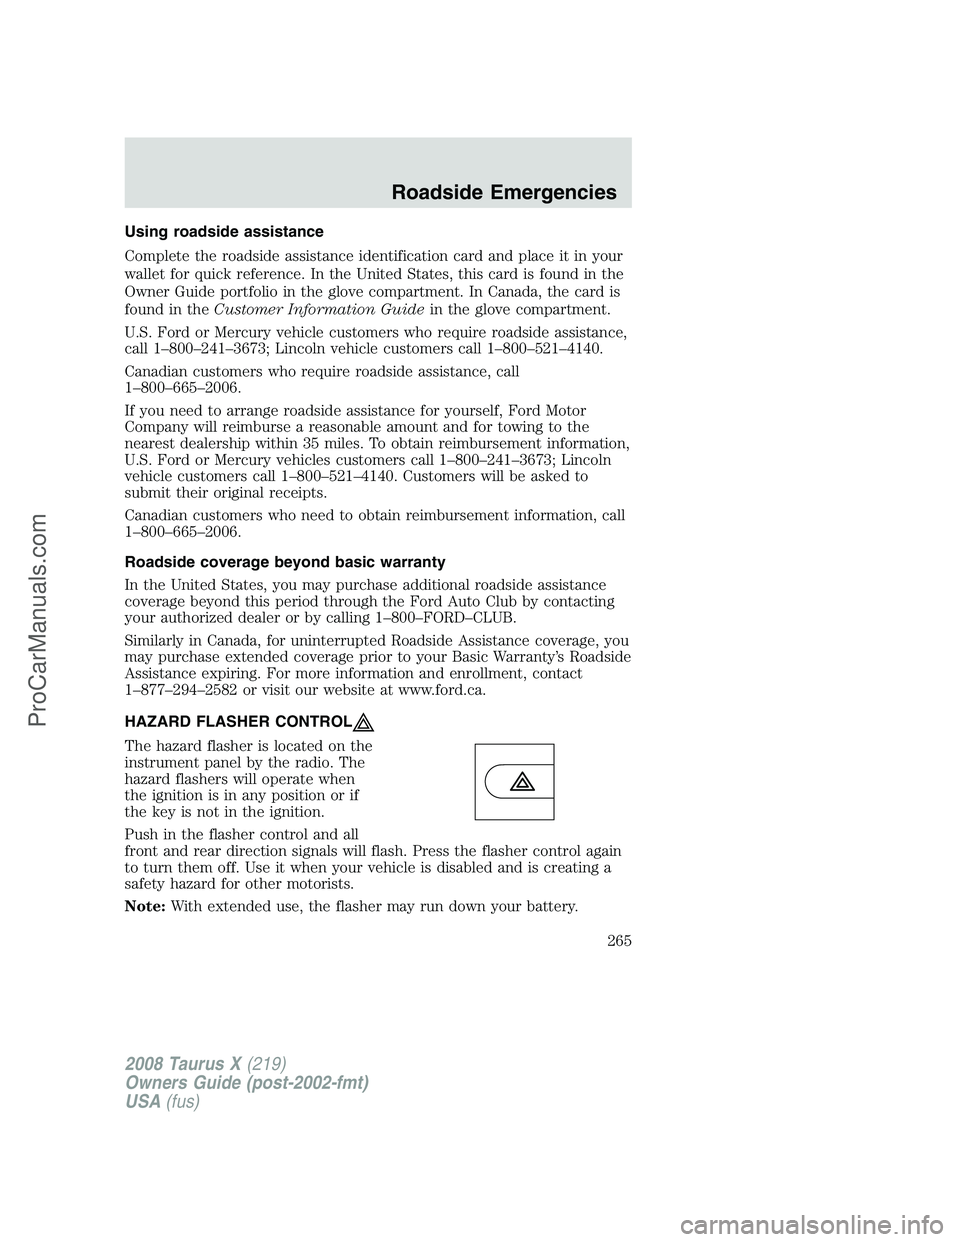
HAZARD FLASHER CONTROL
The hazard flasher is located on the
instrument panel by the radio. The
hazard flashers will operate when
the ignition is in any position or if
the key is not in the ignition.
Push in the flasher control and all
front and rear direction signals will flash. Press the flasher control again
to turn them off. Use it when your vehicle is disabled and is creating a
safety hazard for other motorists.
Note:With extended use, the flasher may run down your battery.
2008 Taurus X(219)
Owners Guide (post-2002-fmt)
USA(fus)
Roadside Emergencies
265
ProCarManuals.com
Page 276 of 352

Stopping and securing the vehicle
1. Park on a level surface, set the
parking brake and activate hazard
flashers.
2. Place gearshift lever in P (Park)
and turn engine off.
Removing the spare tire and jack
If the 3rd row seat (if equipped) is stowed in the floor, you will need to
unstow it to access the spare tire and jack. Refer toUnstowing the 3rd
row seatin theSeating and Safety Restraintchapter for this
procedure.
1. Remove the carpeted floor panel
located in the rear of the vehicle,
remove the wing nut that secures
the spare tire by turning it
counterclockwise.
2. Lift and remove the spare tire
from the trunk.
3. Remove the second wing nut that
secures the jack retention bracket
by turning it counterclockwise,
remove the jack kit from the
vehicle.
4. Remove the jack and the wrench
from the felt bag. Fold down the
wrench socket to use to loosen the
lug nuts and to operate the jack.
2008 Taurus X(219)
Owners Guide (post-2002-fmt)
USA(fus)
Roadside Emergencies
276
ProCarManuals.com
Page 279 of 352
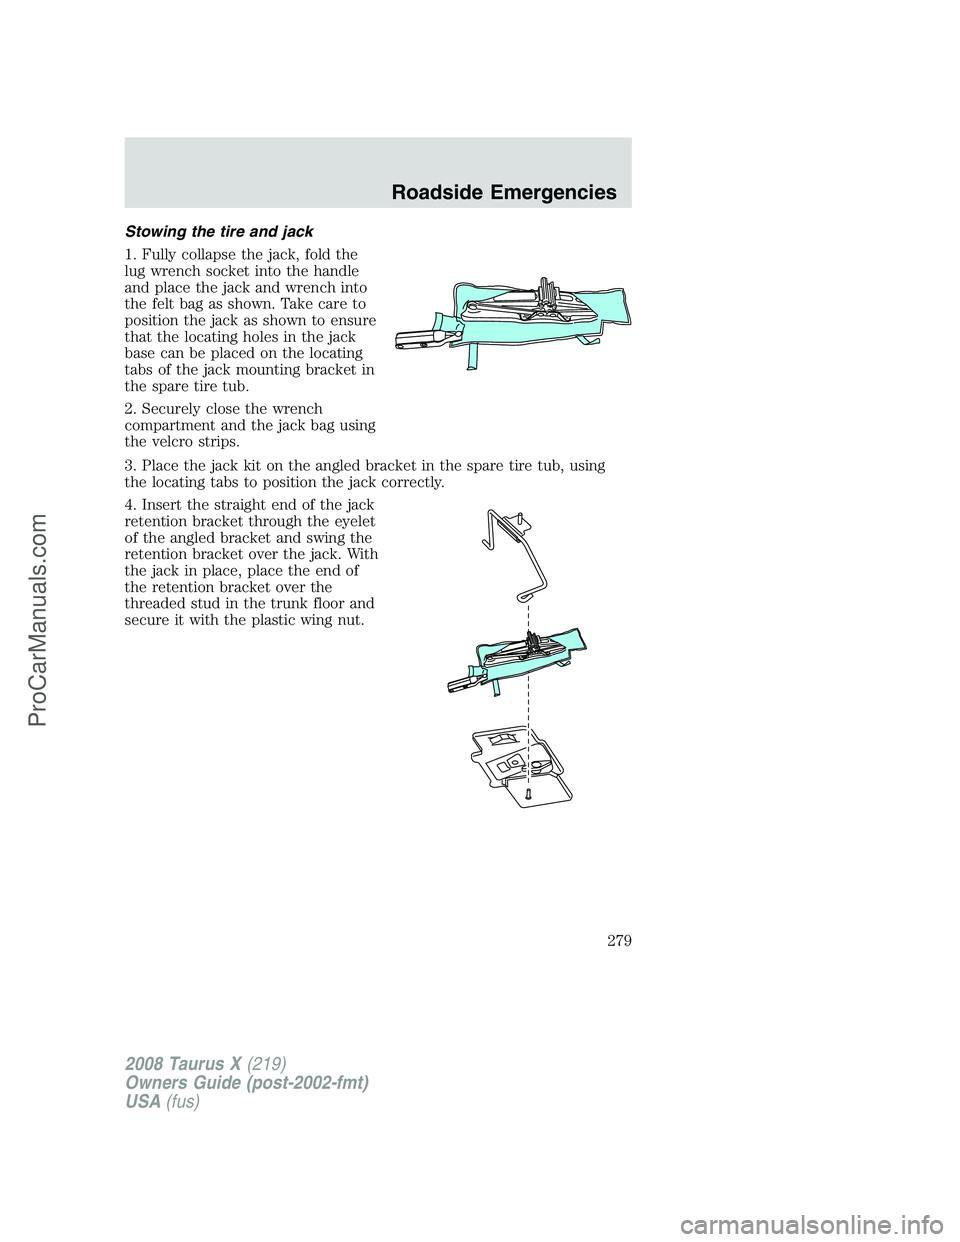
Stowing the tire and jack
1. Fully collapse the jack, fold the
lug wrench socket into the handle
and place the jack and wrench into
the felt bag as shown. Take care to
position the jack as shown to ensure
that the locating holes in the jack
base can be placed on the locating
tabs of the jack mounting bracket in
the spare tire tub.
2. Securely close the wrench
compartment and the jack bag using
the velcro strips.
3. Place the jack kit on the angled bracket in the spare tire tub, using
the locating tabs to position the jack correctly.
4. Insert the straight end of the jack
retention bracket through the eyelet
of the angled bracket and swing the
retention bracket over the jack. With
the jack in place, place the end of
the retention bracket over the
threaded stud in the trunk floor and
secure it with the plastic wing nut.
2008 Taurus X(219)
Owners Guide (post-2002-fmt)
USA(fus)
Roadside Emergencies
279
ProCarManuals.com
Page 280 of 352
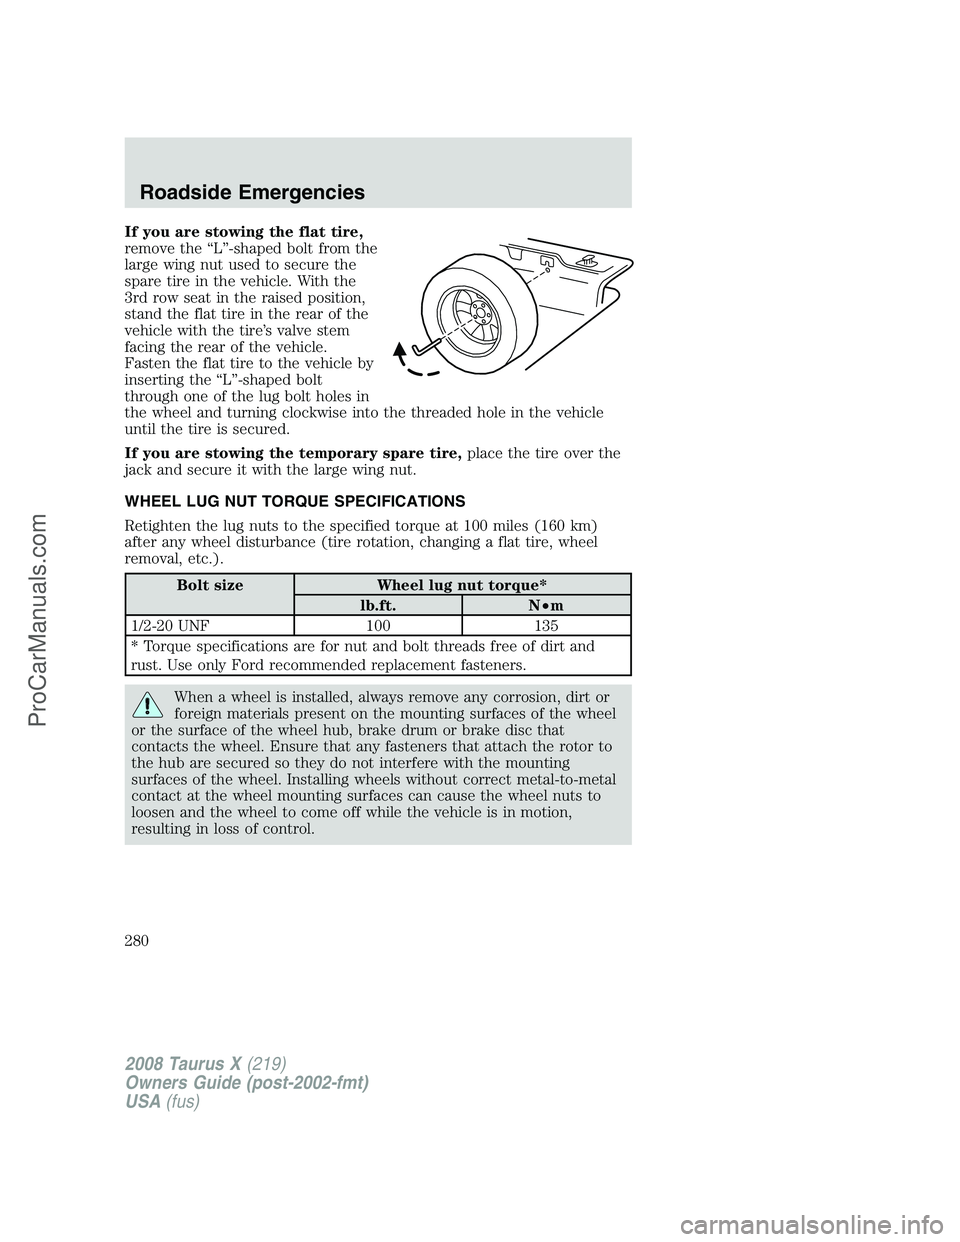
If you are stowing the flat tire,
remove the “L”-shaped bolt from the
large wing nut used to secure the
spare tire in the vehicle. With the
3rd row seat in the raised position,
stand the flat tire in the rear of the
vehicle with the tire’s valve stem
facing the rear of the vehicle.
Fasten the flat tire to the vehicle by
inserting the “L”-shaped bolt
through one of the lug bolt holes in
the wheel and turning clockwise into the threaded hole in the vehicle
until the tire is secured.
If you are stowing the temporary spare tire,place the tire over the
jack and secure it with the large wing nut.
WHEEL LUG NUT TORQUE SPECIFICATIONS
Retighten the lug nuts to the specified torque at 100 miles (160 km)
after any wheel disturbance (tire rotation, changing a flat tire, wheel
removal, etc.).
Bolt size Wheel lug nut torque*
lb.ft. N•m
1/2-20 UNF 100 135
* Torque specifications are for nut and bolt threads free of dirt and
rust. Use only Ford recommended replacement fasteners.
When a wheel is installed, always remove any corrosion, dirt or
foreign materials present on the mounting surfaces of the wheel
or the surface of the wheel hub, brake drum or brake disc that
contacts the wheel. Ensure that any fasteners that attach the rotor to
the hub are secured so they do not interfere with the mounting
surfaces of the wheel. Installing wheels without correct metal-to-metal
contact at the wheel mounting surfaces can cause the wheel nuts to
loosen and the wheel to come off while the vehicle is in motion,
resulting in loss of control.
2008 Taurus X(219)
Owners Guide (post-2002-fmt)
USA(fus)
Roadside Emergencies
280
ProCarManuals.com
Page 290 of 352
In some states (in the U.S.) you must directly notify Ford in writing
before pursuing remedies under your state’s warranty laws. Ford is also
allowed a final repair attempt in some states.
In the United States, a warranty dispute must be submitted to the BBB
AUTO LINE before taking action under the Magnuson-Moss Warranty
Act, or to the extent allowed by state law, before pursuing replacement
or repurchase remedies provided by certain state laws. This dispute
handling procedure is not required prior to enforcing state created rights
or other rights which are independent of the Magnuson-Moss Warranty
Act or state replacement or repurchase laws.
IN CALIFORNIA (U.S. ONLY)
California Civil Code Section 1793.2(d) requires that, if a manufacturer
or its representative is unable to repair a motor vehicle to conform to the
vehicle’s applicable express warranty after a reasonable number of
attempts, the manufacturer shall be required to either replace the
vehicle with one substantially identical or repurchase the vehicle and
reimburse the buyer in an amount equal to the actual price paid or
payable by the consumer (less a reasonable allowance for consumer
use). The consumer has the right to choose whether to receive a refund
or replacement vehicle.
California Civil Code Section 1793.22(b) presumes that the manufacturer
has had a reasonable number of attempts to conform the vehicle to its
applicable express warranties if, within the first 18 months of ownership
of a new vehicle or the first 18,000 miles (29,000 km), whichever occurs
first:
1. Two or more repair attempts are made on the same non-conformity
likely to cause death or serious bodily injury OR
2. Four or more repair attempts are made on the same nonconformity (a
defect or condition that substantially impairs the use, value or safety of
the vehicle) OR
3. The vehicle is out of service for repair of nonconformities for a total of
more than 30 calendar days (not necessarily all at one time)
In the case of 1 or 2 above, the consumer must also notify the
manufacturer of the need for the repair of the nonconformity at the
following address:
Ford Motor Company
16800 Executive Plaza Drive
Mail Drop 3NE-B
Dearborn, MI 48126
2008 Taurus X(219)
Owners Guide (post-2002-fmt)
USA(fus)
Customer Assistance
290
ProCarManuals.com
Page 308 of 352
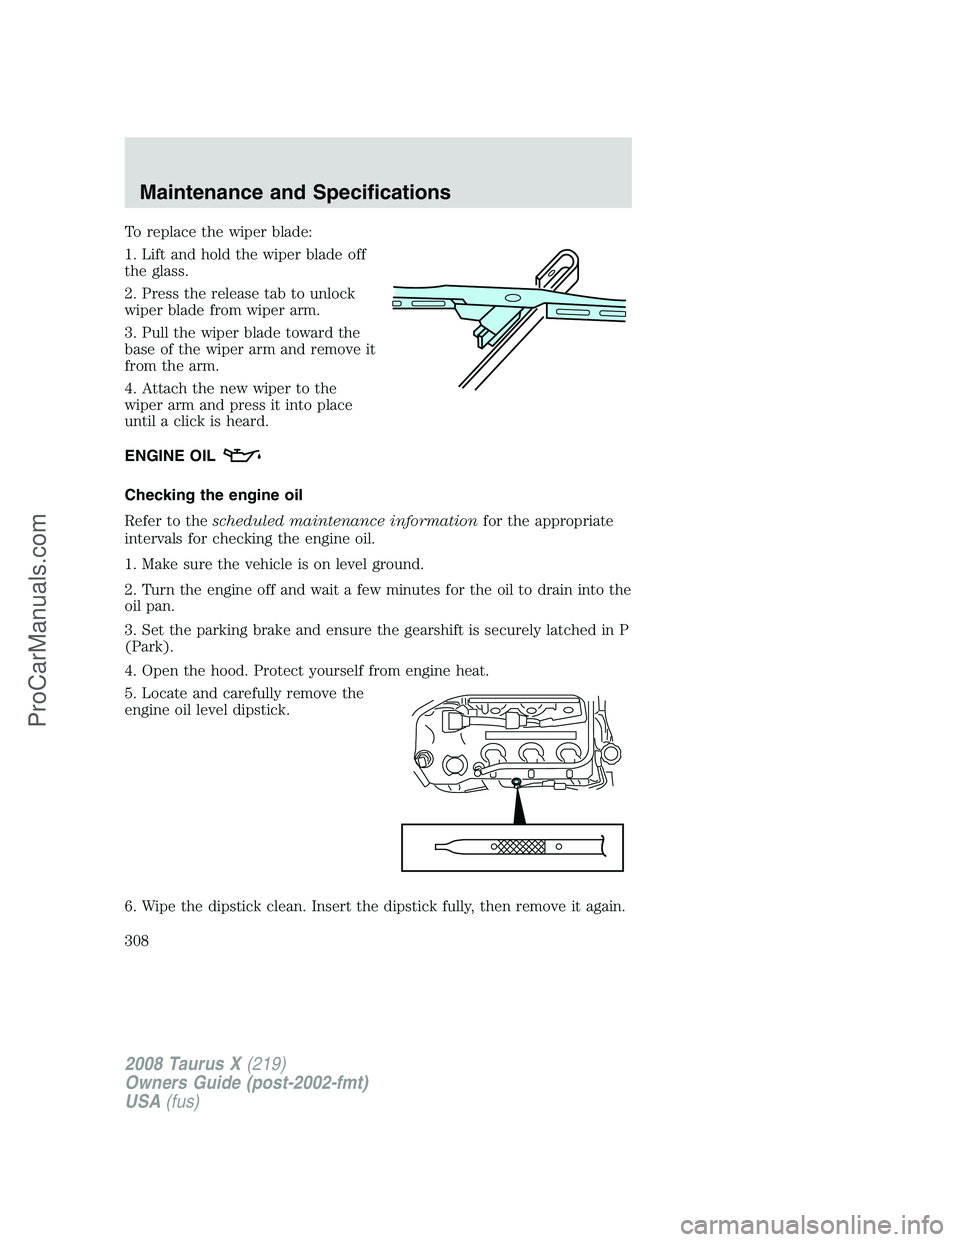
To replace the wiper blade:
1. Lift and hold the wiper blade off
the glass.
2. Press the release tab to unlock
wiper blade from wiper arm.
3. Pull the wiper blade toward the
base of the wiper arm and remove it
from the arm.
4. Attach the new wiper to the
wiper arm and press it into place
until a click is heard.
ENGINE OIL
Checking the engine oil
Refer to thescheduled maintenance informationfor the appropriate
intervals for checking the engine oil.
1. Make sure the vehicle is on level ground.
2. Turn the engine off and wait a few minutes for the oil to drain into the
oil pan.
3. Set the parking brake and ensure the gearshift is securely latched in P
(Park).
4. Open the hood. Protect yourself from engine heat.
5. Locate and carefully remove the
engine oil level dipstick.
6. Wipe the dipstick clean. Insert the dipstick fully, then remove it again.
2008 Taurus X(219)
Owners Guide (post-2002-fmt)
USA(fus)
Maintenance and Specifications
308
ProCarManuals.com
Page 328 of 352
3. The fuel cap may not have been securely tightened. SeeFuel filler
capin this chapter.
4. Driving through deep water—the electrical system may be wet.
These temporary malfunctions can be corrected by filling the fuel tank
with good quality fuel, properly tightening the fuel cap or letting the
electrical system dry out. After three driving cycles without these or any
other temporary malfunctions present, the
indicator should stay off
the next time the engine is started. A driving cycle consists of a cold
engine startup followed by mixed city/highway driving. No additional
vehicle service is required.
If the
indicator remains on, have your vehicle serviced at the first
available opportunity. Although some malfunctions detected by the
OBD-II may not have symptoms that are apparent, continued driving
with the
indicator on can result in increased emissions, lower fuel
economy, reduced engine and transmission smoothness, and lead to more
costly repairs.
Readiness for Inspection/Maintenance (I/M) testing
Some state/provincial and local governments may have
Inspection/Maintenance (I/M) programs to inspect the emission control
equipment on your vehicle. Failure to pass this inspection could prevent
you from getting a vehicle registration. Your vehicle may not pass the I/M
test if the
indicator is on or not working properly (bulb is burned
out), or if the OBD-II system has determined that some of the emission
control systems have not been properly checked. In this case, the vehicle
is considered not ready for I/M testing.
If the
indicator is on or the bulb does not work, the vehicle may
need to be serviced. Refer to the On board diagnostics (OBD-II)
description in this chapter.
If the vehicle’s engine or transmission has just been serviced, or the
battery has recently run down or been replaced, the OBD-II system may
indicate that the vehicle is not ready for I/M testing. To determine if the
vehicle is ready for I/M testing, turn the ignition key to the ON position
for 15 seconds without cranking the engine. If the
indicator blinks
eight times, it means that the vehicle is not ready for I/M testing; if
the
indicator stays on solid, it means that the vehicle is ready for
I/M testing.
2008 Taurus X(219)
Owners Guide (post-2002-fmt)
USA(fus)
Maintenance and Specifications
328
ProCarManuals.com