2008 FORD F250 tow
[x] Cancel search: towPage 160 of 400
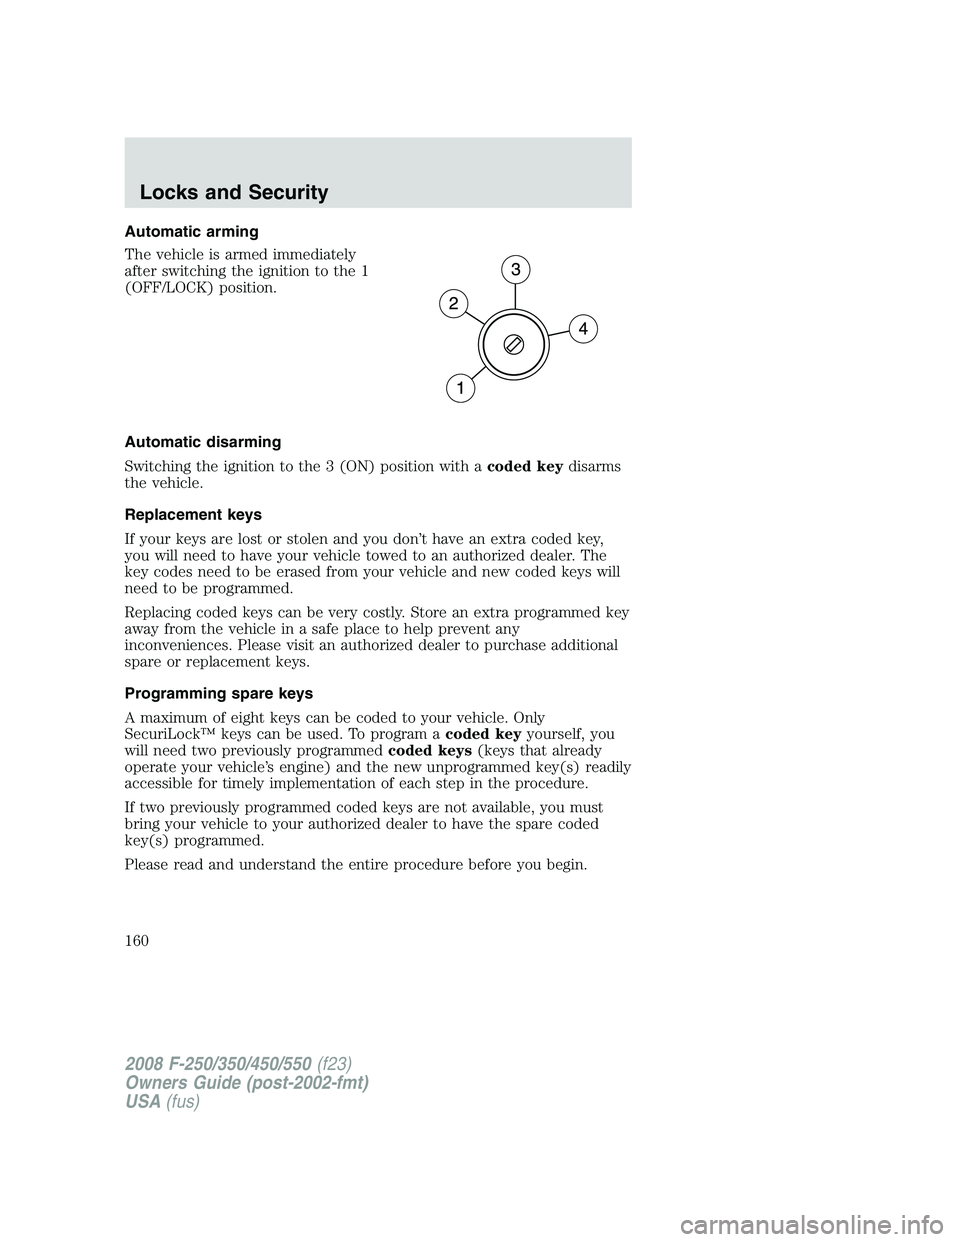
Automatic arming
The vehicle is armed immediately
after switching the ignition to the 1
(OFF/LOCK) position.
Automatic disarming
Switching the ignition to the 3 (ON) position with acoded keydisarms
the vehicle.
Replacement keys
If your keys are lost or stolen and you don’t have an extra coded key,
you will need to have your vehicle towed to an authorized dealer. The
key codes need to be erased from your vehicle and new coded keys will
need to be programmed.
Replacing coded keys can be very costly. Store an extra programmed key
away from the vehicle in a safe place to help prevent any
inconveniences. Please visit an authorized dealer to purchase additional
spare or replacement keys.
Programming spare keys
A maximum of eight keys can be coded to your vehicle. Only
SecuriLock™ keys can be used. To program acoded keyyourself, you
will need two previously programmedcoded keys(keys that already
operate your vehicle’s engine) and the new unprogrammed key(s) readily
accessible for timely implementation of each step in the procedure.
If two previously programmed coded keys are not available, you must
bring your vehicle to your authorized dealer to have the spare coded
key(s) programmed.
Please read and understand the entire procedure before you begin.
2008 F-250/350/450/550(f23)
Owners Guide (post-2002-fmt)
USA(fus)
Locks and Security
160
Page 176 of 400
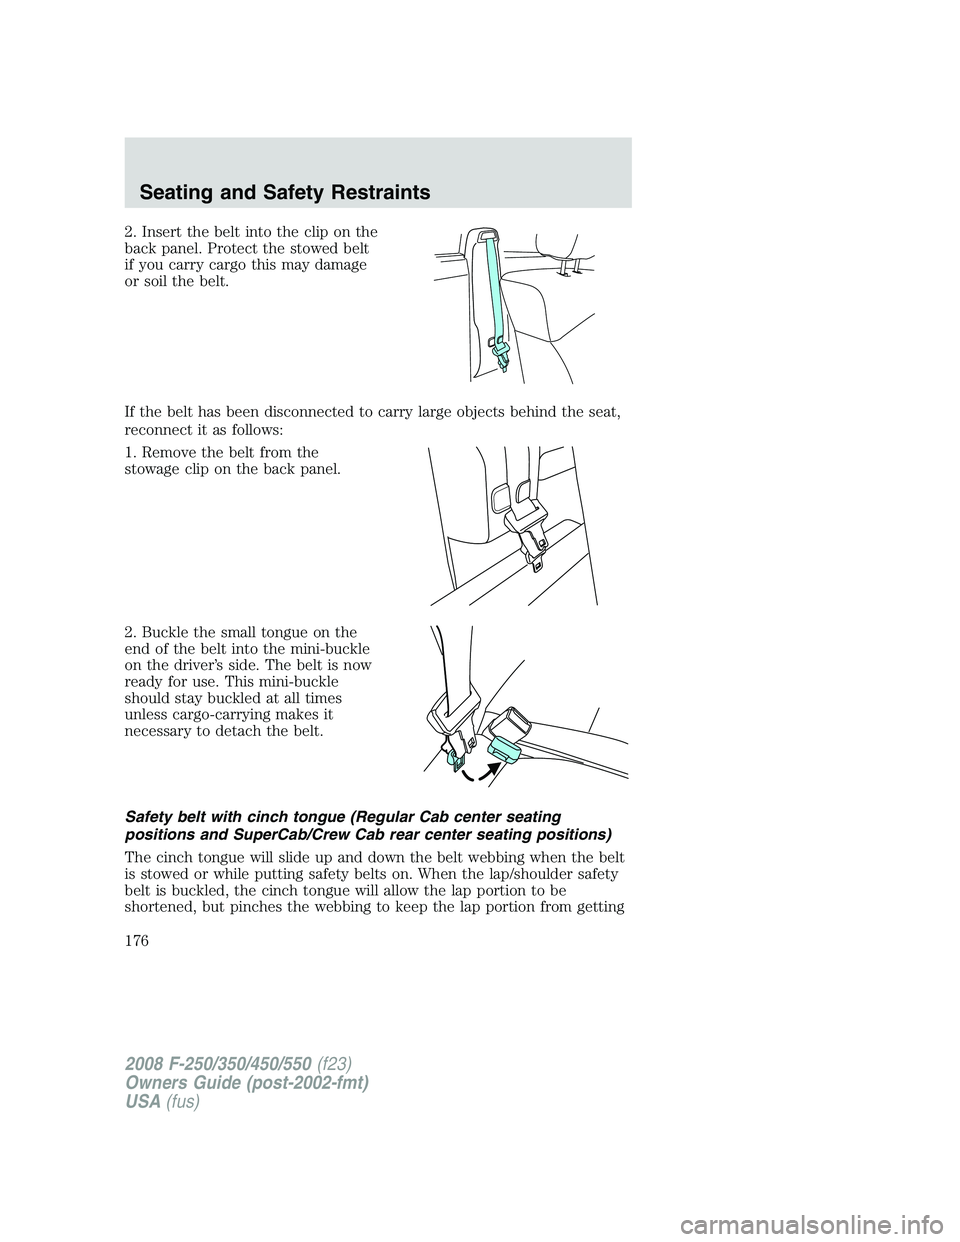
2. Insert the belt into the clip on the
back panel. Protect the stowed belt
if you carry cargo this may damage
or soil the belt.
If the belt has been disconnected to carry large objects behind the seat,
reconnect it as follows:
1. Remove the belt from the
stowage clip on the back panel.
2. Buckle the small tongue on the
end of the belt into the mini-buckle
on the driver’s side. The belt is now
ready for use. This mini-buckle
should stay buckled at all times
unless cargo-carrying makes it
necessary to detach the belt.
Safety belt with cinch tongue (Regular Cab center seating
positions and SuperCab/Crew Cab rear center seating positions)
The cinch tongue will slide up and down the belt webbing when the belt
is stowed or while putting safety belts on. When the lap/shoulder safety
belt is buckled, the cinch tongue will allow the lap portion to be
shortened, but pinches the webbing to keep the lap portion from getting
2008 F-250/350/450/550(f23)
Owners Guide (post-2002-fmt)
USA(fus)
Seating and Safety Restraints
176
Page 185 of 400

Never place your arm over the air bag module as a deploying air
bag can result in serious arm fractures or other injuries.
To properly position yourself away from the airbag:
•Move your seat to the rear as far as you can while still reaching the
pedals comfortably.
•Recline the seat slightly one or two degrees from the upright position.
Do not put anything on or over the air bag module. Placing
objects on or over the air bag inflation area may cause those
objects to be propelled by the air bag into your face and torso causing
serious injury.
Do not attempt to service, repair, or modify the airbag
supplemental restraint systems or its fuses. See your authorized
dealer.
The front passenger air bag is not designed to offer protection to
an occupant in the center front seating position.
Modifying or adding equipment to the front end of the vehicle
(including frame, bumper, front end body structure and tow
hooks) may affect the performance of the airbag system, increasing the
risk of injury. Do not modify the front end of the vehicle.
Additional equipment such as snowplow equipment may effect
the performance of the airbag sensors increasing the risk of
injury. Please refer to theFord Truck Body Builders Layout Bookfor
instructions about the appropriate installation of additional equipment.
Children and airbags
For additional important safety information, read all information on
safety restraints in this guide.
Children must always be properly restrained. Failure to follow these
instructions may increase the risk of injury in a collision.
2008 F-250/350/450/550(f23)
Owners Guide (post-2002-fmt)
USA(fus)
Seating and Safety Restraints
185
Page 196 of 400
Follow all instructions provided by the manufacturer of the
booster seat.
Never put the shoulder belt under a child’s arm or behind the
back because it eliminates the protection for the upper part of
the body and may increase the risk of injury or death in a collision.
Never use pillows, books, or towels to boost a child. They can
slide around and increase the likelihood of injury or death in a
collision.
SAFETY SEATS FOR CHILDREN
Child and infant or child safety seats
Use a safety seat that is recommended for the size and weight of the child.
Carefully follow all of the manufacturer’s instructions with the safety seat
you put in your vehicle. If you do not install and use the safety seat
properly, the child may be injured in a sudden stop or collision.
When installing a child safety seat:
•Review and follow the information
presented in theAirbag
supplemental restraint system
(SRS)section in this chapter.
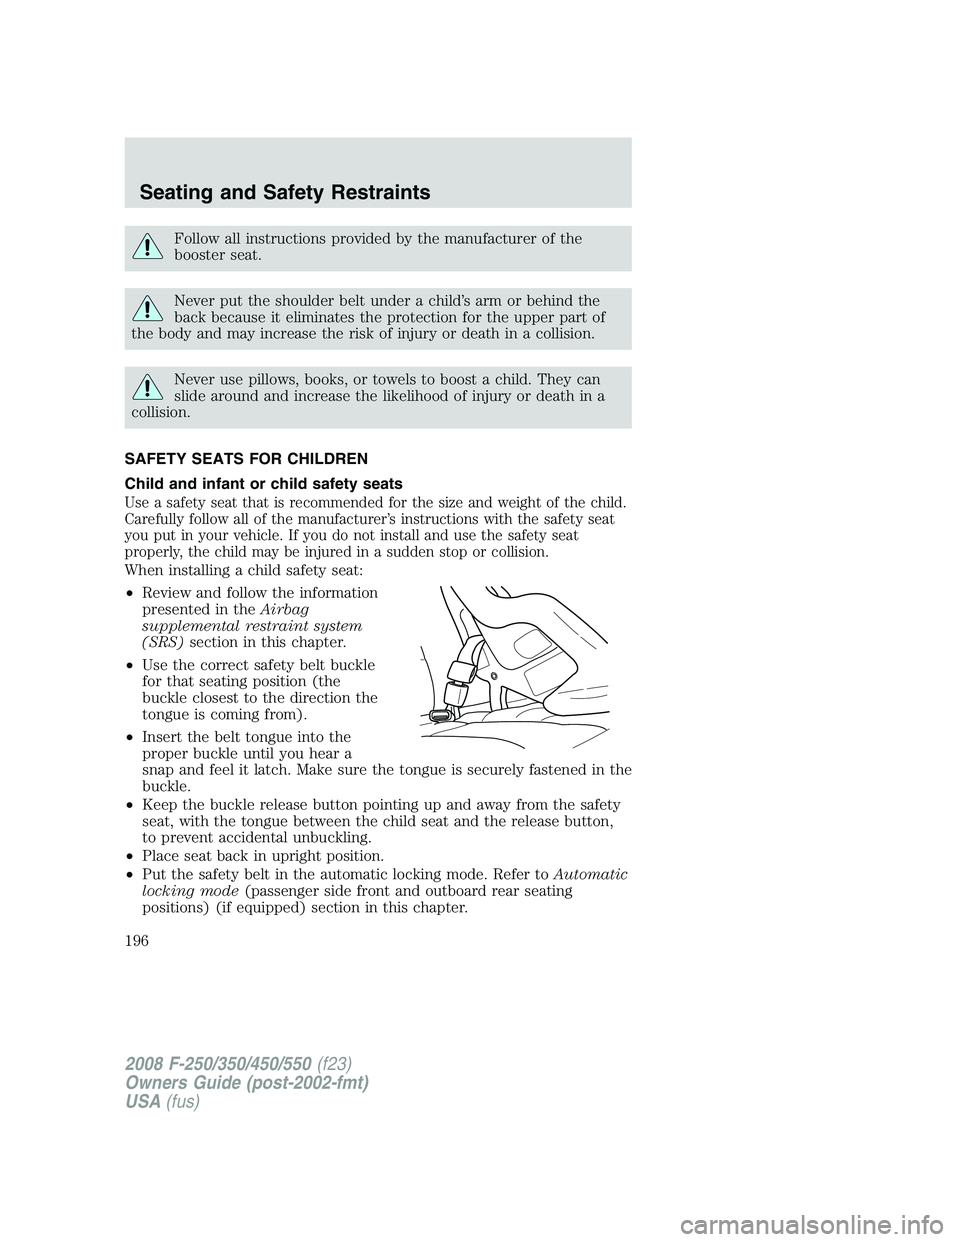
•Use the correct safety belt buckle
for that seating position (the
buckle closest to the direction the
tongue is coming from).
•Insert the belt tongue into the
proper buckle until you hear a
snap and feel it latch. Make sure the tongue is securely fastened in the
buckle.
•Keep the buckle release button pointing up and away from the safety
seat, with the tongue between the child seat and the release button,
to prevent accidental unbuckling.
•Place seat back in upright position.
•Put the safety belt in the automatic locking mode. Refer toAutomatic
locking mode(passenger side front and outboard rear seating
positions) (if equipped) section in this chapter.
2008 F-250/350/450/550(f23)
Owners Guide (post-2002-fmt)
USA(fus)
Seating and Safety Restraints
196
Page 199 of 400
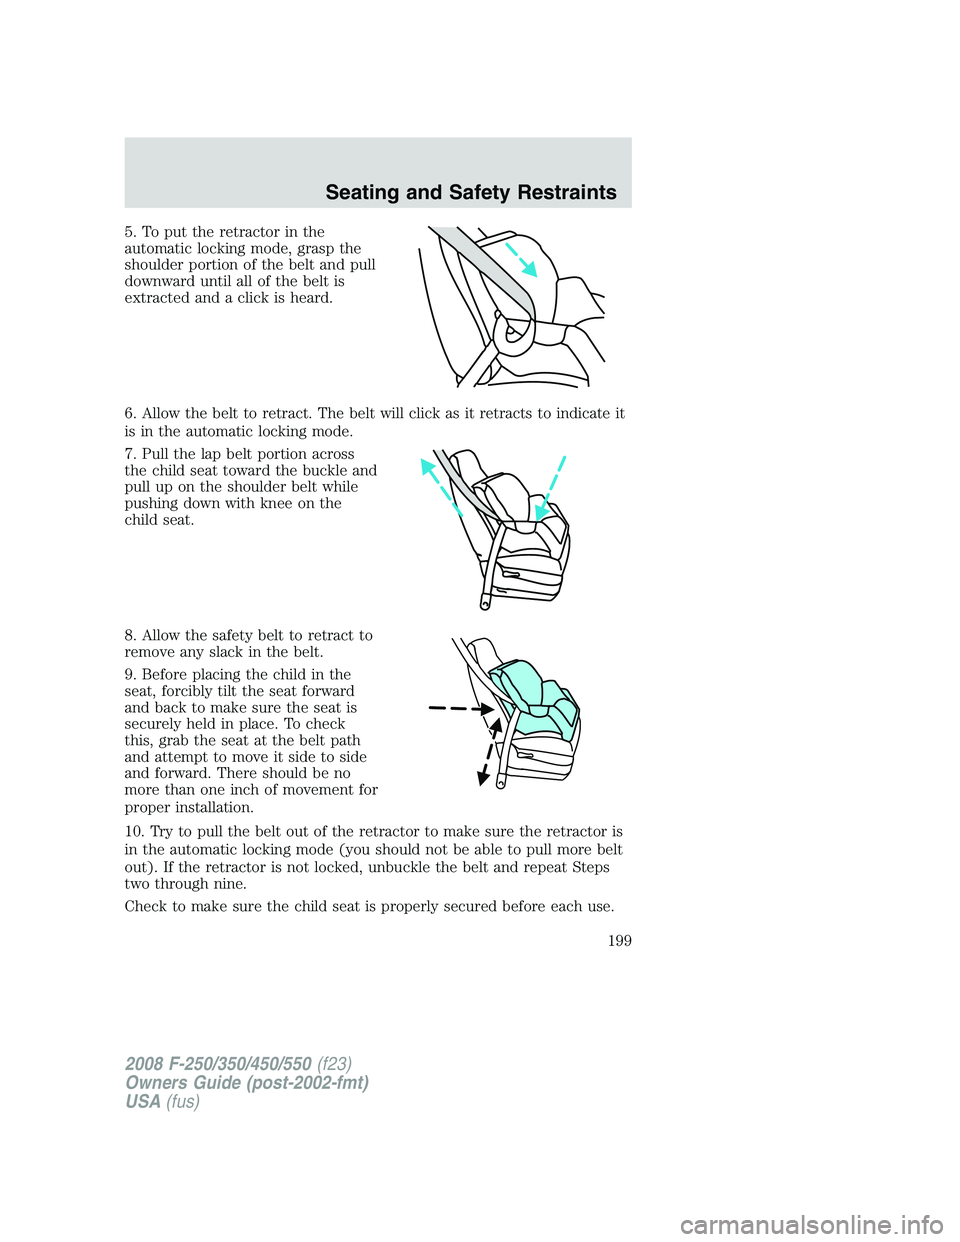
5. To put the retractor in the
automatic locking mode, grasp the
shoulder portion of the belt and pull
downward until all of the belt is
extracted and a click is heard.
6. Allow the belt to retract. The belt will click as it retracts to indicate it
is in the automatic locking mode.
7. Pull the lap belt portion across
the child seat toward the buckle and
pull up on the shoulder belt while
pushing down with knee on the
child seat.
8. Allow the safety belt to retract to
remove any slack in the belt.
9. Before placing the child in the
seat, forcibly tilt the seat forward
and back to make sure the seat is
securely held in place. To check
this, grab the seat at the belt path
and attempt to move it side to side
and forward. There should be no
more than one inch of movement for
proper installation.
10. Try to pull the belt out of the retractor to make sure the retractor is
in the automatic locking mode (you should not be able to pull more belt
out). If the retractor is not locked, unbuckle the belt and repeat Steps
two through nine.
Check to make sure the child seat is properly secured before each use.
2008 F-250/350/450/550(f23)
Owners Guide (post-2002-fmt)
USA(fus)
Seating and Safety Restraints
199
Page 216 of 400
•Do not run over curbs or hit the tire against a curb when parking
If your vehicle is stuck in snow, mud, sand, etc.,do notrapidly
spin the tires; spinning the tires can tear the tire and cause an
explosion. A tire can explode in as little as three to five seconds.
Never spin the tires in excess of the 35 mph (55 km/h) point
indicated on the speedometer.
Highway hazards
No matter how carefully you drive there’s always the possibility that you
may eventually have a flat tire on the highway. Drive slowly to the
closest safe area out of traffic. This may further damage the flat tire, but
your safety is more important.
If you feel a sudden vibration or ride disturbance while driving, or you
suspect your tire or vehicle has been damaged, immediately reduce your
speed. Drive with caution until you can safely pull off the road. Stop and
inspect the tires for damage. If a tire is under-inflated or damaged,
deflate it, remove wheel and replace it with your spare tire and wheel. If
you cannot detect a cause, have the vehicle towed to the nearest repair
facility or tire dealer to have the vehicle inspected.
Tire and wheel alignment
A bad jolt from hitting a curb or pothole can cause the front end of your
vehicle to become misaligned or cause damage to your tires. If your
vehicle seems to pull to one side when you’re driving, the wheels may be
out of alignment. Have your authorized dealer check the wheel alignment
periodically.
Wheel misalignment in the front or the rear can cause uneven and rapid
treadwear of your tires and should be corrected by your authorized
dealer. Front Wheel Drive (FWD) vehicles and those with an
independent rear suspension (if equipped) may require alignment of all
four wheels.
The tires should also be balanced periodically. An unbalanced tire and
wheel assembly may result in irregular tire wear.
2008 F-250/350/450/550(f23)
Owners Guide (post-2002-fmt)
USA(fus)
Tires, Wheels and Loading
216
Page 227 of 400

When you believe your system is not operating properly
The main function of the Tire Pressure Monitoring System is to warn you
when your tires need air. It can also warn you in the event the system is no
longer capable of functioning as intended. Please refer to the following
chart for information concerning your Tire Pressure Monitoring System:
Low Tire Pressure
Warning LightPossible cause Customer Action Required
Solid Warning Light Tire(s)
under-inflated1. Check your tire pressure to
ensure tires are properly
inflated; refer toInflating your
tiresin this chapter.
2. After inflating your tires to
the manufacturer’s
recommended inflation pressure
as shown on the Tire Label
(located on the edge of driver’s
door or the B-Pillar), the
vehicle must be driven for at
least two minutes over 20 mph
(32 km/h) before the light will
turn OFF.
Spare tire in
useYour temporary spare tire is in
use. Repair the damaged road
wheel/tire and reinstall it on the
vehicle to restore system
functionality. For a description
on how the system functions,
refer toWhen your temporary
spare tire is installedin this
section.
TPMS
malfunctionIf your tires are properly
inflated and your spare tire is
not in use and the light remains
ON, have the system inspected
by your authorized dealer.
Tire rotation
without sensor
trainingOn vehicles with different front
and rear tire pressures, the
TPMS system must be retrained
following every tire rotation.
Refer toTire rotationin this
chapter.
2008 F-250/350/450/550(f23)
Owners Guide (post-2002-fmt)
USA(fus)
Tires, Wheels and Loading
227
Page 232 of 400

1.Left front tire:Place the TPMS reset tool against the left front tire
where the tire meets the rim, opposite from the valve stem (1) as shown.
This is where the sensor is located inside the rim.
The tool needs to be held against the tire sidewall opposite the
valve stem as illustrated with the arrow on the tool pointing
towards the rim; do not use the tool with the arrow pointing away
from the rim as it may not activate the sensor.
2. Press and release the green button and hold the tool to the tire
sidewall until the horn sounds. The red light on the TPMS reset tool will
illuminate while the tool is active. The horn will sound once within 10
seconds to indicate the process was successful.
Note:If a double horn chirp is heard, repeat the procedure. If a single
horn chirp is not heard, move the vehicle to rotate the wheels at least a
1�4-turn and repeat the procedure. If the horn does not sound while
attempting to reset any wheel, seek service from your authorized dealer.
3. Perform Steps 1 and 2 on the right front, right rear and finally the left
rear tires.
Successful completion of the reset procedure can be verified by turning
the ignition to OFF without the horn sounding. If two short beeps are
heard, the reset procedure was unsuccessful and must be repeated.
If after repeating the procedure two short beeps are heard when the key
is turned to OFF, seek assistance from your authorized dealer.
2008 F-250/350/450/550(f23)
Owners Guide (post-2002-fmt)
USA(fus)
Tires, Wheels and Loading
232