2008 FORD F250 ECO mode
[x] Cancel search: ECO modePage 43 of 400
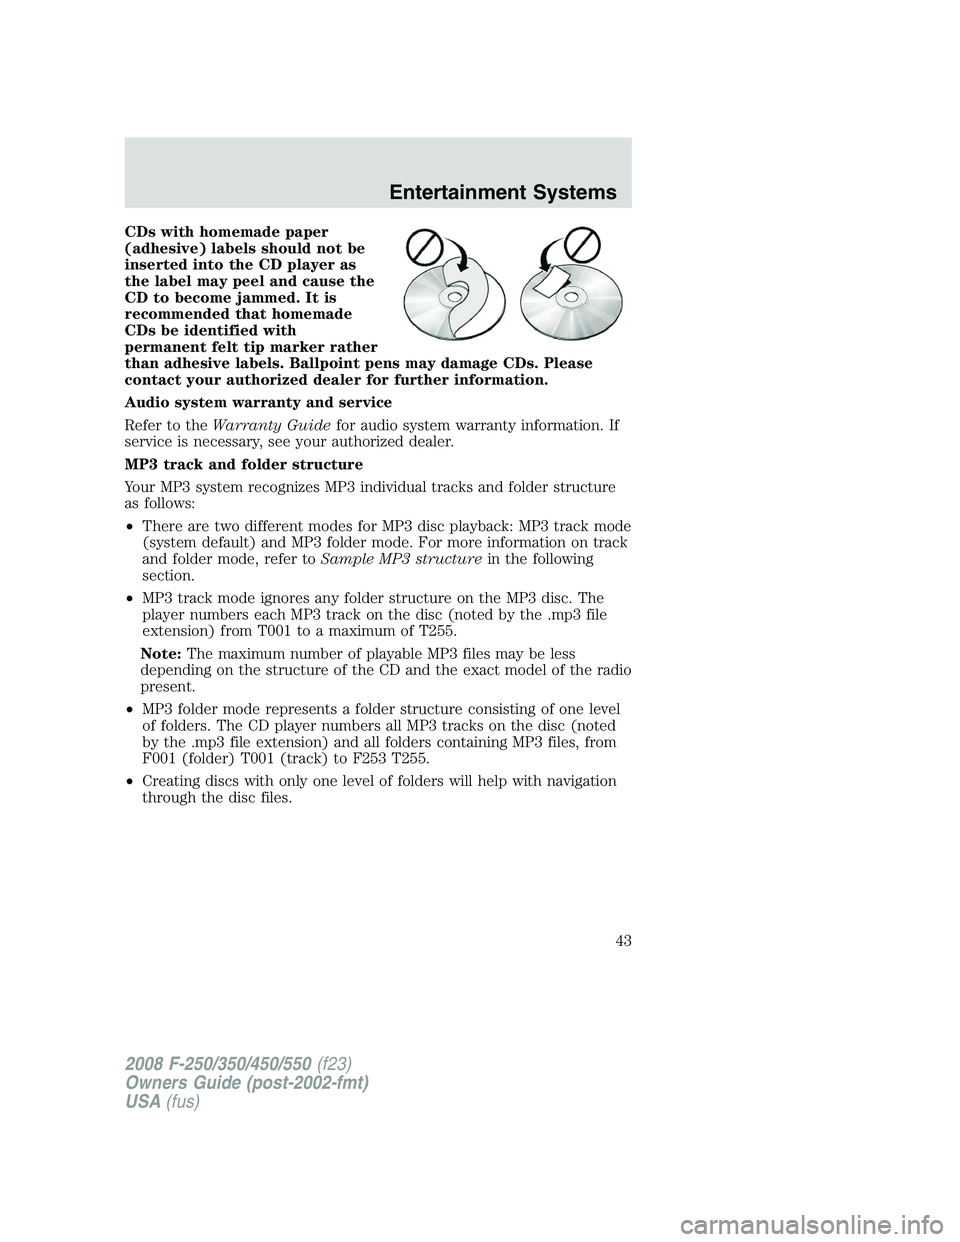
CDs with homemade paper
(adhesive) labels should not be
inserted into the CD player as
the label may peel and cause the
CD to become jammed. It is
recommended that homemade
CDs be identified with
permanent felt tip marker rather
than adhesive labels. Ballpoint pens may damage CDs. Please
contact your authorized dealer for further information.
Audio system warranty and service
Refer to theWarranty Guidefor audio system warranty information. If
service is necessary, see your authorized dealer.
MP3 track and folder structure
Your MP3 system recognizes MP3 individual tracks and folder structure
as follows:
•There are two different modes for MP3 disc playback: MP3 track mode
(system default) and MP3 folder mode. For more information on track
and folder mode, refer toSample MP3 structurein the following
section.
•MP3 track mode ignores any folder structure on the MP3 disc. The
player numbers each MP3 track on the disc (noted by the .mp3 file
extension) from T001 to a maximum of T255.
Note:The maximum number of playable MP3 files may be less
depending on the structure of the CD and the exact model of the radio
present.
•MP3 folder mode represents a folder structure consisting of one level
of folders. The CD player numbers all MP3 tracks on the disc (noted
by the .mp3 file extension) and all folders containing MP3 files, from
F001 (folder) T001 (track) to F253 T255.
•Creating discs with only one level of folders will help with navigation
through the disc files.
2008 F-250/350/450/550(f23)
Owners Guide (post-2002-fmt)
USA(fus)
Entertainment Systems
43
Page 50 of 400
2. Insert an MP3 disc into the
system, label-side up to turn on the
DVD system. It will load and
automatically begin to play. If there
is already a disc in the system, press
PLAY on the DVD player.
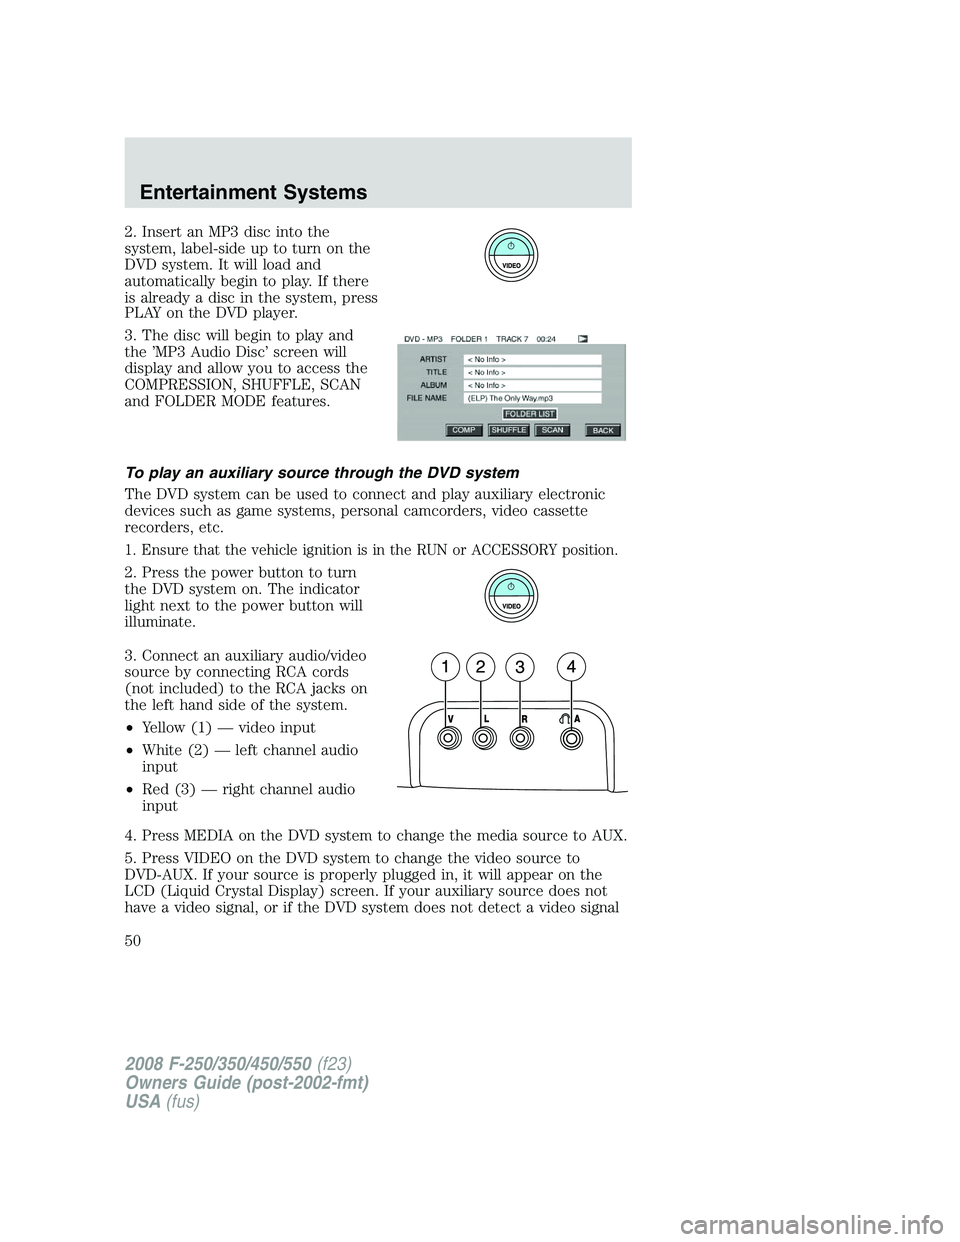
3. The disc will begin to play and
the ’MP3 Audio Disc’ screen will
display and allow you to access the
COMPRESSION, SHUFFLE, SCAN
and FOLDER MODE features.
To play an auxiliary source through the DVD system
The DVD system can be used to connect and play auxiliary electronic
devices such as game systems, personal camcorders, video cassette
recorders, etc.
1. Ensure that the vehicle ignition is in the RUN or ACCESSORY position.
2. Press the power button to turn
the DVD system on. The indicator
light next to the power button will
illuminate.
3. Connect an auxiliary audio/video
source by connecting RCA cords
(not included) to the RCA jacks on
the left hand side of the system.
•Yellow (1) — video input
•White (2) — left channel audio
input
•Red (3) — right channel audio
input
4. Press MEDIA on the DVD system to change the media source to AUX.
5. Press VIDEO on the DVD system to change the video source to
DVD-AUX. If your source is properly plugged in, it will appear on the
LCD (Liquid Crystal Display) screen. If your auxiliary source does not
have a video signal, or if the DVD system does not detect a video signal
2008 F-250/350/450/550(f23)
Owners Guide (post-2002-fmt)
USA(fus)
Entertainment Systems
50
Page 51 of 400
from the auxiliary source, the screen will remain black. If the video
source is set to DVD-AUX, the display will automatically turn on if a
video signal is detected.
To listen to audio over the headphones (Dual play mode):
1. You may listen to channels A and B over wired or wireless
headphones. Refer toUsing the infrared wireless headphonesand
Using wired headphonesfor further information.
•Black (4) — wired headphone output (wired headphones not
included)
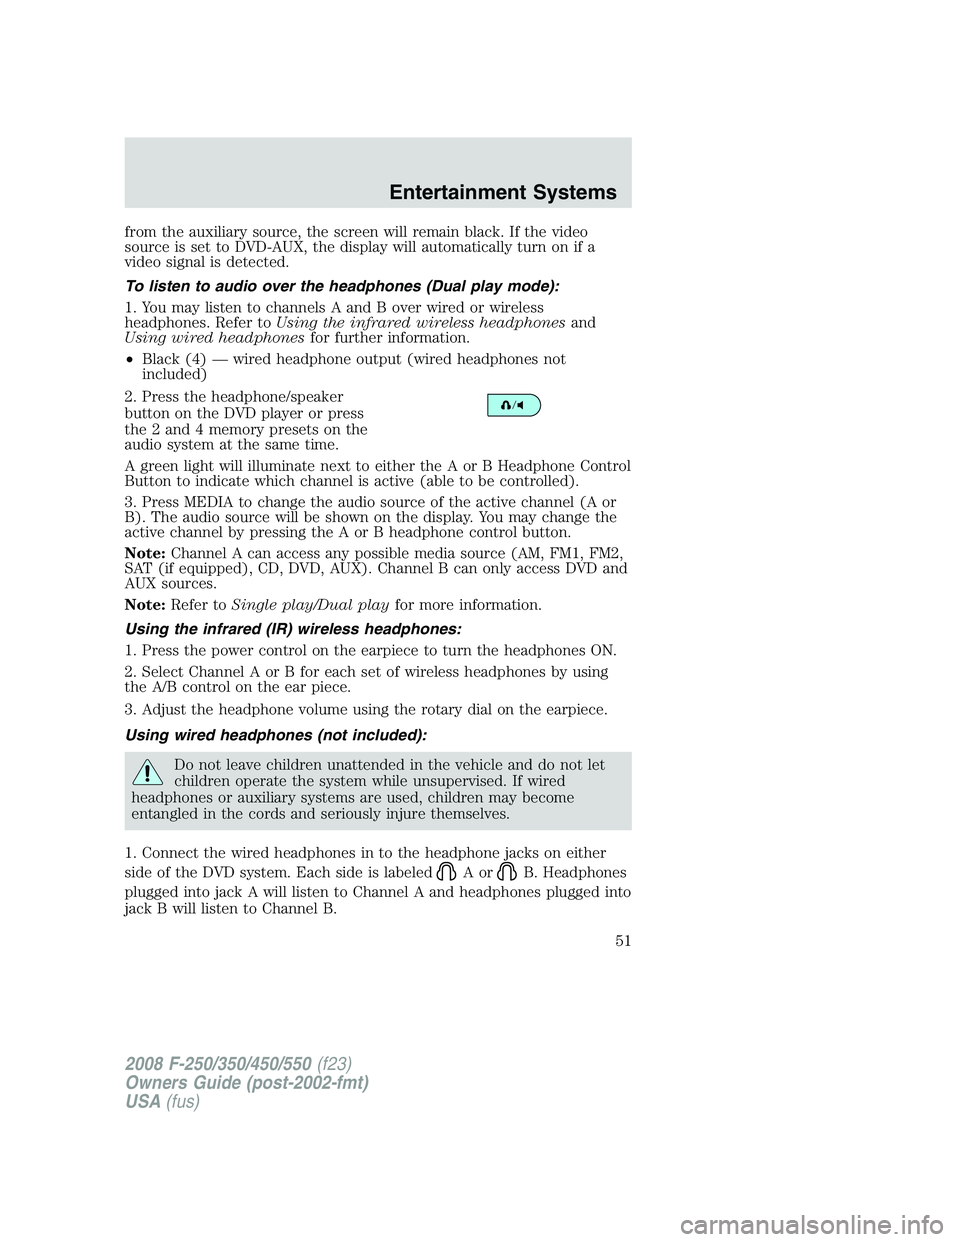
2. Press the headphone/speaker
button on the DVD player or press
the 2 and 4 memory presets on the
audio system at the same time.
A green light will illuminate next to either the A or B Headphone Control
Button to indicate which channel is active (able to be controlled).
3. Press MEDIA to change the audio source of the active channel (A or
B). The audio source will be shown on the display. You may change the
active channel by pressing the A or B headphone control button.
Note:Channel A can access any possible media source (AM, FM1, FM2,
SAT (if equipped), CD, DVD, AUX). Channel B can only access DVD and
AUX sources.
Note:Refer toSingle play/Dual playfor more information.
Using the infrared (IR) wireless headphones:
1. Press the power control on the earpiece to turn the headphones ON.
2. Select Channel A or B for each set of wireless headphones by using
the A/B control on the ear piece.
3. Adjust the headphone volume using the rotary dial on the earpiece.
Using wired headphones (not included):
Do not leave children unattended in the vehicle and do not let
children operate the system while unsupervised. If wired
headphones or auxiliary systems are used, children may become
entangled in the cords and seriously injure themselves.
1. Connect the wired headphones in to the headphone jacks on either
side of the DVD system. Each side is labeled
AorB. Headphones
plugged into jack A will listen to Channel A and headphones plugged into
jack B will listen to Channel B.
2008 F-250/350/450/550(f23)
Owners Guide (post-2002-fmt)
USA(fus)
Entertainment Systems
51
Page 53 of 400

Note:Headphone A can access any possible media (AM, FM1, FM2, SAT
(if equipped), CD, DVD, DVD-AUX). Headphone B can only access DVD
and DVD-AUX.
For further information, refer toSingle play/Dual playlater in this
section.
2.
/(Stop/Eject):Press
once to stop and press a second
time to eject a disc from the DVD
system.
3.
(Reverse):Press and
release for the previous chapter or
track. Press and hold to reverse
search a DVD, Video CD, or FES CD in DVD/CD mode.
4.
(Fast forward):Press and
release for the next chapter or
track. Press and hold to forward
search a DVD, Video CD, or FES CD in DVD/CD mode.
5.
/(Play/Pause):Press
(Play) to select DVD mode (and to
turn the DVD system on if it is off).
If a disc is present, it will resume or begin to play. Press (Pause) while
playing a disc to pause a DVD or CD.
6.On/Off:Press to turn the DVD
system On/Off.
7.VIDEO:Press repeatedly to cycle
through the following video state
options which will be indicated on
the bottom right hand corner of the
display: DVD DISC, DVD-AUX,
NON-DVD and Off (no indicator). If you select the DVD-AUX video
source, the display will turn off if there is no video signal detected. When
a video signal is detected on the auxiliary video input, and the display is
in the DVD-AUX video mode, the display will automatically turn on.
8.Infrared (IR) Receiver & Transmitter:System sensor which reads
the signals from the remote control and sends audio signals to the
infrared (IR) wireless headphones.
2008 F-250/350/450/550(f23)
Owners Guide (post-2002-fmt)
USA(fus)
Entertainment Systems
53
Page 61 of 400
Wired headphones
Do not leave children unattended in the vehicle and do not let
children operate the system while unsupervised. If wired
headphones or auxiliary systems are used, children may become
entangled in the cords and seriously injure themselves.
The driver should never use the headphones while driving the
vehicle. Using headphones may prevent the driver from hearing
audible warnings such as horns or emergency sirens, which could
result in a crash causing serious injury. Give your full attention to
driving and to the road.
You may purchase wired headphones for your FES (Family
Entertainment System). Plug them into the 3.5 mm headphone jack(s)
located on the left and right sides of the system. (Channel A is located
on the left side and Channel B is located on the right side.) These
headphones will be active when in Dual Play mode.
To listen to the audio on wired headphones (not included), connect the
wired headphones into the headphone jacks on the sides of the DVD
system. The wired headphone jack for Channel A is located on the left
side of the FES and is labeled
A. Headphones plugged into this
headphone jack will hear audio from the audio source selected to be the
Channel A source. The wired headphone jack for Channel B is located on
the right side of the FES and is labeled
B. Headphones plugged into
this headphone jack will hear audio from the audio source selected to be
the Channel B source.
Adjust the headphone volume using
the volume control on the DVD
system.
Operation
Single play/Dual play
Your DVD and audio system work together with the infrared headphones
and wired headphones (not included) to allow the rear seat passengers
to listen to the radio (and other media sources) over the headphones.
This enables the front and rear seat passengers to listen to a variety of
sources a variety of ways.
2008 F-250/350/450/550(f23)
Owners Guide (post-2002-fmt)
USA(fus)
Entertainment Systems
61
Page 66 of 400
COMP (Compression):Compression brings soft and loud CD passages
together for a more consistent listening level when in CD mode. Press to
turn the feature on/off.
SHUFFLE:Press to hear all tracks on the current CD in random order.
Press again to stop.
SCAN:Press for a brief sampling of all tracks on the current CD. Press
again to stop.
Playing MP3 discs
To play an MP3 disc on your DVD system:
1. Ensure that the vehicle ignition is in the RUN or ACCESSORY position.
2. Ensure that the DVD system is on.
3. Insert the MP3 disc into the DVD system, label side up.
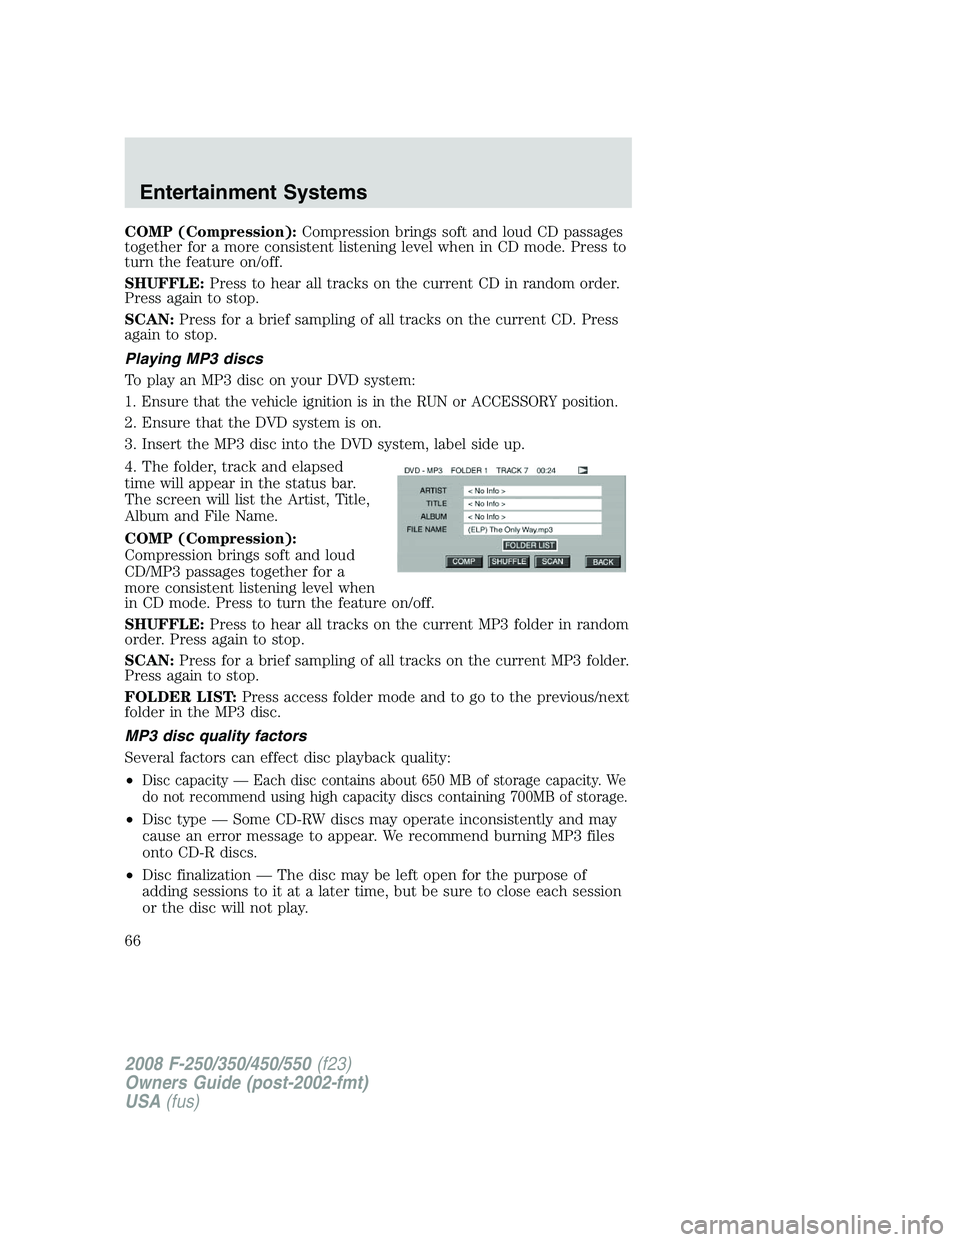
4. The folder, track and elapsed
time will appear in the status bar.
The screen will list the Artist, Title,
Album and File Name.
COMP (Compression):
Compression brings soft and loud
CD/MP3 passages together for a
more consistent listening level when
in CD mode. Press to turn the feature on/off.
SHUFFLE:Press to hear all tracks on the current MP3 folder in random
order. Press again to stop.
SCAN:Press for a brief sampling of all tracks on the current MP3 folder.
Press again to stop.
FOLDER LIST:Press access folder mode and to go to the previous/next
folder in the MP3 disc.
MP3 disc quality factors
Several factors can effect disc playback quality:
•
Disc capacity — Each disc contains about 650 MB of storage capacity. We
do not recommend using high capacity discs containing 700MB of storage.
•Disc type — Some CD-RW discs may operate inconsistently and may
cause an error message to appear. We recommend burning MP3 files
onto CD-R discs.
•Disc finalization — The disc may be left open for the purpose of
adding sessions to it at a later time, but be sure to close each session
or the disc will not play.
2008 F-250/350/450/550(f23)
Owners Guide (post-2002-fmt)
USA(fus)
Entertainment Systems
66
Page 69 of 400
Frame by frame
1. With a DVD playing, press pause.
2. Press the right cursor button. The
DVD will advance one frame. Each
press of the right cursor button will
advance the DVD video by one frame.
Headphone/auxiliary jacks
There are wired headphones (not included) and auxiliary jacks on the left
and right side of your DVD system. They can be used to plug in wired
headphones or to connect and play auxiliary electronic devices such as
game systems, personal camcorders, video cassette recorders, etc.
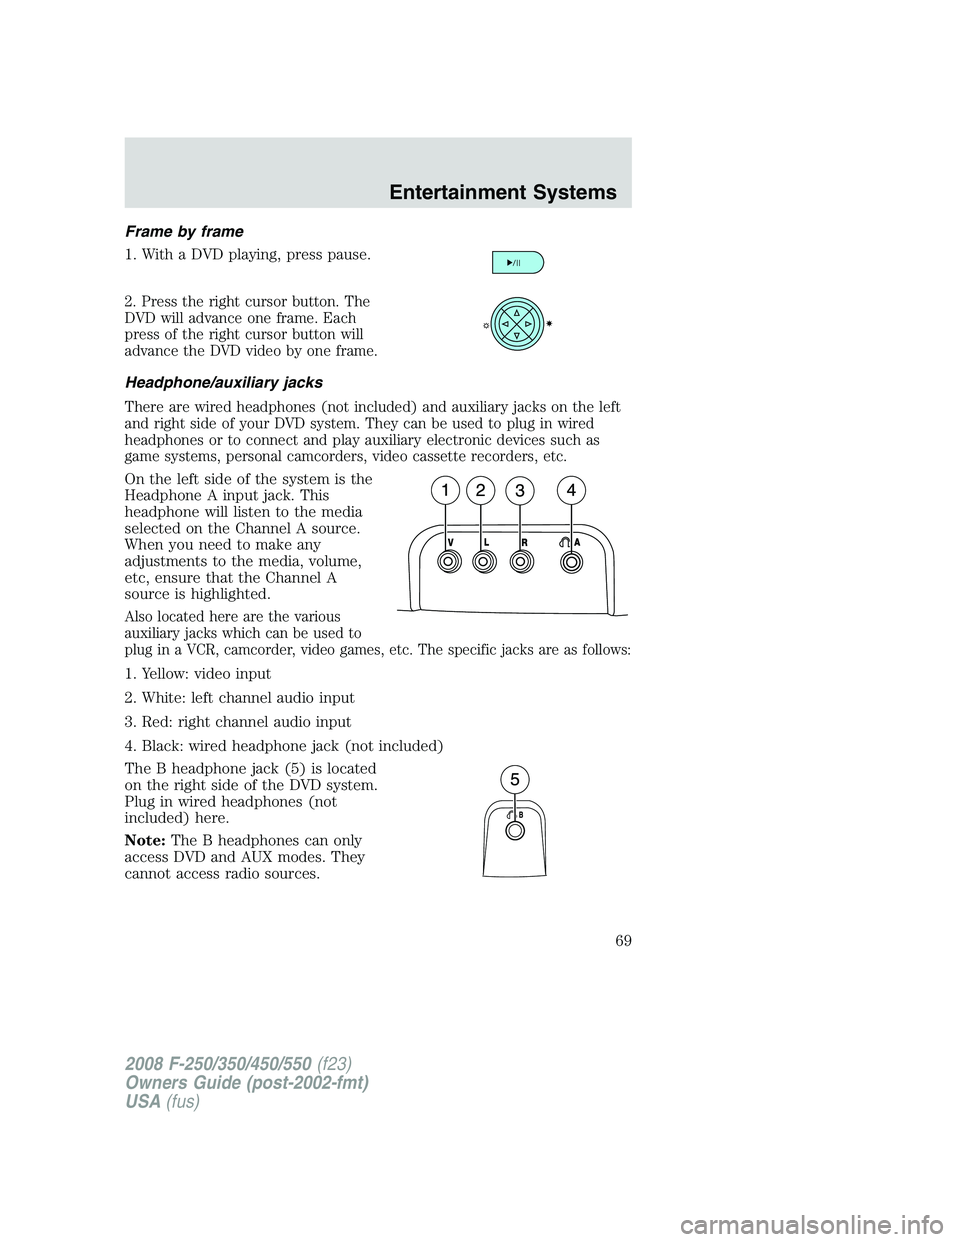
On the left side of the system is the
Headphone A input jack. This
headphone will listen to the media
selected on the Channel A source.
When you need to make any
adjustments to the media, volume,
etc, ensure that the Channel A
source is highlighted.
Also located here are the various
auxiliary jacks which can be used to
plug in a VCR, camcorder, video games, etc. The specific jacks are as follows:
1. Yellow: video input
2. White: left channel audio input
3. Red: right channel audio input
4. Black: wired headphone jack (not included)
The B headphone jack (5) is located
on the right side of the DVD system.
Plug in wired headphones (not
included) here.
Note:The B headphones can only
access DVD and AUX modes. They
cannot access radio sources.
2008 F-250/350/450/550(f23)
Owners Guide (post-2002-fmt)
USA(fus)
Entertainment Systems
69
Page 79 of 400
Operating tips
•To reduce fog build up on the windshield during humid weather, place
the air flow selector in the
position.
•To reduce humidity build up inside the vehicle, do not drive with the
air flow selector in the O (OFF) position.
•Do not put objects under the front seats that will interfere with the
airflow to the rear seats.
•Remove any snow, ice or leaves from the air intake area at the base of
the windshield.
•To improve the A/C cool down, drive with the windows slightly open
for 2–3 minutes after start up or until the vehicle has been “aired out.”
For maximum cooling performance in MAX A/C mode:
1. Move the temperature control to the coolest setting.
2. Set the fan to the highest speed initially, then adjust in order to
maintain comfort.
To aid in side window defogging and demisting in cold weather:
1. Select
.
2. Select A/C.
3. Set the temperature control to maintain comfort.
4. Set the fan speed to highest setting.
5. Direct the outer instrument panel vents towards the side windows.
Do not place objects on top of the instrument panel as these
objects may become projectiles in a collision or sudden stop.
2008 F-250/350/450/550(f23)
Owners Guide (post-2002-fmt)
USA(fus)
Climate Controls
79