Page 36 of 554

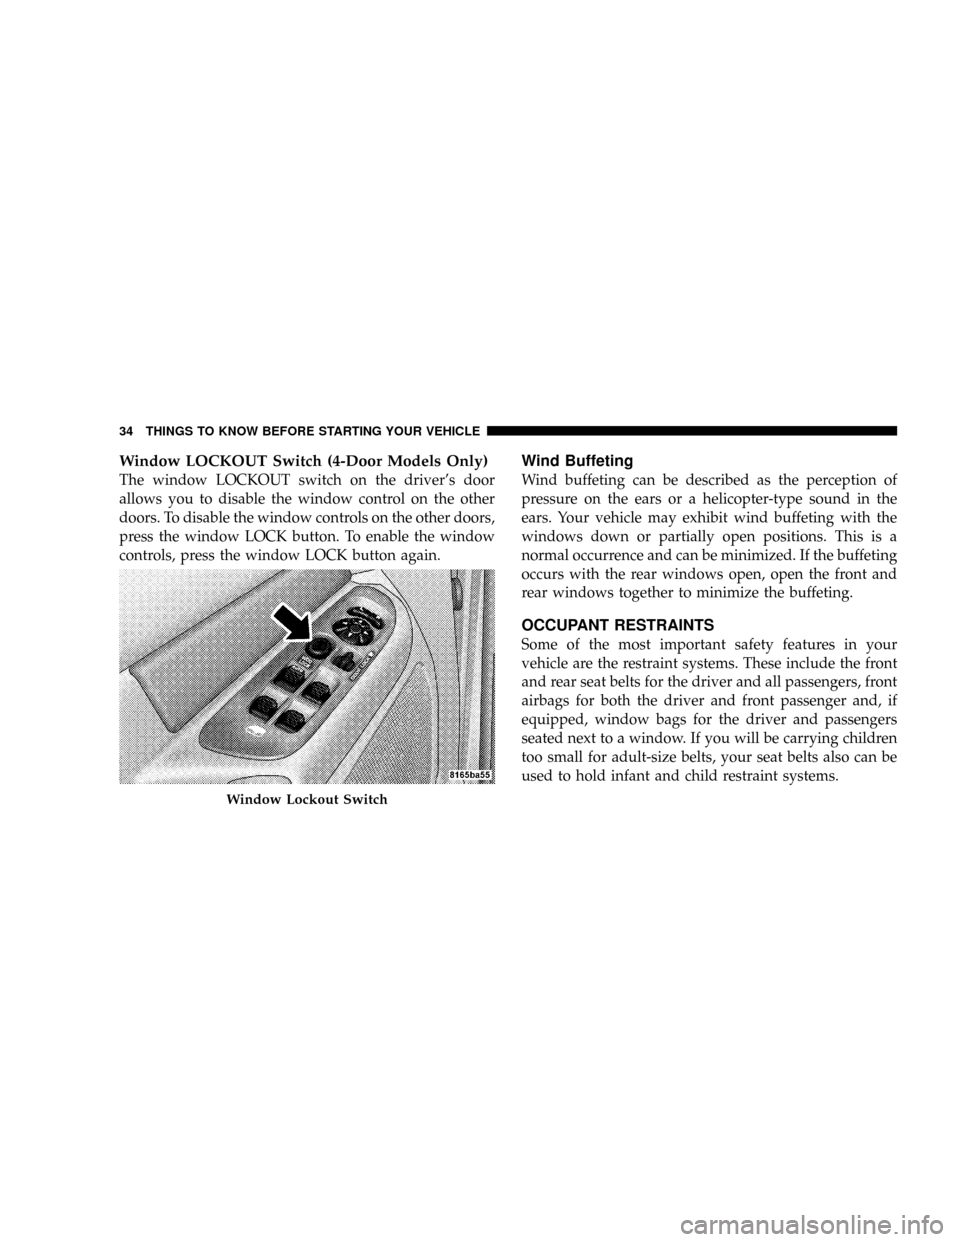
Window LOCKOUT Switch (4-Door Models Only)
The window LOCKOUT switch on the driver's door
allows you to disable the window control on the other
doors. To disable the window controls on the other doors,
press the window LOCK button. To enable the window
controls, press the window LOCK button again.
Wind Buffeting
Wind buffeting can be described as the perception of
pressure on the ears or a helicopter-type sound in the
ears. Your vehicle may exhibit wind buffeting with the
windows down or partially open positions. This is a
normal occurrence and can be minimized. If the buffeting
occurs with the rear windows open, open the front and
rear windows together to minimize the buffeting.
OCCUPANT RESTRAINTS
Some of the most important safety features in your
vehicle are the restraint systems. These include the front
and rear seat belts for the driver and all passengers, front
airbags for both the driver and front passenger and, if
equipped, window bags for the driver and passengers
seated next to a window. If you will be carrying children
too small for adult-size belts, your seat belts also can be
used to hold infant and child restraint systems.
Window Lockout Switch
34 THINGS TO KNOW BEFORE STARTING YOUR VEHICLE
Page 48 of 554

Enhanced Seat Belt Reminder System (BeltAlertT)
If the driver's seat belt has not been buckled within 60
seconds of starting the vehicle and if the vehicle speed is
greater than 5 mph (8 km/h), the Enhanced Warning
System (BeltAlertt) will alert the driver to buckle the seat
belt. The driver should also instruct all other occupants to
buckle their seat belts. If the driver unbuckles the seat
belt while the vehicle is in motion an immediate chime
will be heard and, the Enhanced Warning System
(BeltAlertt) will continue to chime and flash the Seat Belt
Warning Light for 96 seconds or until the driver's seat
belt is buckled. The Enhanced Warning System
(BeltAlertt) will be reactivated if the ignition is cycled,
driver's seat belt is unbuckled for more than 10 seconds
and the vehicle speed is greater than 5 mph (8 km/h).
The Enhanced Warning System (BeltAlertt) can be en-
abled or disabled by your authorized dealer or by
following these steps:NOTE:The following steps must occur within the first
60 seconds of the ignition switch being turned to the ON
or START position. The manufacturer does not recom-
mend deactivating the Enhanced Warning System
(BeltAlertt).
1. With all doors closed and the ignition switch in any
position except On or Start, buckle the driver's seat belt.
2. Turn the ignition switch to the ON position and wait
for the Seat Belt Warning Light to turn off.
3. Within 60 seconds of turning the ignition switch to the
ON position, unbuckle and then re-buckle the driver's
seat belt at least three times within 10 seconds, ending
with the seat belt buckled.
4. Turn the ignition switch to the LOCK position. A
single chime will sound to signify that you have success-
fully completed the programming.
46 THINGS TO KNOW BEFORE STARTING YOUR VEHICLE
Page 61 of 554

Maintaining Your Airbag System
WARNING!
²Modifications to any part of the airbag system
could cause it to fail when you need it. You could
be injured if the airbag system is not there to
protect you. Do not modify the components or
wiring, including adding any kind of badges or
stickers to the steering wheel hub trim cover or the
upper right side of the instrument panel. Do not
modify the front bumper, vehicle body structure,
or add aftermarket side steps or running boards.
²You need proper knee impact protection in a
collision. Do not mount or locate any aftermarket
equipment on or behind the knee bolsters.
²It is dangerous to try to repair any part of the
airbag system yourself. Be sure to tell anyone who
works on your vehicle that it has an airbag system.NOTE:
Perchlorate Material ± special handling may ap-
ply, see www.dtsc.ca.gov/hazardouswaste/perchlorate
Enhanced Accident Response System
If the airbags deploy after an impact and the electrical
system remains functional, vehicles equipped with
power door locks will unlock automatically. In addition,
approximately five seconds after the vehicle has stopped
moving, the interior lights will light until the ignition
switch is turned off.
Airbag Light
You will want to have the airbags ready to
inflate for your protection in an impact. While
the airbag system is designed to be mainte-
nance free, if any of the following occurs, have
an authorized dealer service the system promptly:
²The airbag light does not come on or flickers during
the six to eight seconds when the ignition switch is
first turned ON.
THINGS TO KNOW BEFORE STARTING YOUR VEHICLE 59
2
Page 82 of 554
Lights
Check the operation of all exterior lights. Check turn
signal and high beam indicator lights on the instrument
panel.
Door Latches
Check for positive closing, latching and locking.
Fluid Leaks
Check area under the vehicle after overnight parking for
fuel, water, oil, or other fluid leaks. Also, if fuel fumes are
detected, the cause should be located and corrected.
80 THINGS TO KNOW BEFORE STARTING YOUR VEHICLE
Page 137 of 554

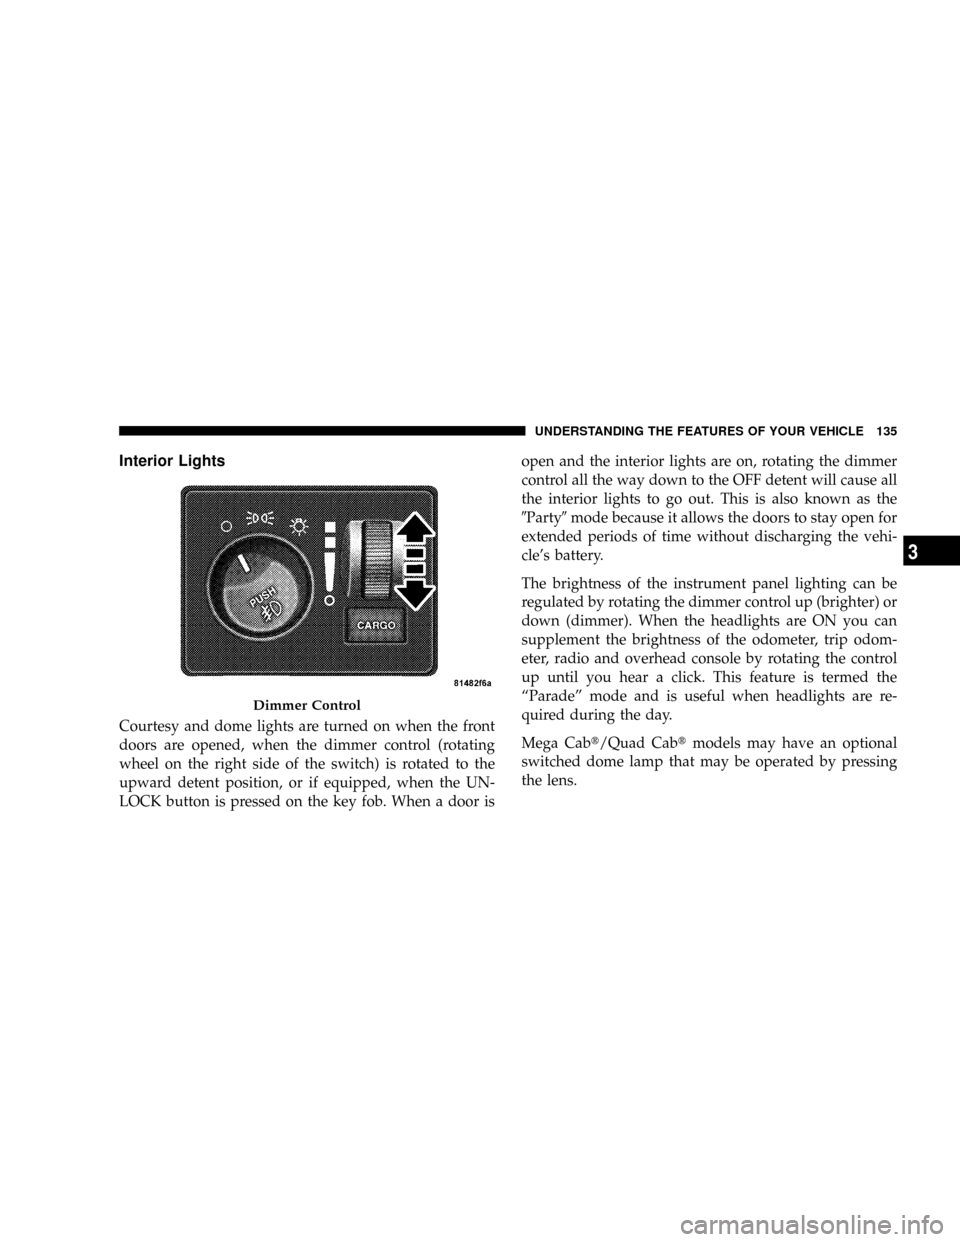
Interior Lights
Courtesy and dome lights are turned on when the front
doors are opened, when the dimmer control (rotating
wheel on the right side of the switch) is rotated to the
upward detent position, or if equipped, when the UN-
LOCK button is pressed on the key fob. When a door isopen and the interior lights are on, rotating the dimmer
control all the way down to the OFF detent will cause all
the interior lights to go out. This is also known as the
9Party9mode because it allows the doors to stay open for
extended periods of time without discharging the vehi-
cle's battery.
The brightness of the instrument panel lighting can be
regulated by rotating the dimmer control up (brighter) or
down (dimmer). When the headlights are ON you can
supplement the brightness of the odometer, trip odom-
eter, radio and overhead console by rotating the control
up until you hear a click. This feature is termed the
ªParadeº mode and is useful when headlights are re-
quired during the day.
Mega Cabt/Quad Cabtmodels may have an optional
switched dome lamp that may be operated by pressing
the lens.
Dimmer Control
UNDERSTANDING THE FEATURES OF YOUR VEHICLE 135
3
Page 140 of 554

Lights-on Reminder
If the headlights, parking lights, or cargo lights are left on
after the ignition is turned OFF, a chime will sound when
the driver's door is opened.
Fog Lights Ð If Equipped
The fog lights are turned ON by placing the
headlight rotary control in the parking light or
headlight position and pushing in the headlight
rotary control. The fog lights will operate only when the
parking lights are on or when the vehicle headlights are
on low beam. An indicator light located in the instrument
cluster will illuminate when the fog lights are on. The fog
lights will turn off when the switch is pushed a second
time, when the headlight switch is rotated to the OFF
position, or the high beam is selected.
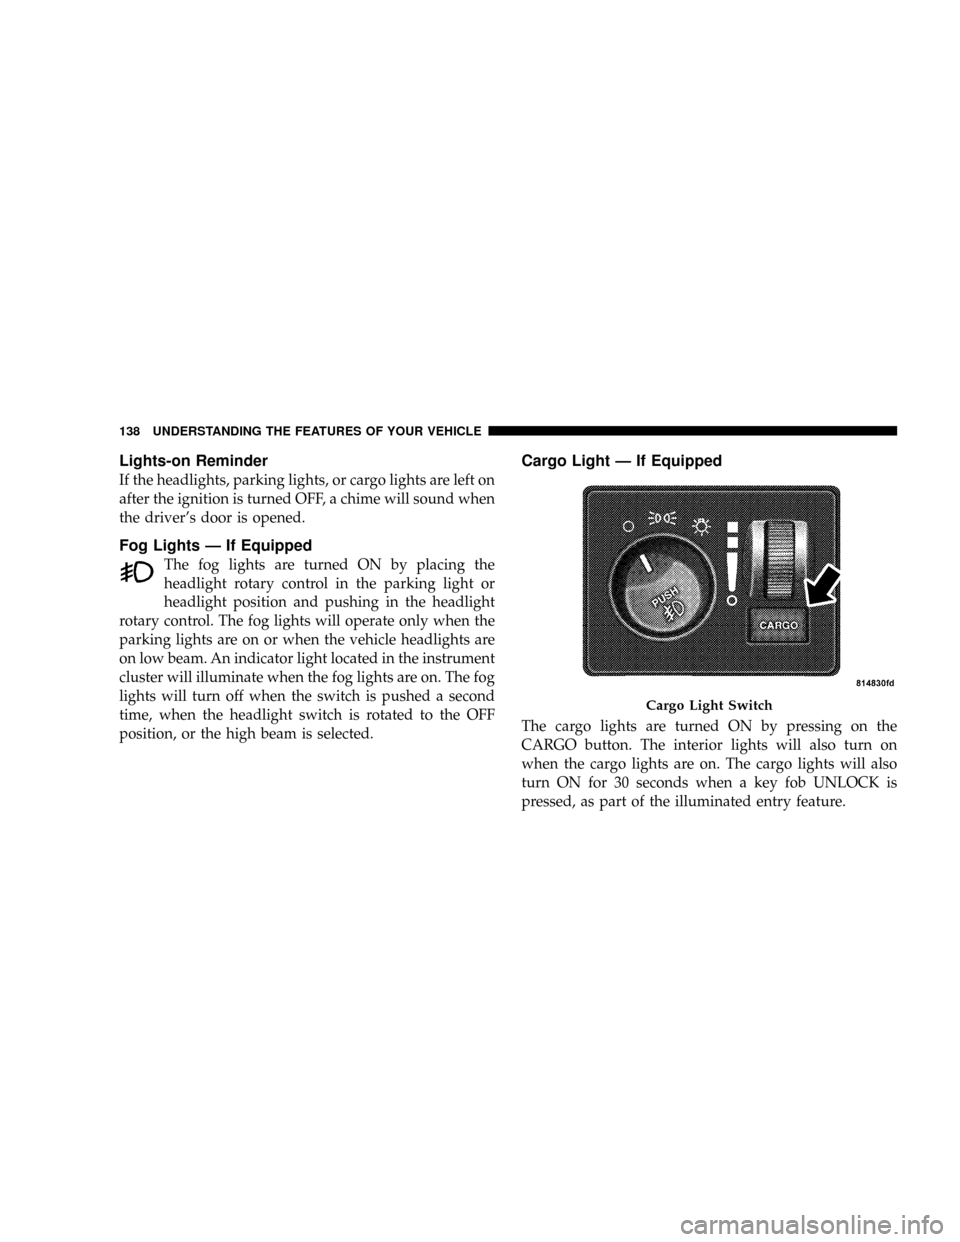
Cargo Light Ð If Equipped
The cargo lights are turned ON by pressing on the
CARGO button. The interior lights will also turn on
when the cargo lights are on. The cargo lights will also
turn ON for 30 seconds when a key fob UNLOCK is
pressed, as part of the illuminated entry feature.
Cargo Light Switch
138 UNDERSTANDING THE FEATURES OF YOUR VEHICLE
Page 151 of 554
Courtesy/Reading Lights
In the middle of the console are two courtesy/reading
lights.
Both lights illuminate as courtesy lights when a door is
opened, when the dimmer control is rotated to the
courtesy light position (fully-upward position), or when
the UNLOCK button is pressed on the Remote Keyless
Entry transmitter, if equipped. These lights are also
operated individually as reading lights by pressing the
recessed area of the corresponding lens.
NOTE:The courtesy/reading lights will remain on until
the switch is pressed a second time, so be sure they have
been turned off before leaving the vehicle. If the interior
lights are left on after the vehicle is turned off, they will
extinguish after 15 minutes.
OVERHEAD CONSOLE WITH
COMPASS/TEMPERATURE MINI-TRIP COMPUTER
Ð IF EQUIPPED
This optional overhead console consists of the following:
²Courtesy Lights
²Compass/Temperature Mini-Trip Computer (CMTC)
UNDERSTANDING THE FEATURES OF YOUR VEHICLE 149
3
Page 164 of 554

Then proceed with Step 4 under, ªProgramming
HomeLinkt,º earlier in this section.
Using HomeLinkT
To operate, simply press and release the programmed
HomeLinktbutton. Activation will now occur for the
trained device (i.e., garage door opener, gate operator,
security system, entry door lock, home/office lighting,
etc.) The hand-held transmitter of the device may also be
used at any time.
Reprogramming A Single HomeLinkTButton
To reprogram a channel that has been previously trained,
follow these steps:
1. Turn the ignition switch to the ON/RUN position.
2. Press and hold the desired HomeLinktbutton, for 20
seconds, until the indicator(s) starts to flash.Do not
release the button.3.Without releasing the button,proceed with PRO-
GRAMMING HOMELINKt, Step #2, and follow all
remaining steps.
Security
It is advised to erase all channels before you sell or turn
in your vehicle.
To do this, press and hold the two outside buttons, for 20
seconds, until the indicators begin to flash. Note that all
channels will be erased. Individual channels cannot be
erased.
The HomeLinktUniversal Transceiver is disabled when
the Vehicle Theft Alarm is active.
Troubleshooting Tips
If you are having trouble programming HomeLinkt, here
are some of the most common solutions:
²Replace the battery in the original transmitter.
162 UNDERSTANDING THE FEATURES OF YOUR VEHICLE