2008 DODGE RAM 2500 POWER WAGON brake
[x] Cancel search: brakePage 294 of 504

Driving Through Water
Extreme care should be taken crossing any type of water.
Water crossings should be avoided if possible and only
be attempted when necessary, in a safe responsible
manner. You should only drive through areas which are
designated and approved. You should tread lightly and
avoid damage to the environment. You should know
your vehicles abilities and be able to recover it if some-
thing goes wrong. You should never stop or shut a
vehicle off when crossing deep water unless you ingested
water into the engine air intake. If the engine stalls do not
attempt to restart it. Determine if it has ingested water
first. The key to any crossing is low and slow. You want
to use 1st gear in 4L (low) and proceed very slowly with
a constant slow speed (3-5 mph maximum) and light
throttle. Keep the vehicle moving; do not try to accelerate
through the crossing. After crossing any water higherthan the bottom of the axle differentials, you should
inspect all of the vehicle fluids for signs of water inges-
tion.
CAUTION!
Water ingestion into the axles, transmission, transfer
case, engine or vehicle interior can occur if you drive
too fast or through too deep of water. Water can cause
permanent damage to engine, driveline or other
vehicle components and your brakes will be less
effective once wet and/or muddy
²Before You Cross Any Type Of Water± As you
approach any type of water you need to determine if
you can cross it safely and responsibly. If necessary, get
out and walk through the water or probe it with a
stick. You need to be sure of its depth, approach angle,
current and bottom condition. Be careful of murky or
294 STARTING AND OPERATING
Page 299 of 504

point. Using tow straps requires coordination between
the two drivers. Good communication and line of sight
are required for a safe recovery. First connect the tow
strap to the correct attachment points on both vehicles.
There should be a least 20 to 30 feet between the
vehicles to allow for a safe recovery. If necessary join
two tow straps together using a 1
1¤2inch hard wood
dowel. This will keep the straps from becoming knot-
ted and is safer than using a clevis pin if the strap
breaks. Next have the tow vehicle backup, leaving 2 to
3 feet worth of slack in the strap. Then the tow vehicle,
using light throttle, should accelerate tightening the
strap providing the pulling force needed to free the
vehicle. The vehicle being recovered should assist in
the recovery, at the time of the snap, by slowly
spinning the tires in the same direction as the pulling
vehicle. After the vehicle becomes free, the driver of
the previously stuck vehicle should signal they are free
and should hit their brakes stopping both vehicles.The driver of the pulling vehicle should let off the
throttle without using the brakes, once signaled by the
other driver. This sequence is important to avoid
having the recovered vehicle hit the pulling vehicle.
WARNING!
Never use tow straps with end hooks or link two
straps with a clevis pin. These heavy metal objects
could become projectiles if a strap breaks, which
could cause severe injury. Never leave more than 2 or
3 feet of slack in the strap. More slack than this
greatly increases the risk of injury and vehicle dam-
age. Always keep everyone at least 30 feet away from
a strapping or winching situation.
STARTING AND OPERATING 299
5
Page 301 of 504
WARNING!
Winch cables are under high tension when in use and
can become a projectile if they fail. Never stand over
or straddle the winch cable. Never jerk or overload
the winch cable. Never stand in front of the vehicle
while winching. Failure to follow these instructions
can result in serious or fatal injury.
After Driving Off-Road
Off-road operation puts more stress on your vehicle than
does most on-road driving. After driving off-road, it is
always a good idea to check for damage.
²Completely inspect the underbody of your vehicle.
Check tires, body structure, steering, suspension, and
exhaust system for damage.
²Check threaded fasteners for looseness, particularly on
the chassis, drivetrain components, steering, and sus-
pension. Retighten them, if required, and torque to the
values specified in the Service Manual.
²Check for accumulations of plants or brush. These
things could be a fire hazard, or they might hide
damage to fuel lines, brake hoses, axle pinion seals,
and propeller shafts.
²After extended operation in mud, sand, water, or
similar dirty conditions, have brake drums and rotors,
brake linings, and axle yokes inspected and cleaned as
soon as possible.
²If you experience unusual vibration after driving in
mud, slush or similar conditions, check the wheels for
packed material. Packed foreign material can cause a
wheel imbalance and cleaning the wheels will correct
the situation.
STARTING AND OPERATING 301
5
Page 302 of 504

WARNING!
Abrasive material in any part of the brakes may cause
excessive wear or unpredictable braking. You might
not have full braking power when you need it to
prevent an accident. If you have been operating your
vehicle in dirty conditions, get your brakes checked
and cleaned as necessary. Failure to do so may result
is serious injury.
WINCH USAGE ± IF EQUIPPED
Things To Know Before Using Your Winch
General Winch Information
Your vehicle is equipped with an electric vehicle recovery
winch. This winch uses the electrical power from the
vehicle charging system to power a motor that windswire rope into the winch drum via planetary gear reduc-
tion. By nature, a winch is capable of generating very
high forces and should be used with care. Do not operate
the winch without reading and understanding the com-
plete winch owner's manual.
Tensioning the Wire Rope
The winch rope must be properly tensioned before use.
Follow the instructions below to tension the rope:
1. Un-spool the wire rope leaving 5 wraps of rope on the
winch drum.
2. Attach the hook to a suitable anchor point.
CAUTION!
Be certain the anchor will withstand the load re-
quired to tension the wire rope.
302 STARTING AND OPERATING
Page 305 of 504

1.Motor:The winch motor is powered by the vehicle
charging system and features a thermal protection switch
that automatically stops motor function in the power-in
direction if the motor gets too hot.
2.Remote Socket:The remote socket allows the remote
control to be attached to the control pack to allow the
winch to function.
3.Winch Drum w/ Integral Brake:The winch drum
allows the wire rope to be stored on the winch and
transmits force to the wire rope. The winch is equipped
with an integral brake that will stop rotation of the winch
drum if the winch motor is stopped.
4.3 Stage Planetary Gear Set:Provides balance between
speed and pulling power.
5.Wire Rope:The wire rope allows the winch to be
connected to an anchor to provide a pulling force.6.Clutch Lever:The clutch lever allows the winch drum
to be disconnected from the winch motor to allow the
wire rope to be pulled from the winch by hand.
7.Remote Control:The remote control provides the
interface between the winch operator and the winch. The
remote control provides the ability to power the winch in,
out, and stop the winch. To operate the winch, the toggle
switch is pressed down to power the winch in and up to
power the winch out. The winch will stop if the switch is
left in the neutral (center) position.
CAUTION!
If not installed, the hook strap must be placed on the
hook.
Fairlead:The fairlead acts as a guide for the wire rope
and minimizes damage to the rope.
STARTING AND OPERATING 305
5
Page 312 of 504
NOTE: How to choose an anchor point:A secure
anchor is critical to winching operations. An anchor must
be strong enough to hold while winching. Natural an-
chors include trees, stumps and rocks. Hook the cable as
low as possible. If no natural anchors are available when
recovering another vehicle, your vehicle becomes the
anchor point. In this case, be sure to put the transmission
in neutral, apply the hand brake and block its wheels to
prevent your vehicle from moving. Ideally, you'll want
an anchor point that will enable you to pull straight in the
direction the vehicle will move. This allows the wire rope
to wind tightly and evenly onto the spooling drum. An
anchor point as far away as possible will provide the
winch with its greatest pulling power.
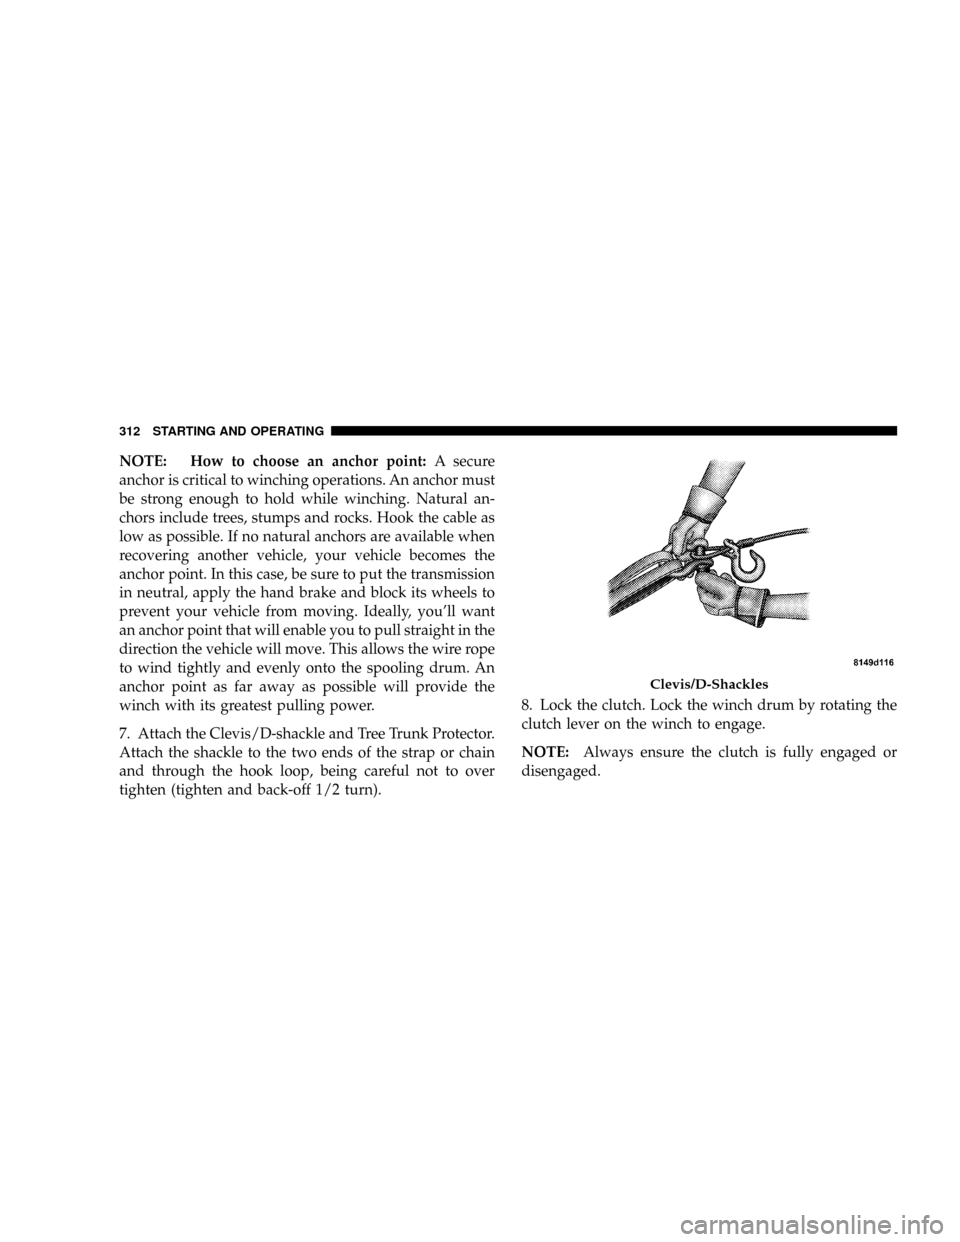
7. Attach the Clevis/D-shackle and Tree Trunk Protector.
Attach the shackle to the two ends of the strap or chain
and through the hook loop, being careful not to over
tighten (tighten and back-off 1/2 turn).8. Lock the clutch. Lock the winch drum by rotating the
clutch lever on the winch to engage.
NOTE:Always ensure the clutch is fully engaged or
disengaged.
Clevis/D-Shackles
312 STARTING AND OPERATING
Page 316 of 504

NOTE:Avoid overheating the winch motor. For ex-
tended winching, stop at reasonable intervals to allow
the winch motor to cool down.
NOTE: What to look for under load:The wire rope
must always spool onto the drum as indicated by the
drum rotation decal on the winch. As you power-in,
make sure the wire rope winds evenly and tightly on the
drum. This prevents the outer wire wraps from drawing
into the inner wraps, binding and damaging the wire
rope. Avoid shock loads by using the control switch
intermittently to take up wire rope slack. Shock loads can
momentarily far exceed the winch and wire rope ratings.
During side pulls the wire rope tends to stack up at one
end of the drum. This stack can become large enough to
cause serious damage to the winch. So, line up pulls as
straight ahead as possible and stop winching if the wire
rope comes close to the tie rods or mounting plate. To fixan uneven stack, spool out that section of the rope and
reposition it to the opposite end of the drum, which will
free up space for continued winching.
16. Secure vehicle. Once recovery of the vehicle is com-
plete, be sure to secure the vehicle's brakes and put the
transmission in9park9(automatic) or9low9gear for
9manual9transmissions. Release tension in the wire rope.
17. Disconnect wire rope. Disconnect from the anchor.
18. Rewind wire rope. The person handling the wire
rope should walk the rope in and not let it slide through
the hand, control the winch at all times.
316 STARTING AND OPERATING
Page 321 of 504
vehicle's frame/tow hook and run the wire rope through
a snatch block. Disengage the clutch and, using the
snatch block, pull out enough wire to reach your anchor
point. Do not attach hook to mounting kit. Secure to the
anchor point with a tree trunk protector or choker chain.
Attach the clevis/shackle. Attach the shackle to the two
ends of the strap/chain, being careful not to over tighten
(tighten and back-off 1/2 turn).
PARKING BRAKE
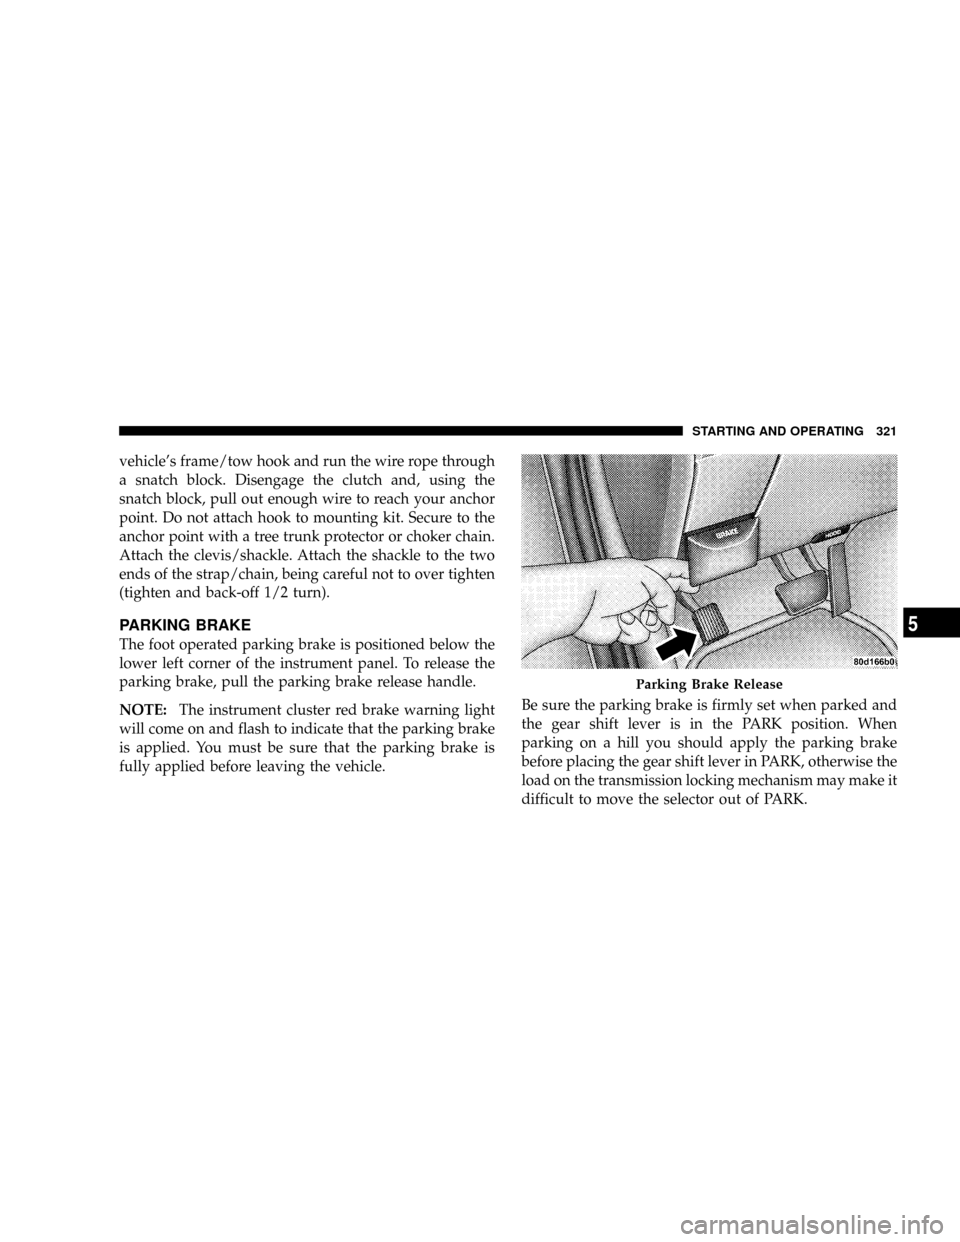
The foot operated parking brake is positioned below the
lower left corner of the instrument panel. To release the
parking brake, pull the parking brake release handle.
NOTE:The instrument cluster red brake warning light
will come on and flash to indicate that the parking brake
is applied. You must be sure that the parking brake is
fully applied before leaving the vehicle.Be sure the parking brake is firmly set when parked and
the gear shift lever is in the PARK position. When
parking on a hill you should apply the parking brake
before placing the gear shift lever in PARK, otherwise the
load on the transmission locking mechanism may make it
difficult to move the selector out of PARK.
Parking Brake Release
STARTING AND OPERATING 321
5