2008 DODGE GRAND CARAVAN service
[x] Cancel search: servicePage 108 of 531
The UConnecttsystem can be used with any Hands-Free
Profile certified Bluetoothtcellular phone. See the
UConnecttwebsite for supported phones. If your cellu-
lar phone supports a different profile (e.g., Headset
Profile) you may not be able to use any UConnectt
features. Refer to your cellular service provider or the
phone manufacturer for details.
The UConnecttsystem is fully integrated with the vehi-
cle's audio system. The volume of the UConnecttsystem
can be adjusted either from the radio volume control
knob or from the steering wheel radio control (right
switch), if so equipped.
The radio display will be used for visual prompts from
the UConnecttsystem such as9CELL9or caller ID on
certain radios.Operation
Voice commands can be used to operate the UConnectt
system and to navigate through the UConnecttmenu
structure. Voice commands are required after most
UConnecttsystem prompts. You will be prompted for a
specific command and then guided through the available
options.
²Prior to giving a voice command, one must wait for
the beep, which follows the9Ready9prompt or another
prompt.
²For certain operations, compound commands can be
used. For example, instead of saying9Setup9and then
9Phone Pairing,9the following compound command
can be said:9Setup Phone Pairing.9
²For each feature explanation in this section, only the
combined form of the voice command is given. You
can also break the commands into parts and say each
part of the command when you are asked for it. For
106 UNDERSTANDING THE FEATURES OF YOUR VEHICLE
Page 115 of 531
List All Names in the UConnecttPhonebook
²
Press the PHONE button to begin.
²After the9Ready9prompt and the following beep, say
9Phonebook List Names.9
²The UConnecttsystem will play the names of all the
phonebook entries.
²To call one of the names in the list, press the ªVoice
Recognitionº button during the playing of the desired
name, and say9Call.9
NOTE:The user can also exercise9Edit9or9Delete9
operations at this point.
²The UConnecttsystem will then prompt you as to the
number designation you wish to call.
²The selected number will be dialed.
Phone Call Features
The following features can be accessed through the
UConnecttsystem if the feature(s) are available on your
cellular service plan. For example, if your cellular service
plan provides three-way calling, this feature can be
accessed through the UConnecttsystem. Check with
your cellular service provider for the features that you
have.
Answer or Reject an Incoming Call - No Call
Currently in Progress
When you receive a call on your cellular phone, the
UConnecttsystem will interrupt the vehicle audio sys-
tem, if on, and will ask if you would like to answer the
call. Press the PHONE button to accept the call. To reject
the call, press and hold the PHONE button until you hear
a single beep, indicating that the incoming call was
rejected.
UNDERSTANDING THE FEATURES OF YOUR VEHICLE 113
3
Page 119 of 531
²After the9Ready9prompt and the following beep, say
9Emergency9and the UConnecttsystem will instruct
the paired cellular phone to call the emergency num-
ber. This feature is supported in the U.S., Canada, and
Mexico.
NOTE:The emergency number dialed is based on the
country where the vehicle is purchased (911 for the U.S.
and Canada and 060 for Mexico). The number dialed may
not be applicable with the available cellular service and
area.
The UConnecttsystem does slightly lower your chances
of successfully making a phone call as to that for the cell
phone directly.
Your phone must be turned on and paired to the
UConnecttsystem to allow use of this vehicle feature in
emergency situations, when the cell phone has network
coverage and stays paired to the UConnecttsystem.Towing Assistance
If you need towing assistance:
²Press the PHONE button to begin.
²After the9Ready9prompt and the following beep, say
9Towing Assistance.9
NOTE:The Towing Assistance number dialed is based
on the country where the vehicle is purchased (1-800-528-
2069 for the U.S., 1-877-213-4525 for Canada, 55-14-3454
for Mexico City and 1-800-712-3040 for outside Mexico
City in Mexico).
Please refer to the 24-Hour ªTowing Assistanceº cover-
age details in the Warranty Information Booklet and on
the 24±Hour Towing Assistance Card.
Paging
To learn how to page, refer to9Working with Automated
Systems.9Paging works properly except for pagers of
UNDERSTANDING THE FEATURES OF YOUR VEHICLE 117
3
Page 120 of 531
certain companies, which time out a little too soon to
work properly with the UConnecttsystem.
Voice Mail Calling
To learn how to access your voice mail, refer to9Working
with Automated Systems.9
Working with Automated Systems
This method is used in instances where one generally has
to press numbers on the cellular phone keypad while
navigating through an automated telephone system.
You can use your UConnecttsystem to access a voice
mail system or an automated service, such as a paging
service or automated customer service line. Some ser-
vices require immediate response selection. In some
instances, that may be too quick for use of the UConnectt
system.
When calling a number with your UConnecttsystem
that normally requires you to enter in a touch-tonesequence on your cellular phone keypad, you can press
the ªVoice Recognitionº button and say the sequence you
wish to enter, followed by the word9Send.9For example,
if required to enter your PIN followed with a pound, (3 7
4 6 #), you can press the ªVoice Recognitionº button and
say,93746#Send.9Saying a number, or sequence of
numbers, followed by9Send,9is also to be used for
navigating through an automated customer service cen-
ter menu structure, and to leave a number on a pager.
You can also send stored UConnecttphonebook entries
as tones for fast and easy access to voice mail and pager
entries. To use this feature, dial the number you wish to
call and then press the ªVoice Recognitionº button and
say, ªSend.º The system will prompt you to enter the
name or number and say the name of the phonebook
entry you wish to send. The UConnecttsystem will then
send the corresponding phone number associated with
the phonebook entry, as tones over the phone.
118 UNDERSTANDING THE FEATURES OF YOUR VEHICLE
Page 178 of 531
NOTE:
²Ensure that the rear bumper is free of dirt and debris
to keep the system operating properly.
²Jackhammers, large trucks, and other vibrations could
affect the performance of the system.
Enabling and Disassembling The Rear Park Assist
System
There are times when you may want to disable the Rear
Park Assist System, such as when towing a trailer.
NOTE:The manufacturer suggests disabling the Rear
Park Assist System when towing a trailer. Refer to the
following procedures.
Vehicles Equipped With the Electronic Vehicle
Information Center (EVIC)
You can turn the Rear Park Assist System on or off
through the EVIC. For details, refer to ªPersonal Settings(Customer Programmable Features)º under ªElectronic
Vehicle Information Center (EVIC)º in Section 4 of this
manual.
Vehicles Equipped With the Compass Mini-Trip
Computer (CMTC)
You can turn the Rear Park Assist System ON or OFF
through the CMTC by pressing the left reset button in the
instrument cluster. Turn the ignition switch to the ON
position, then press and hold the rest button for approxi-
mately two seconds.
Service The Rear Park Assist System
If the Rear Park Assist System malfunctions, the instru-
ment cluster will actuate a single chime, once per ignition
cycle, and it will display the(SERVICE PARK ASSIST
SYSTEM(message. Refer to ªCompass Mini Trip Com-
puter (CMTC) or ªElectronic Vehicle Information Center
(EVIC)º Ð as equipped, in Section 4 of this manual.
176 UNDERSTANDING THE FEATURES OF YOUR VEHICLE
Page 179 of 531
If(SERVICE PARK ASSIST SYSTEM(appears in the
Electronic Vehicle Information Center (EVIC), after mak-
ing sure the rear bumper is clean, please see your
authorized dealer.
Should this wrench symbol display with the
letterPnext to it, your Park Sense System
needs servicing. Contact your authorized
dealer.
Cleaning The Rear Park Assist System
Clean the Rear Park Assist Sensors with water, car wash
soap and a soft cloth. Do not use rough or hard cloths. Do
not scratch or poke the sensors, otherwise, you could
damage the sensors.
ADJUSTABLE PEDALS Ð IF EQUIPPED
This feature allows both the brake and accelerator pedals to
move toward or away from the driver to provide improved
position with the steering wheel. The adjustable pedal
system is designed to allow a greater range of driver comfort
for steering wheel tilt and seat positions. The switch is
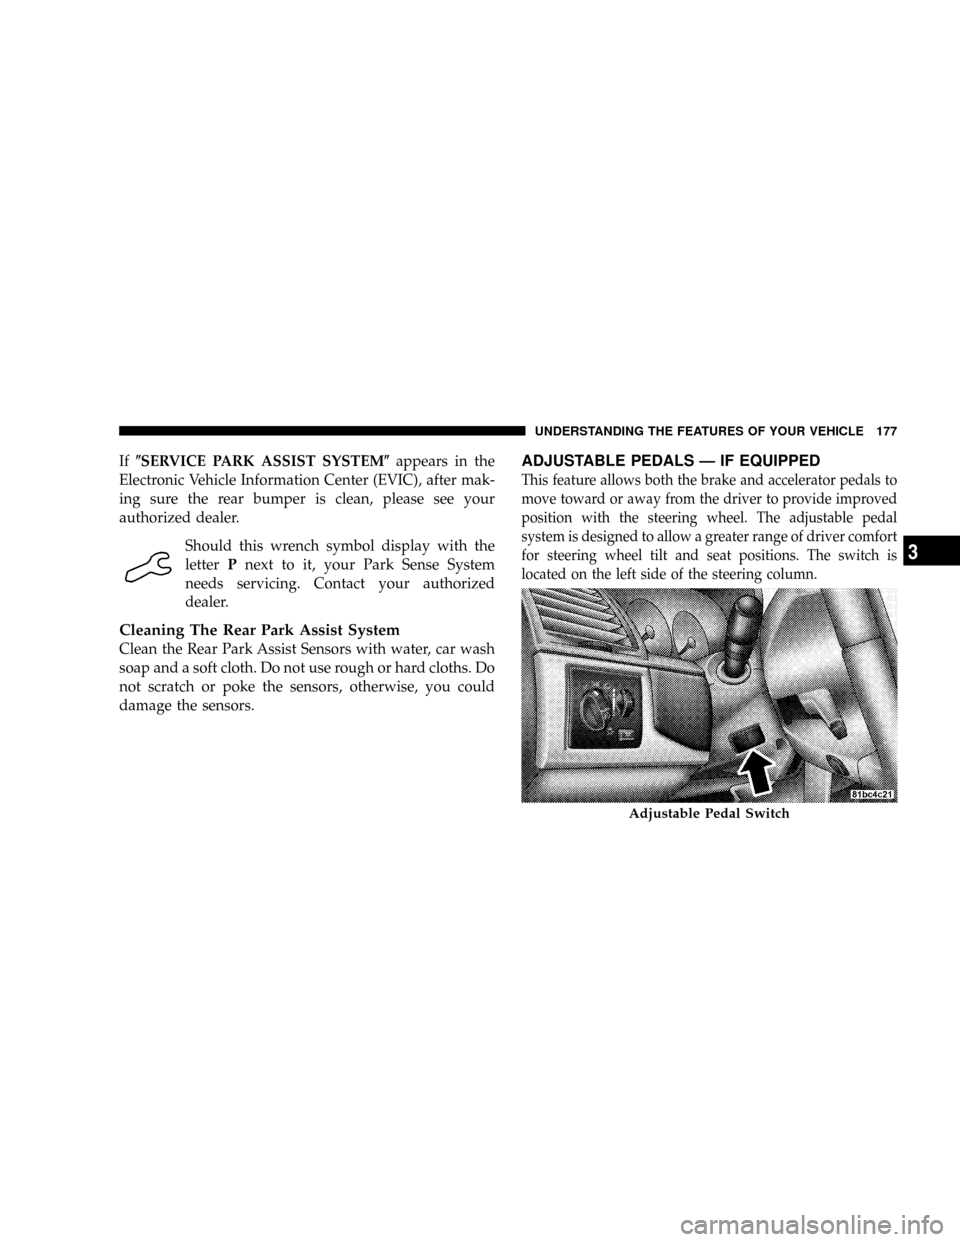
located on the left side of the steering column.
Adjustable Pedal Switch
UNDERSTANDING THE FEATURES OF YOUR VEHICLE 177
3
Page 228 of 531
INSTRUMENT CLUSTER DESCRIPTIONS
1. Fuel Gauge
The pointer shows the level of fuel in the fuel tank when
the ignition switch is in the ON position.
2. Fuel Door Reminder
The arrow in this symbol is a reminder that the
Fuel Filler Door is located on the left side of the
vehicle.
3. Temperature Gauge
The temperature gauge shows engine coolant tempera-
ture. Any reading within the normal range indicates that
the engine cooling system is operating satisfactorily.The gauge pointer will likely indicate a higher tempera-
ture when driving in hot weather, up mountain grades,
or when towing a trailer. It should not be allowed to
exceed the upper limits of the normal operating range.
CAUTION!
Driving with a hot engine cooling system could
damage your vehicle. If temperature gauge reads
ªHª, pull over and stop the vehicle. Idle the vehicle
with the air conditioner turned off until the pointer
drops back into the normal range. If the pointer
remains on the ªHº, and you hear continuous chimes,
turn the engine off immediately, and call an autho-
rized dealer for service.
226 UNDERSTANDING YOUR INSTRUMENT PANEL
Page 229 of 531
WARNING!
A hot engine cooling system is dangerous. You or
others could be badly burned by steam or boiling
coolant. You may want to call an authorized dealer if
your vehicle overheats. If you decide to look under
the hood yourself, see Section 7 of this manual.
Follow the warnings under the Cooling System Pres-
sure Cap paragraph.
4. Speedometer
Indicates vehicle speed.
5. Turn Signal Indicators
The arrow will flash with the exterior turn signal
when the turn signal lever is operated.
If the vehicle electronics sense that the vehicle has
traveled about one mile with the turn signals on, acontinuous chime will sound to alert you to turn the
signals off. If either indicator flashes at a rapid rate, check
for a defective outside light bulb.
6. High Beam Light
This light shows that the headlights are on high
beam. Pull the turn signal lever towards the
steering wheel to switch the headlights from high or low
beam.
7. Anti-Lock Brake System Light
This light monitors the Anti-Lock Brake Sys-
tem. The light will turn on when the ignition
switch is turned to the ON position and may
stay on for as long as four seconds.
If the ABS light remains on or turns on while driving, it
indicates that the Anti-Lock portion of the brake system
is not functioning and that service is required. However,
the conventional brake system will continue to operate
normally if the BRAKE warning light is not on.
UNDERSTANDING YOUR INSTRUMENT PANEL 227
4