2008 DODGE GRAND CARAVAN battery replacement
[x] Cancel search: battery replacementPage 28 of 531
The table below explains the Lamp Flash options.
FunctionWhich Turn
Signal LampsNumber of
Flashes
Lock All 1
Unlock 1st Press Left Side 2
Unlock All
DoorsAll 2
Left Side Left Side 2
Right Side Right Side 2
Liftgate All 2
Programming Additional RKE Transmitters
Refer to Sentry KeytImmobilizer System ªCustomer
Key Programming.º
If you do not have a programmed RKE transmitter,
contact your authorized dealer for details.
Replacing the RKE Transmitter Battery
The recommended replacement battery is one CR2032
battery.
NOTE:
Perchlorate Material Ð special handling may ap-
ply. See: www.dtsc.ca.gov/hazardouswaste/perchlorate.
NOTE:Do not touch the battery terminals that are on
the back housing or the printed circuit board.
1. Battery access is through a door located on the rear of
the RKE transmitter. Insert a small, flat bladed screw-
driver into the slot and gently pry open the access door.
26 THINGS TO KNOW BEFORE STARTING YOUR VEHICLE
Page 29 of 531
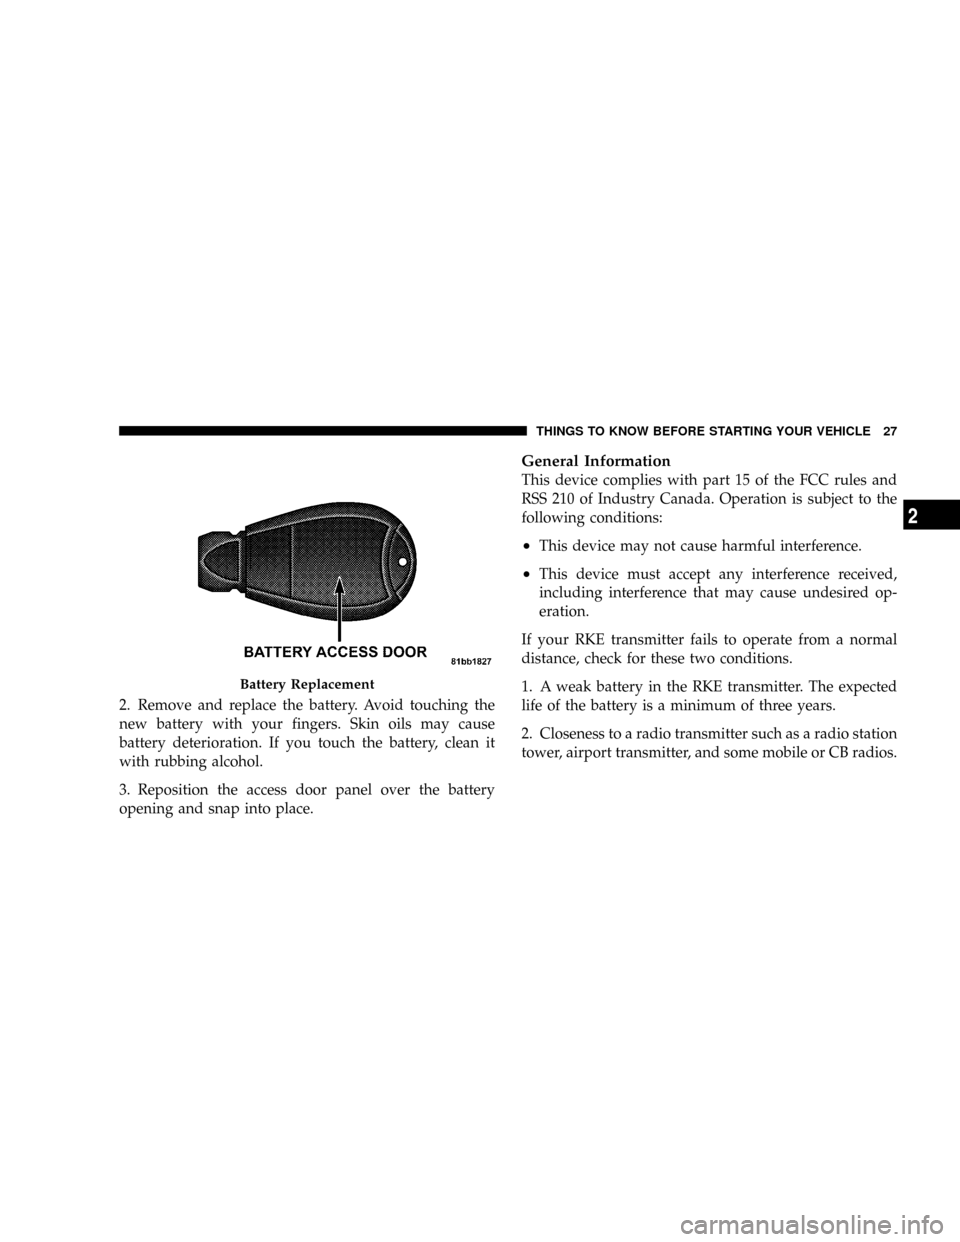
2. Remove and replace the battery. Avoid touching the
new battery with your fingers. Skin oils may cause
battery deterioration. If you touch the battery, clean it
with rubbing alcohol.
3. Reposition the access door panel over the battery
opening and snap into place.
General Information
This device complies with part 15 of the FCC rules and
RSS 210 of Industry Canada. Operation is subject to the
following conditions:
²This device may not cause harmful interference.
²This device must accept any interference received,
including interference that may cause undesired op-
eration.
If your RKE transmitter fails to operate from a normal
distance, check for these two conditions.
1. A weak battery in the RKE transmitter. The expected
life of the battery is a minimum of three years.
2. Closeness to a radio transmitter such as a radio station
tower, airport transmitter, and some mobile or CB radios.
Battery Replacement
THINGS TO KNOW BEFORE STARTING YOUR VEHICLE 27
2
Page 433 of 531
MAINTAINING YOUR VEHICLE
CONTENTS
m3.3L Engine Compartment................434
m3.8L Engine Compartment................435
m4.0L Engine Compartment................436
mOnboard Diagnostic System Ð OBD II........437
NLoose Fuel Filler Cap Message Ð gASCAP . . . 438
mEmissions Inspection And Maintenance
Programs............................438
mReplacement Parts......................440
mAuthorized Dealer Service................440mMaintenance Procedures..................441
NEngine Oil..........................441
NEngine Oil Filter......................444
NDrive Belt...........................445
NSpark Plugs.........................445
NEngine Air Cleaner....................445
NCatalytic Converter....................446
NMaintenance-Free Battery................448
NAir Conditioner Maintenance.............450
7
Page 441 of 531
This vehicle has a simple ignition key-actuated test,
which you can use prior to going to the test station. To
check if this vehicle's OBD II system is ready, you must
do the following:
1. Insert the ignition key into the ignition switch.
2. Turn the ignition to the ON position, but do not crank
or start the engine.
3. If you crank or start the engine, you will have to start
this test over.
4. As soon as you turn the ignition key to the ON
position, you will see the MIL symbol come on as part of
a normal bulb check.
5. Approximately 15 seconds later, one of two things will
happen:
a. The MIL will flash for about 10 seconds and then
return to being fully illuminated until you turn OFFthe ignition key or start the engine. This means that the
vehicle's OBD II system isnot readyand you should
notproceed to the I/M station.
b. The MIL will not flash at all and will remain fully
illuminated until you turn OFF the ignition key or start
the engine. This means that the vehicle's OBD II
system isready,and you can proceed to the I/M
station.
If the OBD II system isnot ready,you should see an
authorized dealer or repair facility. If this vehicle was
recently serviced or had a battery failure or replacement,
you may need to do nothing more than drive the vehicle
as you normally would in order for the OBD II system to
update. A recheck with the above test routine may then
indicate that the system is now ready.
Regardless of whether the vehicle's OBD II system is
ready or not ready, if the MIL is illuminated during
normal vehicle operation, you should have the vehicle
MAINTAINING YOUR VEHICLE 439
7
Page 483 of 531
The Heated Mirrors, Lower Instrument Panel Power
Outlet and Removable Floor Console, when in the front
position are fused with self-resetting fuses that are only
serviceable by an authorized dealer. The power seats are
fused by a 30 Amp circuit breaker located under the
driver's seat. The Power Windows are fused by a 25 Amp
circuit breaker located under the instrument panel near
the steering column. If you experience temporary or
permanent loss of these systems, see your authorized
dealer for service.
VEHICLE STORAGE
If you are leaving your vehicle dormant for more than 21
days you may want to take steps to protect your battery.
You may do the following:
²Remove the 20 Amp mini-fuse in the Integrated Power
Module labeled Ignition-Off Draw (IOD).
²Or, disconnect the negative cable from the battery.
²Anytime you store your vehicle, or keep it out of
service for two weeks or more, run the air conditioning
system at idle for about five minutes in the fresh air
and high blower setting. This will ensure adequate
system lubrication to minimize the possibility of com-
pressor damage when the system is started again.
REPLACEMENT LIGHT BULBS
LIGHT BULBS Ð Interior Bulb Number
Center & Rear Dome Light.................. 578
Center & Rear Reading Lights............... 578
Front Door Courtesy Light.................. 578
Front Header Reading Lights Ð If Equipped..... 578
Instrument Cluster Lights.................PC74
Liftgate Light(s).......................... 578
Overhead Console Reading Lights..........PC579
Removable Console Light Ð If Equipped....... 194
Visor Vanity Lights....................6501966
MAINTAINING YOUR VEHICLE 481
7
Page 511 of 531
Automatic Dimming Mirror................ 100
Automatic Door Locks...................34,35
Automatic Headlights.................... 163
Automatic Temperature Control (ATC)......... 309
Automatic Transaxle...................... 328
Adding Fluid......................... 465
Fluid Level Check...................... 465
Interlock System....................... 329
Reset Mode.......................... 334
Selection Of Lubricant................465,488
Shifting............................. 330
Special Additives...................... 467
Automatic Transmission................464,467
Adding Fluid......................466,467
Fluid and Filter Changes................. 467
Fluid Change......................... 467
Fluid Level Check...................... 466
Fluid Type........................465,488Ball Joints............................. 453
Battery............................... 448
Gas Caution.......................... 449
Jump Starting......................... 425
Keyless Transmitter Replacement (RKE)....... 26
Saving Feature (Protection)............... 166
Bearings.............................. 467
Belts, Drive............................ 445
Body Mechanism Lubrication............... 454
B-Pillar Location........................ 353
Brake Assist System...................... 341
Brake Control System, Electronic............. 340
Brake Fluid............................ 488
Brake, Parking.......................... 335
Brake System........................337,462
Anti-Lock (ABS)....................... 338
Fluid Check.......................... 463
Hoses.............................. 462
Warning Light........................ 228
INDEX 509
10
Page 519 of 531
Key, Sentry (Immobilizer)................... 15
Key-In Reminder......................... 15
Keyless Entry System...................... 21
Keys................................. 12
Knee Bolster............................ 67
Lap/Shoulder Belts....................... 57
LATCH (Lower Anchors and Tether for CHildren)... 86
Latches
Hood............................... 158
Lead Free Gasoline...................... 377
Life of Tires............................ 364
Liftgate................................ 48
Lights..............................94,160
Airbag......................67,73,77,94,233
Alarm.............................. 233
Anti-Lock.........................227,339
Automatic Headlights................... 163
Back-Up............................. 484Battery Saver......................... 166
Brake Assist Warning................... 343
Brake Warning........................ 228
Bulb Replacement...................481,482
Center Mounted Stop................... 485
Daytime Running...................... 163
Dimmer Switch, Headlight.............162,170
Engine Temperature Warning.............. 232
Fog ..........................165,233,483
Hazard Warning Flasher................. 410
Headlight Switch...................... 163
Headlights........................... 482
Headlights On Reminder................. 165
Headlights On With Wipers............... 164
High Beam........................... 170
High Beam Indicator.................... 227
High Beam/Low Beam Select............. 170
Illuminated Entry....................... 20
Interior..........................160,162
INDEX 517
10