Page 132 of 467
because a door is open. This includes the glove box light,
but not the trunk light. To restore interior light operation,
either turn the ignition switch ON or cycle the light
switch.
MULTI-FUNCTION CONTROL LEVER
The Multi-Function Control Lever controls the operation
of the headlights, parking lights, turn signals, headlight
beam selection, instrument panel light dimming, interior
lights, the passing lights, and fog lights. The lever is
located on the left side of the steering column.
HEADLIGHTS; PARKING LIGHTS; INSTRUMENT
LIGHTS
Turn the end of the Multi-Function Control Lever to the
first detent for parking light operation. Turn to the
second detent for headlight operation. Turn to the third
detent ªAº for ªAutoº headlight operation (if equipped). To change the brightness of the instrument panel lights,
rotate the center portion of the Multi-Function Control
Lever up or down. HEADLIGHT Switch130 UNDERSTANDING THE FEATURES OF YOUR VEHICLE
Page 133 of 467

AUTOMATIC HEADLIGHT SYSTEM Ð IF
EQUIPPED
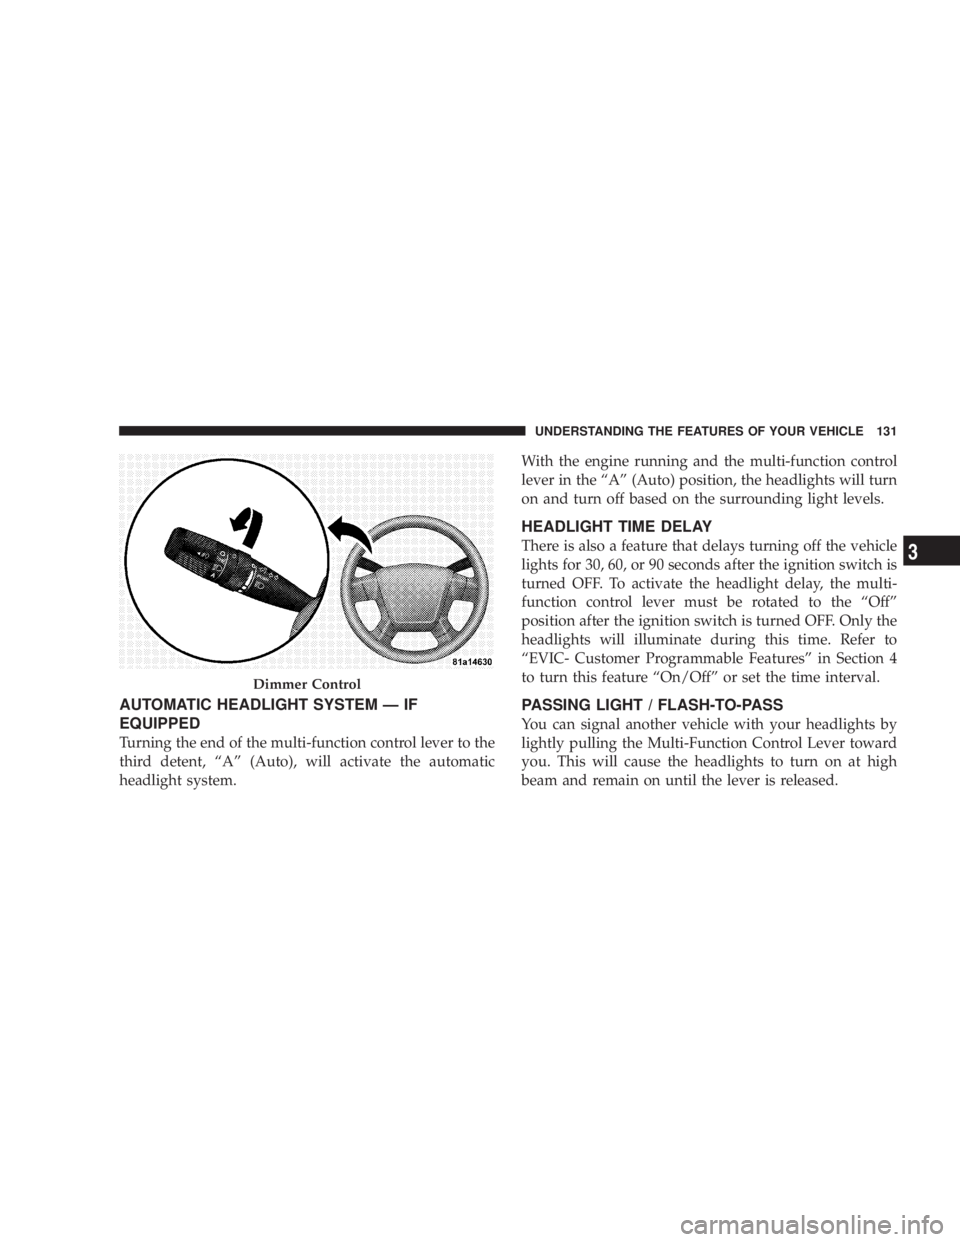
Turning the end of the multi-function control lever to the
third detent, ªAº (Auto), will activate the automatic
headlight system. With the engine running and the multi-function control
lever in the ªAº (Auto) position, the headlights will turn
on and turn off based on the surrounding light levels.
HEADLIGHT TIME DELAY
There is also a feature that delays turning off the vehicle
lights for 30, 60, or 90 seconds after the ignition switch is
turned OFF. To activate the headlight delay, the multi-
function control lever must be rotated to the ªOffº
position after the ignition switch is turned OFF. Only the
headlights will illuminate during this time. Refer to
ªEVIC- Customer Programmable Featuresº in Section 4
to turn this feature ªOn/Offº or set the time interval.
PASSING LIGHT / FLASH-TO-PASS
You can signal another vehicle with your headlights by
lightly pulling the Multi-Function Control Lever toward
you. This will cause the headlights to turn on at high
beam and remain on until the lever is released.Dimmer Control UNDERSTANDING THE FEATURES OF YOUR VEHICLE 131
3
Page 134 of 467

NOTE: If the Multi-Function Control Lever is held in
the flash to pass position for more than 15 seconds, the
high beams will shut off. If this occurs, wait 30 seconds
for the next flash to pass operation.
DAYTIME RUNNING LIGHTS (DRL) Ð IF
EQUIPPED
The high beam lights will come on as Daytime Running
Lights (DRL) at DRL intensity (lower), whenever the
ignition is on, the engine is running, the headlight switch
is off, the parking brake is off, the turn signal is off, and
the gearshift lever is in any position except park.
NOTE: On this vehicle, the daytime running light will
automatically turn off when the turn signal is in opera-
tion and automatically turn back on when the turn signal
is not operating. LIGHTS ON REMINDER
If the headlights or parking lights are on after the ignition
is turned OFF, a chime will sound to alert the driver
when the driver's door is opened.
FOG LIGHTS Ð IF EQUIPPED
The front fog light switch is on the Multi-Function
Control Lever. To activate the front fog lights, turn
on the parking lights or the low beam headlights
and pull out the end of the control lever.132 UNDERSTANDING THE FEATURES OF YOUR VEHICLE
Page 137 of 467
Rotate the end of the lever to the first detent past the
intermittent settings for Low-speed wiper operation, or
to the second detent past the intermittent settings for
High-speed wiper operation. NOTE: The wipers will automatically return to the
PARK position if you turn off the ignition switch while
they are operating. The wipers will resume operation
when you turn the ignition switch to the ON position
again.
CAUTION!² Turn the windshield wipers off when driving
through an automatic car wash. Damage to the
windshield wipers may result if the wiper control
is left in any position other than OFF.
² Always remove any buildup of snow that prevents
the windshield wiper blades from returning to the
OFF position. If the windshield wiper control is
turned OFF and the blades cannot return to the
OFF position, damage to the wiper motor may
occur.Windshield Wiper/Washer Lever UNDERSTANDING THE FEATURES OF YOUR VEHICLE 135
3
Page 142 of 467
ELECTRONIC SPEED CONTROL Ð IF EQUIPPED
When engaged, this device takes over the accelerator
operation at speeds greater than 25 mph (40 km/h).
The Speed Control Lever is located on the right side of
the steering wheel. To Activate:
Push in and release the ON/OFF button located in the
end of the Electronic Speed Control Lever. The Speed
Control indicator in the instrument cluster will illumi-
nate. To turn the system OFF, push in and release the
ON/OFF button a second time. The Speed Control
indicator will turn off. The system should be turned OFF
when not in use.
NOTE: The Electronic Speed Control System will auto-
matically turn itself off when the ignition key is turned to
the LOCK position.
Speed Control Location140 UNDERSTANDING THE FEATURES OF YOUR VEHICLE
Page 143 of 467

WARNING!Leaving the Electronic Speed Control system on
when not in use is dangerous. You could accidentally
set the system or cause it to go faster than you want.
You could lose control and have an accident. Always
leave the system OFF when you are not using it.
To Set Desired Speed:
When the vehicle has reached the desired speed, push
down on the lever and release SET DECEL. The vehicle
will operate at the selected speed.
NOTE:
² The vehicle must be traveling at least 25 mph (40
km/h) for the speed control to set. ² The vehicle should be traveling at a steady speed and
on level ground before pushing down the SET DECEL
lever.
To Deactivate:
A soft tap on the brake pedal, pulling the speed control
lever toward you CANCEL, or normal brake pressure
while slowing the vehicle will deactivate speed control
without erasing the set speed memory. Pushing in the
ON/OFF button (in the end of the lever) or turning off
the ignition switch erases the set speed memory.
To Resume Speed:
To resume a previously set speed, push upward on the
RESUME ACCEL lever and release. Resume can be used
at any speed above 20 mph (32 km/h). UNDERSTANDING THE FEATURES OF YOUR VEHICLE 141
3
Page 147 of 467

Your vehicle should be parked outside of the garage
when programming.
Begin Programming
1. Turn the ignition switch to the ON/RUN position.
2. Hold the battery side of the hand-held transmitter
away from the HomeLink t button you wish to program.
Place the hand-held transmitter 1 to 3 in (3 to 8 cm) away
from the HomeLink t button you wish to program while
keeping the indicator light in view.
3. Simultaneously press and hold both the chosen
HomeLink t button and the hand-held transmitter button
until the HomeLink t indicator changes from a slow to a
rapidly blinking light, then release both the HomeLink t
and hand-held transmitter buttons. Watch for the HomeLink t indicator to change flash rates.
When it changes, it is programmed. It may take up to 30
seconds, or longer in rare cases. The garage door may
open and close while you train.
NOTE: Some gate operators and garage door openers
may require you to replace Step 3 with procedures noted
in the ªGate Operator/Canadian Programmingº section.
NOTE: After training a HomeLink t channel, if the
garage door does not operate with HomeLink t and the
garage door opener was manufactured after 1995, the
garage door opener may have a rolling code. If so,
proceed to Step 5 ªProgramming A Rolling Code Sys-
tem.º
4. Press and hold the just-trained HomeLink t button
and observe the indicator light. UNDERSTANDING THE FEATURES OF YOUR VEHICLE 145
3
Page 149 of 467

NOTE: There are 30 seconds in which to initiate the next
step after the ªLearnº button has been pressed.
7. Return to the vehicle and press the programmed
HomeLink t button twice (holding the button for two
seconds each time). If the device is plugged in and
activates, programming is complete.
If the device does not activate, press the button a third
time (for two seconds) to complete the training.
If you have any problems, or require assistance, please
call toll-free 1±800±355±3515 or, on the Internet at
www.HomeLink.com for information or assistance.
To program the remaining two HomeLink t buttons,
repeat each step for each remaining button. DO NOT
erase the channels. Using HomeLink t
To operate, simply press and release the programmed
HomeLink t button. Activation will now occur for the
trained device (i.e., garage door opener, gate operator,
security system, entry door lock, home/office lighting,
etc. The hand-held transmitter of the device may also be
used at any time.
Reprogramming a Single Homelink t Button
To reprogram a channel that has been previously trained,
follow these steps:
1. Turn the ignition switch to the ON/RUN position.
2. Press and hold the desired HomeLink t button until
the indicator light begins to flash after 20 seconds. Do not
release the button.
3. Without releasing the button, proceed with Program-
ming Homelink t Step 2 and follow all remaining steps.UNDERSTANDING THE FEATURES OF YOUR VEHICLE 147
3