2008 Citroen JUMPER DAG engine
[x] Cancel search: enginePage 33 of 163

35
2
READY TO SET OFF
Instruments and controls
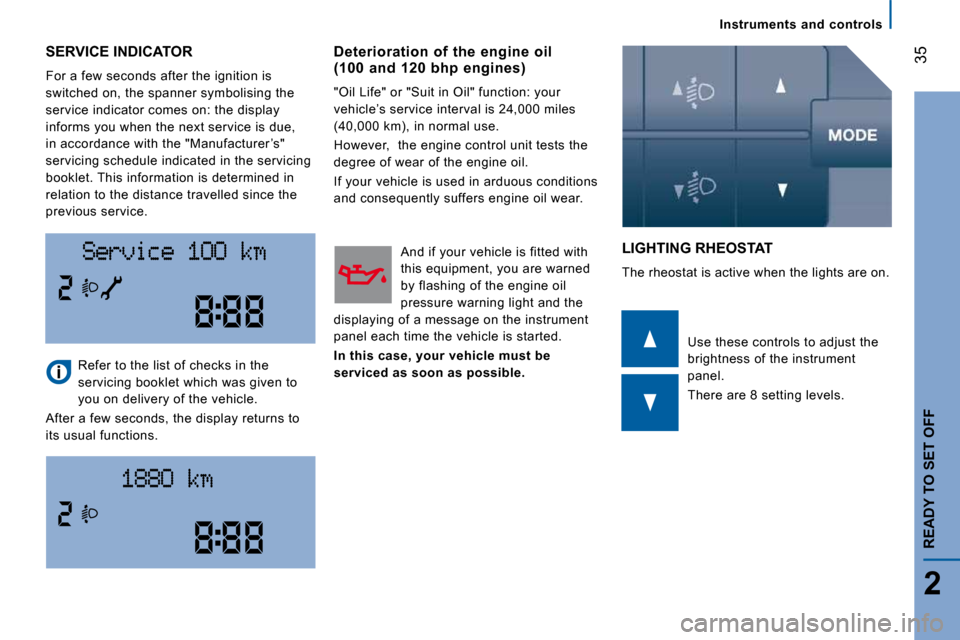
SERVICE INDICATOR
For a few seconds after the ignition is
switched on, the spanner symbolising the
service indicator comes on: the display
informs you when the next service is due,
in accordance with the "Manufacturer ’s"
servicing schedule indicated in the servicing
booklet. This information is determined in
relation to the distance travelled since the
previous service.
LIGHTING RHEOSTAT
The rheostat is active when the lights are on.
Refer to the list of checks in the
servicing booklet which was given to
you on delivery of the vehicle.
After a few seconds, the display returns to
its usual functions. Use these controls to adjust the
brightness of the instrument
panel.
There are 8 setting levels.
Deterioration of the engine oil (100 and 120 bhp engines)
"Oil Life" or "Suit in Oil" function: your
vehicle’s service interval is 24,000 miles
(40,000 km), in normal use.
However, the engine control unit tests the
degree of wear of the engine oil.
If your vehicle is used in arduous conditions
and consequently suffers engine oil wear.
And if your vehicle is fitted with
this equipment, you are warned
by flashing of the engine oil
pressure warning light and the
displaying of a message on the instrument
panel each time the vehicle is started.
In this case, your vehicle must be
serviced as soon as possible.
Page 35 of 163

37
2
READY TO SET OFF
Starting and stopping
STARTING AND STOPPING
MAR position: running.
Certain accessories can be used.
AVV position: starter.
The starter is operated.
PARK position: parking.
The side lights can be left on, with the
ignition off.
Refer to "Side lights/parking lights" in
chapter 3.
STOP position: steering lock.
The ignition is off. Good practice when starting
Engine immobiliser warning light
If this comes on, use another key
and have the faulty key checked
by a CITROËN dealer.
Diesel pre-heating warning light
Turn the key to the MAR position.
In cold weather, wait for this
warning light to switch off then
operate the starter ( AVV position) until the
engine starts.
If the temperature is high enough, the
warning light comes on for less than one
second, you can start without waiting. Door or bonnet open warning light
If this comes on, a door or the
bonnet is not closed correctly,
check!
Page 36 of 163

+ 5%+ 5%
2 s2 s
38
Starting and stopping
Hill start assistance
This function, linked with the ESP, makes
starting on a hill easier and is activated in
the following conditions:
- the vehicle must be stationary, with the engine running,
- the gradient of the road must be greater than 5 %, With the brake pedal pressed and the clutch
pedal pressed, when you release the brake
pedal you have approximately 2 seconds
without rolling back and without using the
handbrake within which to move off.
During the moving off phase, the function
is deactivated automatically with gradual
reduction of the braking pressure.
During this phase, a typical noise of
mechanical releasing of the brakes may be
heard, signalling the imminent movement of
the vehicle.
Page 37 of 163

2
READY TO SET OFF
Starting and stopping
Fault When a malfunction of the
system occurs, this warning light
comes on accompanied by an
audible signal and confirmed by
a message on the display, if fitted in your
vehicle.
Contact a CITROËN dealer to have the
system checked.
The HHC (Hill Holder Control) or Hill Start
Assistance function is a driving comfort
feature. It is not an automatic vehicle
parking function or an automatic handbrake. Good practice when stopping
Minimise engine and gearbox wear
When switching off the ignition, let the
engine run for a few seconds to allow the
turbocharger to return to idle.
Do not press the accelerator when switching
off the ignition.
There is no need to engage a gear after
parking the vehicle.
Page 39 of 163

41
3
ERGONOMICS AND COMFORT
AUTOMATIC LIGHTING
If your vehicle is fitted with this function,
the side lights and dipped headlamps are
switched on automatically if the light is
poor and when continuous operation of the
windscreen wipers is detected.
In fog or snow, the brightness sensor may
detect sufficient light. Therefore, the lights
will not be switched on automatically. If
necessary, you must switch on the dipped
headlamps manually.
They are switched off when the light returns
to a sufficient level or after the windscreen
wipers are switched off.
HEADLAMP BEAM
You are advised to adjust the height of the
headlamp beams in accordance with the load in
your vehicle.
This function can be accessed in the dipped
headlamps and main beam headlamps position.
SIDE/PARKING LIGHTS
This system enables you to leave the side
lights on when parked; with the ignition off,
key in the PARK position or key removed.
Activation Turn the ring to this position.
The lights are switched off
automatically when the ignition is
switched off.
Do not cover the brightness sensor at
the top centre of the windscreen.
FOLLOW ME HOME LIGHTING
Ignition off or key in the STOP
position.
Within 2 minutes after switching
off the engine, position the ignition
key in the STOP position or remove it.
Pull the lights stalk towards the steering
wheel.
The indicator light comes on the
instrument panel.
Each action on the lights stalk, pulled
towards the steering wheel, prolongs the
follow me home lighting by 30 seconds up
to approximately 3 minutes. When this time
has elapsed, the lights are switched off
automatically.
Deactivate this control by keeping the stalk
pulled towards the steering wheel for more
than 2 consecutive seconds. Press this control turning the
key one notch in the opposite
direction to starting at the same
time. You can then remove the
key.
If your vehicle is fitted with
this function: when you leave
your vehicle with the automatic
switching on of the lights
activated (ring in position A), the side lights
and dipped headlamps remain on for the
selected duration (when leaving a car park
for example).
Press these controls, located
on the fascia panel, several
times in succession to adjust the
headlamps.
An indicator light on the display
indicates the adjustment position
selected (0, 1, 2, 3). Steering wheel controls
Page 44 of 163

VENTILATION
DE-ICING AND DEMISTING Manual mode
Direct the control to this air
distribution setting.
For faster and more effective de-icing
and demisting of the windscreen: De-icing the rear screen and mirrors
Only operates when the engine
is running. Pressing this button
activates the rapid demisting-de-
icing of the rear screen and mirrors.
This function switches off automatically to
prevent excessive energy consumption. It
stops when the engine is switched off but
resumes when the engine is started again.
Pressing this button switches the function off.
- increase the air flow setting,
- move the exterior air intake control temporarily to air
recirculation.
Returning to the exterior air
intake position permits renewal
of the air in the passenger
compartment.
Windscreen and side windows
The ventilation outlets located at the base
of the windscreen and the side vents for the
side windows increase the effectiveness of
the de-icing and demisting. Do not obstruct
these air outlets.
The pollen filter permits continuous and
effective filtering of dust.
The air recirculation (which can be activated
by the driver or the passenger) isolates the
passenger compartment from the exterior
atmosphere. However, this position should
only be used temporarily, the norm is to
drive with the control positioned with the
exterior air intake open.
Ventilation
Page 46 of 163

48
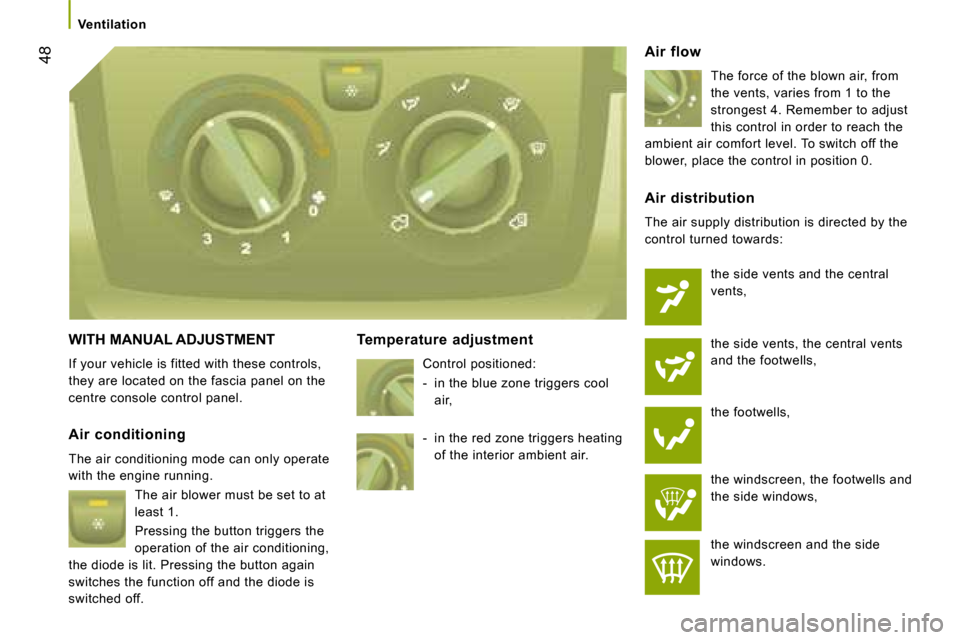
WITH MANUAL ADJUSTMENT
If your vehicle is fitted with these controls,
they are located on the fascia panel on the
centre console control panel. Temperature adjustment
Control positioned:
- in the blue zone triggers cool air, Air flow
The force of the blown air, from
the vents, varies from 1 to the
strongest 4. Remember to adjust
this control in order to reach the
ambient air comfort level. To switch off the
blower, place the control in position 0.
Air conditioning
The air conditioning mode can only operate
with the engine running. The air blower must be set to at
least 1.
Pressing the button triggers the
operation of the air conditioning,
the diode is lit. Pressing the button again
switches the function off and the diode is
switched off. Air distribution
The air supply distribution is directed by the
control turned towards:
the side vents and the central
vents,
the side vents, the central vents
and the footwells,
the footwells,
the windscreen, the footwells and
the side windows,
the windscreen and the side
windows.
- in the red zone triggers heating
of the interior ambient air.
Ventilation
Page 48 of 163

50
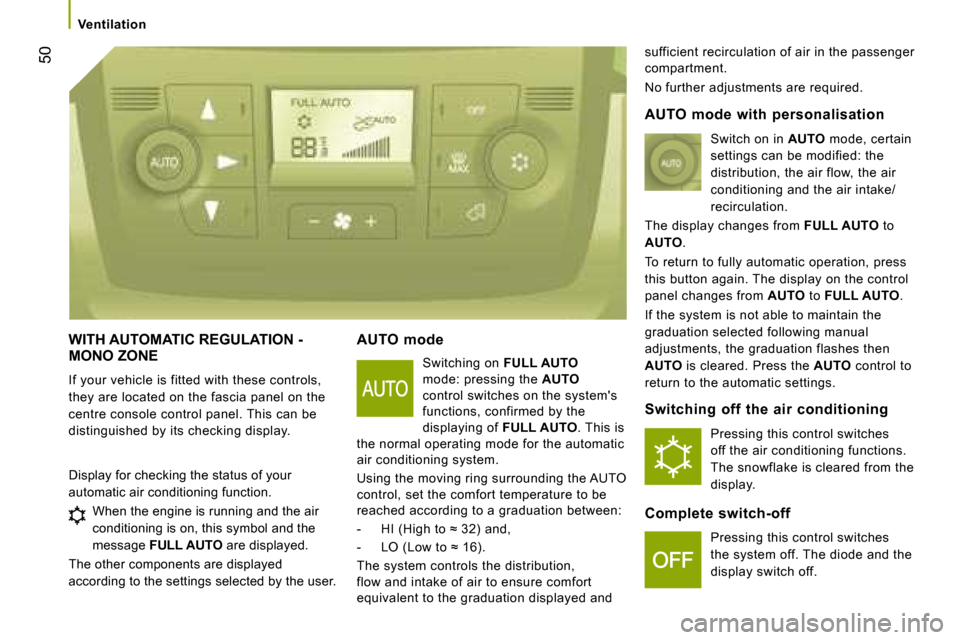
WITH AUTOMATIC REGULATION - MONO ZONE
If your vehicle is fitted with these controls,
they are located on the fascia panel on the
centre console control panel. This can be
distinguished by its checking display. AUTO mode
Switching on FULL AUTO
mode: pressing the AUTO
control switches on the system's
functions, confirmed by the
displaying of FULL AUTO . This is
the normal operating mode for the automatic
air conditioning system.
Using the moving ring surrounding the AUTO
control, set the comfort temperature to be
reached according to a graduation between:
� � � �-� � �H�I� �(�H�i�g�h� �t�o� �≈� �3�2�)� �a�n�d�,�
� � �-� � �L�O� �(�L�o�w� �t�o� �≈� �1�6�)�.� �
The system controls the distribution,
flow and intake of air to ensure comfort
equivalent to the graduation displayed and sufficient recirculation of air in the passenger
compartment.
No further adjustments are required.
Display for checking the status of your
automatic air conditioning function. When the engine is running and the air
conditioning is on, this symbol and the
message FULL AUTO are displayed.
The other components are displayed
according to the settings selected by the user. AUTO mode with personalisation
Switch on in AUTO mode, certain
settings can be modified: the
distribution, the air flow, the air
conditioning and the air intake/
recirculation.
The display changes from FULL AUTO to
AUTO .
To return to fully automatic operation, press
this button again. The display on the control
panel changes from AUTO to FULL AUTO .
If the system is not able to maintain the
graduation selected following manual
adjustments, the graduation flashes then
AUTO is cleared. Press the AUTO control to
return to the automatic settings.
Switching off the air conditioning
Pressing this control switches
off the air conditioning functions.
The snowflake is cleared from the
display.
Complete switch-off Pressing this control switches
the system off. The diode and the
display switch off.
Ventilation