Page 166 of 531

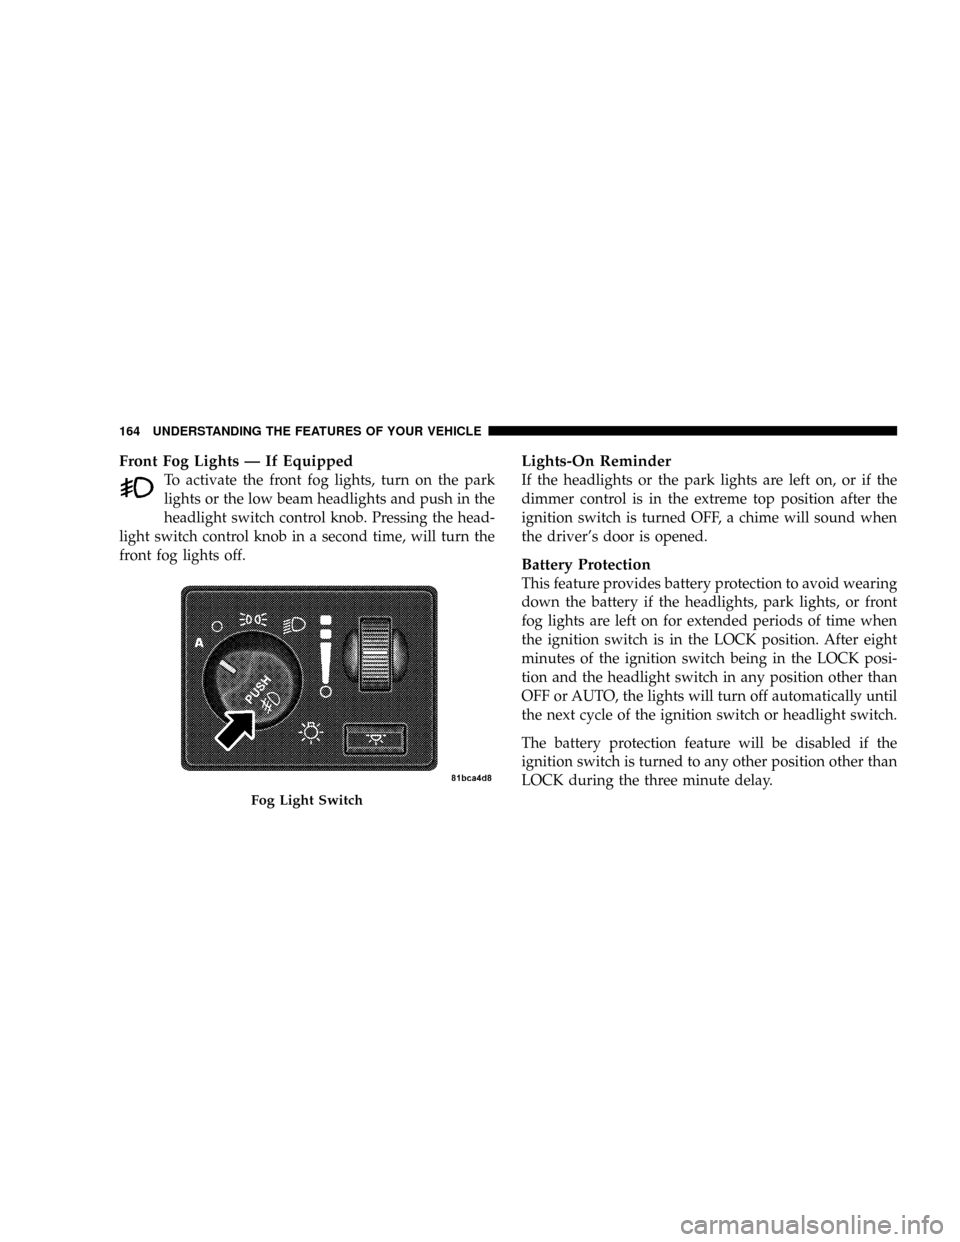
Front Fog Lights Ð If Equipped
To activate the front fog lights, turn on the park
lights or the low beam headlights and push in the
headlight switch control knob. Pressing the head-
light switch control knob in a second time, will turn the
front fog lights off.
Lights-On Reminder
If the headlights or the park lights are left on, or if the
dimmer control is in the extreme top position after the
ignition switch is turned OFF, a chime will sound when
the driver's door is opened.
Battery Protection
This feature provides battery protection to avoid wearing
down the battery if the headlights, park lights, or front
fog lights are left on for extended periods of time when
the ignition switch is in the LOCK position. After eight
minutes of the ignition switch being in the LOCK posi-
tion and the headlight switch in any position other than
OFF or AUTO, the lights will turn off automatically until
the next cycle of the ignition switch or headlight switch.
The battery protection feature will be disabled if the
ignition switch is turned to any other position other than
LOCK during the three minute delay.
Fog Light Switch
164 UNDERSTANDING THE FEATURES OF YOUR VEHICLE
Page 234 of 531

brakes. If the ABS light does not turn on when the
Ignition switch is turned to the ON position, have the
light inspected by an authorized dealer.
14. Electronic Stability Program (ESP) Indicator
Light/Traction Control System (TCS) Indicator Light
If this indicator light flashes during accelera-
tion, apply as little throttle as possible. While
driving, ease up on the accelerator. Adapt your
speed and driving to the prevailing road con-
ditions, and do not switch off the ESP, or TCS.
15. Tachometer
The red segments indicate the maximum permissible
engine revolutions per minute (RPM x 1000) for each gear
range. Before reaching the red area, ease up on the
accelerator.16. High Beam Light
This light shows that the headlights are on high
beam. Pull the turn signal lever towards the
steering wheel to switch the headlights from high or low
beam.
17. Front Fog Light Indicator Ð If Equipped
This light shows when the front fog lights are ON.
18. Seat Belt Reminder Light
When the ignition switch is first turned ON, this
light will turn on for five to eight seconds as a bulb
check. During the bulb check, if the driver's seat
belt is unbuckled, a chime will sound. After the bulb
check or when driving, if the driver's seat belt remains
unbuckled, the Seat Belt Reminder Light will illuminate
and the chime will sound. Refer to the Occupant Re-
straints section for more information.
232 UNDERSTANDING YOUR INSTRUMENT PANEL
Page 308 of 531

²In cold or damp weather, the use of the RECIRCULA-
TION mode will cause windows to fog on the inside
because of moisture build-up inside the vehicle. For
maximum defogging, select the Outside Air position.
²In order to prevent fogging, when the recirculation
button is pressed and the mode control is set to
PANEL the A/C will engage automatically.
²The A/C can be deselected manually without disturb-
ing the mode control selection.
Air Outlets
The airflow from each of the instrument panel outlets can
be adjusted for direction and turned on or off to control
airflow.
NOTE:For maximum airflow to the rear, the center
instrument panel outlets can be directed toward the rear
seat passengers.
ECONOMY Mode
If ECONOMY mode is desired, press the A/C button to
turn off the indicator light and the A/C compressor.
Rotate the temperature control knob to the desired tem-
perature.
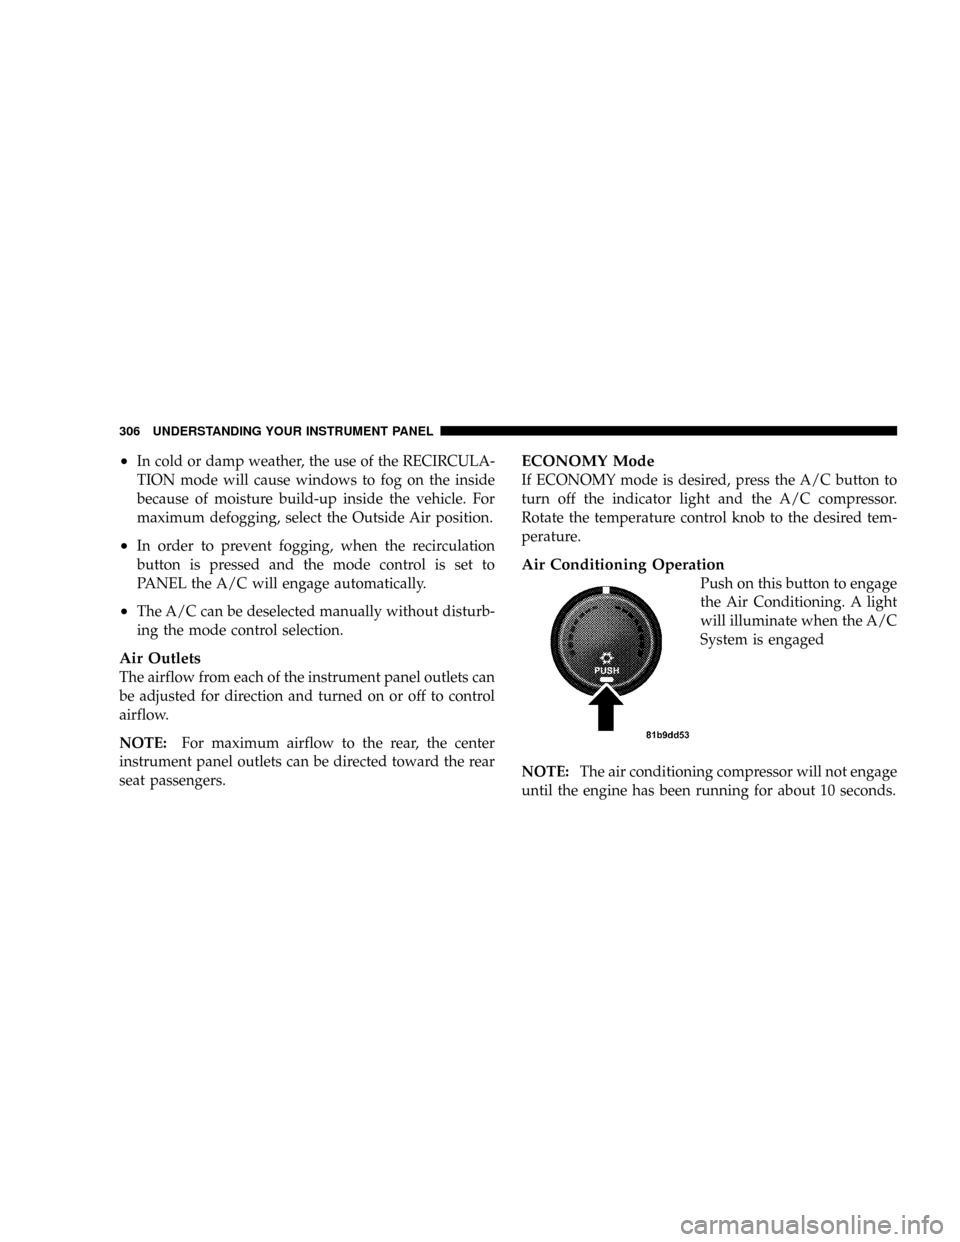
Air Conditioning Operation
Push on this button to engage
the Air Conditioning. A light
will illuminate when the A/C
System is engaged
NOTE:The air conditioning compressor will not engage
until the engine has been running for about 10 seconds.
306 UNDERSTANDING YOUR INSTRUMENT PANEL
Page 317 of 531

FLOOR Mode
Air comes from the floor outlets. A slight amount of
air is directed through the defrost and side window
demister outlets.
MIX Mode
Air comes from the floor, defrost and side window
demist outlets. This mode works best in cold or
snowy conditions. It allows you to stay comfortable
while keeping the windshield clear.
DEFROST Mode
Air comes from the windshield and side window
demist outlets. Use DEFROST mode with maxi-
mum blower and temperature settings for best wind-
shield and side window defrosting.
NOTE:While operating in the other modes, the system
will not automatically sense the presence of fog, mist or
ice on the windshield. DEFROST mode must be manually
selected to clear the windshield and side glass.The SNOWFLAKE mode or A/C button allows
the operator to manually activate or deactivate the
air conditioning system. When in SNOWFLAKE
mode the ATC display is on, cool, dehumidified air flows
through the air outlets. If ECONOMY mode is desired,
press the SNOWFLAKE button to turn off the SNOW-
FLAKE mode in the ATC display and deactivate the A/C
system. Note: If fog or mist appears on the windshield or
side glass, select DEFROST mode and increase blower
speed.
RECIRCULATION Control
When outside air contains smoke, odors, or
high humidity, or if rapid cooling is desired,
you may wish to recirculate interior air by
pressing the RECIRCULATION mode control
button. RECIRCULATION mode should only be used
temporarily. The recirculation symbol will illuminate in
the display when this button is selected. Push the button
UNDERSTANDING YOUR INSTRUMENT PANEL 315
4
Page 323 of 531
OPERATING TIPS A/C AIR FILTER Ð IF EQUIPPED
On vehicles equipped with Automatic Temperature Con-
trol (ATC), the climate control system filters out dust and
pollen from the air. Refer to Section 7 ªAir Conditioningº
for filter replacement instructions.
ELECTRIC REAR WINDOW DEFROSTER Ð IF
EQUIPPED
Press this button (located on your front climate
control) to turn on the rear window defroster and
the optional heated mirrors. A light will show that the
defroster is on. The defroster automatically turns off after
about ten minutes of operation, as long as the ignition
switch is in the ON position.
After the initial time interval has expired, if the rear
window defogger switch is pressed to the on position
again (during the same ignition cycle), the system will
automatically turn off after about five minutes.
UNDERSTANDING YOUR INSTRUMENT PANEL 321
4
Page 433 of 531
NFog Lights..........................483
NRear Tail, Stop, Turn Signal, Side Marker
And Backup Lights....................484
NCenter High-Mounted Stop Light (CHMSL) . . . 485
NLicense Light........................485mFluids And Capacities...................486
mFluids, Lubricants And Genuine Parts........487
NEngine.............................487
NChassis............................488
MAINTAINING YOUR VEHICLE 431
7
Page 482 of 531

REPLACEMENT LIGHT BULBS
LIGHT BULBS Ð Interior Bulb Number
Center & Rear Dome Light.................. 578
Center & Rear Reading Lights............... 578
Front Door Courtesy Light.................. 578
Front Header Reading Lights Ð If Equipped..... 578
Instrument Cluster Lights.................PC74
Liftgate Light(s).......................... 578
Overhead Console Reading Lights..........PC579
Removable Console Light Ð If Equipped....... 194
Visor Vanity Lights....................6501966
NOTE:For lighted switches, see your dealer for replace-
ment.
All of the interior bulbs are glass wedge base or glass
cartridge types. Aluminum base bulbs are not approved
and should not be used for replacement.LIGHT BULBS Ð Exterior Bulb Number
Backup, Tail, Stop Light...................3157
Center High-Mounted Stop Light. . . LED (See Note 1)
Fog Light Ð If Equipped..................9145
Park/Turn Signal.............PY27 / 7W or 3757A
Front Side Marker...................... W5W
Headlight Ð (Low and High Beam Halogen).... H11
Headlight (HID Ð If Equipped).............. D1S
License................................ 168
Note 1: The Center High-Mounted Stop Light (CHMSL)
uses LED lights that are not serviceable separately. The
CHMSL must be replaced as an assembly, see your
authorized Dealer.
480 MAINTAINING YOUR VEHICLE
Page 485 of 531
Fog Lights
NOTE:Access to the fog light bulb is from the rear of
the fascia. On the left rear side of the fascia, remove the
push pin and lower the hinged access door on the air
dam.
1. From behind the bumper fascia, or the access panel on
the air dam, twist the bulb counterclockwise, and remove
bulb.
CAUTION!
Do not touch the new bulb with your fingers. Oil
contamination will severely shorten bulb life. If the
bulb comes in contact with an oily surface, clean the
bulb with rubbing alcohol.
2. Disconnect wire harness from the bulb.
3. Reconnect the wiring harness to the new bulb and
reinstall the bulb by twisting clockwise.
MAINTAINING YOUR VEHICLE 483
7