2008 CHEVROLET UPLANDER remote control
[x] Cancel search: remote controlPage 150 of 476
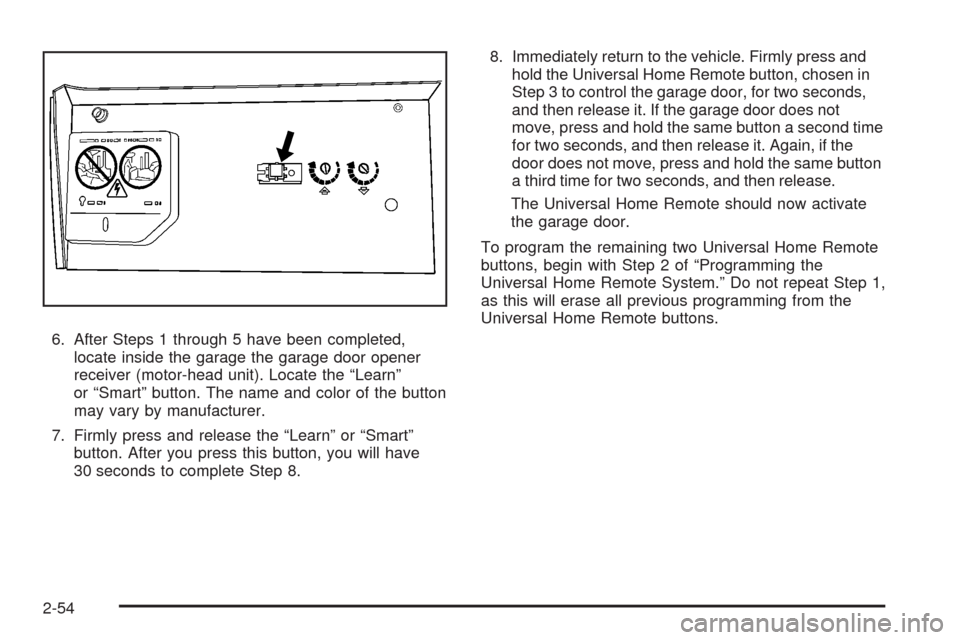
6. After Steps 1 through 5 have been completed,
locate inside the garage the garage door opener
receiver (motor-head unit). Locate the “Learn”
or “Smart” button. The name and color of the button
may vary by manufacturer.
7. Firmly press and release the “Learn” or “Smart”
button. After you press this button, you will have
30 seconds to complete Step 8.8. Immediately return to the vehicle. Firmly press and
hold the Universal Home Remote button, chosen in
Step 3 to control the garage door, for two seconds,
and then release it. If the garage door does not
move, press and hold the same button a second time
for two seconds, and then release it. Again, if the
door does not move, press and hold the same button
a third time for two seconds, and then release.
The Universal Home Remote should now activate
the garage door.
To program the remaining two Universal Home Remote
buttons, begin with Step 2 of “Programming the
Universal Home Remote System.” Do not repeat Step 1,
as this will erase all previous programming from the
Universal Home Remote buttons.
2-54
Page 178 of 476
Dome Lamp
The dome lamp is located in the headliner and has
two buttons to manually turn it on or off. The dome lamp
will come on each time you open a door, unless you
turn on the interior lamps override feature. SeeInterior
Lamps Control on page 3-17.
Entry Lighting
With entry lighting, the interior of your vehicle is
illuminated so that you can see inside before you enter
your vehicle. The lamps will come on for 20 seconds
if you unlock your door using your key or the remote
keyless entry transmitter and the ignition is in LOCK.
After 20 seconds have passed, the interior lamps
will slowly fade out. The lamps will turn off before
the 20 seconds if you do one of the following:
Lock all the doors using the key.
Press lock on the power door lock switch.
Press lock on the remote keyless entry transmitter.
When any door is opened, entry lighting is cancelled.
The interior lamps will stay on while any door or
the liftgate is open, and slowly fade out when all
doors and the liftgate are closed.The interior lamps may stay on for up to 25 seconds
after all doors have been closed if they have not been
locked. SeeDelayed Lighting on page 3-18.
To turn the entry lighting feature off or on, seeDIC
Vehicle Personalization (Uplevel Only) on page 3-76.
Delayed Lighting
The delayed lighting feature will continue to illuminate
the interior for 20 seconds after all doors have been
closed, so that you can �nd your ignition and buckle
your safety belt at night. Delayed lighting will not occur
while the ignition is in RUN or ACCESSORY. After
20 seconds have passed, the interior lamps will slowly
fade out. The lamps will fade out before the 20 seconds
have passed if you do one of the following:
Turn the ignition to RUN or ACCESSORY.
Lock all doors using the remote keyless entry
transmitter.
Lock all doors using the power door lock switch or
the key.
To turn the delayed lighting feature off or on, seeDIC
Vehicle Personalization (Uplevel Only) on page 3-76.
3-18
Page 179 of 476
Exit Lighting
With exit lighting, the interior lamps will come on for
about 25 seconds whenever you remove the key from
the ignition. If you turn the ignition key to RUN or
ACCESSORY, the lamps will fade out. The lamps
will also fade out if you lock the doors with the power
door lock switch or the remote keyless entry transmitter.
When any door is opened, exit lighting is cancelled.
The interior lamps will stay on while any door or
the liftgate is open, and slowly fade out when all
doors and the liftgate are closed.
The interior lamps may stay on for up to 20 seconds
after all doors have been closed if they have not been
locked. SeeDelayed Lighting on page 3-18.
To turn the exit lighting feature off or on, seeDIC
Vehicle Personalization (Uplevel Only) on page 3-76.
Front Reading Lamps
There are two reading lamps and one courtesy lamp
in the overhead console. To turn either reading lamp on
or off, press the lens of the lamp. The courtesy lamp
will come on each time you open a door, unless you
turn on the interior lamps override feature. SeeInterior
Lamps Control on page 3-17.
Rear Reading Lamps
There are two reading lamps in the third row headliner.
To turn either reading lamp on or off, press the lens
of the lamp.
There may also be a reading lamp in the second row,
integrated with the dome lamp. To turn the second
row reading lamp on or off, press the button next to
the lamp lens.
Cargo Lamp
The cargo lamp is located in the rear of your vehicle,
above the liftgate opening, and does not have a switch.
The cargo lamp will come on each time you open a
door, unless you turn on the interior lamps override.
SeeInterior Lamps Control on page 3-17.
3-19
Page 183 of 476
Power Outlet 115 Volt Alternating
Current
Your vehicle may have a power outlet that can be used
to plug in electrical equipment that uses a maximum
limit of 150 watts.
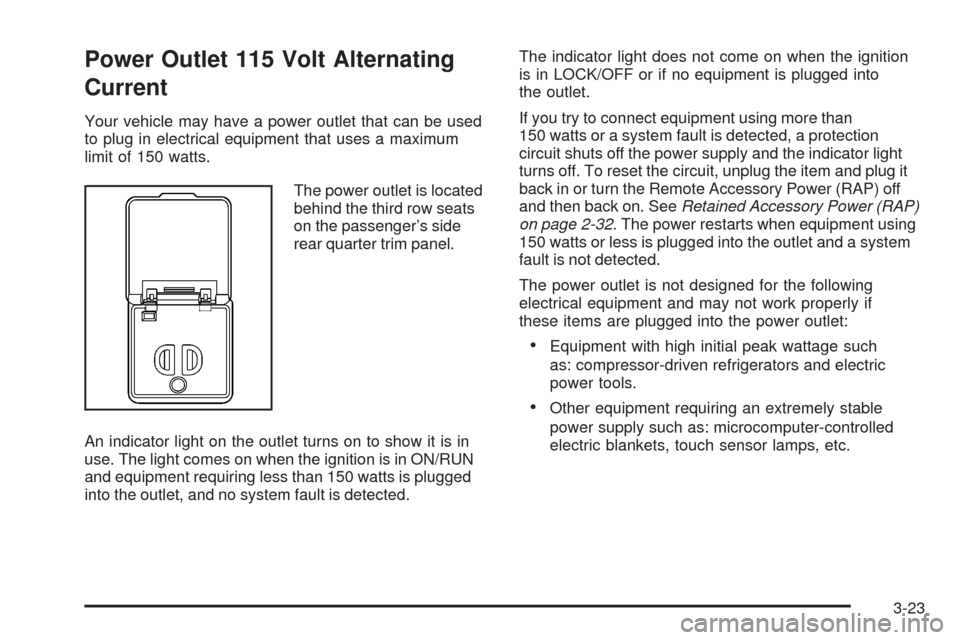
The power outlet is located
behind the third row seats
on the passenger’s side
rear quarter trim panel.
An indicator light on the outlet turns on to show it is in
use. The light comes on when the ignition is in ON/RUN
and equipment requiring less than 150 watts is plugged
into the outlet, and no system fault is detected.The indicator light does not come on when the ignition
is in LOCK/OFF or if no equipment is plugged into
the outlet.
If you try to connect equipment using more than
150 watts or a system fault is detected, a protection
circuit shuts off the power supply and the indicator light
turns off. To reset the circuit, unplug the item and plug it
back in or turn the Remote Accessory Power (RAP) off
and then back on. SeeRetained Accessory Power (RAP)
on page 2-32. The power restarts when equipment using
150 watts or less is plugged into the outlet and a system
fault is not detected.
The power outlet is not designed for the following
electrical equipment and may not work properly if
these items are plugged into the power outlet:
Equipment with high initial peak wattage such
as: compressor-driven refrigerators and electric
power tools.
Other equipment requiring an extremely stable
power supply such as: microcomputer-controlled
electric blankets, touch sensor lamps, etc.
3-23
Page 210 of 476
Driver Information Center (DIC)
Your vehicle has a Driver Information Center (DIC).
All messages appear in the DIC display located in the
instrument panel cluster, below the tachometer. The DIC
buttons are located on the center of the instrument
panel, below the center outlets.
The DIC comes on when the ignition is on. After a short
delay, the DIC displays WELCOME DRIVER (1 or 2)
if a personalized key 1 or 2 is used, and then the
information that was last displayed before the engine
was turned off. The driver number also corresponds
to the numbers, 1 or 2, on the back of the remote
keyless entry transmitters.
The DIC displays the odometer, trip odometers, fuel
economy, trip computer, vehicle system information, and
compass display, if equipped. It also displays warning
messages if a system problem is detected. In addition,
the DIC displays phone numbers that are called using the
OnStar
®system, if equipped. SeeOnStar®System on
page 2-47.On some vehicles, the outside air temperature
automatically appears in the bottom right corner
of the DIC display when viewing all of the information
screens, except for the oil life screens. If the outside air
temperature is at or below 37°F (3°C), the temperature
reading will toggle between displaying the outside
temperature and the word ICE for two minutes. If there is
a problem with the system that controls the temperature
display, the letters OC (open circuit) or SC (short circuit)
will appear on the display. If this occurs, have the vehicle
serviced by your dealer/retailer.
The DIC also allows some features to be customized
or personalized, if equipped. SeeDIC Vehicle
Personalization (Uplevel Only) on page 3-76
for more information.
DIC Operation and Displays
The DIC has different modes which can be accessed by
pressing the DIC buttons located on the center of the
instrument panel. The buttons are the information,
set/reset, and menu buttons.
The button functions are detailed in the following pages.
3-50
Page 228 of 476

REDUCED POWER STOP WHEN SAFE
This message displays when your vehicle is in an
overheated engine operating mode. This operating mode
allows your vehicle to be driven to a safe place in an
emergency. In this mode, you will notice a signi�cant
loss in power and engine performance. SeeOverheated
Engine Protection Operating Mode on page 5-25for
more information. Anytime this message is on, the
vehicle should be taken to your dealer/retailer for
service as soon as possible.
This message displays and a chime sounds only
when the ignition is in ON/RUN. Press any of the
DIC buttons to acknowledge this message and to
clear it from the screen.
This message continues to display for two seconds
if it has not been acknowledged when the engine
is turned off. It also re-displays for two seconds if the
message has been acknowledged, but the condition
still exists when the engine is turned off.
If the condition still exists, the message re-appears
when the engine is turned on.
REMOTE START DISABLED
If your vehicle has the remote start feature, this message
displays if a remote start attempt is unsuccessful. This
may be caused if any of the following conditions are true
when a remote start attempt is made:
The remote start system is disabled through the DIC.
The key is in the ignition.
The hood or the doors are not closed.
There is an emission control system malfunction.
The engine coolant temperature is too high.
The oil pressure is low.
The hazard warning �ashers are turned on.
The maximum number of remote starts or remote
start attempts between ignition cycles has been
reached.
The content theft-deterrent alarm is on while
attempting to remote start the vehicle.
See “REMOTE START” underDIC Vehicle
Personalization (Uplevel Only) on page 3-76and
“Remote Vehicle Start” underRemote Keyless Entry
(RKE) System Operation on page 2-5for more
information.
3-68
Page 262 of 476

Navigation/Radio System
Your vehicle may have a navigation radio system.
The navigation system has built-in features intended
to minimize driver distraction. Technology alone,
no matter how advanced, can never replace your
own judgment. See the Navigation System manual for
some tips to help you reduce distractions while driving.
Rear Seat Entertainment (RSE)
System
Vehicles with a Rear Seat Entertainment (RSE) system
have a DVD player, a video display screen, auxiliary
inputs, two sets of wireless headphones, and a remote
control.
Parental Control
rj
(Parental Control):This button is located behind
the video screen, next to the auxiliary jacks. Press this
button while using rear seat audio (RSA) to make the
video screen go blank and to mute the audio while a DVD
or CD is playing. The power indicator lights on the DVD
player �ash. Turning on the parental control also disables
all other button operations from the remote control andthe DVD player, except for the eject button. Press this
button again to restore operation of the RSA, DVD player,
and remote control.
This button can also be used to turn the DVD player
power on and to automatically resume play of a disc that
is in the player while the ignition is on. If no disc is in the
player, the system powers up with no display on the LCD
screen.
Before You Drive
The RSE is designed for rear seat passengers only.
The driver cannot safely view the video screen
while driving and should not try to do so.
Normal operation could be limited under extremely low
or high temperatures, in order to protect the system
from damage. Operate the RSE system under normal
or comfortable cabin temperature ranges.
Headphones
Notice:Do not store the headphones in heat or
direct sunlight. This could damage the headphones
and repairs will not be covered by your warranty.
Storage in extreme cold can weaken the batteries.
Keep the headphones stored in a cool, dry place.
3-102
Page 265 of 476
To use the auxiliary audio and video inputs, connect an
external auxiliary device such as a camcorder to the
RCA jacks and turn on both the auxiliary device power
and the power on the front of the RSE player.
If a disc is present when the RSE power is turned on,
the player automatically begins playing the disc. Press
the AUX button on the remote control or the DVD AUX
button on the DVD player faceplate to switch the system
between the DVD player and the auxiliary device. See
“DVD Player” and “Remote Control” later in this section
for more information.
Audio Output
Audio from the DVD player or auxiliary inputs can be
heard through the following sources:
Wireless Headphones
Vehicle Speakers
Wired Headphones (not included)
Vehicle Speakers
Only one audio source can be heard through the
vehicle’s speakers at a time.
The RSE system or an auxiliary device can be heard
through all of the vehicle’s speakers when the following
occurs:
A DVD or auxiliary device is playing
The front audio system is on and the CD AUX
button is pressed to enable the RSE system
DVD appears on the radio display when the RSE
system is on.
To turn the vehicles speakers on and off, press the CD
AUX button on the radio. The audio from the RSE system
can be heard through the wireless headphones and the
vehicles speakers at the same time. The volume on the
radio varies when switching between the radio, CD, DVD,
MP3, or an auxiliary device.
3-105