2008 CHEVROLET TRAIL BLAZER window
[x] Cancel search: windowPage 83 of 472
Lockout Protection
This feature stops the power door locks from locking
when the key is in the ignition and a door is open
to protect you from locking your key in the vehicle.
If the power lock switch is pressed when a door is open
and the key is in the ignition, all the doors will lock
and then the driver’s door will unlock.
Liftgate/Liftglass
{CAUTION:
It can be dangerous to drive with the
liftgate or liftglass open because carbon
monoxide (CO) gas can come into your
vehicle. You cannot see or smell CO. It can
cause unconsciousness and even death.
CAUTION: (Continued)
CAUTION: (Continued)
If you must drive with the liftgate open or if
electrical wiring or other cable connections
must pass through the seal between the body
and the liftgate or liftglass:
Make sure all other windows are shut.
Turn the fan on your climate control
system to its highest speed and select the
control setting that will force outside air
into your vehicle. See “Climate Control
System” in the Index.
If you have air outlets on or under the
instrument panel, open them all the way.
SeeEngine Exhaust on page 2-36.
Liftgate Release
To unlock the liftgate, use the power door lock switch or
the remote keyless entry transmitter. SeeRemote
Keyless Entry (RKE) System Operation on page 2-5. The
liftglass will also unlock when the liftgate is unlocked.
Press the button on the liftglass to open it. To open the
entire liftgate, lift the handle located in the center of
the liftgate. When the liftgate is opened, the liftglass will
lock after a short delay.
2-11
Page 84 of 472
Emergency Release for Opening
Liftgate
1. Remove the trim plug, located on the inside of the
liftgate in the center, to expose the access hole in
the trim panel.
2. Use a tool to reach through the access hole in the
trim panel.
3. Pry the left release lever up to the unlock position.
Pry the right release lever up to unlatch the liftgate.
4. Reinstall the trim plug.
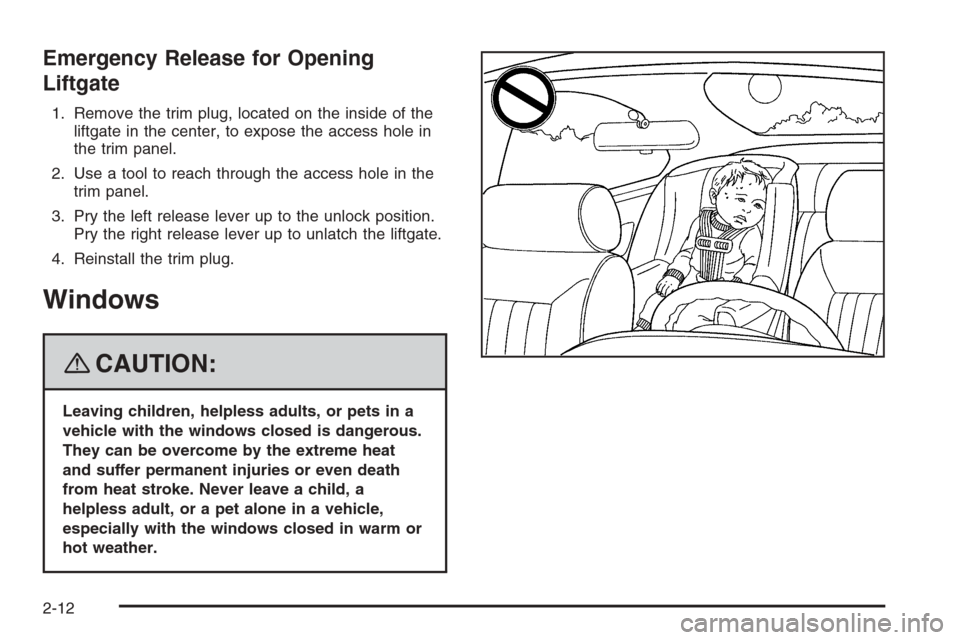
Windows
{CAUTION:
Leaving children, helpless adults, or pets in a
vehicle with the windows closed is dangerous.
They can be overcome by the extreme heat
and suffer permanent injuries or even death
from heat stroke. Never leave a child, a
helpless adult, or a pet alone in a vehicle,
especially with the windows closed in warm or
hot weather.
2-12
Page 85 of 472
Power Windows
{CAUTION:
Leaving children in a vehicle with the keys is
dangerous for many reasons, children or
others could be badly injured or even killed.
They could operate the power windows or
other controls or even make the vehicle move.
The windows will function and they could be
seriously injured or killed if caught in the path
of a closing window. Do not leave keys in a
vehicle with children.
When there are children in the rear seat use
the window lockout button to prevent
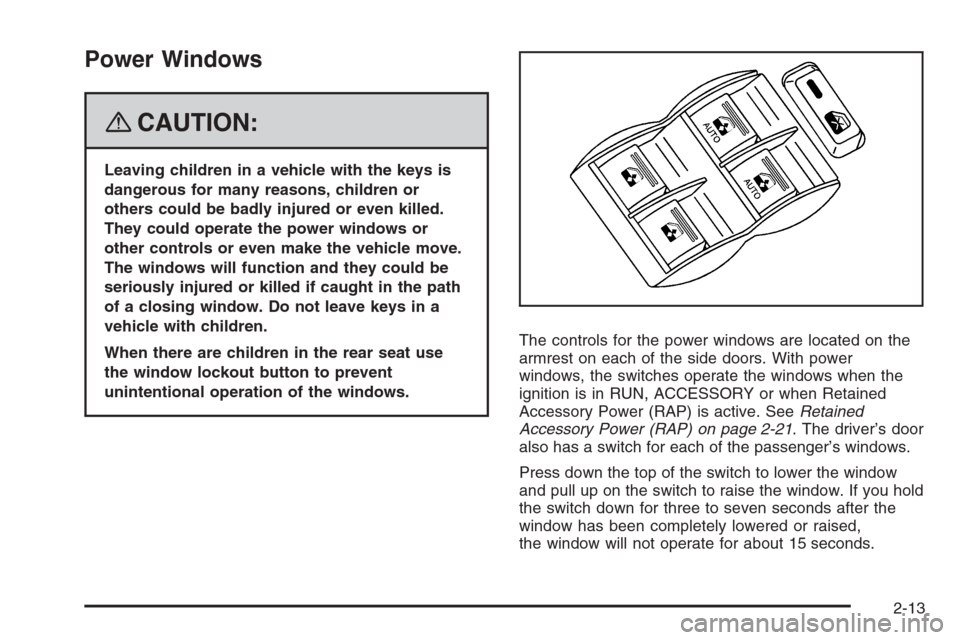
unintentional operation of the windows.The controls for the power windows are located on the
armrest on each of the side doors. With power
windows, the switches operate the windows when the
ignition is in RUN, ACCESSORY or when Retained
Accessory Power (RAP) is active. SeeRetained
Accessory Power (RAP) on page 2-21. The driver’s door
also has a switch for each of the passenger’s windows.
Press down the top of the switch to lower the window
and pull up on the switch to raise the window. If you hold
the switch down for three to seven seconds after the
window has been completely lowered or raised,
the window will not operate for about 15 seconds.
2-13
Page 86 of 472
Express-Down Window
AUTO (Express-down):The driver’s and front
passenger’s window switches have an express-down
feature that allows you to lower the window without
holding the switch down. Press down brie�y on
the driver’s or front passenger’s window switch labeled
AUTO to activate the express-down feature. Lightly
tap the switch to open the window slightly. The
express-down feature can be interrupted at any time by
pressing the top of the switch.
Window Lockout
o
(Lockout):Your vehicle has a lockout feature to
prevent passengers from operating the power windows.
The lockout switch is located in front of the window
switches on the driver’s door. A light in the lockout
switch will come on to show that the switch has been
activated. Press the lockout switch again to return
to normal operation.
Sun Visors
Sun Visors with Slide Rod
Your vehicle may have this feature. Pull the sun visor
down to block glare. Detach the sun visor from the
center mount and slide it along the rod from side-to-side
to cover the driver or passenger side of the front
window. Swing the sun visor to the side to cover the
side window. It can also be moved along the rod from
side-to-side in this position.
Sun Visors with Fixed Rod and Pull-out
Extension
Your vehicle may have this feature. Pull the sun visor
down to block glare. Pull the sun visor extender out for
additional coverage. Detach the sun visor from the center
mount and swing it to the side to cover the side window.
Visor Vanity Mirror
Pull the sun visor down to expose the vanity mirror.
You may have to lift a cover to expose the mirror.
Lighted Visor Vanity Mirror
Your vehicle may have this feature. Pull the sun visor
down and lift the mirror cover to turn on the lamps.
The lamps will turn off when the cover is closed.
2-14
Page 88 of 472
Testing the Alarm
To test the alarm:
1. From inside the vehicle, lower the driver’s window
and open the driver’s door.
2. Activate the system by locking the doors with the
power door lock switch while the door is open, or
with the RKE transmitter.
3. Get out of the vehicle, close the door and wait for
the security light to go out.
4. Then reach in through the window, unlock the door
with the manual door lock and open the door. This
should set off the alarm.
When the alarm is set the power door unlock switch will
not work.
If the alarm does not sound when it should but the
headlamps �ash, check to see if the horn works. The
horn fuse may be blown. To replace the fuse, seeFuses
and Circuit Breakers on page 5-110.
If the alarm does not sound or the headlamps do not
�ash, the vehicle should be serviced by your
dealer/retailer.
Passlock®(U. S. Only)
Your vehicle has the Passlock theft-deterrent system.
Passlock is a passive theft-deterrent system that
enables fuel if the ignition lock cylinder is turned with a
valid key. If a correct key is not used or the ignition
lock cylinder has been tampered with, the fuel system is
disabled and the vehicle will not start.
During normal operation, the security light will turn off
about �ve seconds after the key is turned to ON/RUN.
If the engine stalls and the security light �ashes,
wait about 10 minutes until the light stops �ashing before
trying to restart the engine. Remember to release the
key from START as soon as the engine starts.
If the engine does not start after three tries, the vehicle
needs service.
If the engine is running and the security light comes on,
you will be able to restart the engine if you turn the
engine off. However, your Passlock system is not
working properly and must be serviced by your
dealer/retailer. Your vehicle is not protected by Passlock
at this time. You may also want to check the fuse.
SeeFuses and Circuit Breakers on page 5-110. See
your dealer/retailer for service.
In an emergency, call the Roadside Assistance Center.
SeeRoadside Assistance Program on page 7-7.
Do not leave the key or device that disarms or
deactivates the theft deterrent system in the vehicle.
2-16
Page 93 of 472
The battery could be drained if you leave the key in the
ignition while your vehicle is parked. You may not be
able to start your vehicle after it has been parked for an
extended period of time.
Retained Accessory Power (RAP)
These vehicle accessories can be used for up to
20 minutes after the engine is turned off:
Audio System
Power Windows
Overhead Console
Sunroof (if equipped)
These features will work when the key is in ON/RUN or
ACC/ACCESSORY. Once the key is turned from
ON/RUN to LOCK/OFF, these features continue to work
for up to 20 minutes, or until a door is opened.
Starting the Engine
Move your shift lever to PARK (P) or NEUTRAL (N).
Your engine will not start in any other position – this is a
safety feature. To restart when you are already
moving, use NEUTRAL (N) only.
Notice:Do not try to shift to PARK (P) if your
vehicle is moving. If you do, you could damage the
transmission. Shift to PARK (P) only when your
vehicle is stopped.
Starting Procedure
1. With your foot off the accelerator pedal, turn the
ignition key to START. When the engine starts,
let go of the key. The idle speed will go down as
your engine gets warm. Do not race the engine
immediately after starting it. Operate the engine and
transmission gently to allow the oil to warm up
and lubricate all moving parts.
Your vehicle has a Computer-Controlled Cranking
System. This feature assists in starting the engine
and protects components. If the ignition key is turned
to the START position, and then released when the
engine begins cranking, the engine will continue
cranking for a few seconds or until the vehicle starts.
2-21
Page 108 of 472
Engine Exhaust
{CAUTION:
Engine exhaust can kill. It contains the gas
carbon monoxide (CO), which you cannot see or
smell. It can cause unconsciousness and death.
You might have exhaust coming in if:
The exhaust system sounds strange or
different.
Your vehicle gets rusty underneath.
Your vehicle was damaged in a collision.
Your vehicle was damaged when driving
over high points on the road or over road
debris.
Repairs were not done correctly.
Your vehicle or the exhaust system has
been modi�ed improperly.
If you ever suspect exhaust is coming into your
vehicle:
Drive it only with all the windows down to
blow out any CO; and
Have your vehicle �xed immediately.
Running the Vehicle While Parked
It is better not to park with the engine running. But if you
ever have to, here are some things to know.
{CAUTION:
Idling the engine with the climate control
system off could allow dangerous exhaust into
your vehicle. See the earlier caution under
Engine Exhaust on page 2-36.
Also, idling in a closed-in place can let deadly
carbon monoxide (CO) into your vehicle even if
the climate control fan is at the highest setting.
One place this can happen is a garage.
Exhaust — with CO — can come in easily.
NEVER park in a garage with the engine
running.
Also see “If You Are Caught in a Blizzard”
underWinter Driving on page 4-29.
2-36
Page 110 of 472
Manual Rearview Mirror with
OnStar
®
When you are sitting in a comfortable driving position,
adjust the mirror so you can see clearly behind your
vehicle. Hold the mirror in the center to move it up or
down and side to side. The day/night adjustment allows
you to adjust the mirror to avoid glare from the lamps
behind you. Move the lever to the right for nighttime use
and to the left for daytime use.
There may also be three OnStar
®buttons located at the
bottom of the mirror face. See your dealer/retailer for
more information on the system and how to subscribe to
OnStar
®. SeeOnStar®System on page 2-47for more
information on the services OnStar®provides.
Automatic Dimming Rearview Mirror
with OnStar
®and Compass
Your vehicle may have an automatic-dimming rearview
mirror with a compass.
There may be three additional buttons for the OnStar
®
system. See your dealer/retailer for more information
on the system and how to subscribe to OnStar®.
SeeOnStar®System on page 2-47for more information
about the services OnStar®provides.
O(On/Off):This is the on/off button.
Automatic Dimming Mirror Operation
The automatic dimming mirror comes on each time the
ignition is turned to start. To turn the automatic
dimming feature off or back on, press the on/off button.
The indicator light on the mirror is lit when the
automatic dimming feature is on.
Compass Operation
Press the on/off button once to turn the compass on
or off.
There is a compass display in the window in the upper
right corner of the mirror face.
Compass Calibration
Press and hold the on/off button to activate the compass
calibration mode. CAL will be displayed in the compass
window on the mirror.
The compass can be calibrated by driving the vehicle in
circles at 5 mph (8 km/h) or less until the display
reads a direction.
If after a few seconds the display does not show a
compass direction, (N for North for example), there may
be a strong magnetic �eld interfering with the compass.
Such interference may be caused by a magnetic
antenna mount, note pad holder, or similar object. If the
letter C or CAL appears in the compass window, the
compass may need to be reset or calibrated.
2-38