2008 CHEVROLET MALIBU set clock
[x] Cancel search: set clockPage 134 of 412
Security Light...............................................3-44
Cruise Control Light......................................3-44
Highbeam On Light.......................................3-45
Fuel Gage...................................................3-45
Driver Information Center (DIC).......................3-46
DIC Operation and Displays...........................3-46
DIC Warnings and Messages.........................3-48
DIC Vehicle Personalization............................3-53Audio System(s).............................................3-59
Setting the Clock..........................................3-60
Radio(s)......................................................3-62
Using an MP3..............................................3-73
XM Radio Messages.....................................3-78
Theft-Deterrent Feature..................................3-79
Audio Steering Wheel Controls.......................3-79
Radio Reception...........................................3-80
Backglass Antenna.......................................3-81
XM™ Satellite Radio Antenna System.............3-81
Section 3 Instrument Panel
3-2
Page 153 of 412
Climate Controls
Climate Control System
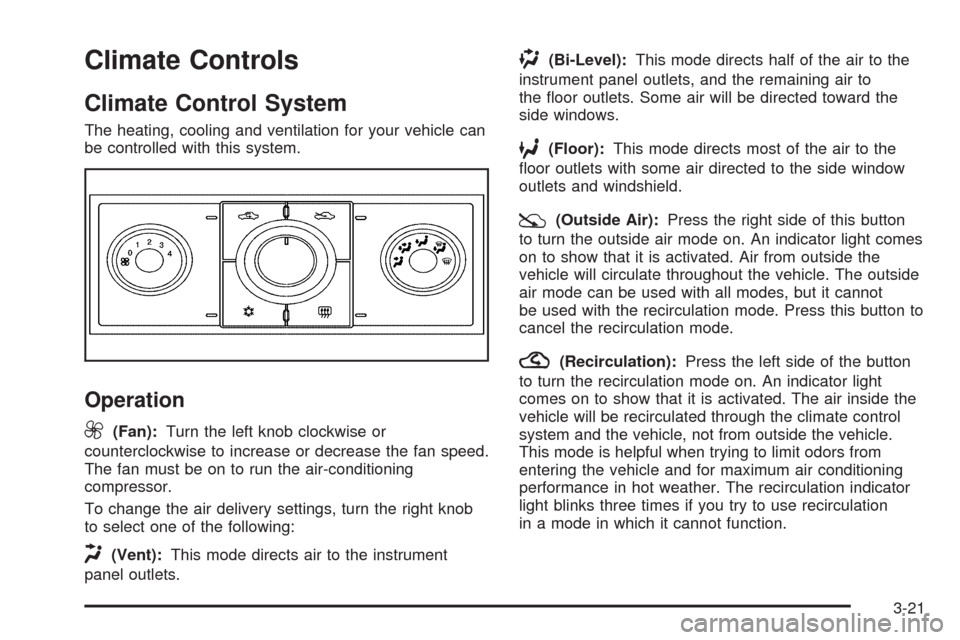
The heating, cooling and ventilation for your vehicle can
be controlled with this system.
Operation
9
(Fan):Turn the left knob clockwise or
counterclockwise to increase or decrease the fan speed.
The fan must be on to run the air-conditioning
compressor.
To change the air delivery settings, turn the right knob
to select one of the following:
H(Vent):This mode directs air to the instrument
panel outlets.
)(Bi-Level):This mode directs half of the air to the
instrument panel outlets, and the remaining air to
the �oor outlets. Some air will be directed toward the
side windows.
6(Floor):This mode directs most of the air to the
�oor outlets with some air directed to the side window
outlets and windshield.
:(Outside Air):Press the right side of this button
to turn the outside air mode on. An indicator light comes
on to show that it is activated. Air from outside the
vehicle will circulate throughout the vehicle. The outside
air mode can be used with all modes, but it cannot
be used with the recirculation mode. Press this button to
cancel the recirculation mode.
?(Recirculation):Press the left side of the button
to turn the recirculation mode on. An indicator light
comes on to show that it is activated. The air inside the
vehicle will be recirculated through the climate control
system and the vehicle, not from outside the vehicle.
This mode is helpful when trying to limit odors from
entering the vehicle and for maximum air conditioning
performance in hot weather. The recirculation indicator
light blinks three times if you try to use recirculation
in a mode in which it cannot function.
3-21
Page 154 of 412
Pressing this button will cancel the outside air mode.
When switching to the defog or defrost modes the
system automatically moves from recirculation to outside
air. When the vehicle or fan is turned off and back on,
the system defaults to outside air automatically.
Only use recirculation mode when it is needed for
comfort, since window fogging can occur.
Temperature Control:Turn the center knob clockwise
or counterclockwise to increase or decrease the
temperature inside the vehicle.
When it is cold outside 0°F (−18°C) or lower, use the
engine coolant heater, if vehicle has one, to provide
warmer air faster to the vehicle. An engine coolant
heater warms the coolant the engine uses that provides
heat to warm the inside of the vehicle. For more
information, seeEngine Coolant Heater on page 2-27.
#(Air Conditioning):Press this button to turn
the air conditioning system on or off. An indicator light
comes on to show it is activated.
The air-conditioning system removes moisture from the
air, so a small amount of water might drip under the
vehicle while it is idling or after the engine is turned off
is normal.
Maximum Air Conditioning
On hot days, open the windows to let hot inside air
escape; then close them. This helps reduce the time it
takes for the vehicle to cool down. It also helps the
air conditioning system operate more efficiently.
For quick cool down on hot days, do the following:
1. Select the
Cvent mode.
2. Select the highest fan speed.
3. Select
#air conditioning.
4. Select the
?recirculation mode.
5. Select the coolest temperature.
Using these settings together for long periods of time can
cause the air inside of the vehicle to become too dry. To
prevent this from happening, after the air in the vehicle
has cooled, turn the recirculation mode off.
3-22
Page 192 of 412
Setting the Clock
AM/FM Radio with Optional CD Player
If your vehicle has an AM/FM radio with an optional
CD player, it has a
Hbutton for setting the time.
With these types of radios, the clock can be set with
either the radio turned on or off.
Set the time by following these steps:
1. Press
Huntil the hour begins �ashing on display.
Press this button a second time and the minutes
begin �ashing on display.
Press
Ha third time and the 12HR or 24HR time
format begins �ashing.
2. While either the hour or the minutes are �ashing,
turn the
fknob, located on the upper right side of
the radio, clockwise or counterclockwise to
increase or decrease the time. While the 12HR or
24HR time format is �ashing, turn the
fknob
clockwise or counterclockwise to select the default
time settings.
3. Press
Hagain until the clock display stops �ashing
to set the currently displayed time; otherwise, the
�ashing stops after �ve seconds and the current
time displayed is automatically set.
MP3 Radio with a Single CD Player
If your vehicle has a radio with a single CD (MP3) player,
the radio has a
Hbutton for setting the time and date.
To set the time and date, follow the instructions:
1. Press the
Hbutton and the HR, MIN, MM, DD,
YYYY (hour, minute, month, day, and year)
displays.
2. Press the pushbutton located under any one of the
labels that you want to change. Every time the
pushbutton is pressed again, the time or the date if
selected, increases by one.
Another way to increase the time or date,
is to press the right
¨SEEK arrow or the
\FWD (forward) button.
3. To decrease, press the left
©SEEK arrow or the
sREV button. You can also turn thefknob,
located on the upper right side of the radio, to adjust
the selected setting.
3-60
Page 196 of 412
Radio Data System (RDS)
Your radio may have the Radio Data System (RDS)
feature. RDS is available for use only on FM stations
that broadcast RDS information. This system relies upon
receiving speci�c information from these stations and
only works when the information is available. While the
radio is tuned to an FM-RDS station, the station
name or call letters display. In rare cases, a radio station
can broadcast incorrect information that causes the
radio features to work improperly. If this happens,
contact the radio station.
Playing the Radio
O
(Power/Volume):Press to turn the system
on and off.
Turn clockwise or counterclockwise to increase or
decrease the volume.
The radio goes to the previous volume setting when the
radio is turned on. The volume can still be adjusted by
using the volume knob.Speed Compensated Volume (SCV):The radio has
Speed Compensated Volume (SCV). When SCV is on,
the radio volume automatically adjusts to compensate for
road and wind noise as you speed up or slow down while
driving. That way, the volume level should sound about
the same as you drive. To activate SCV:
1. Set the radio volume to the desired level.
2. Press the MENU button to display the radio
setup menu.
3. Press the pushbutton under the AUTO VOLUM
(automatic volume) label on the radio display.
4. Press the pushbutton under the desired Speed
Compensated Volume setting (OFF, Low, Med,
or High) to select the level of radio volume
compensation. The display times out after
approximately 10 seconds. Each higher setting
allows for more radio volume compensation at
faster vehicle speeds.
H(Clock):If your vehicle has an AM-FM radio, it has
a clock button for setting the time. With this type of
radio, the clock can be set with either the radio turned
on or off. seeSetting the Clock on page 3-60for
more information.
3-64
Page 199 of 412
Setting the Tone (Bass/Midrange/Treble)
BASS/MID/TREB (Bass, Midrange, or Treble):Your
radio may display some or all tones such as BASS, MID,
and TREB. To adjust the tone settings, press the
fknob or for the AM-FM radio, you can also press the
EQ button until the tone control labels display. Press
the pushbutton positioned under the desired label, then
turn the
fknob clockwise or counterclockwise to
adjust the highlighted setting. The highlighted setting
can also be adjusted by pressing either SEEK arrow.
On some radios, the
\FWD (forward) andsREV
(reverse) buttons are available and can be used to
adjust the desired tone levels.
If a station’s frequency is weak, or has static, decrease
the treble.
Your radio may be capable of adjusting bass, midrange,
or treble to the middle position by pressing the
pushbuttton positioned under the BASS, MID (midrange),
or TREB (treble) label for more than two seconds.
The radio beeps once and the level adjusts to the
middle position.
Your radio may also be capable of adjusting all tone
and speaker controls to the middle position by pressing
the
fknob for more than two seconds until the radio
beeps once.EQ (Equalization):Press this button to select preset
equalization settings.
To return to the manual mode, press the EQ button until
Manual displays or start to manually adjust the bass,
midrange, or treble by pressing the
fknob.
Adjusting the Speakers (Balance/Fade)
`
BAL/FADE (Balance/Fade):To adjust balance
or fade, press the
`if your radio has this symbol, or
the
fknob until the speaker control labels display.
Continue pressing to highlight the desired label, or press
the pushbutton positioned under the desired label.
Turn the
fknob clockwise or counterclockwise to adjust
the highlighted setting. The highlighted setting can
also be adjusted by pressing either SEEK arrow.
On some radios, the
\FWD (forward) andsREV
(reverse) buttons are available and can be used to
adjust the desired tone levels.
Your radio may be capable of adjusting balance or fade
to the middle position by pressing the pushbuttton
positioned under the BAL or FADE label for more than
two seconds. The radio beeps once and the level
adjusts to the middle position.
Your radio may also be capable of adjusting all speaker
and tone controls to the middle position by pressing
the
fknob for more than two seconds until the radio
beeps once.
3-67
Page 205 of 412
Using the Auxiliary Input Jack
Your radio system has an auxiliary input jack located on
the lower right side of the faceplate. This is not an
audio output; do not plug the headphone set into the
front auxiliary input jack. You can however, connect an
external audio device such as an iPod, laptop
computer, MP3 player, CD changer, or cassette tape
player, etc. to the auxiliary input jack for use as another
source for audio listening.
Drivers are encouraged to set up any auxiliary device
while the vehicle is in PARK (P). SeeDefensive Driving
on page 4-2for more information on driver distraction.
To use a portable audio player, connect a 3.5 mm
(1/8 inch) cable to the radio’s front auxiliary input jack.
When a device is connected, press the radio CD/AUX
button to begin playing audio from the device over
the vehicle speakers.
O(Power/Volume):Turn clockwise or counterclockwise
to increase or decrease the volume of the portable player.
You might need to make additional volume adjustments
from the portable device.
BAND:Press to listen to the radio while a portable audio
device is playing. The portable audio device continues
playing, so you might want to stop it or turn it off.CD/AUX (CD/Auxiliary):Press to play a CD while a
portable audio device is playing. Press again and
the system begins playing audio from the connected
portable audio player. If a portable audio player is
not connected, No Aux Input Device Found may display.
Using an MP3
MP3 CD-R or CD-RW Disc
Your radio may have MP3 capability. With this feature,
the radio plays MP3 �les that were recorded on a
CD-R or CD-RW disc. Song title, artist name, and album
can display when �les are recorded using ID3 tags
version 1 and 2.
Compressed Audio
The radio also plays discs that contain both
uncompressed CD audio (.CDA �les) and MP3 �les.
By default the radio reads only the uncompressed
audio and ignore the MP3 �les. Pressing the CAT
button toggles between compressed and uncompressed
audio format.
3-73
Page 285 of 412
{CAUTION:
Adding only plain water to the cooling system
can be dangerous. Plain water, or some other
liquid such as alcohol, can boil before the
proper coolant mixture will. The vehicle’s
coolant warning system is set for the proper
coolant mixture. With plain water or the wrong
mixture, the engine could get too hot but you
would not get the overheat warning. The engine
could catch �re and you or others could be
burned. Use a 50/50 mixture of clean, drinkable
water and DEX-COOL
®coolant.
Notice:In cold weather, water can freeze and crack
the engine, radiator, heater core and other parts.
Use the recommended coolant and the proper
coolant mixture.
{CAUTION:
You can be burned if you spill coolant on hot
engine parts. Coolant contains ethylene glycol
and it will burn if the engine parts are hot
enough. Do not spill coolant on a hot engine.
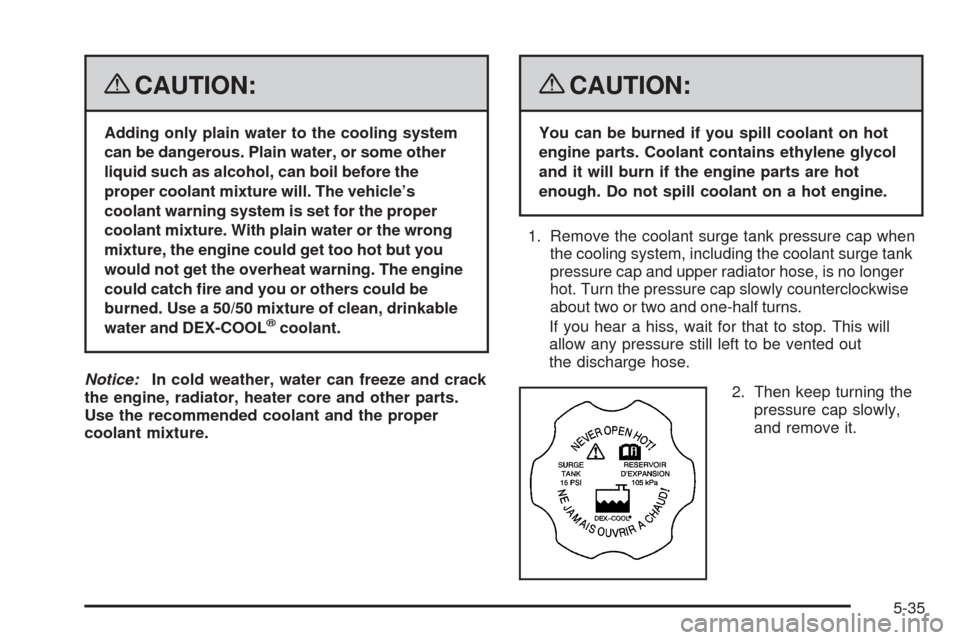
1. Remove the coolant surge tank pressure cap when
the cooling system, including the coolant surge tank
pressure cap and upper radiator hose, is no longer
hot. Turn the pressure cap slowly counterclockwise
about two or two and one-half turns.
If you hear a hiss, wait for that to stop. This will
allow any pressure still left to be vented out
the discharge hose.
2. Then keep turning the
pressure cap slowly,
and remove it.
5-35