2008 CHEVROLET MALIBU tow
[x] Cancel search: towPage 130 of 412
Storage Areas
Glove Box
To open, pull the handle up.
Cupholders
There are removable cupholders located in front of the
center console. See “Center Console Storage Area”
later on in this section for information on how to access
them. To remove the cupholders, press and hold the
tab at the rear of the cupholders and lift up and
rearward. This will disengage the two forward tabs.
To reinstall, place the two forward tabs in the slots
and push the rear of the cupholder down.
If your vehicle has rear seat cupholders, pull down the
door on the back of the center console to access them.
Instrument Panel Storage
Your vehicle has an instrument panel storage area,
with a removable liner, located above the radio.
To open, slide the latch toward you.
Front Storage Area
There is a storage area in front of the shifter.
To access, push the bottom of the door. It will open
automatically.
Center Console Storage
Your vehicle has a center console storage area. Inside
the center console is a storage tray and a main storage
bin. To access the storage tray, pull up on the driver side
latch. To access the main storage bin, pull up on the
passenger side latch. Inside is a removable bin divider
to customize the storage compartment. There also may
be a storage pocket at the rear of the center console.
The armrest on top of the center console can be
adjusted to a rearward, middle, and forward position.
To adjust, pull or push the front of the armrest to
the desired position.
In front of the main storage bin is another storage area.
To access, push down and then forward on the rear
of the cover. Inside is a storage tray and removable
cupholders.
2-52
Page 140 of 412
Turn and Lane-Change Signals
The turn signal has two upward (for right) and two
downward (for left) positions. These positions let you
signal a turn or a lane change.
To signal a turn, move the lever all the way up or down.
When the turn is �nished, the lever returns automatically
to the normal position.
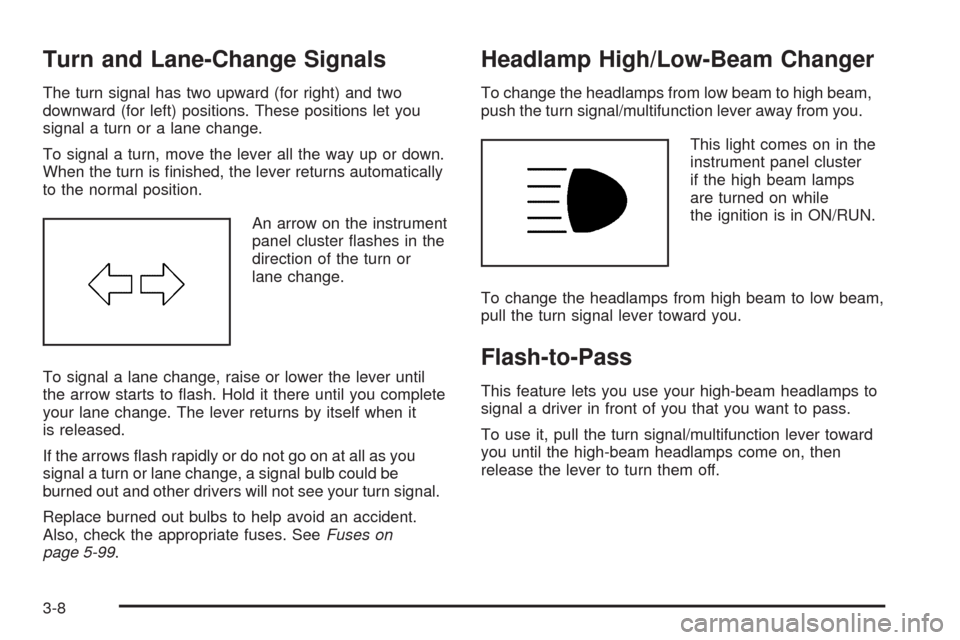
An arrow on the instrument
panel cluster �ashes in the
direction of the turn or
lane change.
To signal a lane change, raise or lower the lever until
the arrow starts to �ash. Hold it there until you complete
your lane change. The lever returns by itself when it
is released.
If the arrows �ash rapidly or do not go on at all as you
signal a turn or lane change, a signal bulb could be
burned out and other drivers will not see your turn signal.
Replace burned out bulbs to help avoid an accident.
Also, check the appropriate fuses. SeeFuses on
page 5-99.
Headlamp High/Low-Beam Changer
To change the headlamps from low beam to high beam,
push the turn signal/multifunction lever away from you.
This light comes on in the
instrument panel cluster
if the high beam lamps
are turned on while
the ignition is in ON/RUN.
To change the headlamps from high beam to low beam,
pull the turn signal lever toward you.
Flash-to-Pass
This feature lets you use your high-beam headlamps to
signal a driver in front of you that you want to pass.
To use it, pull the turn signal/multifunction lever toward
you until the high-beam headlamps come on, then
release the lever to turn them off.
3-8
Page 153 of 412
Climate Controls
Climate Control System
The heating, cooling and ventilation for your vehicle can
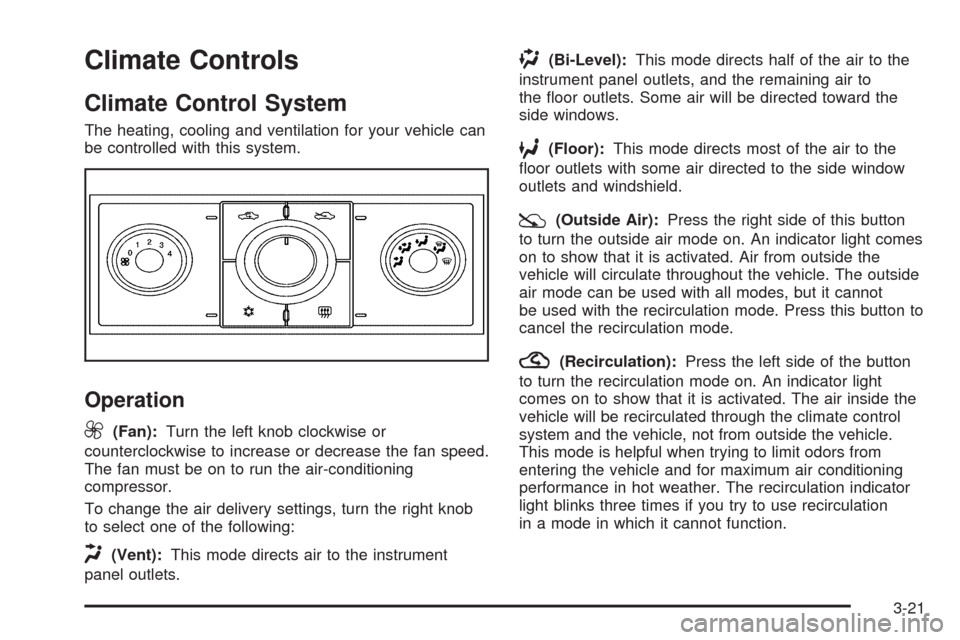
be controlled with this system.
Operation
9
(Fan):Turn the left knob clockwise or
counterclockwise to increase or decrease the fan speed.
The fan must be on to run the air-conditioning
compressor.
To change the air delivery settings, turn the right knob
to select one of the following:
H(Vent):This mode directs air to the instrument
panel outlets.
)(Bi-Level):This mode directs half of the air to the
instrument panel outlets, and the remaining air to
the �oor outlets. Some air will be directed toward the
side windows.
6(Floor):This mode directs most of the air to the
�oor outlets with some air directed to the side window
outlets and windshield.
:(Outside Air):Press the right side of this button
to turn the outside air mode on. An indicator light comes
on to show that it is activated. Air from outside the
vehicle will circulate throughout the vehicle. The outside
air mode can be used with all modes, but it cannot
be used with the recirculation mode. Press this button to
cancel the recirculation mode.
?(Recirculation):Press the left side of the button
to turn the recirculation mode on. An indicator light
comes on to show that it is activated. The air inside the
vehicle will be recirculated through the climate control
system and the vehicle, not from outside the vehicle.
This mode is helpful when trying to limit odors from
entering the vehicle and for maximum air conditioning
performance in hot weather. The recirculation indicator
light blinks three times if you try to use recirculation
in a mode in which it cannot function.
3-21
Page 170 of 412
The Driver Information Center (DIC) may display a
BRAKE FLUID message. SeeDIC Warnings and
Messages on page 3-48for more information.
If the light comes on while you are driving, pull off the
road and stop carefully. You may notice that the pedal is
harder to push or the pedal may go closer to the
�oor. It may take longer to stop. Try turning off and
restarting the vehicle one or two times, if the light is still
on, have the vehicle towed for service. SeeTowing
Your Vehicle on page 4-26.
{CAUTION:
Your brake system may not be working
properly if the brake system warning light is
on. Driving with the brake system warning light
on can lead to an accident. If the light is still
on after you have pulled off the road and
stopped carefully, have the vehicle towed for
service.
Antilock Brake System (ABS)
Warning Light
For vehicles with the
Antilock Brake System
(ABS), this light comes on
brie�y when the engine
is started.
That is normal. If the light does not come on then, have it
�xed so it will be ready to warn you if there is a problem.
If the ABS light stays on, turn the ignition off. If the light
comes on while driving, stop as soon as it is safely
possible and turn the ignition off. Then start the engine
again to reset the system. If the ABS light stays on, or
comes on again while driving, the vehicle needs service.
If the regular brake system warning light is not on, the
vehicle still has brakes, but not antilock brakes. If the
regular brake system warning light is also on, the vehicle
does not have antilock brakes and there is a problem with
the regular brakes. SeeBrake System Warning Light on
page 3-37.
For vehicles with a Driver Information Center (DIC),
seeDIC Warnings and Messages on page 3-48for all
brake related DIC messages.
3-38
Page 172 of 412
Engine Coolant Temperature
Warning Light
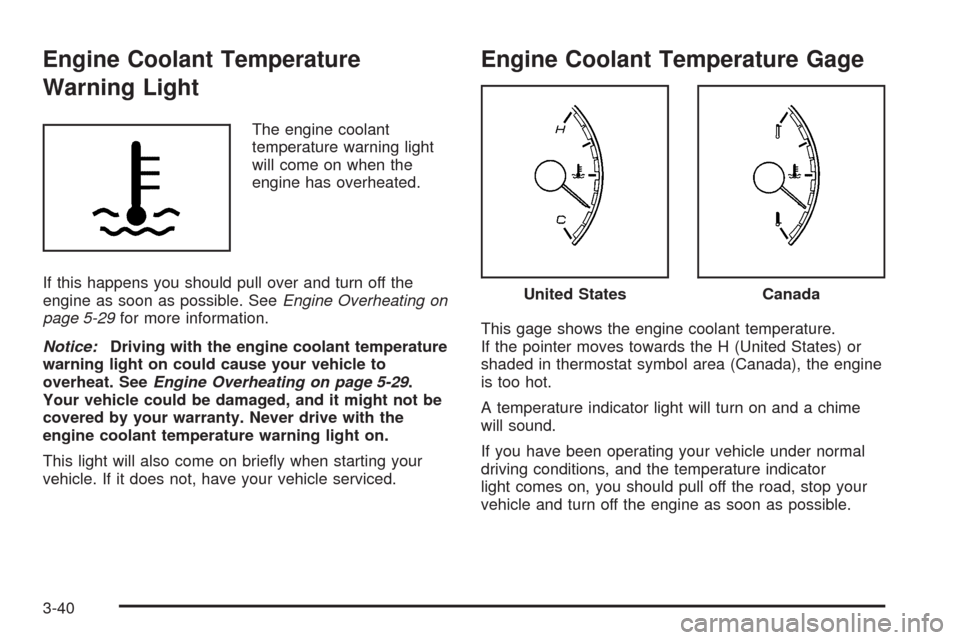
The engine coolant
temperature warning light
will come on when the
engine has overheated.
If this happens you should pull over and turn off the
engine as soon as possible. SeeEngine Overheating on
page 5-29for more information.
Notice:Driving with the engine coolant temperature
warning light on could cause your vehicle to
overheat. SeeEngine Overheating on page 5-29.
Your vehicle could be damaged, and it might not be
covered by your warranty. Never drive with the
engine coolant temperature warning light on.
This light will also come on brie�y when starting your
vehicle. If it does not, have your vehicle serviced.
Engine Coolant Temperature Gage
This gage shows the engine coolant temperature.
If the pointer moves towards the H (United States) or
shaded in thermostat symbol area (Canada), the engine
is too hot.
A temperature indicator light will turn on and a chime
will sound.
If you have been operating your vehicle under normal
driving conditions, and the temperature indicator
light comes on, you should pull off the road, stop your
vehicle and turn off the engine as soon as possible.
United StatesCanada
3-40
Page 174 of 412
Malfunctions often are indicated by the system before
any problem is apparent. Heeding the light can prevent
more serious damage to your vehicle. This system
assists your service technician in correctly diagnosing
any malfunction.
Notice:If you keep driving your vehicle with this
light on, after a while, the emission controls
might not work as well, your vehicle’s fuel economy
might not be as good, and the engine might not
run as smoothly. This could lead to costly repairs
that might not be covered by your warranty.
Notice:Modi�cations made to the engine,
transmission, exhaust, intake, or fuel system of
your vehicle or the replacement of the original tires
with other than those of the same Tire Performance
Criteria (TPC) can affect your vehicle’s emission
controls and can cause this light to come on.
Modi�cations to these systems could lead to costly
repairs not covered by your warranty. This could
also result in a failure to pass a required Emission
Inspection/Maintenance test. SeeAccessories
and Modifications on page 5-3.
This light comes on during a malfunction in one of
two ways:
Light Flashing:A mis�re condition has been detected.
A mis�re increases vehicle emissions and could
damage the emission control system on your vehicle.
Diagnosis and service might be required.The following can prevent more serious damage to
your vehicle:
Reduce vehicle speed.
Avoid hard accelerations.
Avoid steep uphill grades.
If you are towing a trailer, reduce the amount of
cargo being hauled as soon as it is possible.
If the light continues to �ash, when it is safe to do so,
stop the vehicle. Find a safe place to park the vehicle.
Turn the key off, wait at least 10 seconds, and restart
the engine. If the light is still �ashing, follow the previous
steps and see your dealer/retailer for service as soon
as possible.
Light On Steady:An emission control system
malfunction has been detected on your vehicle.
Diagnosis and service might be required.
You might be able to correct the emission system
malfunction by considering the following:
Make sure the fuel cap is fully installed. SeeFilling
the Tank on page 5-8. The diagnostic system can
determine if the fuel cap has been left off or
improperly installed. A loose or missing fuel cap
allows fuel to evaporate into the atmosphere. A few
driving trips with the cap properly installed should
turn the light off.
3-42
Page 215 of 412
Your Driving, the Road, and the Vehicle............4-2
Defensive Driving...........................................4-2
Drunk Driving.................................................4-2
Control of a Vehicle........................................4-3
Braking.........................................................4-4
Antilock Brake System (ABS)...........................4-5
Braking in Emergencies...................................4-5
Traction Control System (TCS).........................4-6
Electronic Stability Control (ESC)......................4-8
Panic Brake Assist........................................4-10
Steering......................................................4-10
Off-Road Recovery.......................................4-13
Passing.......................................................4-13
Loss of Control.............................................4-13Driving at Night............................................4-15
Driving in Rain and on Wet Roads..................4-15
Before Leaving on a Long Trip.......................4-16
Highway Hypnosis........................................4-16
Hill and Mountain Roads................................4-17
Winter Driving..............................................4-18
If Your Vehicle is Stuck in Sand, Mud,
Ice, or Snow.............................................4-20
Rocking Your Vehicle to Get It Out.................4-21
Loading the Vehicle......................................4-21
Towing..........................................................4-26
Towing Your Vehicle.....................................4-26
Recreational Vehicle Towing...........................4-26
Towing a Trailer...........................................4-30
Section 4 Driving Your Vehicle
4-1
Page 235 of 412
Rocking Your Vehicle to Get It Out
First, turn the steering wheel left and right to clear the
area around the front wheels. Turn off any traction or
stability system. SeeTraction Control System (TCS)
on page 4-6andElectronic Stability Control (ESC)
on page 4-8. Then shift back and forth between
REVERSE (R) and a forward gear, spinning the wheels
as little as possible. To prevent transmission wear, wait
until the wheels stop spinning before shifting gears.
Release the accelerator pedal while you shift, and press
lightly on the accelerator pedal when the transmission is
in gear. By slowly spinning the wheels in the forward and
reverse directions, you will cause a rocking motion that
could free your vehicle. If that does not get your vehicle
out after a few tries, it might need to be towed out. If your
vehicle does need to be towed out, seeTowing Your
Vehicle on page 4-26.
Loading the Vehicle
It is very important to know how much weight your
vehicle can carry. This weight is called the vehicle
capacity weight and includes the weight of all
occupants, cargo, and all nonfactory-installed
options. Two labels on your vehicle show how much
weight it may properly carry, the Tire and Loading
Information label and the Vehicle Certi�cation label.
{CAUTION:
Do not load the vehicle any heavier than
the Gross Vehicle Weight Rating (GVWR),
or either the maximum front or rear Gross
Axle Weight Rating (GAWR). If you do,
parts on the vehicle can break, and it can
change the way your vehicle handles.
These could cause you to lose control
and crash. Also, overloading can shorten
the life of the vehicle.
4-21