2008 CHEVROLET MALIBU remote start
[x] Cancel search: remote startPage 125 of 412
Programming Universal Home
Remote — Rolling Code
For questions or help programming the Universal
Home Remote System, call 1-866-572-2728 or go to
www.learcar2u.com.
Most garage door openers sold after 1996 are
Rolling Code units.
Programming a garage door opener involves
time-sensitive actions, so read the entire procedure
before starting. Otherwise, the device will time out
and the procedure will have to be repeated.
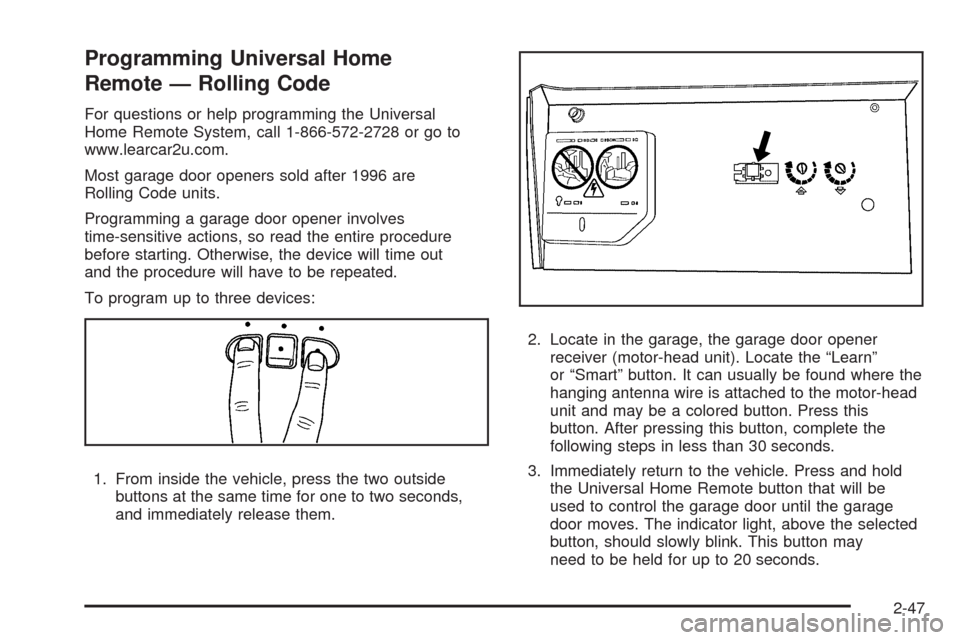
To program up to three devices:
1. From inside the vehicle, press the two outside
buttons at the same time for one to two seconds,
and immediately release them.2. Locate in the garage, the garage door opener
receiver (motor-head unit). Locate the “Learn”
or “Smart” button. It can usually be found where the
hanging antenna wire is attached to the motor-head
unit and may be a colored button. Press this
button. After pressing this button, complete the
following steps in less than 30 seconds.
3. Immediately return to the vehicle. Press and hold
the Universal Home Remote button that will be
used to control the garage door until the garage
door moves. The indicator light, above the selected
button, should slowly blink. This button may
need to be held for up to 20 seconds.
2-47
Page 126 of 412
4. Immediately, within one second, release the button
when the garage door moves. The indicator light
will blink rapidly until programming is complete.
5. Press and release the same button again. The
garage door should move, con�rming that
programming is successful and complete.
To program another Rolling Code device such as an
additional garage door opener, a security device,
or home automation device, repeat Steps 1 through 5,
choosing a different function button in Step 3 than
what was used for the garage door opener.
If these instructions do not work, the garage door
opener is probably a Fixed Code unit. Follow the
Programming instructions that follow for a Fixed
Code garage door opener.
Programming Universal Home
Remote — Fixed Code
For questions or help programming the Universal
Home Remote System, call 1-866-572-2728 or go to
www.learcar2u.com.
Most garage door openers sold before 1996 are
Fixed Code units.
Programming a garage door opener involves
time-sensitive actions, so read the entire procedure
before starting. Otherwise, the device will time out
and the procedure will have to be repeated.To program up to three devices:
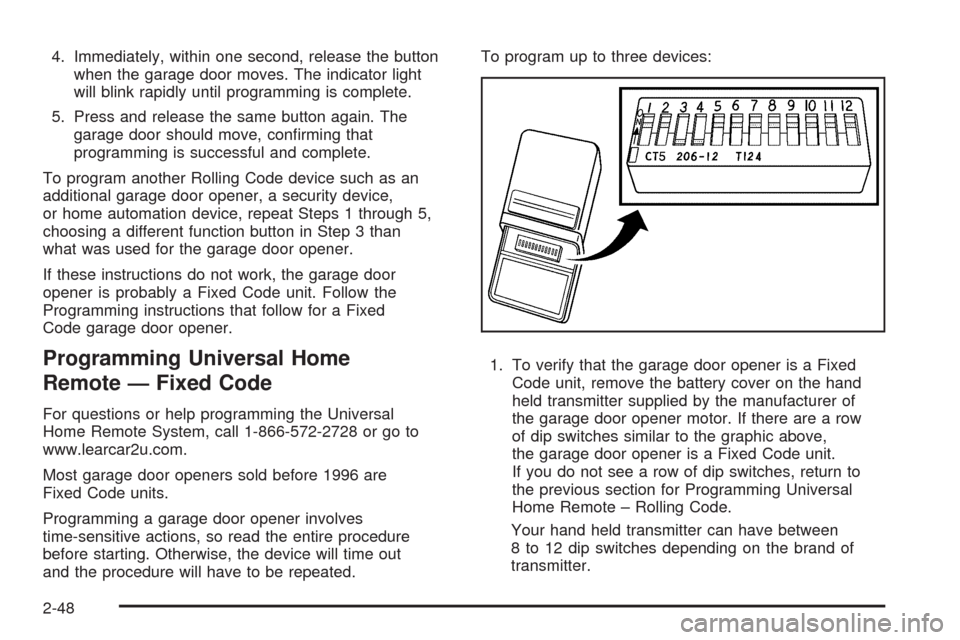
1. To verify that the garage door opener is a Fixed
Code unit, remove the battery cover on the hand
held transmitter supplied by the manufacturer of
the garage door opener motor. If there are a row
of dip switches similar to the graphic above,
the garage door opener is a Fixed Code unit.
If you do not see a row of dip switches, return to
the previous section for Programming Universal
Home Remote – Rolling Code.
Your hand held transmitter can have between
8 to 12 dip switches depending on the brand of
transmitter.
2-48
Page 152 of 412
Power Outlet 115 Volt Alternating
Current
Your vehicle may have a power outlet that can be used
to plug in electrical equipment that uses a maximum
limit of 150 watts.
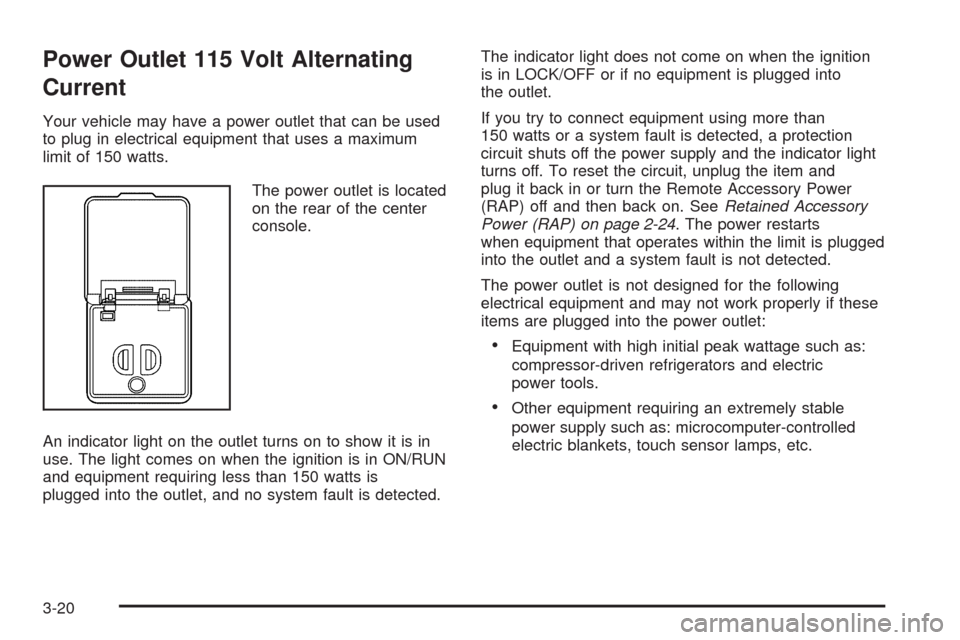
The power outlet is located
on the rear of the center
console.
An indicator light on the outlet turns on to show it is in
use. The light comes on when the ignition is in ON/RUN
and equipment requiring less than 150 watts is
plugged into the outlet, and no system fault is detected.The indicator light does not come on when the ignition
is in LOCK/OFF or if no equipment is plugged into
the outlet.
If you try to connect equipment using more than
150 watts or a system fault is detected, a protection
circuit shuts off the power supply and the indicator light
turns off. To reset the circuit, unplug the item and
plug it back in or turn the Remote Accessory Power
(RAP) off and then back on. SeeRetained Accessory
Power (RAP) on page 2-24. The power restarts
when equipment that operates within the limit is plugged
into the outlet and a system fault is not detected.
The power outlet is not designed for the following
electrical equipment and may not work properly if these
items are plugged into the power outlet:
Equipment with high initial peak wattage such as:
compressor-driven refrigerators and electric
power tools.
Other equipment requiring an extremely stable
power supply such as: microcomputer-controlled
electric blankets, touch sensor lamps, etc.
3-20
Page 156 of 412
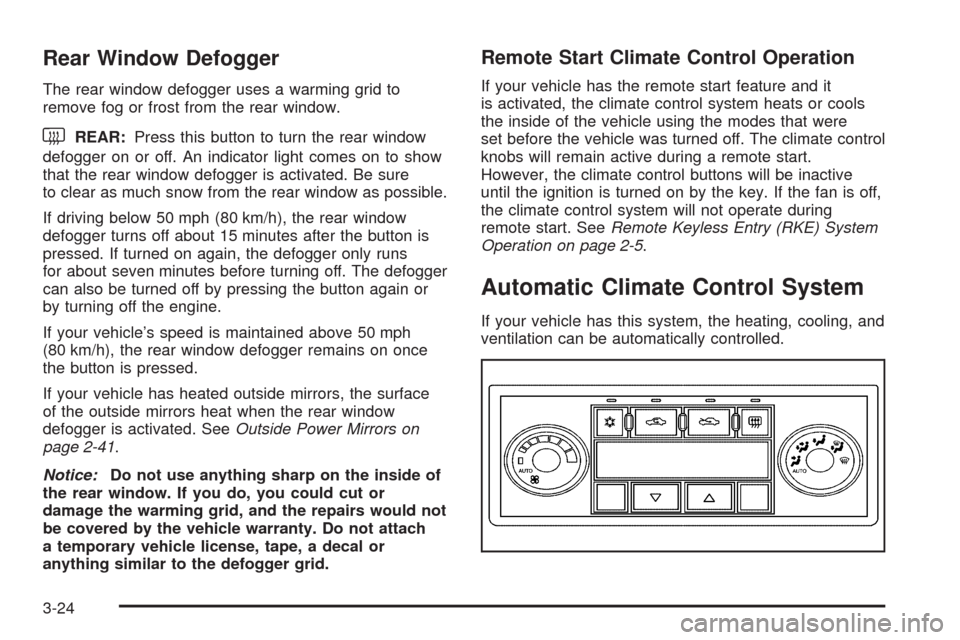
Rear Window Defogger
The rear window defogger uses a warming grid to
remove fog or frost from the rear window.
that the rear window defogger is activated. Be sure
to clear as much snow from the rear window as possible.
If driving below 50 mph (80 km/h), the rear window
defogger turns off about 15 minutes after the button is
pressed. If turned on again, the defogger only runs
for about seven minutes before turning off. The defogger
can also be turned off by pressing the button again or
by turning off the engine.
If your vehicle’s speed is maintained above 50 mph
(80 km/h), the rear window defogger remains on once
the button is pressed.
If your vehicle has heated outside mirrors, the surface
of the outside mirrors heat when the rear window
defogger is activated. SeeOutside Power Mirrors on
page 2-41.
Notice:Do not use anything sharp on the inside of
the rear window. If you do, you could cut or
damage the warming grid, and the repairs would not
be covered by the vehicle warranty. Do not attach
a temporary vehicle license, tape, a decal or
anything similar to the defogger grid.
Remote Start Climate Control Operation
If your vehicle has the remote start feature and it
is activated, the climate control system heats or cools
the inside of the vehicle using the modes that were
set before the vehicle was turned off. The climate control
knobs will remain active during a remote start.
However, the climate control buttons will be inactive
until the ignition is turned on by the key. If the fan is off,
the climate control system will not operate during
remote start. SeeRemote Keyless Entry (RKE) System
Operation on page 2-5.
Automatic Climate Control System
If your vehicle has this system, the heating, cooling, and
ventilation can be automatically controlled.
3-24
Page 161 of 412
Remote Start Climate Control Operation
If the vehicle has remote start and it is activated,
the climate control system heats and cools the inside of
the vehicle using the previous system settings before
the vehicle was turned off. The climate control knobs will
remain active during a remote start. However, the
climate control buttons will be inactive until the ignition
is turned on by the key. If the fan is off, the climate
control system will not operate during remote start.
With the automatic climate control system, the climate
control displays “RS” in place of the temperature to
indicate that remote start is activated. For best
performance, turn both the fan and mode knobs to
AUTO. If the temperature is cold enough and the mode
knob is set to AUTO, the system begins in defrost to
clear the windows. SeeRemote Keyless Entry
(RKE) System Operation on page 2-5.
Outlet Adjustment
Use the lever located in the center of each outlet by
moving it either up and down or side-to-side, to change
the direction and amount of air�ow in the vehicle.
Operation Tips
Clear away any ice, snow, or leaves from the air
inlets at the base of the windshield that may
block the �ow of air into the vehicle.
Do not use non-GM approved hood de�ectors as
they could adversely affect the performance of
the system.
Keep the path under the front seats clear of objects
to help circulate the air inside of the vehicle more
effectively.
When an objectionable odor outside the vehicle is
encountered, use the recirculation mode, with the
temperature knob at a comfortable setting to prevent
the odor from entering the vehicle through the
ventilation system. This can be helpful when driving
through a long tunnel with poor ventilation.
However, extended usage of this mode in cold or
cool weather can cause window fogging.
3-29
Page 167 of 412
Passenger Airbag Status Indicator
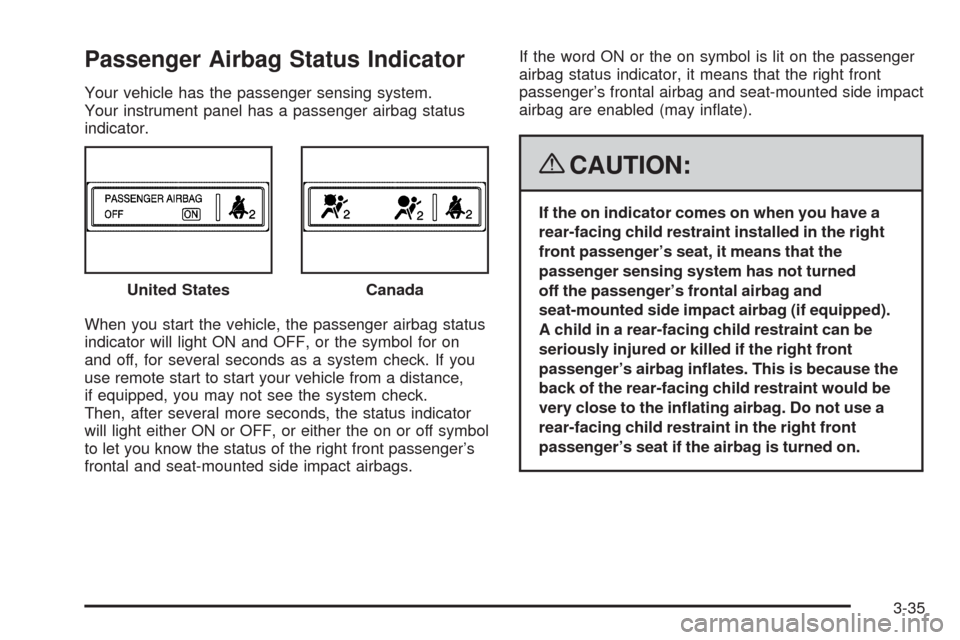
Your vehicle has the passenger sensing system.
Your instrument panel has a passenger airbag status
indicator.
When you start the vehicle, the passenger airbag status
indicator will light ON and OFF, or the symbol for on
and off, for several seconds as a system check. If you
use remote start to start your vehicle from a distance,
if equipped, you may not see the system check.
Then, after several more seconds, the status indicator
will light either ON or OFF, or either the on or off symbol
to let you know the status of the right front passenger’s
frontal and seat-mounted side impact airbags.If the word ON or the on symbol is lit on the passenger
airbag status indicator, it means that the right front
passenger’s frontal airbag and seat-mounted side impact
airbag are enabled (may in�ate).
{CAUTION:
If the on indicator comes on when you have a
rear-facing child restraint installed in the right
front passenger’s seat, it means that the
passenger sensing system has not turned
off the passenger’s frontal airbag and
seat-mounted side impact airbag (if equipped).
A child in a rear-facing child restraint can be
seriously injured or killed if the right front
passenger’s airbag in�ates. This is because the
back of the rear-facing child restraint would be
very close to the in�ating airbag. Do not use a
rear-facing child restraint in the right front
passenger’s seat if the airbag is turned on. United States
Canada
3-35
Page 186 of 412
Personalization Menu Modes
OIL LIFE RESET
When this feature is displayed, you can reset the engine
oil life system. To reset the system, seeEngine Oil
Life System on page 5-22. See “OIL LIFE” underDIC
Operation and Displays on page 3-46for more
information.
UNITS
This feature allows you to select the units of
measurement in which the DIC will display the vehicle
information. When UNITS appears on the display, press
and hold the reset button for at least one second to
scroll through the available settings:
ENGLISH (default in United States):All information
will be displayed in English units.
METRIC (default in Canada):All information will be
displayed in metric units.
To select a setting and move on to the next feature,
press the information button while the desired setting is
displayed on the DIC.
REMOTE START
If your vehicle has remote start, this feature allows
remote start to be turned off or on. Remote start allows
you to start the engine from outside of the vehicle
using your Remote Keyless Entry (RKE) transmitter.
When REMOTE START appears on the display, press
and hold the reset button for at least one second to
scroll through the available settings:
OFF:The remote start feature will be disabled.
ON (default):The remote start feature will be enabled.
SeeRemote Vehicle Start on page 2-7for more
information.
To select a setting and move on to the next feature,
press the information button while the desired setting is
displayed on the DIC.
3-54
Page 316 of 412
TPMS Sensor Matching Process
Each TPMS sensor has a unique identi�cation code.
Any time you replace one or more of the TPMS sensors
or rotate the vehicle’s tires, the identi�cation codes
need to be matched to the new tire/wheel location.
The sensors are matched, to the tire/wheel locations,
in the following order: driver side front tire, passenger
side front tire, passenger side rear tire, and driver
side rear tire using a TPMS diagnostic tool. See your
dealer/retailer for service.
The TPMS sensors can also be matched to each
tire/wheel position by increasing or decreasing the tire’s
air pressure. When increasing the tire’s pressure, do
not exceed the maximum in�ation pressure indicated on
the tire’s sidewall. To decrease the tire’s air-pressure
use the pointed end of the valve cap, a pencil-style
air pressure gage, or a key.
You have two minutes to match each tire and wheel
position. If it takes longer than two minutes to match
any tire and wheel position, the matching process stops
and you need to start over.The TPMS matching process is outlined below:
1. Set the parking brake.
2. Turn the ignition switch to ON/RUN with the
engine off.
3. Press and hold the Remote Keyless Entry (RKE)
transmitter’s LOCK and UNLOCK buttons, at the
same time, for about �ve seconds to start the TPMS
learn mode. The horn sounds twice indicating the
TPMS receiver is ready and in learn mode.
4. Start with the driver side front tire. The driver side
front turn signal also comes on to indicate that
corner’s sensor is ready to be learned.
5. Remove the valve cap from the tire’s valve
stem. Activate the TPMS sensor by increasing
or decreasing the tire’s air pressure for about
eight seconds. The horn chirp, can take up to
30 seconds to sound. It chirps one time and then
all the turn signals �ash one time to con�rm the
sensor identi�cation code has been matched to
the tire/wheel position.
6. The passenger side front turn signal comes on to
indicate that corner sensor is ready to be learned.
Proceed to the passenger side front tire and
repeat the procedure in Step 5.
5-66