2008 CHEVROLET IMPALA fuse
[x] Cancel search: fusePage 6 of 400

Front Seats
Manual Seats
{CAUTION:
You can lose control of the vehicle if you try to
adjust a manual driver’s seat while the vehicle
is moving. The sudden movement could startle
and confuse you, or make you push a pedal
when you do not want to. Adjust the driver’s
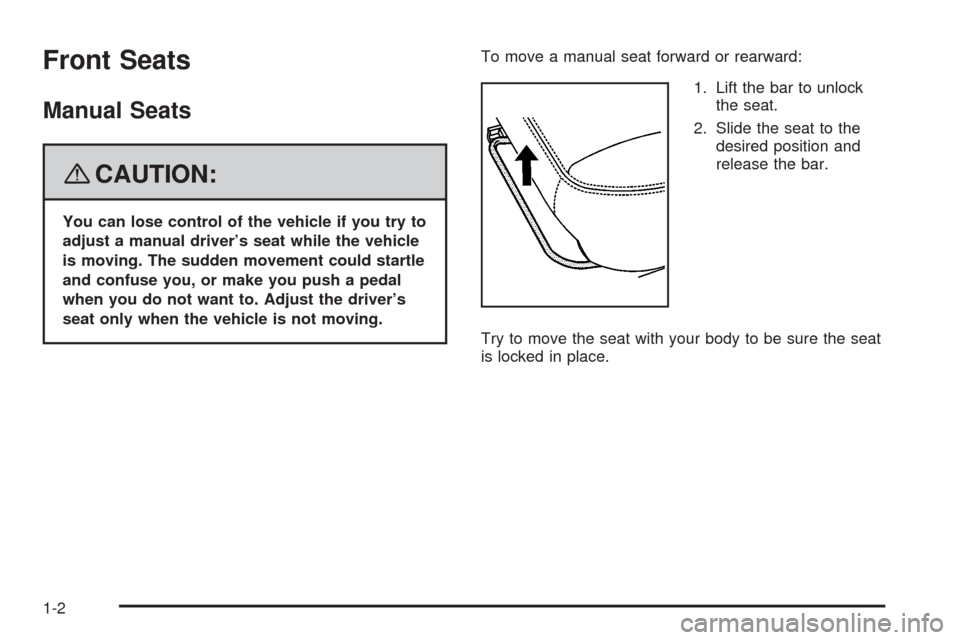
seat only when the vehicle is not moving.To move a manual seat forward or rearward:
1. Lift the bar to unlock
the seat.
2. Slide the seat to the
desired position and
release the bar.
Try to move the seat with your body to be sure the seat
is locked in place.
1-2
Page 8 of 400

Heated Seats
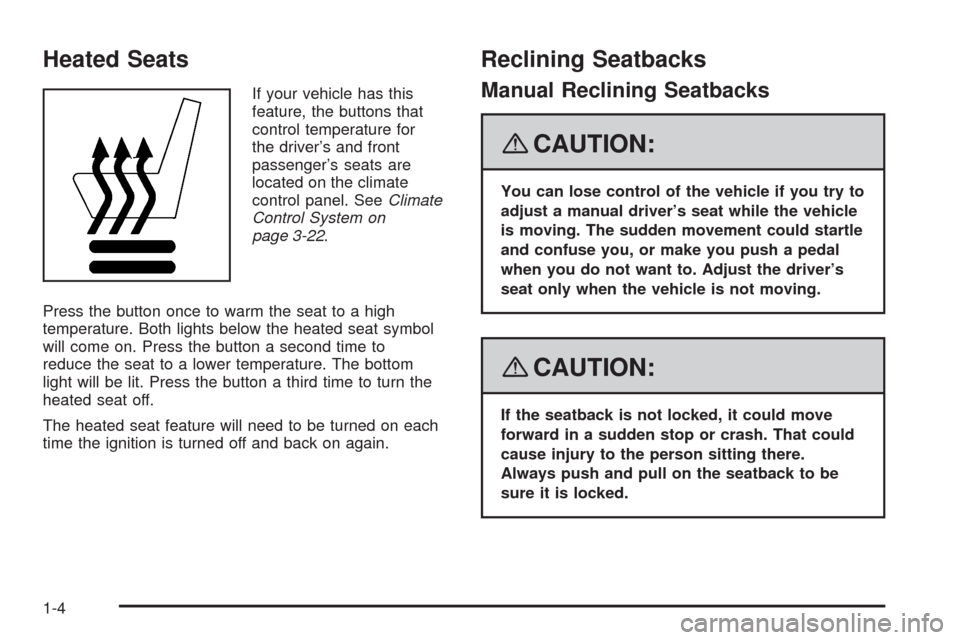
If your vehicle has this
feature, the buttons that
control temperature for
the driver’s and front
passenger’s seats are
located on the climate
control panel. SeeClimate
Control System on
page 3-22.
Press the button once to warm the seat to a high
temperature. Both lights below the heated seat symbol
will come on. Press the button a second time to
reduce the seat to a lower temperature. The bottom
light will be lit. Press the button a third time to turn the
heated seat off.
The heated seat feature will need to be turned on each
time the ignition is turned off and back on again.
Reclining Seatbacks
Manual Reclining Seatbacks
{CAUTION:
You can lose control of the vehicle if you try to
adjust a manual driver’s seat while the vehicle
is moving. The sudden movement could startle
and confuse you, or make you push a pedal
when you do not want to. Adjust the driver’s
seat only when the vehicle is not moving.
{CAUTION:
If the seatback is not locked, it could move
forward in a sudden stop or crash. That could
cause injury to the person sitting there.
Always push and pull on the seatback to be
sure it is locked.
1-4
Page 94 of 400

PASS-Key®III+ Operation
Your vehicle has PASS-Key®III+ (Personalized
Automotive Security System) theft-deterrent system.
PASS-Key
®III+ is a passive theft-deterrent system.
This means you do not have to do anything special to
arm or disarm the system. It works when you transition
the key to ON/RUN, ACC/ACCESSORY or START
from the LOCK/OFF position.
When the PASS-Key
®III+ system senses that someone
is using the wrong key, it prevents the vehicle from
starting. Anyone using a trial-and-error method to start
the vehicle will be discouraged because of the high
number of electrical key codes.
If the engine does not start and the security light on the
instrument panel cluster comes on when trying to
start the vehicle, the key may have a damaged
transponder. Turn the ignition off and try again.
If the engine still does not start, and the key appears to
be undamaged, try another ignition key. At this time,
you may also want to check the fuse, seeFuses
and Circuit Breakers on page 5-99. If the engine still
does not start with the other key, your vehicle needs
service. If your vehicle does start, the �rst key may be
faulty. See your dealer/retailer who can service the
PASS-Key
®III+ to have a new key made. In an
emergency, contact Roadside Assistance.It is possible for the PASS-Key
®III+ decoder to learn
the transponder value of a new or replacement key.
Up to nine additional keys may be programmed for the
vehicle. The following procedure is for programming
additional keys only. If all the currently programmed
keys are lost or do not operate, you must see your
dealer/retailer or a locksmith who can service
PASS-Key
®III+ to have keys made and programmed to
the system.
See your dealer/retailer or a locksmith who can service
PASS-Key
®III+ to get a new key blank that is cut
exactly as the ignition key that operates the system.
To program the new additional key:
1. Verify that the new key has a
1stamped on it.
2. Insert the original, already programmed, key in the
ignition and start the engine. If the engine will not
start, see your dealer/retailer for service.
3. After the engine has started, turn the key to
LOCK/OFF, and remove the key.
2-20
Page 132 of 400

Turn and Lane-Change Signals
The turn signal has two upward (for right) and
two downward (for left) positions. These positions
allow you to signal a turn or a lane change.
To signal a turn, move the lever all the way up or
down. When the turn is �nished, the lever will return
automatically.
An arrow on the instrument
panel cluster will �ash in
the direction of the
turn or lane change.
To signal a lane change, raise or lower the lever until
the arrow starts to �ash. Hold it there until you complete
your lane change. The lever will return by itself when
you release it. If you momentarily press and release the
lever, the turn signal will �ash three times.
If the arrow �ashes faster than normal as you signal a
turn or a lane change, a signal bulb may be burned
out and other drivers will not see your turn signal.If a bulb is burned out, replace it to help avoid an
accident. If the arrows do not go on at all when you
signal a turn, check for burned-out bulbs and then check
the fuse. SeeFuses and Circuit Breakers on page 5-99.
Turn Signal On Chime
If either one of the turn signals are left on and you have
drove more than 3/4 mile (1.2 km), a chime will sound.
Headlamp High/Low-Beam Changer
To change the headlamps from low beam to high beam,
push the turn signal/multifunction lever toward the
front of the vehicle.
This light on the instrument
panel cluster comes on if
the high beam lamps
are turned on while the
ignition is on.
To change the headlamps from high beam to low beam,
pull the turn signal lever toward the rear of the vehicle.
3-8
Page 145 of 400

Certain accessory plugs may not be compatible to
the accessory power outlet and could result in blown
vehicle and adapter fuses. If you experience a problem,
see your dealer/retailer for additional information on
the power accessory plugs.
Notice:Adding any electrical equipment to your
vehicle may damage it or keep other components
from working as they should. The repairs would not
be covered by your warranty. Do not use equipment
exceeding maximum amperage rating of 20 amperes.
Check with your dealer/retailer before adding
electrical equipment.
When adding electrical equipment, be sure to follow
the proper installation instructions included with
the equipment. Check with your dealer/retailer before
adding electrical equipment, and never use anything that
exceeds the maximum amperage rating of 20 amps.
Notice:Improper use of the power outlet can cause
damage not covered by your warranty. Do not
hang any type of accessory or accessory bracket
from the plug because the power outlets are
designed for accessory power plugs only.Ashtray(s) and Cigarette Lighter
Your vehicle may have an ashtray and a cigarette
lighter. The ashtray and cigarette lighter may be
located in the console, if your vehicle has one,
otherwise, they may be located in the center armrest
of the front seat.
Notice:If you put papers, pins, or other �ammable
items in the ashtray, hot cigarettes or other
smoking materials could ignite them and possibly
damage your vehicle. Never put �ammable items in
the ashtray.
Notice:Holding a cigarette lighter in while it is
heating does not let the lighter back away from the
heating element when it is hot. Damage from
overheating can occur to the lighter or heating
element, or a fuse could be blown. Do not hold a
cigarette lighter in while it is heating.
To use the lighter, just push it in all the way and let go.
When it’s ready, it will pop back out by itself.
3-21
Page 248 of 400

Tire Inspection and Rotation...........................5-68
When It Is Time for New Tires.......................5-70
Buying New Tires.........................................5-71
Different Size Tires and Wheels......................5-72
Uniform Tire Quality Grading..........................5-73
Wheel Alignment and Tire Balance..................5-74
Wheel Replacement......................................5-74
Tire Chains..................................................5-76
If a Tire Goes Flat........................................5-77
Changing a Flat Tire.....................................5-78
Removing the Spare Tire and Tools................5-79
Removing the Flat Tire and Installing the
Spare Tire................................................5-81
Storing a Flat or Spare Tire and Tools
(Base Model)............................................5-87
Compact Spare Tire......................................5-89
Appearance Care............................................5-90
Interior Cleaning...........................................5-90
Fabric/Carpet...............................................5-91
Leather.......................................................5-92
Instrument Panel, Vinyl, and Other Plastic
Surfaces..................................................5-92
Care of Safety Belts......................................5-93
Weatherstrips...............................................5-93Washing Your Vehicle...................................5-93
Cleaning Exterior Lamps/Lenses.....................5-94
Finish Care..................................................5-94
Windshield and Wiper Blades.........................5-95
Aluminum Wheels.........................................5-95
Tires...........................................................5-96
Sheet Metal Damage.....................................5-96
Finish Damage.............................................5-96
Underbody Maintenance................................5-96
Chemical Paint Spotting.................................5-96
Vehicle Care/Appearance Materials..................5-97
Vehicle Identi�cation.....................................
.5-98
Vehicle Identi�cation Number (VIN).................5-98
Service Parts Identi�cation Label.....................5-98
Electrical System............................................5-98
Add-On Electrical Equipment..........................5-98
Headlamp Wiring..........................................5-99
Windshield Wiper Fuses................................5-99
Power Windows and Other Power Options.......5-99
Fuses and Circuit Breakers............................5-99
Instrument Panel Fuse Block..........................5-99
Underhood Fuse Block................................5-100
Capacities and Speci�cations........................5-103
Section 5 Service and Appearance Care
5-2
Page 250 of 400

California Proposition 65 Warning
Most motor vehicles, including this one, contain and/or
emit chemicals known to the State of California to
cause cancer and birth defects or other reproductive
harm. Engine exhaust, many parts and systems
(including some inside the vehicle), many �uids, and
some component wear by-products contain and/or emit
these chemicals.
California Perchlorate Materials
Requirements
Certain types of automotive applications, such as airbag
initiators, seat belt pretensioners, and lithium batteries
contained in remote keyless entry transmitters,
may contain perchlorate materials. Special handling
may be necessary. For additional information,
see www.dtsc.ca.gov/hazardouswaste/perchlorate.
Doing Your Own Service Work
{CAUTION:
You can be injured and your vehicle could be
damaged if you try to do service work on a
vehicle without knowing enough about it.
Be sure you have sufficient knowledge,
experience, the proper replacement parts,
and tools before you attempt any vehicle
maintenance task.
Be sure to use the proper nuts, bolts, and
other fasteners. English and metric
fasteners can be easily confused. If you
use the wrong fasteners, parts can later
break or fall off. You could be hurt.
If you want to do some of your own service work, you
should use the proper service manual. It tells you much
more about how to service your vehicle than this
manual can. To order the proper service manual, see
Service Publications Ordering Information on page 7-15.
5-4
Page 261 of 400

A. Windshield Washer Fluid Reservoir. See “Adding
Washer Fluid” underWindshield Washer Fluid
on page 5-38.
B. Battery. SeeBattery on page 5-42.
C. Underhood Fuse Block. SeeUnderhood Fuse Block
on page 5-100.
D. Remote Positive (+) Terminal. SeeJump Starting on
page 5-43.
E. Coolant Recovery Tank. See “Checking Coolant”
underCooling System on page 5-32.
F. Pressure Cap. SeePressure Cap on page 5-29.
G. Power Steering Fluid Cap. SeePower Steering Fluid
on page 5-37.H. Engine Oil Fill Cap. See “When to Add Engine Oil”
underEngine Oil on page 5-17.
I. Engine Oil Dipstick. See “Checking Engine Oil”
underEngine Oil on page 5-17.
J. Automatic Transmission Fluid Dipstick (Out of View).
See “Checking the Fluid Level” underAutomatic
Transmission Fluid on page 5-24.
K. Brake Master Cylinder Reservoir. See “Brake Fluid”
underBrakes on page 5-39.
L. Engine Air Cleaner/Filter. SeeEngine Air
Cleaner/Filter on page 5-22.
5-15