2008 CHEVROLET HHR light
[x] Cancel search: lightPage 125 of 430
Your Responsibility
Increase the radio volume if you cannot hear the OnStar
advisor. If the light next to the OnStar buttons is red,
this means that your system is not functioning properly
and should be checked by your dealer/retailer. If the
light appears clear (no light is appearing), your OnStar
subscription has expired. You can always press the
OnStar button to con�rm that your OnStar equipment
is active.
Storage Areas
Glove Box
To open the glove box, lift up on the lever.
Cupholder(s)
There are two cupholders located in the �oor console
between the front seats. There is also a cupholder
for the rear seat passenger located at the rear of the
�oor console.If your vehicle is an SS model, the automatic
transmission vehicles have a cupholder in front of the
shifter.
Cupholders have inserts that can be removed for
cleaning.
Instrument Panel Storage
Your vehicle has a storage compartment on the
instrument panel above the air vents. Push the button
on the compartment to open the lid.
Floor Console Storage Area
There are two small storage compartments on the �oor
console, one at the front under the window switches
and one next to the parking brake lever.
For the SS model, automatic transmission vehicles have
a storage bin on the right side of the automatic shifter.
Manual transmission vehicles have storage bins in
front of and behind the manual shifter.
Rubber liners can be removed for cleaning.
2-47
Page 133 of 430
Instrument Panel Overview...............................3-4
Hazard Warning Flashers................................3-6
Other Warning Devices...................................3-6
Horn.............................................................3-6
Tilt Wheel.....................................................3-6
Turn Signal/Multifunction Lever.........................3-7
Turn and Lane-Change Signals........................3-8
Headlamp High/Low-Beam Changer..................3-8
Flash-to-Pass.................................................3-8
Windshield Wipers..........................................3-9
Windshield Washer.......................................3-10
Rear Window Wiper/Washer...........................3-11
Cruise Control..............................................3-12
Headlamps..................................................3-15
Wiper Activated Headlamps............................3-16
Headlamps on Reminder................................3-16
Daytime Running Lamps (DRL).......................3-16
Automatic Headlamp System..........................3-17
Fog Lamps..................................................3-18
Instrument Panel Brightness...........................3-18
Dome Lamp.................................................3-19
Entry/Exit Lighting.........................................3-19
Mirror Reading Lamps...................................3-19
Rear Reading Lamps....................................3-19
Electric Power Management...........................3-20
Battery Run-Down Protection..........................3-20Accessory Power Outlet(s).............................3-20
Ashtray(s) and Cigarette Lighter......................3-22
Climate Controls............................................3-23
Climate Control System.................................3-23
Outlet Adjustment.........................................3-26
Passenger Compartment Air Filter...................3-26
Warning Lights, Gages, and Indicators............3-28
Instrument Panel Cluster...............................
.3-29
Speedometer and Odometer...........................3-30
Tachometer.................................................3-30
Safety Belt Reminders...................................3-30
Airbag Readiness Light..................................3-31
Passenger Airbag Status Indicator...................3-32
Charging System Light..................................3-34
Up-Shift Light...............................................3-35
Brake System Warning Light..........................3-35
Antilock Brake System Warning Light...............3-36
Enhanced Traction System Warning Light.........3-37
Electronic Stability Control (ESC)/Traction
Control System (TCS) Indicator/Warning
Light........................................................3-37
Engine Coolant Temperature Warning Light......3-38
Engine Coolant Temperature Gage..................3-39
Tire Pressure Light.......................................3-39
Malfunction Indicator Lamp.............................3-40
Section 3 Instrument Panel
3-1
Page 134 of 430
Oil Pressure Light.........................................3-43
Security Light...............................................3-44
Fog Lamp Light............................................3-44
Highbeam On Light.......................................3-44
Fuel Gage...................................................3-44
Boost Gage.................................................3-45
Driver Information Center (DIC).......................3-46
DIC Operation and Displays...........................3-46
DIC Warnings and Messages.........................3-48
DIC Vehicle Personalization............................3-54Audio System(s).............................................3-59
Setting the Clock..........................................3-60
Radio(s)......................................................3-62
Using an MP3..............................................3-72
XM Radio Messages.....................................3-77
Theft-Deterrent Feature..................................3-78
Audio Steering Wheel Controls.......................3-79
Radio Reception...........................................3-79
Fixed Mast Antenna......................................3-80
XM™ Satellite Radio Antenna System.............3-80
Section 3 Instrument Panel
3-2
Page 137 of 430
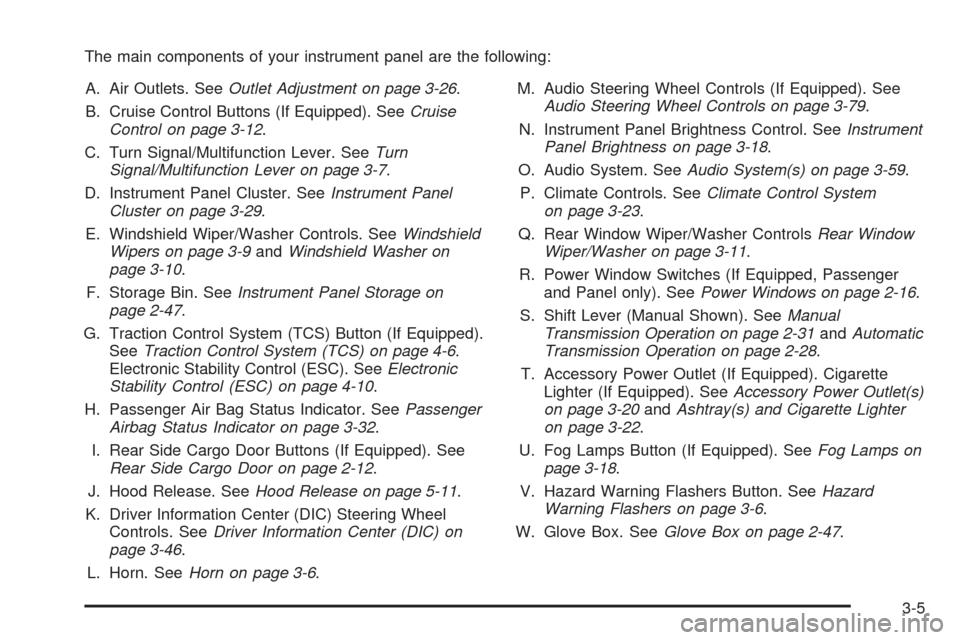
The main components of your instrument panel are the following:
A. Air Outlets. SeeOutlet Adjustment on page 3-26.
B. Cruise Control Buttons (If Equipped). SeeCruise
Control on page 3-12.
C. Turn Signal/Multifunction Lever. SeeTurn
Signal/Multifunction Lever on page 3-7.
D. Instrument Panel Cluster. SeeInstrument Panel
Cluster on page 3-29.
E. Windshield Wiper/Washer Controls. SeeWindshield
Wipers on page 3-9andWindshield Washer on
page 3-10.
F. Storage Bin. SeeInstrument Panel Storage on
page 2-47.
G. Traction Control System (TCS) Button (If Equipped).
SeeTraction Control System (TCS) on page 4-6.
Electronic Stability Control (ESC). SeeElectronic
Stability Control (ESC) on page 4-10.
H. Passenger Air Bag Status Indicator. SeePassenger
Airbag Status Indicator on page 3-32.
I. Rear Side Cargo Door Buttons (If Equipped). See
Rear Side Cargo Door on page 2-12.
J. Hood Release. SeeHood Release on page 5-11.
K. Driver Information Center (DIC) Steering Wheel
Controls. SeeDriver Information Center (DIC) on
page 3-46.
L. Horn. SeeHorn on page 3-6.M. Audio Steering Wheel Controls (If Equipped). See
Audio Steering Wheel Controls on page 3-79.
N. Instrument Panel Brightness Control. SeeInstrument
Panel Brightness on page 3-18.
O. Audio System. SeeAudio System(s) on page 3-59.
P. Climate Controls. SeeClimate Control System
on page 3-23.
Q. Rear Window Wiper/Washer ControlsRear Window
Wiper/Washer on page 3-11.
R. Power Window Switches (If Equipped, Passenger
and Panel only). SeePower Windows on page 2-16.
S. Shift Lever (Manual Shown). SeeManual
Transmission Operation on page 2-31andAutomatic
Transmission Operation on page 2-28.
T. Accessory Power Outlet (If Equipped). Cigarette
Lighter (If Equipped). SeeAccessory Power Outlet(s)
on page 3-20andAshtray(s) and Cigarette Lighter
on page 3-22.
U. Fog Lamps Button (If Equipped). SeeFog Lamps on
page 3-18.
V. Hazard Warning Flashers Button. SeeHazard
Warning Flashers on page 3-6.
W. Glove Box. SeeGlove Box on page 2-47.
3-5
Page 140 of 430
Turn and Lane-Change Signals
The turn signal has two upward (for right) and two
downward (for left) positions. These positions allow you
to signal a turn or a lane change.
To signal a turn, move the lever all the way up or down.
When the turn is �nished, the lever will return
automatically.
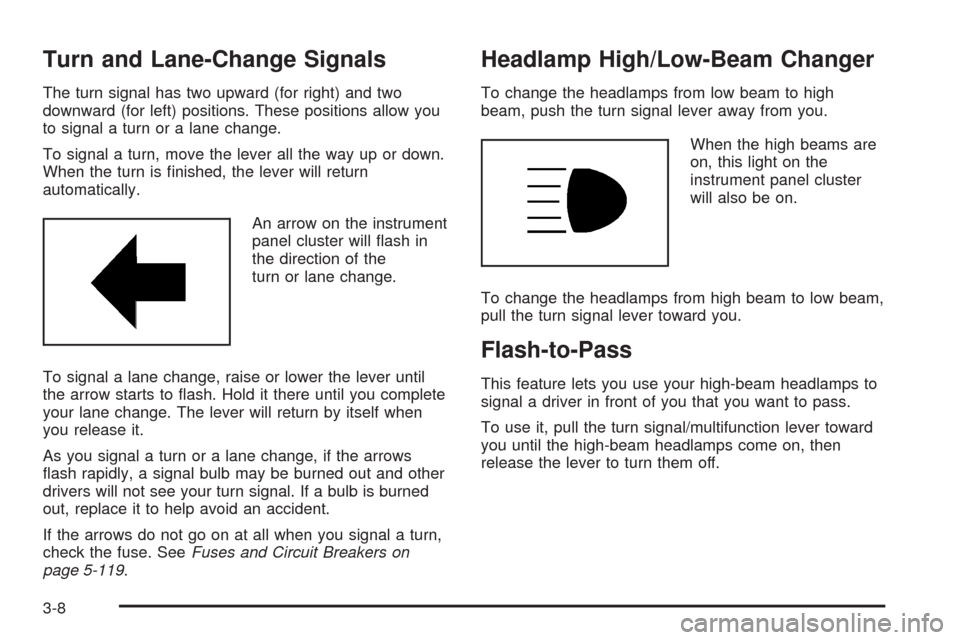
An arrow on the instrument
panel cluster will �ash in
the direction of the
turn or lane change.
To signal a lane change, raise or lower the lever until
the arrow starts to �ash. Hold it there until you complete
your lane change. The lever will return by itself when
you release it.
As you signal a turn or a lane change, if the arrows
�ash rapidly, a signal bulb may be burned out and other
drivers will not see your turn signal. If a bulb is burned
out, replace it to help avoid an accident.
If the arrows do not go on at all when you signal a turn,
check the fuse. SeeFuses and Circuit Breakers on
page 5-119.
Headlamp High/Low-Beam Changer
To change the headlamps from low beam to high
beam, push the turn signal lever away from you.
When the high beams are
on, this light on the
instrument panel cluster
will also be on.
To change the headlamps from high beam to low beam,
pull the turn signal lever toward you.
Flash-to-Pass
This feature lets you use your high-beam headlamps to
signal a driver in front of you that you want to pass.
To use it, pull the turn signal/multifunction lever toward
you until the high-beam headlamps come on, then
release the lever to turn them off.
3-8
Page 145 of 430
J(On/Off):Press this button to turn the cruise control
system on and off. The indicator light on the button
will be on when the cruise control is on and go off when
the cruise control is turned off.
RES+ (Resume):Press this button to resume a set
speed and to accelerate the speed.
SET−(Set):Press this button to set a speed and to
decrease the speed.
To set a speed do the following:
1. Press the on/off button to turn cruise control on.
The indicator light on the button will come on.
2. Get to the speed you want.
3. Press the SET−control button and release it. The
CRUISE ENGAGED message will appear on the
Driver Information Center (DIC) to show the system
is engaged.
4. Take your foot off the accelerator pedal.
When you apply the brakes or operate the clutch pedal,
the cruise control will shut off.
If the vehicle is in cruise control and the Traction
Control System (TCS) begins to limit wheel spin, the
cruise control will automatically disengage. SeeTraction
Control System (TCS) on page 4-6andEnhanced
Traction System (ETS) on page 4-9. When road
conditions allow, the cruise control can be used again.Resuming a Set Speed
Suppose the cruise control is set at a desired speed
and then the brake is applied. This will disengage
the cruise control. To return to the previously set speed,
you do not need to go through the set process again.
Once the vehicle is going about 25 mph (40 km/h)
or more, you can press the RES+ part of the button
brie�y.
The vehicle goes back to the previously set speed.
Increasing Speed While Using Cruise
Control
There are two ways to go to a higher speed.
1. Disengage the cruise control by applying the brake
pedal, but do not turn it off. Accelerate to a higher
speed and reset the cruise control.
2. If the cruise control system is already engaged,
press the RES+ button. Hold it there until reach
the desired speed, and then release the button. To
increase the vehicle speed in very small amounts,
press the RES+ button brie�y and then release
it. Each time this is done, the vehicle goes about
1 mph (1.6 km/h) faster.
3-13
Page 146 of 430
Reducing Speed While Using Cruise
Control
If the cruise control system is already engaged,
Push and hold the SET−button until the lower
speed desired is reached, then release it.
To slow down in very small amounts, push the
SET−button brie�y. Each time this is done,
the vehicle goes about 1 mph (1.6 km/h) slower.
Passing Another Vehicle While Using
Cruise Control
Use the accelerator pedal to increase the vehicle speed.
When you take your foot off the pedal, the vehicle
slows down to the cruise control speed you set earlier.
Using Cruise Control on Hills
How well your cruise control will work on hills depends
upon the vehicle speed, load and the steepness of
the hills. When going up steep hills, you might have to
step on the accelerator pedal to maintain the vehicle
speed. When going downhill, you might have to brake or
shift to a lower gear to keep the vehicle speed down.
When the brakes are applied the cruise control turns off.
Many drivers �nd this to be too much trouble and do
not use cruise control on steep hills.
Ending Cruise Control
To end cruise control, step lightly on the brake pedal or
the clutch pedal if your vehicle has a manual
transmission.
Stepping on the brake pedal or clutch pedal will only end
the current cruise control session. Press the cruise
control on/off button to turn the system completely off.
Erasing Speed Memory
The cruise control set speed memory is erased when
the cruise control or the ignition is turned off.
3-14
Page 147 of 430
Headlamps
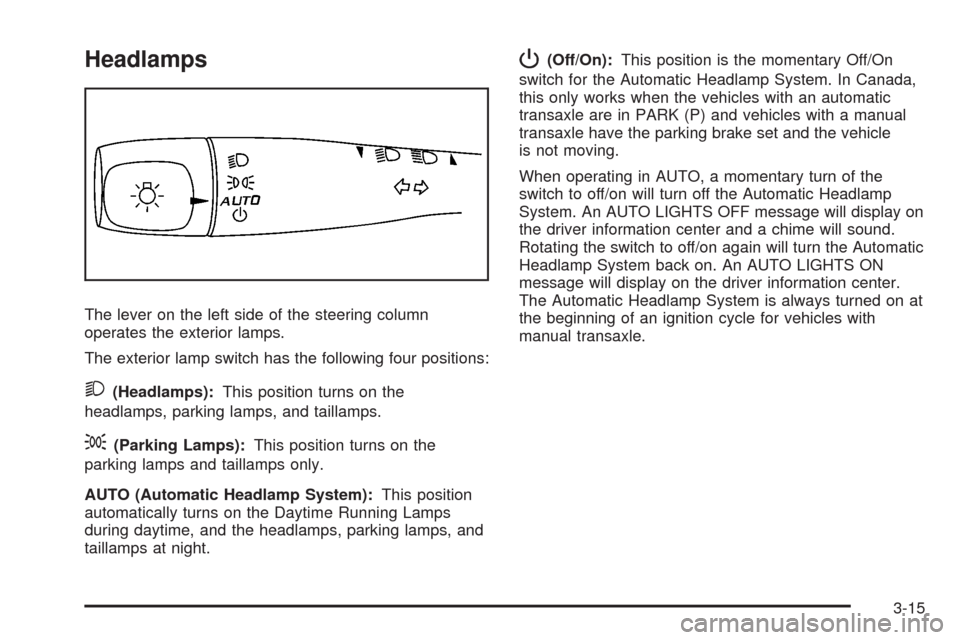
The lever on the left side of the steering column
operates the exterior lamps.
The exterior lamp switch has the following four positions:
2(Headlamps):This position turns on the
headlamps, parking lamps, and taillamps.
;(Parking Lamps):This position turns on the
parking lamps and taillamps only.
AUTO (Automatic Headlamp System):This position
automatically turns on the Daytime Running Lamps
during daytime, and the headlamps, parking lamps, and
taillamps at night.
P(Off/On):This position is the momentary Off/On
switch for the Automatic Headlamp System. In Canada,
this only works when the vehicles with an automatic
transaxle are in PARK (P) and vehicles with a manual
transaxle have the parking brake set and the vehicle
is not moving.
When operating in AUTO, a momentary turn of the
switch to off/on will turn off the Automatic Headlamp
System. An AUTO LIGHTS OFF message will display on
the driver information center and a chime will sound.
Rotating the switch to off/on again will turn the Automatic
Headlamp System back on. An AUTO LIGHTS ON
message will display on the driver information center.
The Automatic Headlamp System is always turned on at
the beginning of an ignition cycle for vehicles with
manual transaxle.
3-15