2008 CHEVROLET EQUINOX check oil
[x] Cancel search: check oilPage 101 of 436
Notice:The engine is designed to work with the
electronics in your vehicle. If you add electrical parts
or accessories, you could change the way the engine
operates. Before adding electrical equipment, check
with your dealer/retailer. If you do not, your engine
might not perform properly. Any resulting damage
would not be covered by your vehicle’s warranty.
Engine Coolant Heater
The engine coolant heater, if available, can help in cold
weather conditions at or below 0°F (−18°C) for easier
starting and better fuel economy during engine warm-up.
Plug in the coolant heater at least four hours before
starting your vehicle. An internal thermostat in the
plug-end of the cord may exist which will prevent
engine coolant heater operation at temperatures.
To Use the Engine Coolant Heater
1. Turn off the engine.
2. Open the hood and unwrap the electrical cord.
The cord is located on the passenger’s side of
the engine compartment, near the radiator.
3. Plug it into a normal, grounded 110-volt AC outlet.
{CAUTION:
Plugging the cord into an ungrounded outlet
could cause an electrical shock. Also, the
wrong kind of extension cord could overheat
and cause a �re. You could be seriously
injured. Plug the cord into a properly grounded
three-prong 110-volt AC outlet. If the cord
will not reach, use a heavy-duty three-prong
extension cord rated for at least 15 amps.
4. Before starting the engine, be sure to unplug and
store the cord as it was before to keep it away
from moving engine parts. If you do not, it could
be damaged.
How long should you keep the coolant heater plugged
in? The answer depends on the outside temperature,
the kind of oil you have, and some other things.
Instead of trying to list everything here, we ask that
you contact your dealer/retailer in the area where you
will be parking your vehicle. The dealer/retailer can
give you the best advice for that particular area.
2-23
Page 165 of 436
Emissions Inspection and
Maintenance Programs
Some state/provincial and local governments have or
might begin programs to inspect the emission control
equipment on your vehicle. Failure to pass this inspection
could prevent you from getting a vehicle registration.
Here are some things you need to know to help your
vehicle pass an inspection:
Your vehicle will not pass this inspection if the check
engine light is on or not working properly.
Your vehicle will not pass this inspection if the
OBD (on-board diagnostic) system determines that
critical emission control systems have not been
completely diagnosed by the system. The vehicle
would be considered not ready for inspection.
This can happen if you have recently replaced the
battery or if the battery has run down. The diagnostic
system is designed to evaluate critical emission
control systems during normal driving. This can take
several days of routine driving. If you have done this
and your vehicle still does not pass the inspection for
lack of OBD system readiness, your dealer/retailer
can prepare the vehicle for inspection.
Oil Pressure Light
{CAUTION:
Do not keep driving if the oil pressure is low.
If you do, your engine can become so hot that
it catches �re. You or others could be burned.
Check your oil as soon as possible and have
your vehicle serviced.
Notice:Lack of proper engine oil maintenance may
damage the engine. The repairs would not be covered
by your warranty. Always follow the maintenance
schedule in this manual for changing engine oil.
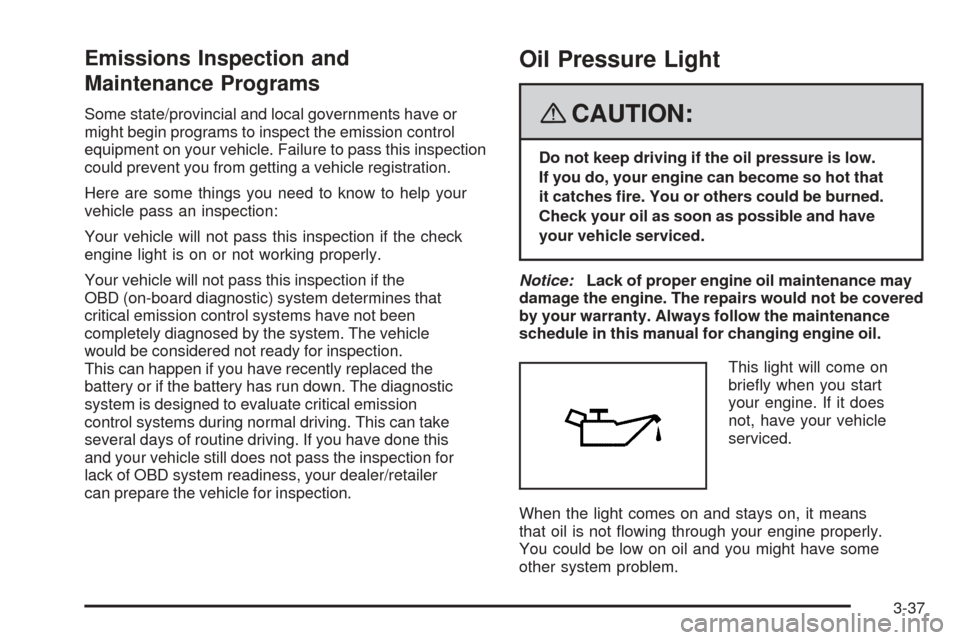
This light will come on
brie�y when you start
your engine. If it does
not, have your vehicle
serviced.
When the light comes on and stays on, it means
that oil is not �owing through your engine properly.
You could be low on oil and you might have some
other system problem.
3-37
Page 173 of 436
When the remaining oil life is low, the CHANGE
ENGINE OIL SOON message will appear on the
display along with the Change Engine Oil Light on the
instrument panel cluster. See “CHANGE ENGINE
OIL SOON” underDIC Warnings and Messages on
page 3-49andChange Engine Oil Light on page 3-38.
You should change the oil as soon as possible. See
Engine Oil on page 5-15. In addition to the engine oil life
system monitoring the oil life, additional maintenance
is recommended in the Maintenance Schedule in
this manual. SeeScheduled Maintenance on page 6-4
for more information.
Remember, you must reset the OIL LIFE yourself
after each oil change. It will not reset itself. Also, be
careful not to reset the OIL LIFE accidentally at any
time other than when the oil has just been changed.
It cannot be reset accurately until the next oil change.
To reset the engine oil life system, seeEngine Oil
Life System on page 5-18.
UNITS
Press the vehicle information button until UNITS
displays. This display allows you to select between
English or Metric units of measurement. Once in this
display, press the set/reset button to select between
ENGLISH or METRIC units.
FRONT TIRES or REAR TIRES
The pressure for each tire can be viewed in the DIC.
The tire pressure will be shown in either pounds
per square inch (psi) or kilopascals (kPa). Press the
vehicle information button until the DIC displays
FRONT TIRES PSI (kPa) LF ## RF ##. Press the
vehicle information button again until the DIC displays
REAR TIRES PSI (kPa) LR ## RR ##.
If a low or high tire pressure condition is detected by
the system while driving, a message advising you
to check the pressure in a speci�c tire will appear in
the display. SeeInflation - Tire Pressure on page 5-59
andDIC Warnings and Messages on page 3-49for
more information.
If the tire pressure display shows dashes instead of a
value, there may be a problem with your vehicle. If this
consistently occurs, see your dealer/retailer for service.
BATTERY
Press the vehicle information button until BATTERY
displays. This display shows the current battery voltage.
If the voltage is normal, the display will show NORMAL.
If the voltage is low or high, the display will show
LOW or HIGH. Your vehicle’s charging system regulates
voltage based on the state of the battery. The battery
voltage may �uctuate when viewing this information
on the DIC. This is normal. SeeCharging System
Light on page 3-30for more information.
3-45
Page 254 of 436
Before Leaving on a Long Trip
To prepare your vehicle for a long trip, consider having it
serviced by your dealer/retailer before departing.
Things to check on your own include:
Windshield Washer Fluid:Reservoir full? Windows
clean — inside and outside?
Wiper Blades:In good shape?
Fuel, Engine Oil, Other Fluids:All levels checked?
Lamps:Do they all work and are lenses clean?
Tires:Are treads good? Are tires in�ated to
recommended pressure?
Weather and Maps:Safe to travel? Have
up-to-date maps?
Highway Hypnosis
Always be alert and pay attention to your surroundings
while driving. If you become tired or sleepy, �nd a safe
place to park your vehicle and rest.
Other driving tips include:
Keep the vehicle well ventilated.
Keep interior temperature cool.
Keep your eyes moving — scan the road ahead
and to the sides.
Check the rearview mirror and vehicle instruments
often.
Hill and Mountain Roads
Driving on steep hills or through mountains is different
than driving on �at or rolling terrain. Tips for driving
in these conditions include:
Keep your vehicle serviced and in good shape.
Check all �uid levels and brakes, tires, cooling
system, and transmission.
Going down steep or long hills, shift to a
lower gear.
{CAUTION:
If you do not shift down, the brakes could get
so hot that they would not work well. You
would then have poor braking or even none
going down a hill. You could crash. Shift down
to let the engine assist the brakes on a steep
downhill slope.
4-16
Page 278 of 436
Parking on Hills
{CAUTION:
You really should not park your vehicle, with a
trailer attached, on a hill. If something goes
wrong, your rig could start to move. People
can be injured, and both your vehicle and the
trailer can be damaged.
But if you ever have to park your rig on a hill, do the
following:
1. Apply your regular brakes, but do not shift into
PARK (P) yet.
2. Have someone place chocks under the trailer
wheels.
3. When the wheel chocks are in place, release the
regular brakes until the chocks absorb the load.
4. Reapply the regular brakes. Then apply your
parking brake, and then shift to PARK (P).
5. Release the regular brakes.
When You Are Ready to Leave After
Parking on a Hill
1. Apply your regular brakes and hold the pedal down
while you do the following:
Start your engine.
Shift into a gear.
Release the parking brake.
2. Let up on the brake pedal.
3. Drive slowly until the trailer is clear of the chocks.
4. Stop and have someone pick up and store the
chocks.
Maintenance When Trailer Towing
Your vehicle will need service more often when you are
pulling a trailer. See the Maintenance Schedule for
more on this. Things that are especially important in
trailer operation are automatic transmission �uid, engine
oil, belts, cooling system and brake system. Each of
these is covered in this manual, and the Index will help
you �nd them quickly. If you are trailering, it is a good
idea to review these sections before you start your trip.
Check periodically to see that all hitch nuts and bolts
are tight.
4-40
Page 279 of 436
Service............................................................5-3
Accessories and Modi�cations..........................5-3
California Proposition 65 Warning.....................5-3
California Perchlorate Materials Requirements.....5-4
Doing Your Own Service Work.........................5-4
Adding Equipment to the Outside of Your
Vehicle......................................................5-5
Fuel................................................................5-5
Gasoline Octane............................................5-5
Gasoline Speci�cations....................................5-6
California Fuel...............................................5-6
Additives.......................................................5-7
Fuels in Foreign Countries...............................5-7
Filling the Tank..............................................5-8
Filling a Portable Fuel Container.....................5-10
Checking Things Under
the Hood....................................................5-10
Hood Release..............................................5-11
Engine Compartment Overview.......................5-12
Engine Oil...................................................5-15
Engine Oil Life System..................................5-18
Engine Air Cleaner/Filter................................5-19Automatic Transmission Fluid.........................5-21
Engine Coolant.............................................5-22
Engine Overheating.......................................5-24
Overheated Engine Protection Operating Mode . . .5-26
Cooling System............................................5-26
Power Steering Fluid.....................................5-31
Windshield Washer Fluid................................5-32
Brakes........................................................5-33
Battery........................................................5-35
Jump Starting...............................................5-36
All-Wheel Drive..............................................5-42
Headlamp Aiming...........................................5-44
Bulb Replacement..........................................5-44
Halogen Bulbs..............................................5-44
Headlamps, Front Turn Signal, Sidemarker,
and Parking Lamps....................................5-45
Taillamps, Turn Signal, Stoplamps and
Back-up Lamps.........................................5-48
License Plate Lamp......................................5-49
Replacement Bulbs.......................................5-50
Windshield Wiper Blade Replacement..............5-50
Section 5 Service and Appearance Care
5-1
Page 285 of 436
Additives
To provide cleaner air, all gasolines in the United States
are now required to contain additives that help prevent
engine and fuel system deposits from forming, allowing
the emission control system to work properly. In most
cases, you should not have to add anything to the fuel.
However, some gasolines contain only the minimum
amount of additive required to meet U.S. Environmental
Protection Agency regulations. To help keep fuel injectors
and intake valves clean, or if your vehicle experiences
problems due to dirty injectors or valves, look for gasoline
that is advertised as TOP TIER Detergent Gasoline. Also,
your dealer/retailer has additives that will help correct and
prevent most deposit-related problems.
Gasolines containing oxygenates, such as ethers and
ethanol, and reformulated gasolines might be available
in your area. We recommend that you use these
gasolines, if they comply with the speci�cations described
earlier. However, E85 (85% ethanol) and other fuels
containing more than 10% ethanol must not be used in
vehicles that were not designed for those fuels.
Notice:Your vehicle was not designed for fuel that
contains methanol. Do not use fuel containing
methanol. It can corrode metal parts in the fuel
system and also damage plastic and rubber parts.
That damage would not be covered under your
warranty.Some gasolines that are not reformulated for low
emissions can contain an octane-enhancing additive
called methylcyclopentadienyl manganese tricarbonyl
(MMT); ask the attendant where you buy gasoline
whether the fuel contains MMT. We recommend against
the use of such gasolines. Fuels containing MMT can
reduce the life of spark plugs and the performance of the
emission control system could be affected. The
malfunction indicator lamp might turn on. If this occurs,
return to your dealer/retailer for service.
Fuels in Foreign Countries
If you plan on driving in another country outside the
United States or Canada, the proper fuel might be hard
to �nd. Never use leaded gasoline or any other fuel not
recommended in the previous text on fuel. Costly repairs
caused by use of improper fuel would not be covered by
your warranty.
To check the fuel availability, ask an auto club, or
contact a major oil company that does business in the
country where you will be driving.
5-7
Page 288 of 436
Filling a Portable Fuel Container
{CAUTION:
Never �ll a portable fuel container while it is in
your vehicle. Static electricity discharge from
the container can ignite the fuel vapor. You
can be badly burned and your vehicle
damaged if this occurs. To help avoid injury to
you and others:
Dispense fuel only into approved
containers.
Do not �ll a container while it is inside a
vehicle, in a vehicle’s trunk, pickup bed, or
on any surface other than the ground.
Bring the �ll nozzle in contact with the
inside of the �ll opening before operating
the nozzle. Contact should be maintained
until the �lling is complete.
Do not smoke while pumping fuel.
Do not use a cellular phone while
pumping fuel.
Checking Things Under
the Hood
{CAUTION:
An electric fan under the hood can start up
and injure you even when the engine is not
running. Keep hands, clothing, and tools away
from any underhood electric fan.
{CAUTION:
Things that burn can get on hot engine parts
and start a �re. These include liquids like fuel,
oil, coolant, brake �uid, windshield washer and
other �uids, and plastic or rubber. You or
others could be burned. Be careful not to drop
or spill things that will burn onto a hot engine.
5-10