2008 CHEVROLET CORVETTE lights
[x] Cancel search: lightsPage 1 of 432

Seats and Restraint Systems........................... 1-1
Front Seats
............................................... 1-2
Safety Belts
.............................................. 1-9
Child Restraints
.......................................1-26
Airbag System
.........................................1-43
Restraint System Check
............................1-58
Features and Controls..................................... 2-1
Keys
........................................................ 2-3
Doors and Locks
......................................2-10
Windows
.................................................2-16
Theft-Deterrent Systems
............................2-18
Starting and Operating Your Vehicle
...........2-21
Mirrors
....................................................2-37
OnStar
®System
......................................2-43
Universal Home Remote System
................2-46
Storage Areas
.........................................2-53
Roof Panel
..............................................2-57
Convertible Top
.......................................2-62
Instrument Panel............................................. 3-1
Instrument Panel Overview
.......................... 3-4
Climate Controls
......................................3-26
Warning Lights, Gages, and Indicators
........3-34
Driver Information Center (DIC)
..................3-51
Audio System(s)
.......................................3-84Driving Your Vehicle....................................... 4-1
Your Driving, the Road, and the Vehicle
....... 4-2
Towing
...................................................4-29
Service and Appearance Care.......................... 5-1
Service
..................................................... 5-3
Fuel
......................................................... 5-5
Checking Things Under the Hood
...............5-12
Rear Axle
...............................................5-51
Headlamp Aiming
.....................................5-51
Bulb Replacement
....................................5-52
Windshield Replacement
...........................5-55
Windshield Wiper Blade Replacement
.........5-55
Tires
......................................................5-58
Appearance Care
.....................................5-87
Vehicle Identi�cation
.................................5-98
Electrical System
......................................5-99
Capacities and Speci�cations
...................5-107
Maintenance Schedule..................................... 6-1
Maintenance Schedule
................................ 6-2
Customer Assistance Information.................... 7-1
Customer Assistance and Information
........... 7-2
Reporting Safety Defects
...........................7-16
Vehicle Data Recording and Privacy
...........7-18
Index................................................................ 1
2008 Chevrolet Corvette Owner ManualM
Page 101 of 432
Mirrors
Automatic Dimming Rearview Mirror
with OnStar
®and Compass
The vehicle may have an automatic dimming rearview
mirror with OnStar®, a compass and map lamps.
Three OnStar®buttons are at the bottom of the mirror.
SeeOnStar®System on page 2-43for more
information on the services OnStar®provides.
Mirror Operation
The mirror automatically changes to reduce glare from
headlamps behind you. A time delay feature prevents
rapid changing from the day to night positions while
driving under lights and through traffic.
P(On/Off):The automatic dimming feature is
activated when the vehicle is started. The automatic
dimming feature is turned on or off by pressing
this button located on the lower part of the mirror. Press
and hold the button for up to three seconds to turn
this feature on or off.
T(Indicator Light):This light will turn on when the
automatic dimming feature is active.
Map Lamps
The mirror has map lamps located at the bottom of the
mirror. To manually turn the lamps on or off, press
the button next to each lamp.
Compass Operation
The mirror has an eight-point compass display in the
bottom of the mirror face.
When the ignition and the compass feature are on,
the compass will show two character boxes for
approximately two seconds. After two seconds, the
mirror will display the current compass heading.
For example, NE is displayed for north-east.
Compass Calibration
If after two seconds the display does not show a
compass heading, there may be a strong magnetic �eld
interfering with the compass. Such interference may
be caused by a magnetic antenna mount, note
pad holder or similar object. If the letter C appears in
the compass window, the compass needs calibration.
The mirror compass can be calibrated by driving
the vehicle in circles at 5 mph (8 km/h) or less until the
display reads a direction.
The compass can be placed in calibration mode by
pressing and holding the left map light button until
a C appears on the compass display.
2-37
Page 103 of 432
Cleaning the Mirror
When cleaning the mirror, use a paper towel or similar
material dampened with glass cleaner. Do not spray
glass cleaner directly on the mirror as that may cause
the liquid cleaner to enter the mirror housing.
Automatic Dimming Rearview Mirror
with Compass
If the vehicle has this feature, an automatic dimming
mirror automatically dims to the proper level to minimize
glare at night from lights behind your vehicle.
The mirror also includes a compass display in the upper
right corner of the mirror face.
P(On/Off):This is the on/off button.
Automatic Dimming Mirror Operation
The automatic dimming mirror function is turned on each
time the ignition is started. A light near the on/off button
will come on to indicate the automatic dimming is on.
Press the on/off button for about six seconds to
manually turn the automatic dimming function on or off.
Compass Display
Press the on/off button, located to the far left, brie�y to
turn the compass display on or off.
If the display reads CAL, the compass needs to be
calibrated. For more information, see “Compass
Calibration” later in this section.
To adjust between Fahrenheit and Celsius:
1. Press and hold the on/off button for approximately
four seconds until either a �ashing °F, or °C
appears.
2. Press the button again to change the display to the
desired unit of measurement. After approximately
four seconds of inactivity, the new unit will be locked
in and the compass/temperature display will return.
If an abnormal temperature reading is displayed
for an extended period of time, please consult your
dealer/retailer. Under certain circumstances, a delay in
updating the temperature is normal.
2-39
Page 110 of 432
Universal Home Remote
System
The Universal Home Remote System provides a way to
replace up to three hand-held radio-frequency (RF)
transmitters used to activate devices such as garage
door openers, security systems, and home lighting.
This device complies with Part 15 of the FCC Rules.
Operation is subject to the following two conditions:
1. This device may not cause harmful interference.
2. This device must accept any interference received,
including interference that may cause undesired
operation.
The FCC Grant of Equipment Authorization Certi�cate
number is KOBGTV06A.
This device complies with RSS-210 of Industry Canada.
Operation is subject to the following two conditions:
1. This device may not cause interference.
2. This device must accept any interference received,
including interference that may cause undesired
operation of the device.
The Canadian Registration ID number is 3521A-GTV06A.
Changes or modi�cations to this system by other than
an authorized service facility could void authorization to
use this equipment.
Universal Home Remote System
Operation
This vehicle may have the Universal Home Remote
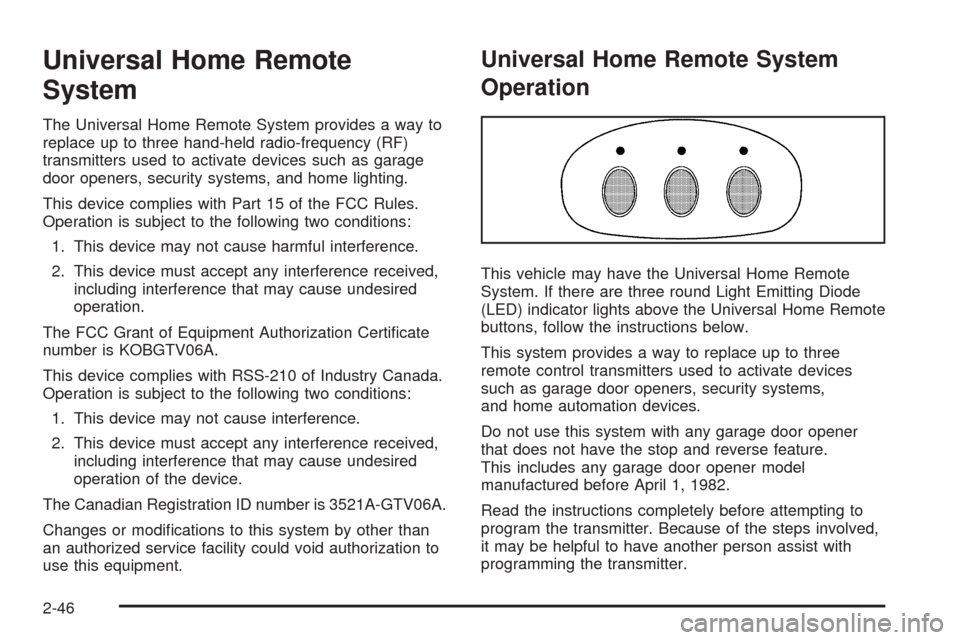
System. If there are three round Light Emitting Diode
(LED) indicator lights above the Universal Home Remote
buttons, follow the instructions below.
This system provides a way to replace up to three
remote control transmitters used to activate devices
such as garage door openers, security systems,
and home automation devices.
Do not use this system with any garage door opener
that does not have the stop and reverse feature.
This includes any garage door opener model
manufactured before April 1, 1982.
Read the instructions completely before attempting to
program the transmitter. Because of the steps involved,
it may be helpful to have another person assist with
programming the transmitter.
2-46
Page 115 of 432
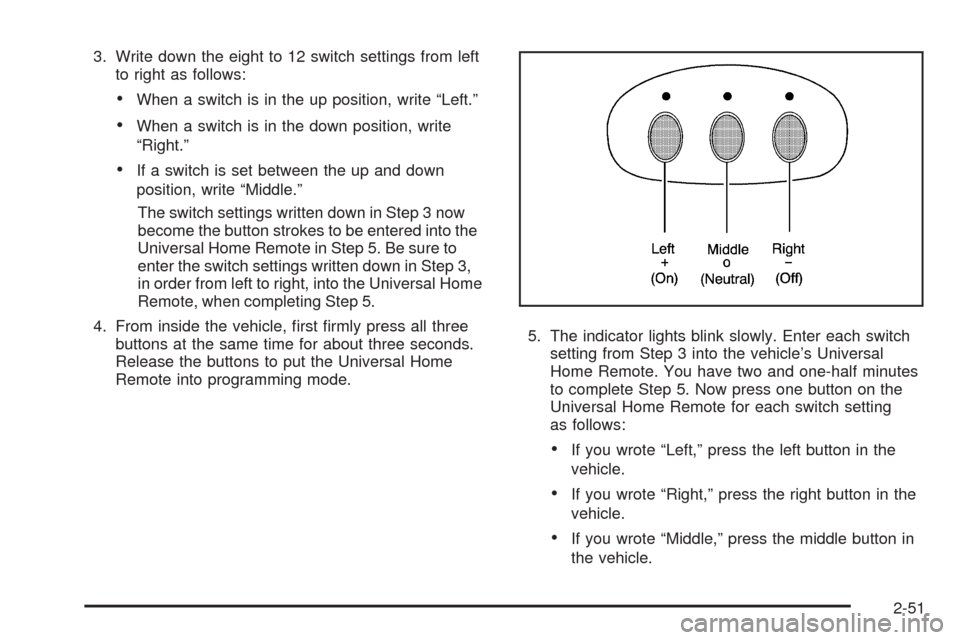
3. Write down the eight to 12 switch settings from left
to right as follows:
When a switch is in the up position, write “Left.”
When a switch is in the down position, write
“Right.”
If a switch is set between the up and down
position, write “Middle.”
The switch settings written down in Step 3 now
become the button strokes to be entered into the
Universal Home Remote in Step 5. Be sure to
enter the switch settings written down in Step 3,
in order from left to right, into the Universal Home
Remote, when completing Step 5.
4. From inside the vehicle, �rst �rmly press all three
buttons at the same time for about three seconds.
Release the buttons to put the Universal Home
Remote into programming mode.5. The indicator lights blink slowly. Enter each switch
setting from Step 3 into the vehicle’s Universal
Home Remote. You have two and one-half minutes
to complete Step 5. Now press one button on the
Universal Home Remote for each switch setting
as follows:
If you wrote “Left,” press the left button in the
vehicle.
If you wrote “Right,” press the right button in the
vehicle.
If you wrote “Middle,” press the middle button in
the vehicle.
2-51
Page 116 of 432
6. After entering all of the switch positions, again,
�rmly press and release all three buttons at the
same time. The indicator lights turn on.
7. Press and hold the button that will be used to
control the garage door until the garage door
moves. The indicator light above the selected button
should slowly blink. This button may need to be
held for up to 55 seconds.
8. Immediately release the button when the garage
door moves. The indicator light blinks rapidly until
programming is complete.
9. Press and release the same button again.
The garage door should move, con�rming
that programming is successful and complete.
To program another Fixed Code device such as an
additional garage door opener, a security device,
or home automation device, repeat Steps 1-9, choosing
a different button in Step 7 than what was used for
the garage door opener.Using Universal Home Remote
Press and hold the appropriate button for at least half of
a second. The indicator light comes on while the
signal is being transmitted.
Operation can occur:
If the vehicle is in accessory mode.
If the vehicle is in running.
If the vehicle is in Retained Accessory Mode (RAP).
SeeRetained Accessory Power (RAP) on page 2-23
for more information.
Up to an additional 10 minutes after RAP �nishes.
Up to 10 minutes after any door is opened.
2-52
Page 117 of 432
Reprogramming Universal Home
Remote Buttons
Any of the three buttons can be reprogrammed by
repeating the instructions.
Erasing Universal Home Remote
Buttons
The programmed buttons should be erased when the
vehicle is sold or the lease ends.
To erase either Rolling Code or Fixed Code on the
Universal Home Remote device:
1. Press and hold the two outside buttons at the same
time for approximately 20 seconds, until the
indicator lights, located directly above the buttons,
begin to blink rapidly.
2. Once the indicator lights begin to blink, release both
buttons. The codes from all buttons are erased.
For help or information on the Universal Home Remote
System, call the customer assistance phone number
underCustomer Assistance Offices on page 7-6.
Storage Areas
Glove Box
To open the glove box, lift up on the lever. Use the key
to lock and unlock. The glove box has a light inside.
Cupholders
There are two cupholders located on the center console
next to the shift lever. To access, place your thumb
on the left side of the lid and slide the handle to
the right.
Center Console Storage
To use this storage area, pull up the lid on the driver’s
side front edge of the console and swing it to the
passenger side.
2-53
Page 137 of 432
Instrument Panel Overview...............................3-4
Hazard Warning Flashers................................3-6
Other Warning Devices...................................3-7
Horn .............................................................3-7
Tilt Wheel.....................................................3-7
Turn Signal/Multifunction Lever.........................3-8
Turn and Lane-Change Signals (Auto Signal).....3-9
Headlamp High/Low-Beam Changer..................3-9
Flash-to-Pass...............................................3-10
Windshield Wipers........................................3-10
Windshield Washer.......................................3-11
Cruise Control..............................................3-11
Exterior Lamps.............................................3-15
Wiper Activated Headlamps............................3-16
Headlamps on Reminder................................3-16
Daytime Running Lamps (DRL).......................3-16
Fog Lamps ..................................................3-17
Twilight Sentinel
®..........................................3-18
Exterior Lighting Battery Saver........................3-19
Instrument Panel Brightness...........................3-19
Courtesy Lamps...........................................3-19
Entry/Exit Lighting.........................................3-19
Reading Lamps............................................3-20Battery Run-Down Protection..........................3-20
Head-Up Display (HUD).................................3-20
Accessory Power Outlet(s).............................3-24
Ashtray(s) and Cigarette Lighter......................3-25
Climate Controls............................................3-26
Dual Automatic Climate Control System...........3-26
Outlet Adjustment.........................................3-32
Passenger Compartment Air Filter...................3-32
Warning Lights, Gages, and Indicators............3-34
Instrument Panel Cluster................................3-35
Speedometer and Odometer...........................3-36
Tachometer.................................................3-36
Safety Belt Reminders...................................3-36
Airbag Readiness Light..................................3-37
Passenger Airbag Status Indicator...................3-38
Voltmeter Gage............................................3-40
One-to-Four Shift Light
(Manual Transmission)...............................3-40
Brake System Warning Light..........................3-41
Antilock Brake System (ABS) Warning Light........3-42
Traction Control System (TCS) Warning Light......3-42
Active Handling System Light.........................3-43
Engine Coolant Temperature Gage..................3-44
Section 3 Instrument Panel
3-1