2008 CHEVROLET AVALANCHE clock
[x] Cancel search: clockPage 101 of 528
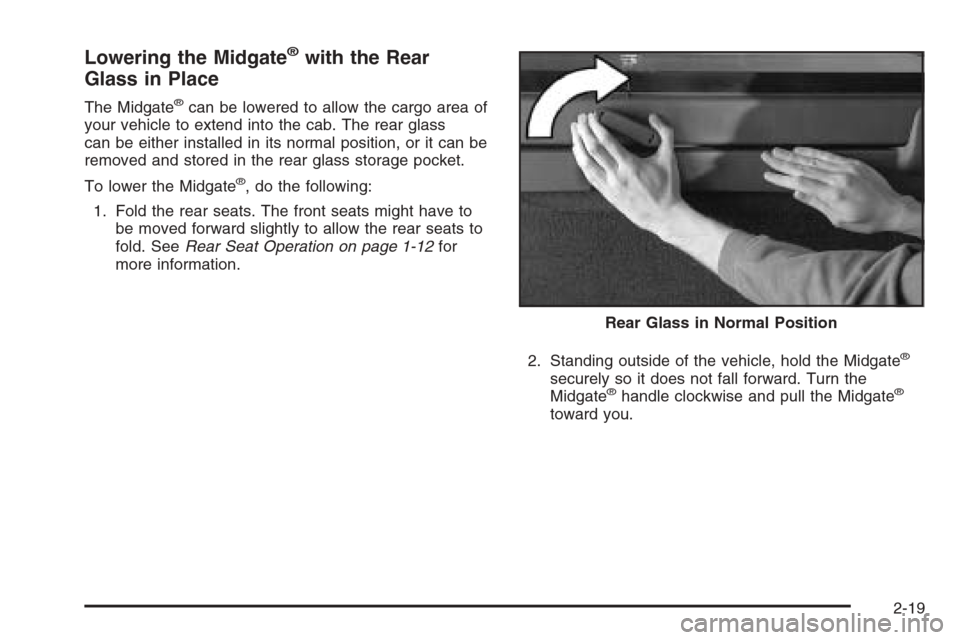
Lowering the Midgate®with the Rear
Glass in Place
The Midgate®can be lowered to allow the cargo area of
your vehicle to extend into the cab. The rear glass
can be either installed in its normal position, or it can be
removed and stored in the rear glass storage pocket.
To lower the Midgate
®, do the following:
1. Fold the rear seats. The front seats might have to
be moved forward slightly to allow the rear seats to
fold. SeeRear Seat Operation on page 1-12for
more information.
2. Standing outside of the vehicle, hold the Midgate
®
securely so it does not fall forward. Turn the
Midgate®handle clockwise and pull the Midgate®
toward you.Rear Glass in Normal Position
2-19
Page 125 of 528

Shifting into NEUTRAL
To shift the transfer case to NEUTRAL do the following:
1. Make sure the vehicle is parked so that it will not roll.
2. Set the parking brake and apply the regular brake
pedal. SeeParking Brake on page 2-44for more
information.
3. Start the vehicle or turn the ignition to ON/RUN.
4. Put the transmission in NEUTRAL (N).
5. Shift the transfer case to Two-Wheel Drive High.
6. Turn the transfer case dial clockwise to NEUTRAL
till it stops and hold it for 10 seconds. Then slowly
release the dial to the four low position. The
NEUTRAL light will come on when the transfer
case shift to NEUTRAL is complete.
7. If the engine is running, verify that the transfer case
is in NEUTRAL (N) by shifting the transmission to
REVERSE (R) for one second, then shift the
transmission to DRIVE (D) for one second.
8. Turn the ignition to ACC/ACCESSORY, which will
turn the engine off.
9. Place the transmission shift lever in PARK (P).
10. Release the parking brake prior to moving
the vehicle.
11. Turn the ignition to LOCK/OFF.
Shifting Out of NEUTRAL
To shift out of NEUTRAL do the following:
1. Set the parking brake and apply the regular brake
pedal.
2. Shift the transmission to NEUTRAL (N) and turn the
ignition to ON/RUN with the engine off.
3. Turn the transfer case dial to the desired transfer
case shift position (Two-Wheel Drive High,
Four-Wheel Drive High, AUTO).
After the transfer case has shifted out of NEUTRAL
the NEUTRAL light will go out.
4. Release the parking brake prior to moving the
vehicle.
Notice:Shifting the transmission into gear before
the Four-Wheel Drive Low indicator light has stopped
�ashing could damage the transfer case. To help
avoid damaging your vehicle, always wait for the
Four-Wheel Drive Low indicator light to stop �ashing
before shifting the transmission into gear.
5. Start the engine and shift the transmission to the
desired position.
Excessively shifting the transfer case into or out of the
different modes may cause the transfer case to enter the
shift protection mode. This will protect the transfer case
from possible damage and will only allow the transfer
case to respond to one shift per 10 seconds. The transfer
case may stay in this mode for up to three minutes.
2-43
Page 182 of 528

Fog Lamp Light............................................3-48
Cruise Control Light......................................3-48
Highbeam On Light.......................................3-48
Tow/Haul Mode Light....................................3-48
Fuel Gage...................................................3-49
Low Fuel Warning Light.................................3-50
Driver Information Center (DIC).......................3-50
DIC Operation and Displays
(With DIC Buttons)....................................3-51
DIC Operation and Displays
(Without DIC Buttons)................................3-56
DIC Warnings and Messages.........................3-59
DIC Vehicle Customization
(With DIC Buttons)....................................3-66Audio System(s).............................................3-75
Setting the Clock..........................................3-76
Radio(s) (MP3).............................................3-78
Using an MP3 (Radio with CD or
Six-Disc CD Player)...................................3-96
Using an MP3 (Radio with CD and
DVD Player)...........................................3-101
XM Radio Messages...................................3-106
Navigation/Radio System..............................3-107
Rear Seat Entertainment (RSE) System.........3-107
Rear Seat Audio (RSA)................................3-116
Theft-Deterrent Feature................................3-118
Audio Steering Wheel Controls......................3-118
Radio Reception.........................................3-119
Fixed Mast Antenna....................................3-120
XM™ Satellite Radio Antenna System............3-120
Section 3 Instrument Panel
3-2
Page 198 of 528
Instrument Panel Brightness
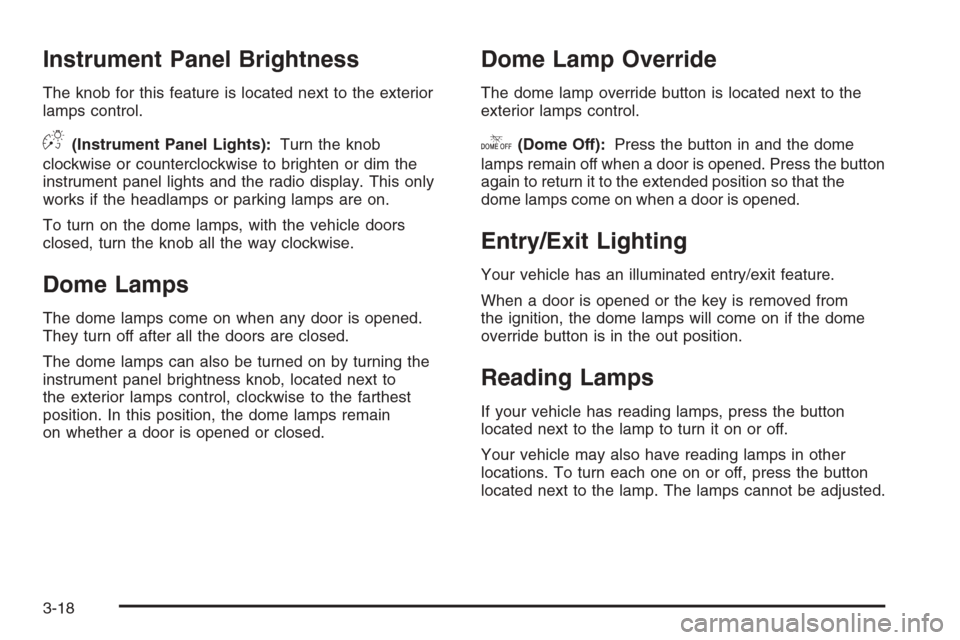
The knob for this feature is located next to the exterior
lamps control.
D(Instrument Panel Lights):Turn the knob
clockwise or counterclockwise to brighten or dim the
instrument panel lights and the radio display. This only
works if the headlamps or parking lamps are on.
To turn on the dome lamps, with the vehicle doors
closed, turn the knob all the way clockwise.
Dome Lamps
The dome lamps come on when any door is opened.
They turn off after all the doors are closed.
The dome lamps can also be turned on by turning the
instrument panel brightness knob, located next to
the exterior lamps control, clockwise to the farthest
position. In this position, the dome lamps remain
on whether a door is opened or closed.
Dome Lamp Override
The dome lamp override button is located next to the
exterior lamps control.
k(Dome Off):Press the button in and the dome
lamps remain off when a door is opened. Press the button
again to return it to the extended position so that the
dome lamps come on when a door is opened.
Entry/Exit Lighting
Your vehicle has an illuminated entry/exit feature.
When a door is opened or the key is removed from
the ignition, the dome lamps will come on if the dome
override button is in the out position.
Reading Lamps
If your vehicle has reading lamps, press the button
located next to the lamp to turn it on or off.
Your vehicle may also have reading lamps in other
locations. To turn each one on or off, press the button
located next to the lamp. The lamps cannot be adjusted.
3-18
Page 201 of 528
Climate Controls
Climate Control System
The heating, cooling, defrost, defog and ventilation of
your vehicle can be controlled with this system.
Manual Operation
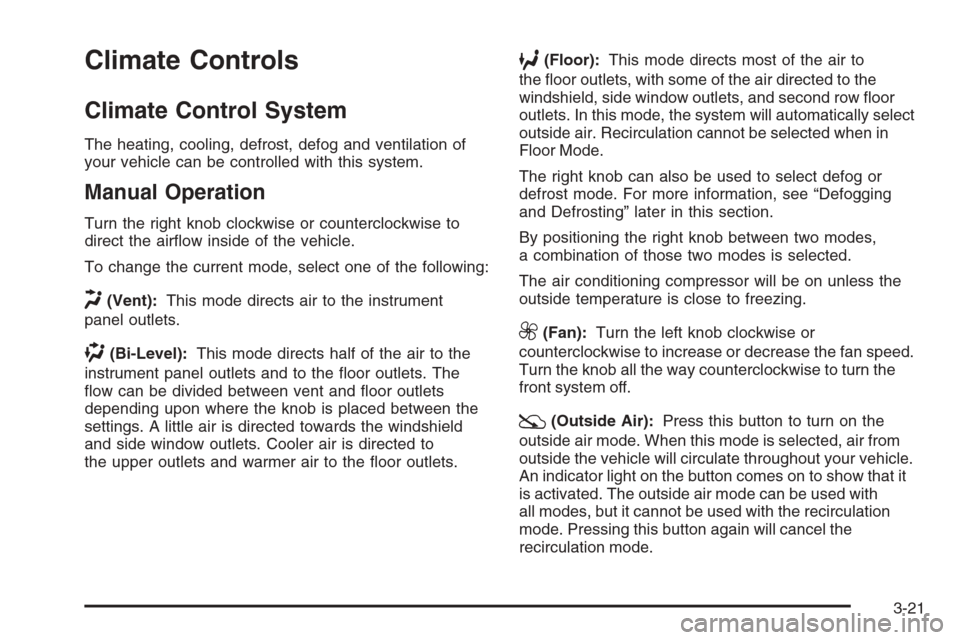
Turn the right knob clockwise or counterclockwise to
direct the air�ow inside of the vehicle.
To change the current mode, select one of the following:
H(Vent):This mode directs air to the instrument
panel outlets.
)(Bi-Level):This mode directs half of the air to the
instrument panel outlets and to the �oor outlets. The
�ow can be divided between vent and �oor outlets
depending upon where the knob is placed between the
settings. A little air is directed towards the windshield
and side window outlets. Cooler air is directed to
the upper outlets and warmer air to the �oor outlets.
6(Floor):This mode directs most of the air to
the �oor outlets, with some of the air directed to the
windshield, side window outlets, and second row �oor
outlets. In this mode, the system will automatically select
outside air. Recirculation cannot be selected when in
Floor Mode.
The right knob can also be used to select defog or
defrost mode. For more information, see “Defogging
and Defrosting” later in this section.
By positioning the right knob between two modes,
a combination of those two modes is selected.
The air conditioning compressor will be on unless the
outside temperature is close to freezing.
9(Fan):Turn the left knob clockwise or
counterclockwise to increase or decrease the fan speed.
Turn the knob all the way counterclockwise to turn the
front system off.
:(Outside Air):Press this button to turn on the
outside air mode. When this mode is selected, air from
outside the vehicle will circulate throughout your vehicle.
An indicator light on the button comes on to show that it
is activated. The outside air mode can be used with
all modes, but it cannot be used with the recirculation
mode. Pressing this button again will cancel the
recirculation mode.
3-21
Page 202 of 528
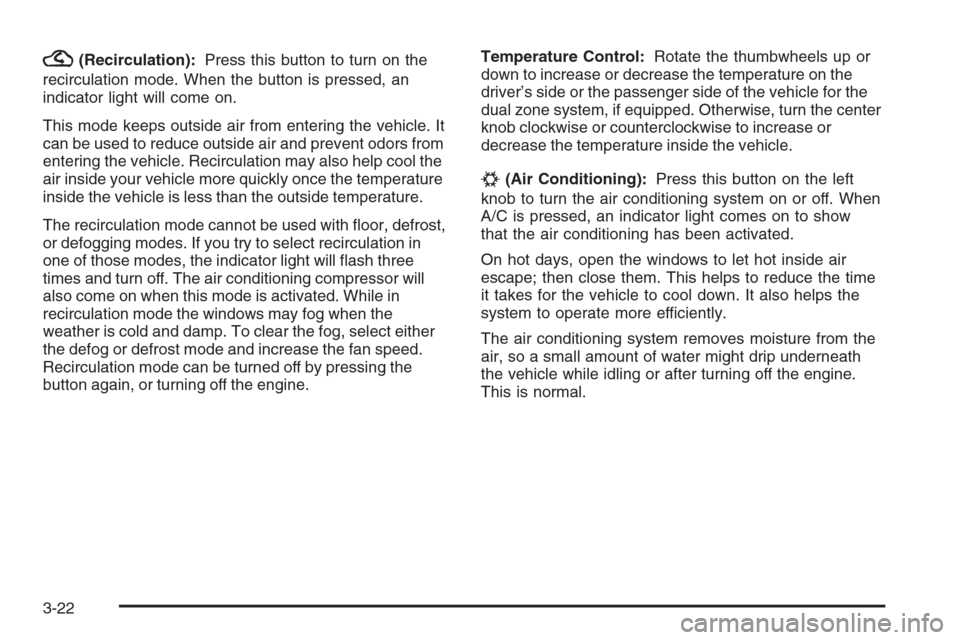
?(Recirculation):Press this button to turn on the
recirculation mode. When the button is pressed, an
indicator light will come on.
This mode keeps outside air from entering the vehicle. It
can be used to reduce outside air and prevent odors from
entering the vehicle. Recirculation may also help cool the
air inside your vehicle more quickly once the temperature
inside the vehicle is less than the outside temperature.
The recirculation mode cannot be used with �oor, defrost,
or defogging modes. If you try to select recirculation in
one of those modes, the indicator light will �ash three
times and turn off. The air conditioning compressor will
also come on when this mode is activated. While in
recirculation mode the windows may fog when the
weather is cold and damp. To clear the fog, select either
the defog or defrost mode and increase the fan speed.
Recirculation mode can be turned off by pressing the
button again, or turning off the engine.Temperature Control:Rotate the thumbwheels up or
down to increase or decrease the temperature on the
driver’s side or the passenger side of the vehicle for the
dual zone system, if equipped. Otherwise, turn the center
knob clockwise or counterclockwise to increase or
decrease the temperature inside the vehicle.
#(Air Conditioning):Press this button on the left
knob to turn the air conditioning system on or off. When
A/C is pressed, an indicator light comes on to show
that the air conditioning has been activated.
On hot days, open the windows to let hot inside air
escape; then close them. This helps to reduce the time
it takes for the vehicle to cool down. It also helps the
system to operate more efficiently.
The air conditioning system removes moisture from the
air, so a small amount of water might drip underneath
the vehicle while idling or after turning off the engine.
This is normal.
3-22
Page 203 of 528
Defogging and Defrosting
Fog on the inside of the windows is a result of high
humidity (moisture) condensing on the cool window
glass. This can be minimized if the climate control
system is used properly. There are two modes to clear
fog or frost from your windshield. Turn the right knob
clockwise to select the defog or defrost mode.
-(Defog):The defog mode is used to clear the
windows of fog or moisture and warm the passengers.
This mode directs air to the windshield, �oor outlets,
and side window vents. When this mode is selected,
the system turns off recirculation and runs the air
conditioning compressor unless the outside temperature
is close to freezing. The recirculation mode cannot be
selected while in the defog mode. Do not drive the
vehicle until all the windows are clear.
0(Defrost):The defrost mode is used to remove
fog or frost from the windshield more quickly. This mode
directs a portion of the air to the windshield and side
window vents and some to the �oor vents. In this mode,
the system will automatically force outside air into the
vehicle. The recirculation mode cannot be selected while
in the defrost mode. The air conditioning compressor
will run automatically in this setting, unless the outside
temperature is close to freezing. Do not drive the vehicle
until all the windows are clear.
Rear Window Defogger
The rear window defogger uses a warming grid to
remove fog from the rear window.
<(Rear Window Defogger):Press this button on
the right knob to turn on the rear window defogger.
The system will automatically turn off several minutes
after it has been activated. The defogger can also
be turned off by pressing the button again or by turning
off the engine. Do not drive the vehicle until all the
windows are clear.
If your vehicle has heated outside rearview mirrors,
the mirrors will heat to help clear fog or frost from the
surface of the mirror when the rear window defog button
is pressed.
Notice:Do not use anything sharp on the inside
of the rear window. If you do, you could cut or
damage the warming grid, and the repairs would
not be covered by the vehicle warranty. Do not
attach a temporary vehicle license, tape, a decal
or anything similar to the defogger grid.
3-23
Page 256 of 528
Setting the Clock
MP3 Radios with a Single CD or a
Single CD and DVD Player
If the vehicle has a radio with a single CD or a CD and
DVD player, it has a
H(clock) button for setting the
time and date.
To set the time and date, follow the instructions:
1. Press the
Hbutton and the HR, MIN, MM, DD,
YYYY (hour, minute, month, day, and year)
displays.
2. Press the pushbutton located under any one of the
labels to change it. Every time the pushbutton is
pressed again, the time or the date if selected,
increases by one.
Another way to increase the time or date,
is to press the right
¨SEEK arrow or
the
\FWD (forward) button.
To decrease the time or date, press the
left
©SEEK arrow or thesREV (reverse)
button, or turn the
f(tune) knob, located on
the upper right side of the radio, to adjust
the selected setting.
Changing the Time and Date Default
Settings
To change the time default setting from 12 hour to
24 hour or to change the date default setting from
month/day/year to day/month/year, follow these
instructions:
1. Press the
Hbutton and then the pushbutton
located under the forward arrow that is currently
displayed on the radio screen until the time 12H
and 24H, and the date MM/DD/YYYY (month, day,
and year) and DD/MM/YYYY (day, month, and
year) displays.
2. Press the pushbutton located under the desired
option.
3. Press the
Hbutton again to apply the selected
default, or let the screen time out.
3-76