2008 CHEVROLET AVALANCHE turn signal
[x] Cancel search: turn signalPage 288 of 528

Headphones
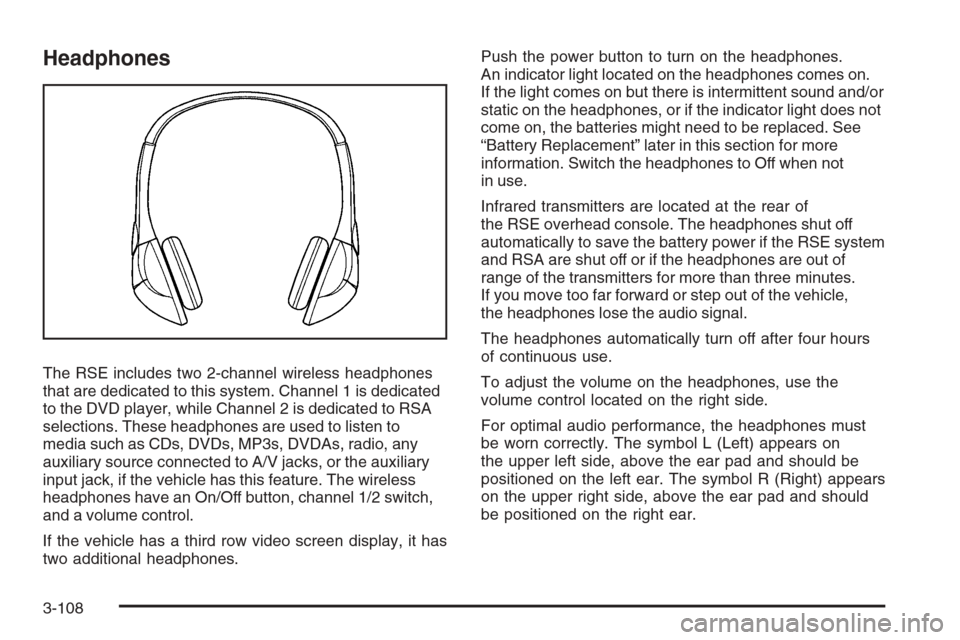
The RSE includes two 2-channel wireless headphones
that are dedicated to this system. Channel 1 is dedicated
to the DVD player, while Channel 2 is dedicated to RSA
selections. These headphones are used to listen to
media such as CDs, DVDs, MP3s, DVDAs, radio, any
auxiliary source connected to A/V jacks, or the auxiliary
input jack, if the vehicle has this feature. The wireless
headphones have an On/Off button, channel 1/2 switch,
and a volume control.
If the vehicle has a third row video screen display, it has
two additional headphones.Push the power button to turn on the headphones.
An indicator light located on the headphones comes on.
If the light comes on but there is intermittent sound and/or
static on the headphones, or if the indicator light does not
come on, the batteries might need to be replaced. See
“Battery Replacement” later in this section for more
information. Switch the headphones to Off when not
in use.
Infrared transmitters are located at the rear of
the RSE overhead console. The headphones shut off
automatically to save the battery power if the RSE system
and RSA are shut off or if the headphones are out of
range of the transmitters for more than three minutes.
If you move too far forward or step out of the vehicle,
the headphones lose the audio signal.
The headphones automatically turn off after four hours
of continuous use.
To adjust the volume on the headphones, use the
volume control located on the right side.
For optimal audio performance, the headphones must
be worn correctly. The symbol L (Left) appears on
the upper left side, above the ear pad and should be
positioned on the left ear. The symbol R (Right) appears
on the upper right side, above the ear pad and should
be positioned on the right ear.
3-108
Page 289 of 528

Notice:Do not store the headphones in heat or
direct sunlight. This could damage the headphones
and repairs will not be covered by your warranty.
Storage in extreme cold can weaken the batteries.
Keep the headphones stored in a cool, dry place.
If the foam ear pads attached to the headphones
become worn or damaged, the pads can be replaced
separately from the headphone set. See your
dealer/retailer for more information.
Battery Replacement
To change the batteries on the headphones, do the
following:
1. Turn the screw to loosen the battery door located
on the left side of the headphones. Slide the
battery door open.
2. Replace the two batteries in the compartment.
Make sure that they are installed correctly, using the
diagram on the inside of the battery compartment.
3. Replace the battery door and tighten the
door screw.
If the headphones are to be stored for a long period of
time, remove the batteries and keep them in a cool,
dry place.
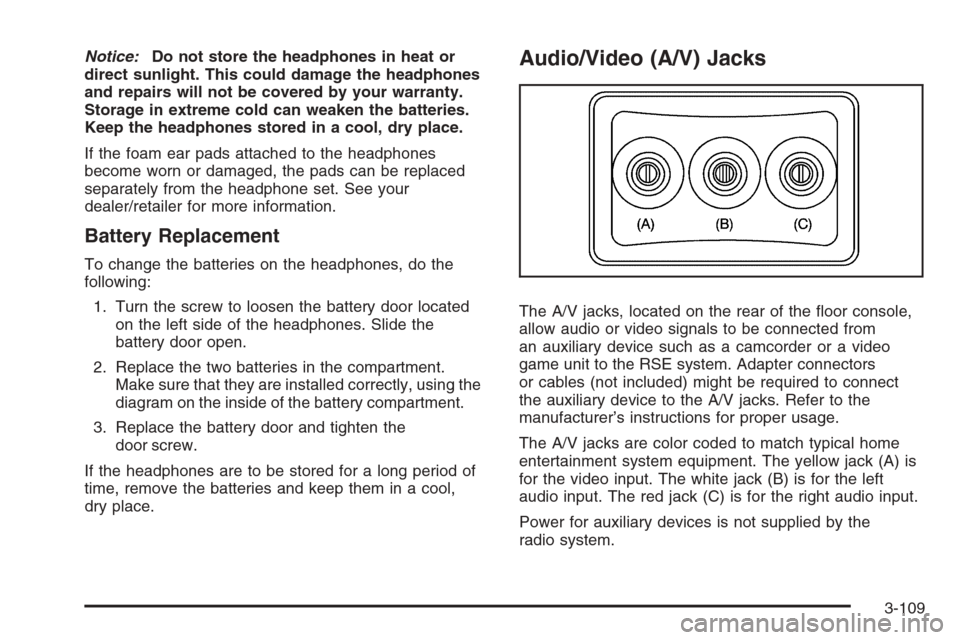
Audio/Video (A/V) Jacks
The A/V jacks, located on the rear of the �oor console,
allow audio or video signals to be connected from
an auxiliary device such as a camcorder or a video
game unit to the RSE system. Adapter connectors
or cables (not included) might be required to connect
the auxiliary device to the A/V jacks. Refer to the
manufacturer’s instructions for proper usage.
The A/V jacks are color coded to match typical home
entertainment system equipment. The yellow jack (A) is
for the video input. The white jack (B) is for the left
audio input. The red jack (C) is for the right audio input.
Power for auxiliary devices is not supplied by the
radio system.
3-109
Page 290 of 528

To use the auxiliary inputs of the RSE system, connect
an external auxiliary device to the color-coded A/V jacks
and turn both the auxiliary device and the video screen
power on. If the video screen is in the DVD player mode,
pressing the AUX (auxiliary) button on the remote control
switches the video screen from the DVD player mode to
the auxiliary device. The radio can listen to the audio of
the connected auxiliary device by sourcing to auxiliary.
SeeRadio(s) (MP3) on page 3-78for more information.
How to Change the RSE Video Screen
Settings
The screen display mode (normal, full, and zoom),
screen brightness, and setup menu language can be
changed from the on screen setup menu. To change any
feature, do the following:
1. Press the
z(display menu) button on the remote
control.
2. Use the remote control
n,q,p,o(navigation)
arrows and the
r(enter) button to use the
setup menu.
3. Press the
zbutton again to remove the setup
menu from the screen.
Audio Output
Audio from the DVD player or auxiliary inputs can be
heard through the following possible sources:
Wireless Headphones
Vehicle Speakers
Vehicle wired headphone jacks on the rear seat
audio system, if the vehicle has this feature.
The RSE system always transmits the audio signal to
the wireless headphones, if there is audio available.
See “Headphones” earlier in this section for more
information.
The DVD player is capable of outputting audio to the
wired headphone jacks on the RSA system, if the
vehicle has this feature. The DVD player can be
selected as an audio source on the RSA system.
SeeRear Seat Audio (RSA) on page 3-116for more
information.
When a device is connected to the A/V jacks, or the
radio’s auxiliary input jack, if the vehicle has this feature,
the rear seat passengers are able to hear audio from
the auxiliary device through the wireless or wired
headphones. The front seat passengers are able to
listen to playback from this device through the vehicle
speakers by selecting AUX as the source on the radio.
3-110
Page 291 of 528

Video Screen
The video screen is located in the overhead console.
To use the video screen, do the following:
1. Push the release button located on the overhead
console.
2. Move the screen to the desired position.
When the video screen is not in use, push it up into its
locked position.
If a DVD is playing and the screen is raised to its locked
position, the screen remains on, this is normal, and
the DVD continues to play through the previous audio
source. Use the remote control power button or eject the
disc to turn off the screen.
The overhead console contains the infrared transmitters
for the wireless headphones and the infrared receivers
for the remote control. They are located at the rear
of the console.
Notice:Avoid directly touching the video screen,
as damage may occur. See “Cleaning the Video
Screen” later in this section for more information.
Remote Control
To use the remote control, aim it at the transmitter
window at the rear of the overhead console and press
the desired button. Direct sunlight or very bright light
could affect the ability of the RSE transmitter to receive
signals from the remote control. If the remote control
does not seem to be working, the batteries might need
to be replaced. See “Battery Replacement” later in
this section. Objects blocking the line of sight could
also affect the function of the remote control.
If a CD or DVD is in the Radio DVD slot, the remote
control power button can be used to turn on the video
screen display and start the disc. The radio can also
turn on the video screen display. SeeRadio(s) (MP3)
on page 3-78for more information.
Notice:Storing the remote control in a hot area or
in direct sunlight can damage it, and the repairs
will not be covered by your warranty. Storage
in extreme cold can weaken the batteries. Keep
the remote control stored in a cool, dry place.
3-111
Page 300 of 528

XM™ Satellite Radio Service
XM™ Satellite Radio Service gives digital radio
reception from coast-to-coast in the 48 contiguous
United States, and in Canada. Just as with FM, tall
buildings or hills can interfere with satellite radio signals,
causing the sound to fade in and out. In addition,
traveling or standing under heavy foliage, bridges,
garages, or through tunnels could cause loss of the
XM signal for a period of time. The radio may display
NO XM SIGNAL to indicate interference.
Fixed Mast Antenna
The �xed mast antenna can withstand most car washes
without being damaged. If the mast should ever become
slightly bent, straighten it out by hand. If the mast is badly
bent, replace it.
Check occasionally to make sure the mast is still
tightened to its base. If tightening is required, tighten
by hand, then with a wrench one quarter turn.
XM™ Satellite Radio Antenna
System
The XM™ Satellite Radio antenna is located on the roof
of the vehicle. Keep this antenna clear of snow and
ice build up for clear radio reception.
If the vehicle has a sunroof, the performance of the
XM™ system may be affected if the sunroof is open.
Loading items onto the roof of the vehicle can interfere
with the performance of the XM™ system. Make
sure the XM™ Satellite Radio antenna is not obstructed.
3-120
Page 317 of 528

Surface Obstacles:Unseen or hidden obstacles can
be hazardous. A rock, log, hole, rut, or bump can startle
you if you are not prepared for them. Often these
obstacles are hidden by grass, bushes, snow, or even
the rise and fall of the terrain itself. Here are some
things to consider:
Is the path ahead clear?
Will the surface texture change abruptly up ahead?
Does the travel take you uphill or downhill?
There is more discussion of these subjects later.
Will you have to stop suddenly or change direction
quickly?
When you drive over obstacles or rough terrain, keep a
�rm grip on the steering wheel. Ruts, troughs, or other
surface features can jerk the wheel out of your hands if
you are not prepared.When you drive over bumps, rocks, or other obstacles,
the wheels can leave the ground. If this happens,
even with one or two wheels, you cannot control the
vehicle as well or at all.
Because you will be on an unpaved surface, it is
especially important to avoid sudden acceleration,
sudden turns, or sudden braking.
In a way, off-road driving requires a different kind of
alertness from driving on paved roads and highways.
There are no road signs, posted speed limits, or signal
lights. You have to use your own good judgment
about what is safe and what is not.
Drinking and driving can be very dangerous on any
road. And this is certainly true for off-road driving.
At the very time you need special alertness and driving
skills, your re�exes, perceptions, and judgment can
be affected by even a small amount of alcohol.
You could have a serious — or even fatal — accident
if you drink and drive or ride with a driver who has been
drinking. SeeDrunk Driving on page 4-2.
4-17
Page 355 of 528

Driving with a Trailer
Towing a trailer requires a certain amount of
experience. Before setting out for the open road, you’ll
want to get to know your rig. Acquaint yourself with the
feel of handling and braking with the added weight of the
trailer. And always keep in mind that the vehicle you are
driving is now a good deal longer and not nearly as
responsive as your vehicle is by itself.
Before you start, check all trailer hitch parts and
attachments, safety chains, electrical connector, lamps,
tires and mirror adjustment. If the trailer has electric
brakes, start your vehicle and trailer moving and then
apply the trailer brake controller by hand to be sure
the brakes are working. This lets you check your
electrical connection at the same time.
During your trip, check occasionally to be sure that
the load is secure, and that the lamps and any trailer
brakes are still working.
Following Distance
Stay at least twice as far behind the vehicle ahead as
you would when driving your vehicle without a trailer.
This can help you avoid situations that require
heavy braking and sudden turns.
Passing
You’ll need more passing distance up ahead when
you’re towing a trailer. And, because you’re a good
deal longer, you’ll need to go much farther beyond the
passed vehicle before you can return to your lane.
Backing Up
Hold the bottom of the steering wheel with one hand.
Then, to move the trailer to the left, just move that hand
to the left. To move the trailer to the right, move your
hand to the right. Always back up slowly and, if possible,
have someone guide you.
Making Turns
Notice:Making very sharp turns while trailering
could cause the trailer to come in contact with the
vehicle. Your vehicle could be damaged. Avoid
making very sharp turns while trailering.
When you’re turning with a trailer, make wider turns than
normal. Do this so your trailer won’t strike soft shoulders,
curbs, road signs, trees or other objects. Avoid jerky or
sudden maneuvers. Signal well in advance.
4-55
Page 356 of 528

Turn Signals When Towing a Trailer
The arrows on your instrument panel will �ash whenever
you signal a turn or lane change. Properly hooked up,
the trailer lamps will also �ash, telling other drivers
you’re about to turn, change lanes or stop.
When towing a trailer, the arrows on your instrument
panel will �ash for turns even if the bulbs on the trailer
are burned out. Thus, you may think drivers behind
you are seeing your signal when they are not. It’s
important to check occasionally to be sure the trailer
bulbs are still working.
Driving On Grades
Reduce speed and shift to a lower gearbeforeyou start
down a long or steep downgrade. If you don’t shift
down, you might have to use your brakes so much
that they would get hot and no longer work well.You can tow in DRIVE (D). If the transmission shifts too
often (e.g., under heavy loads and/or hilly conditions)
you may want to shift the transmission to a lower
gear selection or enable the Tow/Haul mode.
See “Tow/Haul Mode” earlier in this section.
When towing at high altitude on steep uphill grades,
consider the following: Engine coolant at higher altitudes
will boil at a lower temperature than at or near sea level.
If you turn your engine off immediately after towing at
high altitude on steep uphill grades, your vehicle may
show signs similar to engine overheating. To avoid this,
let the engine run while parked (preferably on level
ground) with the automatic transmission in PARK (P) for
a few minutes before turning the engine off. If you do
get the overheat warning, seeEngine Overheating on
page 5-28.
4-56