2008 CADILLAC CTS ESP
[x] Cancel search: ESPPage 160 of 490

Daytime Running Lamps (DRL)
Daytime Running Lamps (DRL) can make it easier for
others to see the front of your vehicle during the
day. DRL can be helpful in many different driving
conditions, but they can be especially helpful in the short
periods after dawn and before sunset. Fully functional
daytime running lamps are required on all vehicles
�rst sold in Canada.
The DRL system will make either the reduced intensity
low-beam headlamps or dedicated DRL’s come on
when the following conditions are met:
It is still daylight and the ignition is in ON/RUN or
START.
The exterior lamp control is in off or AUTO and the
headlamps are off.
The automatic transmission is not in PARK (P).
When DRL’s are on, only the reduced intensity
low-beam headlamps or dedicated DRL’s will be on.
No other exterior lamps will be on. The instrument panel
cluster will not be lit up either.When the exterior lamp control is in AUTO and it is dark
enough outside, the DRL turns off and the low-beam
headlamps will turn on. When it is bright enough outside,
the low-beam headlamps will go off, and the DRL will
turn back on. If the vehicle is started in a dark garage,
the automatic headlamp system comes on immediately.
Once the vehicle leaves the garage, it takes about
one minute for the automatic headlamp system
to change to DRL if it is light outside. During that delay,
the instrument panel cluster may not be as bright as
usual. Make sure the instrument panel brightness lever
is in the full bright position. SeeInstrument Panel
Brightness on page 3-20.
Turning the exterior lamp control to off or to the
low-beam headlamp position will turn off the DRL.
If the parking lamps or the fog lamps were turned on
instead, the DRL will still turn off.
This will work regardless of gear position and whether
or not the parking brake is set.
3-18
Page 212 of 490

To change customization preferences, use the following
procedure.
Entering the Feature Settings Menu
1. Turn the ignition on.
To avoid excessive drain on the battery, it is
recommended that the headlamps are turned off.
2. Press the customization button to enter the feature
settings menu.
Feature Settings Menu Items
The following are customization features that allow you
to program settings to the vehicle:
Display In English
This feature will only display if a language other than
English has been set. This feature allows you to change
the language in which the DIC messages appear
back to English.
Press the customization button until the Press
VTo
Display In English screen appears on the DIC display.
Press the set/reset button once to select English as
the language in which all DIC messages will appear.
Display Language
This feature allows you to select the language in which
the DIC messages will appear.
Press the customization button until the Display
Language screen appears on the DIC display. Press the
set/reset button once to access the settings for this
feature. Then press the menu up/down button to scroll
through the following settings:
English (default):All messages will appear in English.
Deutsch:All messages will appear in German.
Italiano:All messages will appear in Italian.
Francais:All messages will appear in French.
Espanol:All messages will appear in Spanish.
Portugese:All messages will appear in Portugese.
Arabic:All messages will appear in Arabic.
Chinese:All messages will appear in Chinese.
Japanese:All messages will appear in Japanese.
No Change:No change will be made to this feature.
The current setting will remain.
To select a setting, press the set/reset button while the
desired setting is displayed on the DIC.
3-70
Page 253 of 490

No Info:No artist, song title, category, or text
information is available at this time on this channel.
The system is working properly.
NotFound:There are no channels available for the
selected category. The system is working properly.
Radio ID:If tuned to channel 0, this message
will alternate with the XM Radio 8 digit radio ID label.
This label is needed to activate the service.
Unknown:If this message is received when tuned to
channel 0, there may be a receiver fault. Consult
with your dealer/retailer.
Check XM:If this message does not clear within a
short period of time, the receiver may have a fault.
Consult with your dealer/retailer.
Navigation/Radio System
Your vehicle may have a navigation radio system.
The navigation system has built-in features intended to
minimize driver distraction. Technology alone, no
matter how advanced, can never replace your own
judgment. See the Navigation System manual for some
tips to help you reduce distractions while driving.
Bluetooth®
Vehicles equipped with a Bluetooth system can use a
Bluetooth capable cell phone with a Hands Free Pro�le
to make and receive phone calls. The system can be
used while the key is in ON/RUN or ACC/ACCESSORY
position. The range of the Bluetooth system can be
up to 30 ft. (9.1 m). Not all phones support all functions,
and not all phones are guaranteed to work with the
in-vehicle Bluetooth system.
Voice Recognition
The Bluetooth system uses voice recognition to
interpret voice commands to dial phone numbers and
name tags.
Noise:Keep interior noise levels to a minimum.
The system may not recognize voice commands if there
is too much background noise.
When to Speak:A short tone sounds after the system
responds indicating when it is waiting for a voice
command. Wait until the tone and then speak.
How to Speak:Speak clearly in a calm and natural
voice.
3-111
Page 255 of 490

Pairing a Phone
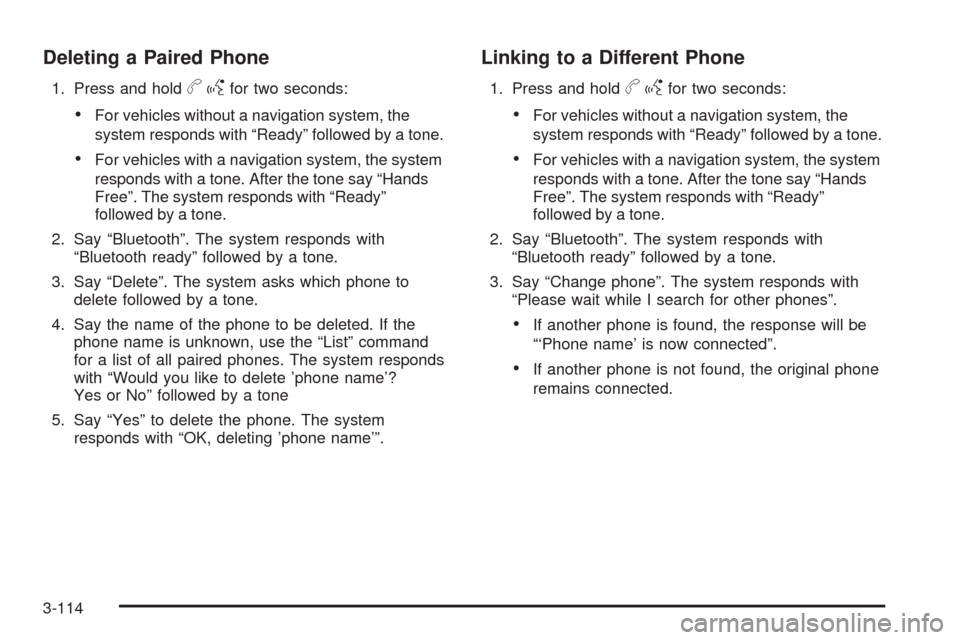
1. Press and holdbgfor two seconds:
For vehicles without a navigation system, the
system responds with “Ready” followed by a tone.
For vehicles with a navigation system, the system
responds with a tone. After the tone say “Hands
Free”. The system responds with “Ready”
followed by a tone.
2. Say “Bluetooth”. The system responds with
“Bluetooth ready” followed by a tone.
3. Say “Pair”. The system responds with instructions
and a four digit PIN number. The PIN number will
be used in Step 4.
4. Start the Pairing process on the cell phone that will
be paired to the vehicle. Reference the cell phone
manufacturers user guide for information on
this process.
Locate the device named “General Motors” in the
list on the cellular phone and follow the instructions
on the cell phone to enter the four digit PIN number
that was provided in Step 3.5. The system prompts for a name for the phone. Use
a name that best describes the phone. This name
will be used to indicate which phone is connected.
The system then con�rms the name provided.
6. The system responds with “’Phone name’ has been
successfully paired” after the pairing process is
complete.
7. Repeat Steps 1 through 7 for additional phones to
be paired.
Listing All Paired and Connected Phones
1. Press and holdbgfor two seconds:
For vehicles without a navigation system, the
system responds with “Ready” followed by a tone.
For vehicles with a navigation system, the system
responds with a tone. After the tone say “Hands
Free”. The system responds with “Ready”
followed by a tone.
2. Say “Bluetooth”. The system responds with
“Bluetooth ready” followed by a tone.
3. Say “List”. The system lists all the paired Bluetooth
devices. If a phone is connected to the vehicle, the
system will say “Is connected” after the connected
phone.
3-113
Page 256 of 490

Deleting a Paired Phone
1. Press and holdbgfor two seconds:
For vehicles without a navigation system, the
system responds with “Ready” followed by a tone.
For vehicles with a navigation system, the system
responds with a tone. After the tone say “Hands
Free”. The system responds with “Ready”
followed by a tone.
2. Say “Bluetooth”. The system responds with
“Bluetooth ready” followed by a tone.
3. Say “Delete”. The system asks which phone to
delete followed by a tone.
4. Say the name of the phone to be deleted. If the
phone name is unknown, use the “List” command
for a list of all paired phones. The system responds
with “Would you like to delete ’phone name’?
Yes or No” followed by a tone
5. Say “Yes” to delete the phone. The system
responds with “OK, deleting ’phone name’”.
Linking to a Different Phone
1. Press and holdbgfor two seconds:
For vehicles without a navigation system, the
system responds with “Ready” followed by a tone.
For vehicles with a navigation system, the system
responds with a tone. After the tone say “Hands
Free”. The system responds with “Ready”
followed by a tone.
2. Say “Bluetooth”. The system responds with
“Bluetooth ready” followed by a tone.
3. Say “Change phone”. The system responds with
“Please wait while I search for other phones”.
If another phone is found, the response will be
“‘Phone name’ is now connected”.
If another phone is not found, the original phone
remains connected.
3-114
Page 257 of 490

Storing Name Tags
The system can store up to thirty phone numbers as
name tags that are shared between the Bluetooth and
OnStar systems.
The system uses the following commands to store and
retrieve phone numbers:
Store
Digit Store
Directory
Using the Store Command
The store command allows a phone number to be
stored without entering the digits individually.
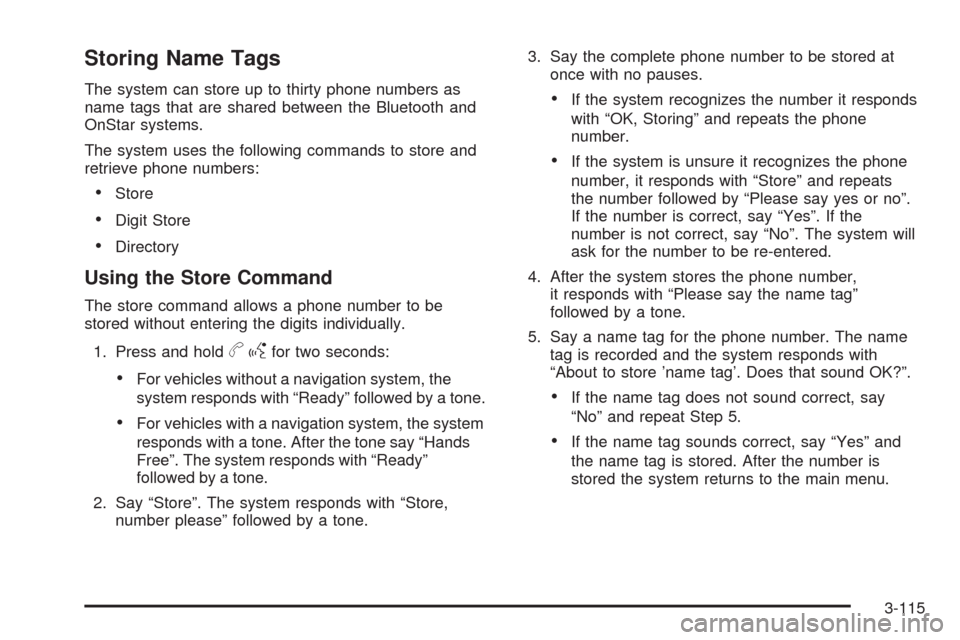
1. Press and hold
bgfor two seconds:
For vehicles without a navigation system, the
system responds with “Ready” followed by a tone.
For vehicles with a navigation system, the system
responds with a tone. After the tone say “Hands
Free”. The system responds with “Ready”
followed by a tone.
2. Say “Store”. The system responds with “Store,
number please” followed by a tone.3. Say the complete phone number to be stored at
once with no pauses.
If the system recognizes the number it responds
with “OK, Storing” and repeats the phone
number.
If the system is unsure it recognizes the phone
number, it responds with “Store” and repeats
the number followed by “Please say yes or no”.
If the number is correct, say “Yes”. If the
number is not correct, say “No”. The system will
ask for the number to be re-entered.
4. After the system stores the phone number,
it responds with “Please say the name tag”
followed by a tone.
5. Say a name tag for the phone number. The name
tag is recorded and the system responds with
“About to store ’name tag’. Does that sound OK?”.
If the name tag does not sound correct, say
“No” and repeat Step 5.
If the name tag sounds correct, say “Yes” and
the name tag is stored. After the number is
stored the system returns to the main menu.
3-115
Page 258 of 490

Using the Digit Store Command
The digit store command allows a phone number to be
stored by entering the digits individually.
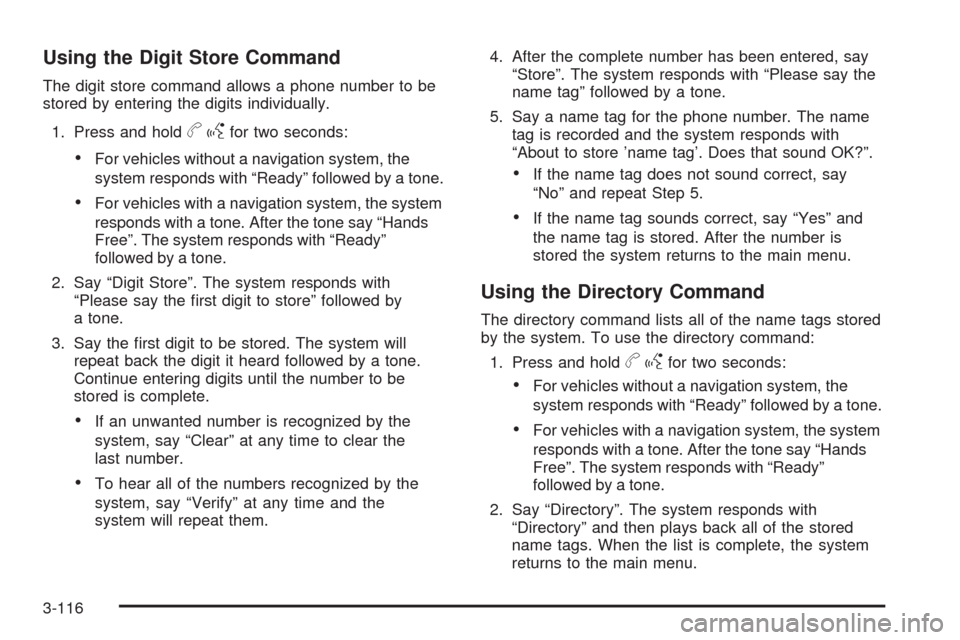
1. Press and hold
bgfor two seconds:
For vehicles without a navigation system, the
system responds with “Ready” followed by a tone.
For vehicles with a navigation system, the system
responds with a tone. After the tone say “Hands
Free”. The system responds with “Ready”
followed by a tone.
2. Say “Digit Store”. The system responds with
“Please say the �rst digit to store” followed by
a tone.
3. Say the �rst digit to be stored. The system will
repeat back the digit it heard followed by a tone.
Continue entering digits until the number to be
stored is complete.
If an unwanted number is recognized by the
system, say “Clear” at any time to clear the
last number.
To hear all of the numbers recognized by the
system, say “Verify” at any time and the
system will repeat them.4. After the complete number has been entered, say
“Store”. The system responds with “Please say the
name tag” followed by a tone.
5. Say a name tag for the phone number. The name
tag is recorded and the system responds with
“About to store ’name tag’. Does that sound OK?”.
If the name tag does not sound correct, say
“No” and repeat Step 5.
If the name tag sounds correct, say “Yes” and
the name tag is stored. After the number is
stored the system returns to the main menu.
Using the Directory Command
The directory command lists all of the name tags stored
by the system. To use the directory command:
1. Press and hold
bgfor two seconds:
For vehicles without a navigation system, the
system responds with “Ready” followed by a tone.
For vehicles with a navigation system, the system
responds with a tone. After the tone say “Hands
Free”. The system responds with “Ready”
followed by a tone.
2. Say “Directory”. The system responds with
“Directory” and then plays back all of the stored
name tags. When the list is complete, the system
returns to the main menu.
3-116
Page 259 of 490

Deleting Name Tags
The system uses the following commands to delete
name tags:
Delete
Delete all name tags
Using the Delete Command
The delete command allows speci�c name tags to be
deleted.
To use the delete command:
1. Press and hold
bgfor two seconds:
For vehicles without a navigation system, the
system responds with “Ready” followed by a tone.
For vehicles with a navigation system, the system
responds with a tone. After the tone say “Hands
Free”. The system responds with “Ready”
followed by a tone.
2. Say “Delete”. The system responds with “Delete,
please say the name tag” followed by a tone.3. Say the name tag to be deleted. The system
responds with “Would you like to delete, ’name tag’?
Please say yes or no”.
If the name tag is correct, say “Yes” to delete the
name tag. The system responds with “OK,
deleting ’name tag’, returning to the main menu.”
If the name tag is incorrect, say “No”. The system
responds with “No. OK, let’s try again, please say
the name tag.”
Using the Delete All Name Tags Command
The delete all name tags command deletes all stored
phone book name tags and route name tags for OnStar
(if present).
To use the delete all name tags command:
1. Press and hold
bgfor two seconds:
For vehicles without a navigation system, the
system responds with “Ready” followed by a tone.
For vehicles with a navigation system, the system
responds with a tone. After the tone say “Hands
Free”. The system responds with “Ready”
followed by a tone.
3-117