2008 BMW Z4 COUPE 3.0SI ESP
[x] Cancel search: ESPPage 7 of 132
Reference
At a glance
Controls
Driving tips
Mobility
5
Your individual vehicle
When you ordered your BMW, you chose vari-
ous items of equipment. This Owner's Manual
describes all models and equipment that BMW
offers within the same group.
We hope you will understand that equipment
and features are included which you might not
have chosen for your vehicle. Any differences
can easily be identified since all optional acces-
sories and special equipment are marked with
an asterisk
*.
If your BMW features equipment not described
in this Owner's Manual, please observe the
enclosed supplementary Owner's Manuals.
Status at time of printing
BMW pursues a policy of continuous, ongoing
development that is conceived to ensure that
our vehicles continue to embody the highest
quality and safety standards combined with
advanced, state-of-the-art technology. In
exceptional cases, the features described in
this Owner's Manual could therefore differ from
those on your vehicle.
For your own safety
Maintenance and repair
Advanced technology, e.g. the use of
modern materials and powerful electron-
ics, requires specially adapted maintenance
and repair methods. You should therefore have
the corresponding work on your vehicle per-
formed only by your BMW center or at a work-
shop that works according to BMW repair pro-
cedures with correspondingly trained
personnel. If this work is not carried out prop-
erly, there is a danger of subsequent damage
and related safety hazards.<
California Proposition 65 warning
California laws require us to state the following
warning:
Engine exhaust and a wide variety of
automobile components and parts,
including components found in the interior fur-
nishings in a vehicle, contain or emit chemicals
known to the State of California to cause cancer
and birth defects and reproductive harm. In
addition, certain fluids contained in vehicles and
certain products of component wear contain or
emit chemicals known to the State of CA to
cause cancer and birth defects or other repro-
ductive harm.
Battery posts, terminals and related accesso-
ries contain lead and lead compounds. Wash
your hands after handling.
Used engine oil contains chemicals that have
caused cancer in laboratory animals. Always
protect your skin by washing thoroughly with
soap and water.<
Page 14 of 132

Cockpit
12
Instrument cluster
1Speedometer
2Indicator lamps for turn signals
3Indicator and warning lamps12
4Tachometer48
with indicator and warning lamps12
5Engine coolant temperature gauge49
6Fuel gauge48
7Button for
>Displaying the clock49
>Service interval display49
>Checking the oil level93
8Position of automatic transmission
*42
9Button for
>Resetting trip odometer48
>Setting the clock49
10Display for
>Trip odometer/Odometer48
>Clock49
>Service interval49
>Computer
*50
>Checking the oil level93
Indicator and warning lamps
Technology that monitors itself
Indicator and warning lamps that are identified
by
+ are tested for proper functioning whenever
the key is turned. They each light up once for
different periods of time.
If a malfunction occurs in one of the monitored
systems, the corresponding lamp does not go
out after the engine has started, or it lights up
again while the vehicle is in motion. You can find
more information about each system on the
specified pages.
Turn signal indicators44
Battery charge current
+102
Headlamp flasher/High beams44, 60
Engine oil pressure/
Engine oil level
+92
Antilock Brake System ABS/Driving
stability control systems
+51
Page 23 of 132
Reference
At a glance
Controls
Driving tips
Mobility
21
Opening and closing:
from inside
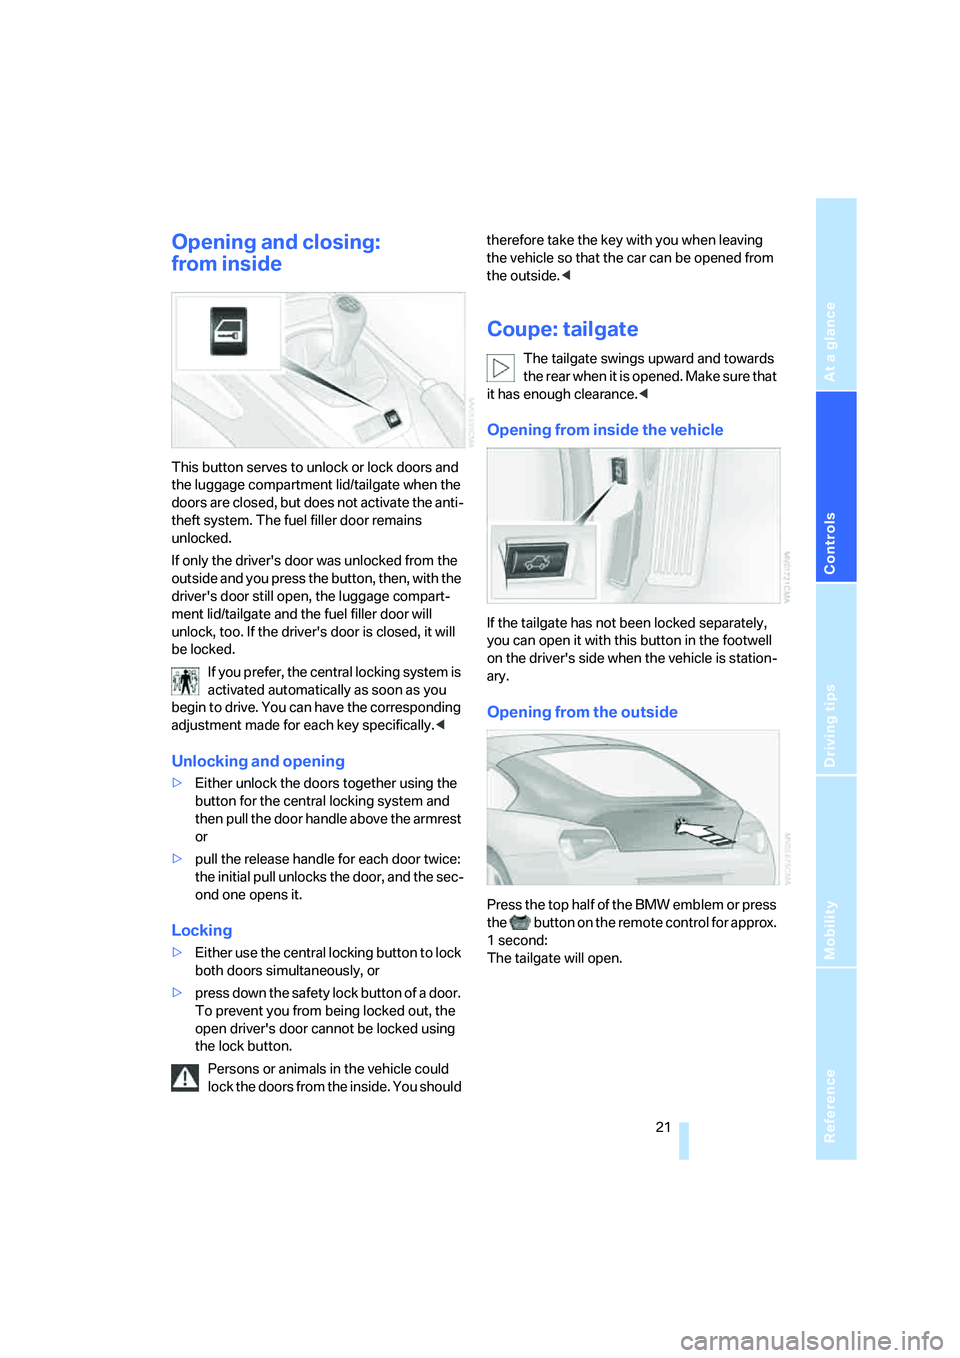
This button serves to unlock or lock doors and
the luggage compartment lid/tailgate when the
doors are closed, but does not activate the anti-
theft system. The fuel filler door remains
unlocked.
If only the driver's door was unlocked from the
outside and you press the button, then, with the
driver's door still open, the luggage compart-
ment lid/tailgate and the fuel filler door will
unlock, too. If the driver's door is closed, it will
be locked.
If you prefer, the central locking system is
activated automatically as soon as you
begin to drive. You can have the corresponding
adjustment made for each key specifically.<
Unlocking and opening
>Either unlock the doors together using the
button for the central locking system and
then pull the door handle above the armrest
or
>pull the release handle for each door twice:
the initial pull unlocks the door, and the sec-
ond one opens it.
Locking
>Either use the central locking button to lock
both doors simultaneously, or
>press down the safety lock button of a door.
To prevent you from being locked out, the
open driver's door cannot be locked using
the lock button.
Persons or animals in the vehicle could
lock the doors from the inside. You should therefore take the key with you when leaving
the vehicle so that the car can be opened from
the outside.<
Coupe: tailgate
The tailgate swings upward and towards
the rear when it is opened. Make sure that
it has enough clearance.<
Opening from inside the vehicle
If the tailgate has not been locked separately,
you can open it with this button in the footwell
on the driver's side when the vehicle is station-
ary.
Opening from the outside
Press the top half of the BMW emblem or press
the button on the remote control for approx.
1 second:
The tailgate will open.
Page 25 of 132

Reference
At a glance
Controls
Driving tips
Mobility
23
The handle recess in the interior trim of the lug-
gage compartment lid makes it easier to pull
down.
Make sure that the closing path of the
luggage compartment lid is clear, other-
wise injuries may result.<
Cargo bay
Emergency release
Pull the lever in the cargo bay. The luggage
compartment lid/tailgate is unlocked.
Roadster: increasing cargo bay
capacity
The cargo bay can be enlarged when the con-
vertible top is closed.
Turn the handles on both sides of the cargo bay
outward beyond the resistance point at the
same time, arrow 1.
The convertible top compartment panel swings
up, arrow 2.
Before opening the convertible top:
Turn both handles inward.
The convertible top compartment panel is
folded down.To avoid any damage when opening the
convertible top, make sure that the con-
vertible top compartment panel in the cargo bay
has been folded down.<
Alarm system*
The concept
The vehicle alarm system responds:
>When a door, the hood or the luggage com-
partment lid/tailgate is opened
>When attempts are made to start the vehi-
cle
>When there are movements in the vehicle
interior: interior motion sensor, refer to
page24
>When the car's inclination changes, for
instance if an attempt is made to jack it up
and steal the wheels or to raise it prior to
towing away: Tilt alarm sensor, refer to
page24
>When there is an interruption in the power
supply from the battery
The alarm system signals unauthorized entry
attempts for a short time by means of:
>An acoustic alarm
>Switching on the hazard warning flashers
>Flashing the high beams
Arming and disarming
When you lock or unlock the vehicle, either with
the remote control or at the door lock, the alarm
system is armed or disarmed at the same time.
The hazard warning flashers light up once when
the alarm system has been properly armed.
You can have different acknowledgment
signals set to confirm arming and disarm-
ing.<
Even when the alarm system is armed, you can
open the luggage compartment lid/tailgate
using the button on the remote control,
refer to page20. When you subsequently close
the luggage compartment lid/tailgate, it is
locked again and monitored.
Page 27 of 132
Reference
At a glance
Controls
Driving tips
Mobility
25
Opening, closing
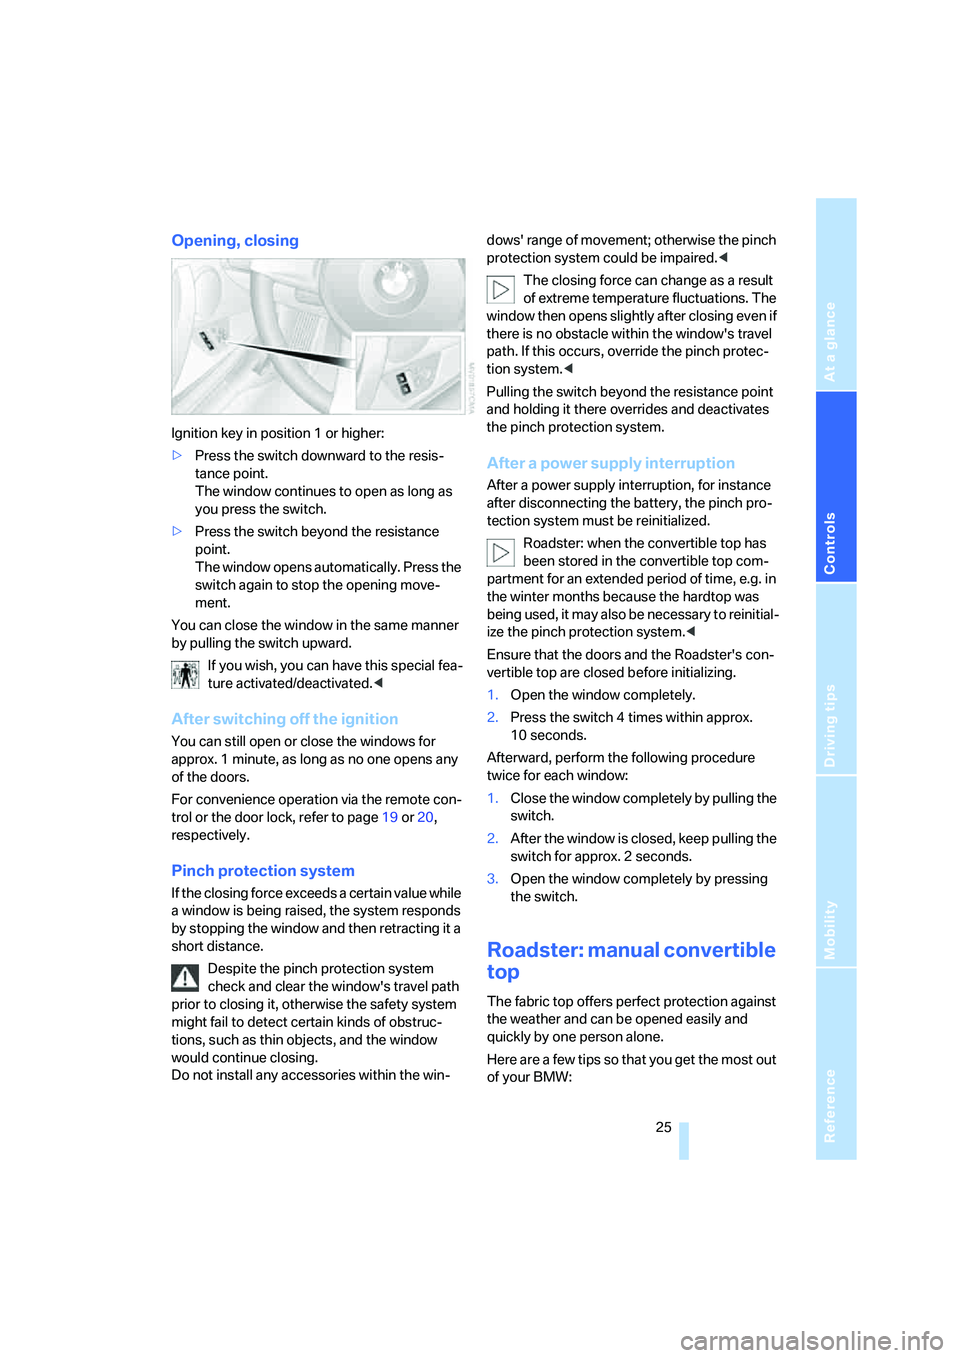
Ignition key in position 1 or higher:
>Press the switch downward to the resis-
tance point.
The window continues to open as long as
you press the switch.
>Press the switch beyond the resistance
point.
The window opens automatically. Press the
switch again to stop the opening move-
ment.
You can close the window in the same manner
by pulling the switch upward.
If you wish, you can have this special fea-
ture activated/deactivated.<
After switching off the ignition
You can still open or close the windows for
approx. 1 minute, as long as no one opens any
of the doors.
For convenience operation via the remote con-
trol or the door lock, refer to page19 or20,
respectively.
Pinch protection system
If the closing force exceeds a certain value while
a window is being raised, the system responds
by stopping the window and then retracting it a
short distance.
Despite the pinch protection system
check and clear the window's travel path
prior to closing it, otherwise the safety system
might fail to detect certain kinds of obstruc-
tions, such as thin objects, and the window
would continue closing.
Do not install any accessories within the win-dows' range of movement; otherwise the pinch
protection system could be impaired.<
The closing force can change as a result
of extreme temperature fluctuations. The
window then opens slightly after closing even if
there is no obstacle within the window's travel
path. If this occurs, override the pinch protec-
tion system.<
Pulling the switch beyond the resistance point
and holding it there overrides and deactivates
the pinch protection system.
After a power supply interruption
After a power supply interruption, for instance
after disconnecting the battery, the pinch pro-
tection system must be reinitialized.
Roadster: when the convertible top has
been stored in the convertible top com-
partment for an extended period of time, e.g. in
the winter months because the hardtop was
being used, it may also be necessary to reinitial-
ize the pinch protection system.<
Ensure that the doors and the Roadster's con-
vertible top are closed before initializing.
1.Open the window completely.
2.Press the switch 4 times within approx.
10 seconds.
Afterward, perform the following procedure
twice for each window:
1.Close the window completely by pulling the
switch.
2.After the window is closed, keep pulling the
switch for approx. 2 seconds.
3.Open the window completely by pressing
the switch.
Roadster: manual convertible
top
The fabric top offers perfect protection against
the weather and can be opened easily and
quickly by one person alone.
Here are a few tips so that you get the most out
of your BMW:
Page 29 of 132
Reference
At a glance
Controls
Driving tips
Mobility
27
climate control to prevent a partial vacuum in
the vehicle.<
Roadster: fully automatic
convertible top*
The fully automatic convertible top combines
assured protection against the elements with
simple and easy handling.
Here are a few tips so that you get the most out
of your BMW:
>It is advisable to close the convertible top
when the vehicle is parked. When closed,
the top not only guards the passenger com-
partment from unforeseeable damage from
the weather, but also affords a degree of
protection against theft. Valuables, how-
ever, should only be kept in the locked
cargo bay, even when the convertible top is
closed.
>Never mount a roof-mounted luggage rack
system on the convertible top.
Do not operate the convertible top at tem-
peratures below 147/–106, otherwise
damage could result.
Never keep a wet convertible top in the convert-
ible top compartment for longer than one day,
otherwise the moisture could cause damage.
Do not lay objects on the convertible top, other-
wise they could fall off when the convertible top
is operated and cause damage or injuries.
Driving while the convertible top is not com-
pletely open or closed can cause vehicle dam-
age or personal injury.
Do not reach into the convertible top mecha-
nism during opening and closing. Keep children
away from the convertible top's range of move-
ment.
For safety reasons, whenever possible operate
the convertible top when the vehicle is station-
ary.<
If a convertible top operation has not yet
been completed as you start to drive off,
at a traffic light for example, you can continue
the procedure at moderate speed:
To do so, press and hold the corresponding button again.
At higher speeds, a vacuum effect in the pas-
senger compartment can cause the convertible
top to begin fluttering. Use the air conditioning
or automatic climate control to increase the air
flow rate and thus prevent a partial vacuum in
the vehicle.<
Before opening and closing
>Read and comply with the preceding safety
precautions.
>Make sure that the convertible top com-
partment panel in the cargo bay has been
folded down; refer to page23. Otherwise
the convertible top cannot be opened.
>Ensure that the luggage compartment lid/
tailgate is closed.
Opening and closing
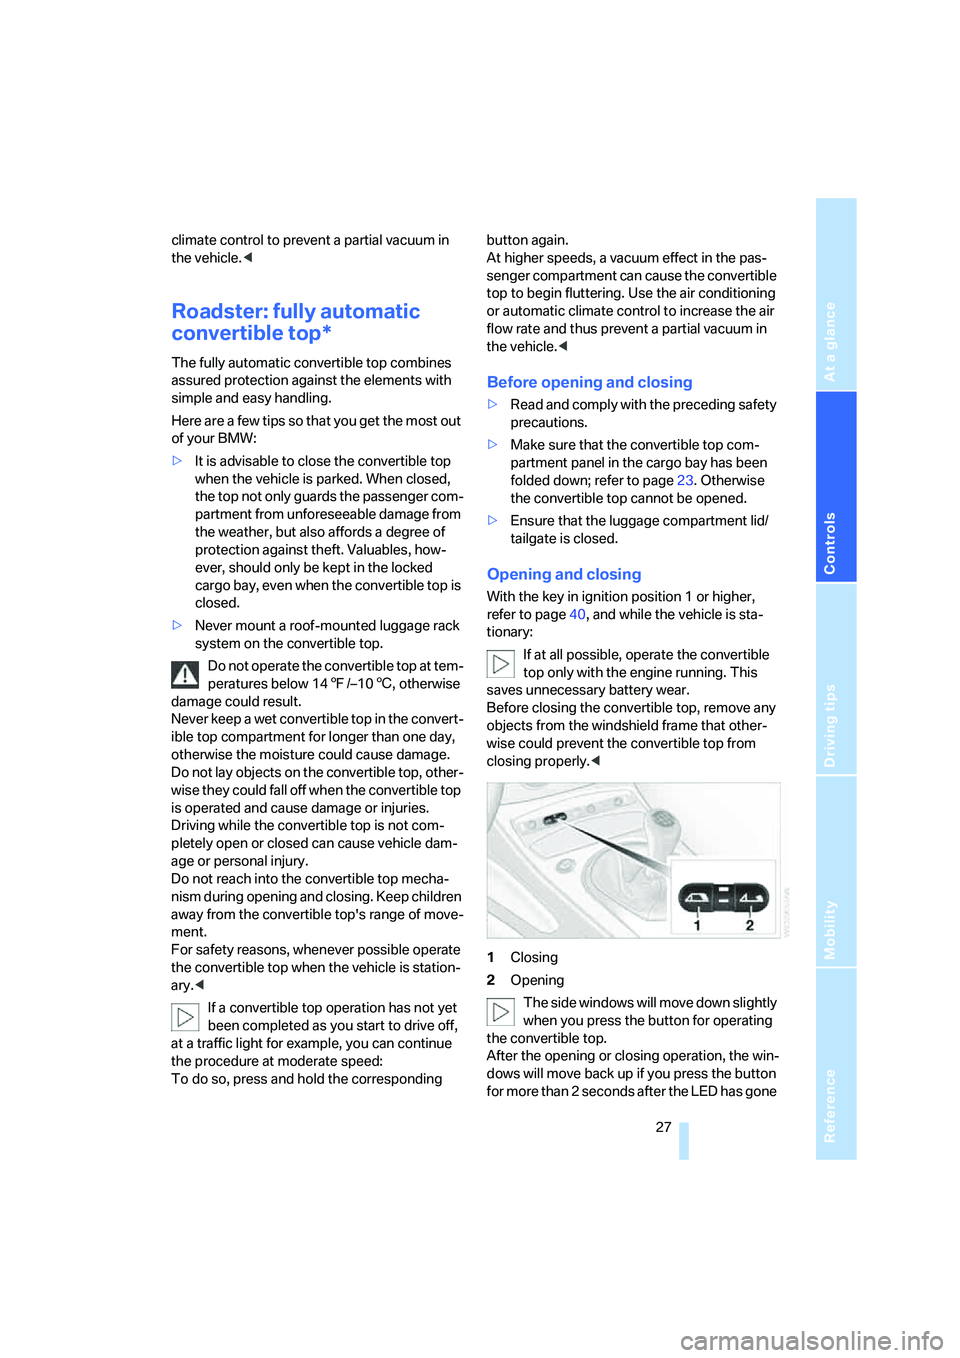
With the key in ignition position 1 or higher,
refer to page40, and while the vehicle is sta-
tionary:
If at all possible, operate the convertible
top only with the engine running. This
saves unnecessary battery wear.
Before closing the convertible top, remove any
objects from the windshield frame that other-
wise could prevent the convertible top from
closing properly.<
1Closing
2Opening
The side windows will move down slightly
when you press the button for operating
the convertible top.
After the opening or closing operation, the win-
dows will move back up if you press the button
for more than 2 seconds after the LED has gone
Page 32 of 132
Adjustments
30
Adjustments
Safe seating position
For relaxed driving with as little fatigue as pos-
sible, you should select a seating position that
reflects your personal requirements. In combi-
nation with the safety belts, the head restraints
and the airbags, the seating position has a
major influence on your safety in the event of an
accident. To ensure that the vehicle's safety
systems provide you with optimal protection,
we request that you direct your careful attention
to the following section.
For supplementary information on transporting
children refer to page36.
Airbags
Always maintain an adequate distance
between yourself and the airbags. Always
grip the steering wheel on the rim, with your
hands in the 3 o'clock and 9 o'clock positions,
to minimize the risk of injury to the hands or
arms in the event of the airbag being triggered
off.
Never allow any objects, individuals or animals
to obstruct the areas between passengers and
airbags.
Never use the front airbag's cover as a storage
tray or support for objects of any kind. Ensure
that the passenger is correctly seated, e.g. does
not prop feet or legs against the dashboard.
Otherwise, leg injury could result if the knee air-
bag and front airbag suddenly deployed.
Make sure that the passenger does not lean his
or her head against the side airbag, otherwise
serious injuries could result if the airbags sud-
denly deployed.<
Even when all these guidelines are observed,
the risk of injury as a result of contact with the
airbags cannot entirely be ruled out in some sit-
uations. In sensitive individuals, the ignition and
inflation noise may induce a mild hearing loss
that is temporary in most cases.
For airbag locations and additional information
on airbags, refer to page56.
Head restraint
A correctly adjusted head restraint reduces the
risk of neck injury in the event of an accident.
Adjust the head restraint in such a way
that its center is at approx. ear level. Oth-
erwise, there is an increased risk of injury in the
event of an accident.<
Head restraints, refer to page32.
Safety belt
Make sure every occupant fastens his or her
safety belt. As supplemental restraint devices,
the airbags are designed to enhance the effec-
tiveness of the safety belts, and not to replace
them.
Your vehicle offers two sitting positions, each of
which is equipped with a safety belt.
Never allow more than one person to
wear a single safety belt. Never allow
infants or small children to ride in a passenger's
lap. Make sure that the belt in the lap area sits
low against the hips and does not press against
the abdomen. The safety belt must never rest
against the throat, rub against sharp edges,
pass over hard or fragile objects or be pinched.
Fasten the safety belt around your body snugly,
ma king sure tha t it is pulled taut across your lap
and shoulder and that it is not twisted; other-
wise, the belt can slide over the hips in the event
of a frontal collision and injure your abdomen.
Avoid wearing bulky clothing and regularly pull
the belt in the upper-body area taut, otherwise
its restraining effect could be impaired.<
Safety belts, refer to page33.
Seats
Before adjusting your seat, always
observe the following precautions
Never try to adjust your seat while driving.
Otherwise, the seat could respond with
unexpected movement, and the ensuing loss of
Page 36 of 132
Adjustments
34
Damaged safety belts
When the belt system has absorbed an
accident or has been damaged, have the
system and its belt tensioners replaced and the
b e l t a n c h o r s c h e c k e d . H a v e t h i s w o r k d o n e o n l y
by your BMW center or at a workshop that
works according to BMW repair procedures
with correspondingly trained personnel. Other-
wise, it is not guaranteed that the safety devices
will function properly.<
Mirrors
Exterior mirrors
The passenger's mirror is more convex
than the driver's mirror. The objects seen
in the mirror are closer than they appear. Do not
gauge your distance from traffic behind you on
the basis of what you see in the mirror; other-
wise there is an increased risk of an accident.<
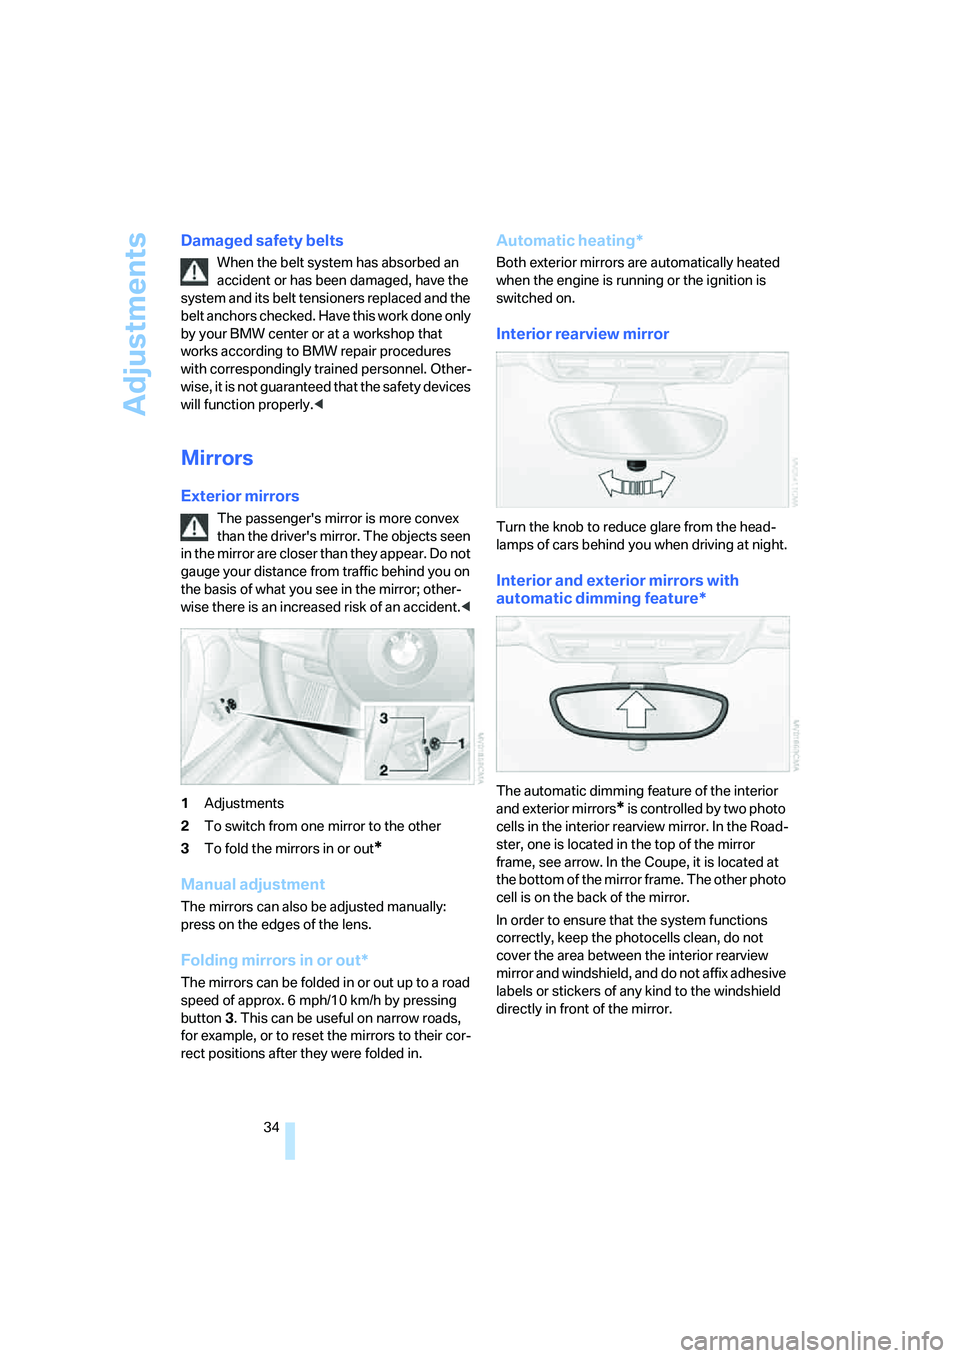
1Adjustments
2To switch from one mirror to the other
3To fold the mirrors in or out
*
Manual adjustment
The mirrors can also be adjusted manually:
press on the edges of the lens.
Folding mirrors in or out*
The mirrors can be folded in or out up to a road
speed of approx. 6 mph/10 km/h by pressing
button3. This can be useful on narrow roads,
for example, or to reset the mirrors to their cor-
rect positions after they were folded in.
Automatic heating*
Both exterior mirrors are automatically heated
when the engine is running or the ignition is
switched on.
Interior rearview mirror
Turn the knob to reduce glare from the head-
lamps of cars behind you when driving at night.
Interior and exterior mirrors with
automatic dimming feature*
The automatic dimming feature of the interior
and exterior mirrors
* is controlled by two photo
cells in the interior rearview mirror. In the Road-
ster, one is located in the top of the mirror
frame, see arrow. In the Coupe, it is located at
the bottom of the mirror frame. The other photo
cell is on the back of the mirror.
In order to ensure that the system functions
correctly, keep the photocells clean, do not
cover the area between the interior rearview
mirror and windshield, and do not affix adhesive
labels or stickers of any kind to the windshield
directly in front of the mirror.