Page 105 of 165

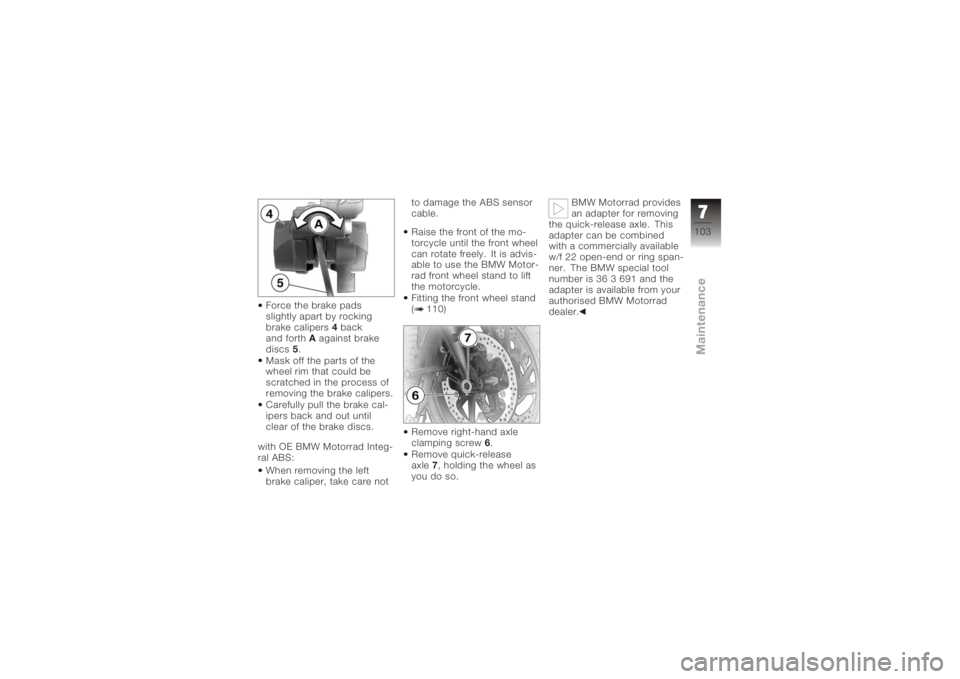
Force the brake pads
slightly apart by rocking
brake calipers4back
and forth Aagainst brake
discs 5.
Mask off the parts of the
wheel rim that could be
scratched in the process of
removing the brake calipers.
Carefully pull the brake cal-
ipers back and out until
clear of the brake discs.
with OE BMW Motorrad Integ-
ral ABS: When removing the left
brake caliper, take care not to damage the ABS sensor
cable.
Raise the front of the mo-
torcycle until the front wheel
can rotate freely. It is advis-
able to use the BMW Motor-
rad front wheel stand to lift
the motorcycle.
Fitting the front wheel stand
( 110)
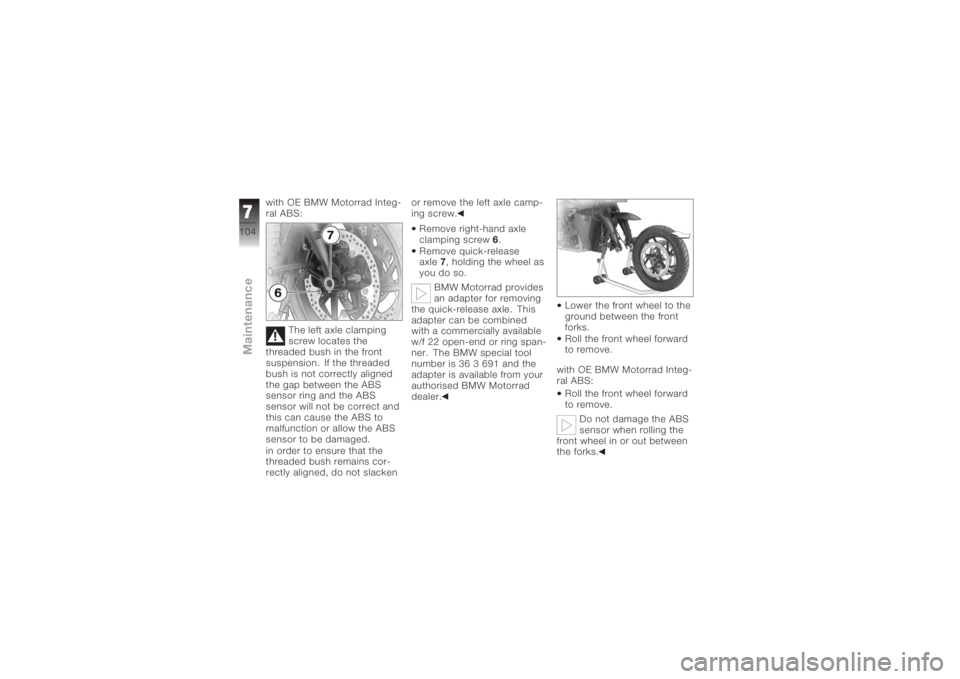
Remove right-hand axle
clamping screw
6.
Remove quick-release
axle 7, holding the wheel as
you do so. BMW Motorrad provides
an adapter for removing
the quick-release axle. This
adapter can be combined
with a commercially available
w/f 22 open-end or ring span-
ner. The BMW special tool
number is 36 3 691 and the
adapter is available from your
authorised BMW Motorrad
dealer.
7103zMaintenance
Page 106 of 165

with OE BMW Motorrad Integ-
ral ABS:The left axle clamping
screw locates the
threaded bush in the front
suspension. If the threaded
bush is not correctly aligned
the gap between the ABS
sensor ring and the ABS
sensor will not be correct and
this can cause the ABS to
malfunction or allow the ABS
sensor to be damaged.
in order to ensure that the
threaded bush remains cor-
rectly aligned, do not slacken or remove the left axle camp-
ing screw.
Remove right-hand axle
clamping screw 6.
Remove quick-release
axle 7, holding the wheel as
you do so.
BMW Motorrad provides
an adapter for removing
the quick-release axle. This
adapter can be combined
with a commercially available
w/f 22 open-end or ring span-
ner. The BMW special tool
number is 36 3 691 and the
adapter is available from your
authorised BMW Motorrad
dealer. Lower the front wheel to the
ground between the front
forks.
Roll the front wheel forward
to remove.
with OE BMW Motorrad Integ-
ral ABS: Roll the front wheel forward
to remove.
Do not damage the ABS
sensor when rolling the
front wheel in or out between
the forks.
7104zMaintenance
Page 107 of 165
Installing front wheel
Threaded fasteners not
tightened to the spe-
cified torque can work loose
or their threads can suffer
damage.
Always have the security of
the fasteners checked by a
specialist workshop, prefer-
ably an authorised BMW Mo-
torrad dealer.
There is a risk of
damaging parts of the
front brake, particularly the
BMW Integral ABS, in the
course of the procedure
described below.
Take care not to damage the
brake system, in particular the
ABS sensor with cable and
the ABS sensor ring.
The front wheel must be
installed right way round
to rotate in the correct direc-
tion. Note the direction-of-rotation
arrows on the tyre or the
wheel rim.
Roll the front wheel into
position between the front
forks. with OE BMW Motorrad Integ-
ral ABS:
Roll the front wheel into
position between the front
forks. Do not damage the ABS
sensor when rolling the
front wheel in or out between
the forks.
7105zMaintenance
Page 108 of 165
Lift the front wheel and in-
stall quick-release axle7.
Quick-release axle in
threaded bush
50 Nm
Install right-hand axle
clamping screw 6.
Clamping screw for quick-
release axle in wheel carrier
19 Nm
Remove the front wheel
stand.
Ease the brake calipers on
to the brake discs. with OE BMW Motorrad Integ-
ral ABS:
The cable of the ABS
sensor could chafe
through if it comes into
contact with the brake disc.
Make sure that the ABS
sensor cable is routed
correctly.
Carefully route the ABS
cable.
Install securing screws 3.
Front brake caliper, wheel
carrier installed ( 133) Remove the adhesive tape
from the wheel rim.
Hold cover
2in position.
Install screws 1.
Firmly pull the handbrake
lever until the pressure point
is perceptible, and repeat
this operation several times.
with OE BMW Motorrad Integ-
ral ABS: Switch on the ignition.
Wait for self-diagnosis to
complete.
Firmly pull the handbrake
lever until the pressure point
7106zMaintenance
Page 113 of 165

with OA Centre stand:Make sure the ground is
level and firm and place
the motorcycle on its centre
stand.
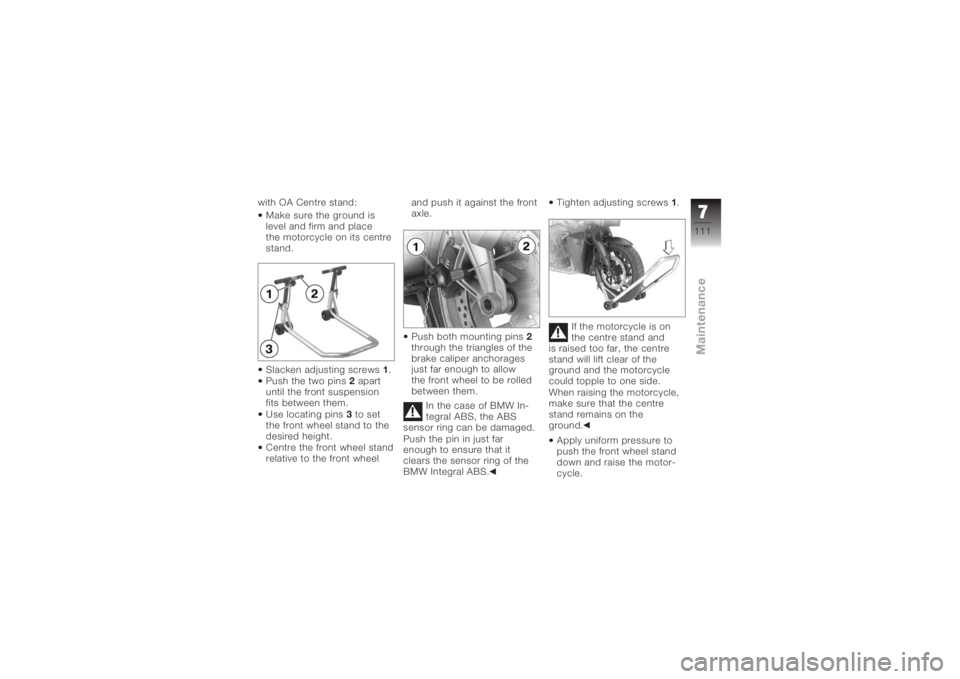
Slacken adjusting screws 1.
Push the two pins 2apart
until the front suspension
fits between them.
Use locating pins 3to set
the front wheel stand to the
desired height.
Centre the front wheel stand
relative to the front wheel and push it against the front
axle.
Push both mounting pins
2
through the triangles of the
brake caliper anchorages
just far enough to allow
the front wheel to be rolled
between them.
In the case of BMW In-
tegral ABS, the ABS
sensor ring can be damaged.
Push the pin in just far
enough to ensure that it
clears the sensor ring of the
BMW Integral ABS. Tighten adjusting screws
1.
If the motorcycle is on
the centre stand and
is raised too far, the centre
stand will lift clear of the
ground and the motorcycle
could topple to one side.
When raising the motorcycle,
make sure that the centre
stand remains on the
ground.
Apply uniform pressure to
push the front wheel stand
down and raise the motor-
cycle.
7111zMaintenance
Page 139 of 165
Final driveRear wheel drive, typeShaft drive with bevel gears
Final drive gear ratio 2.91 : 1Running gearFront suspension, typeDouble leading link
Front suspension, total suspension travel 115 mm, Static 125 mm, Dynamic
Rear suspension, type Single-tube gas-pressure shock absorber
Rear suspension, total suspension travel 135 mm, At wheel
9137zTechnical data
Page 141 of 165
ElectricsOn-board socket, rating5 A
Fuses All circuits are electronically protected, so
plug-in fuses are no longer necessary. If an
electronic fuse trips and de-energises a cir-
cuit, the circuit is active as soon as the ig-
nition is switched on after the fault has been
rectified.
Type
Type, battery AGM (Absorptive Glass Mat) battery
Technical data
Battery rated voltage 12 V
Battery rated capacity 14 Ah
Battery low-temperature test current 100 A
Technical data
Spark plug, manufacturer and designation Bosch YR5DDE
Spark plug, electrode gap
When new 0.7 mm
Spark plug, electrode gap
Wear limit No wear limit; spark-plug replacement as per
maintenance schedule
9139zTechnical data
Page 149 of 165
Confirmation of maintenance workBMW Pre-delivery
CheckCarried out in accord-
ance with manufacturer's
instructions
Date, stamp, signature
BMW Running-in
CheckCarried out in accord-
ance with manufacturer's
instructions
Odometer reading
Brake fluid, newWithout BMW Integ-
ral ABS
With BMW Integral
ABSWheel circuit
Control circuit
Date, stamp, signature
10147zService