2008 BMW 750LI Amp
[x] Cancel search: AmpPage 135 of 254
Navigation
Driving tips
133Reference
At a glance
Controls
Communications
Entertainment
Mobility
>To cancel selection:
Select the arrow and press the con-
troller.
4.Turn the controller to select place names in
the list and press the controller.
Entering town/city of destination with
zip code*
You can enter the zip code if the navigation CD/
DVD supports this function.
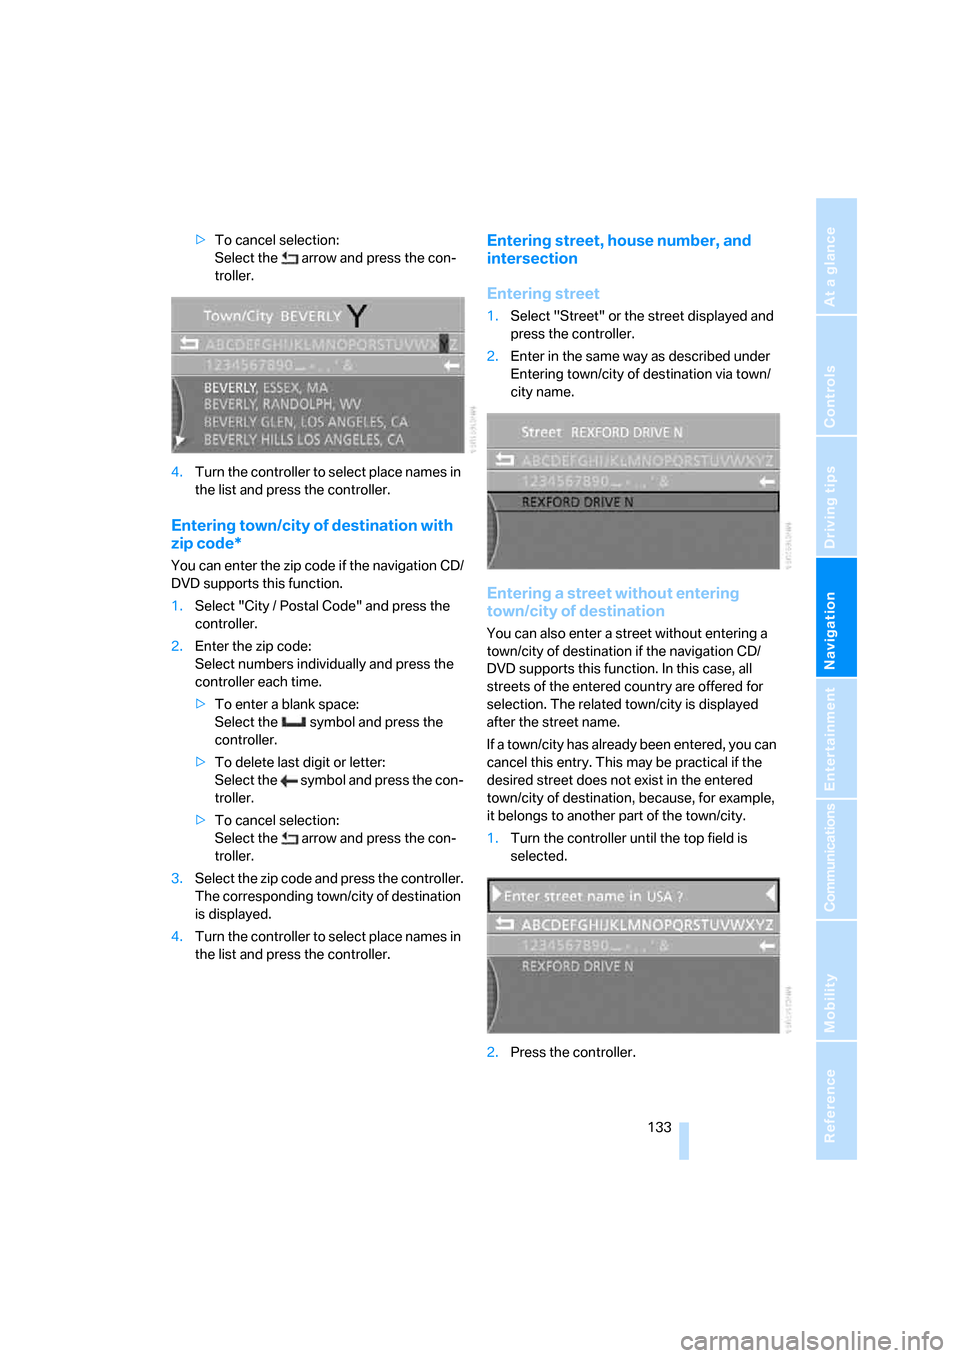
1.Select "City / Postal Code" and press the
controller.
2.Enter the zip code:
Select numbers individually and press the
controller each time.
>To enter a blank space:
Select the symbol and press the
controller.
>To delete last digit or letter:
Select the symbol and press the con-
troller.
>To cancel selection:
Select the arrow and press the con-
troller.
3.Select the zip code and press the controller.
The corresponding town/city of destination
is displayed.
4.Turn the controller to select place names in
the list and press the controller.
Entering street, house number, and
intersection
Entering street
1.Select "Street" or the street displayed and
press the controller.
2.Enter in the same way as described under
Entering town/city of destination via town/
city name.
Entering a street without entering
town/city of destination
You can also enter a street without entering a
town/city of destination if the navigation CD/
DVD supports this function. In this case, all
streets of the entered country are offered for
selection. The related town/city is displayed
after the street name.
If a town/city has already been entered, you can
cancel this entry. This may be practical if the
desired street does not exist in the entered
town/city of destination, because, for example,
it belongs to another part of the town/city.
1.Turn the controller until the top field is
selected.
2.Press the controller.
Page 140 of 254
Destination input
138
Destination list
The destination list includes the last 25 destina-
tions entered. The most recently entered desti-
nation appears at the top of the list.
The system guides you to the destinations in
the sequence in which they appear in the desti-
nation list. You are thus guided first to the des-
tination in the top or first position of the destina-
tion list.
You can edit individual destinations and their
sequence in the list and delete the destination
list, refer to Editing destination list on page138.
In order, for example, to plan a longer route, you
can store all of the destinations to which you
wish to drive in the destination list, refer to
Entering destination manually on page131.
If the destination list is full, then you must
delete at least one entry in order to be
able to store a new destination in the destina-
tion list.<
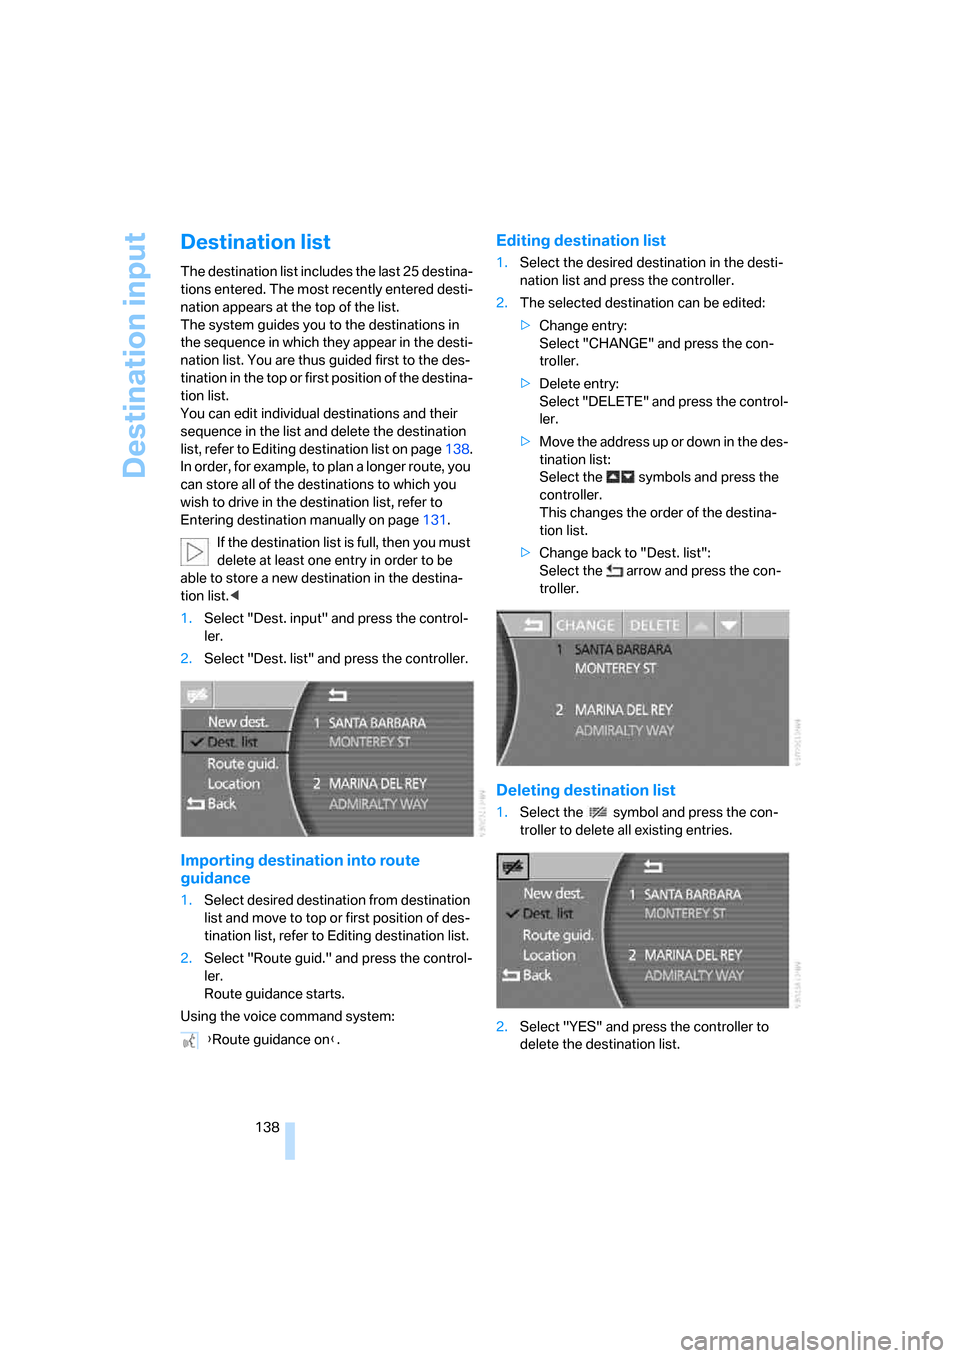
1.Select "Dest. input" and press the control-
ler.
2.Select "Dest. list" and press the controller.
Importing destination into route
guidance
1.Select desired destination from destination
list and move to top or first position of des-
tination list, refer to Editing destination list.
2.Select "Route guid." and press the control-
ler.
Route guidance starts.
Using the voice command system:
Editing destination list
1.Select the desired destination in the desti-
nation list and press the controller.
2.The selected destination can be edited:
>Change entry:
Select "CHANGE" and press the con-
troller.
>Delete entry:
Select "DELETE" and press the control-
ler.
>Move the address up or down in the des-
tination list:
Select the symbols and press the
controller.
This changes the order of the destina-
tion list.
>Change back to "Dest. list":
Select the arrow and press the con-
troller.
Deleting destination list
1.Select the symbol and press the con-
troller to delete all existing entries.
2.Select "YES" and press the controller to
delete the destination list. {Route guidance on}.
Page 144 of 254
Destination input
142
Changing route criteria
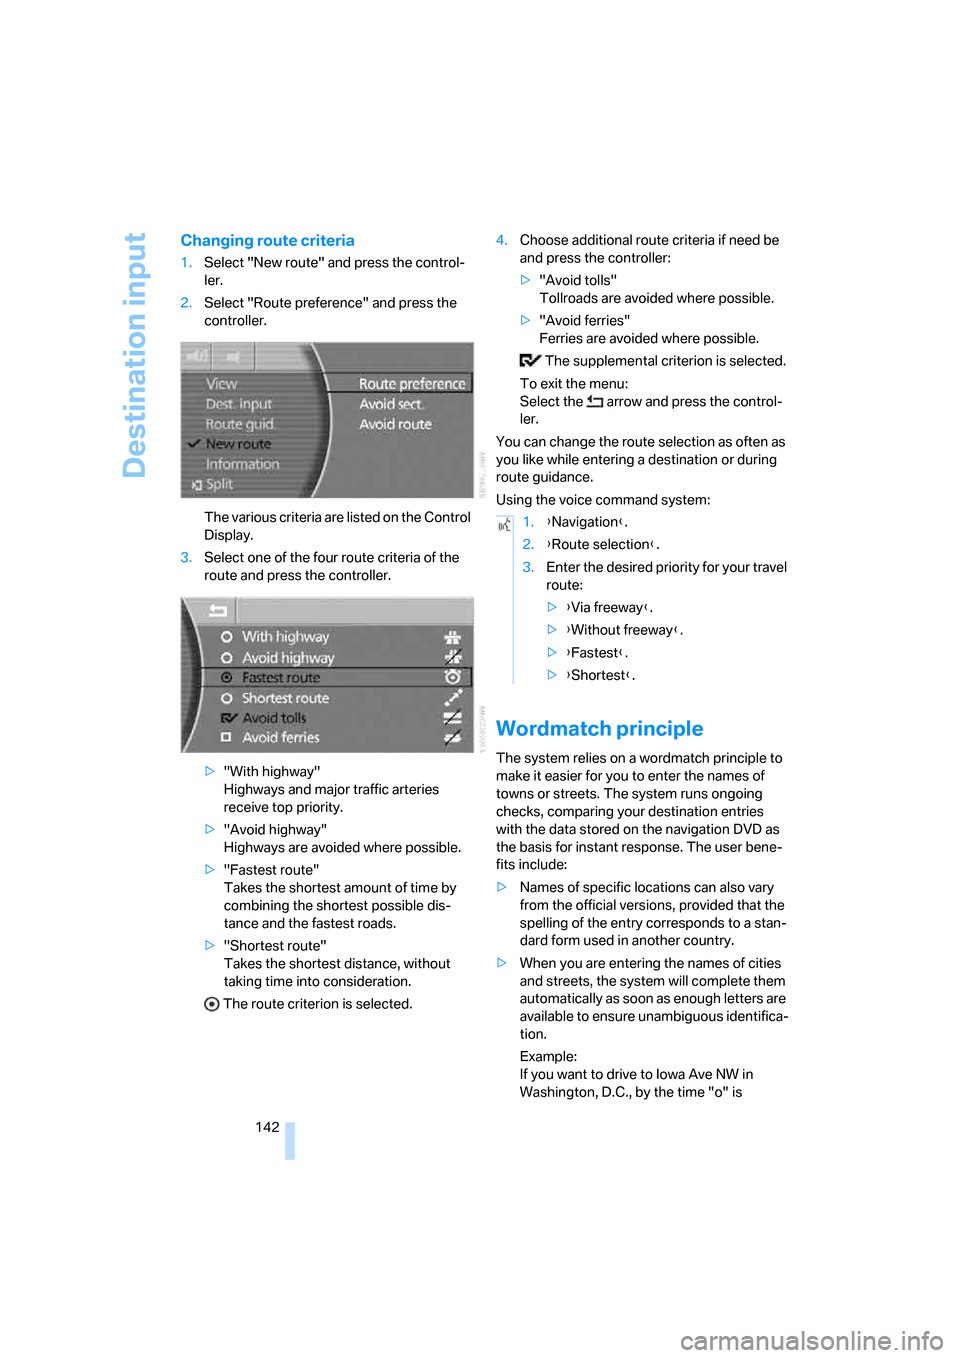
1.Select "New route" and press the control-
ler.
2.Select "Route preference" and press the
controller.
The various criteria are listed on the Control
Display.
3.Select one of the four route criteria of the
route and press the controller.
>"With highway"
Highways and major traffic arteries
receive top priority.
>"Avoid highway"
Highways are avoided where possible.
>"Fastest route"
Takes the shortest amount of time by
combining the shortest possible dis-
tance and the fastest roads.
>"Shortest route"
Takes the shortest distance, without
taking time into consideration.
The route criterion is selected.4.Choose additional route criteria if need be
and press the controller:
>"Avoid tolls"
Tollroads are avoided where possible.
>"Avoid ferries"
Ferries are avoided where possible.
The supplemental criterion is selected.
To exit the menu:
Select the arrow and press the control-
ler.
You can change the route selection as often as
you like while entering a destination or during
route guidance.
Using the voice command system:
Wordmatch principle
The system relies on a wordmatch principle to
make it easier for you to enter the names of
towns or streets. The system runs ongoing
checks, comparing your destination entries
with the data stored on the navigation DVD as
the basis for instant response. The user bene-
fits include:
>Names of specific locations can also vary
from the official versions, provided that the
spelling of the entry corresponds to a stan-
dard form used in another country.
>When you are entering the names of cities
and streets, the system will complete them
automatically as soon as enough letters are
available to ensure unambiguous identifica-
tion.
Example:
If you want to drive to Iowa Ave NW in
Washington, D.C., by the time "o" is
1.{Navigation}.
2.{Route selection}.
3.Enter the desired priority for your travel
route:
>{Via freeway}.
>{Without freeway}.
>{Fastest}.
>{Shortest}.
Page 156 of 254
On/off and settings
154
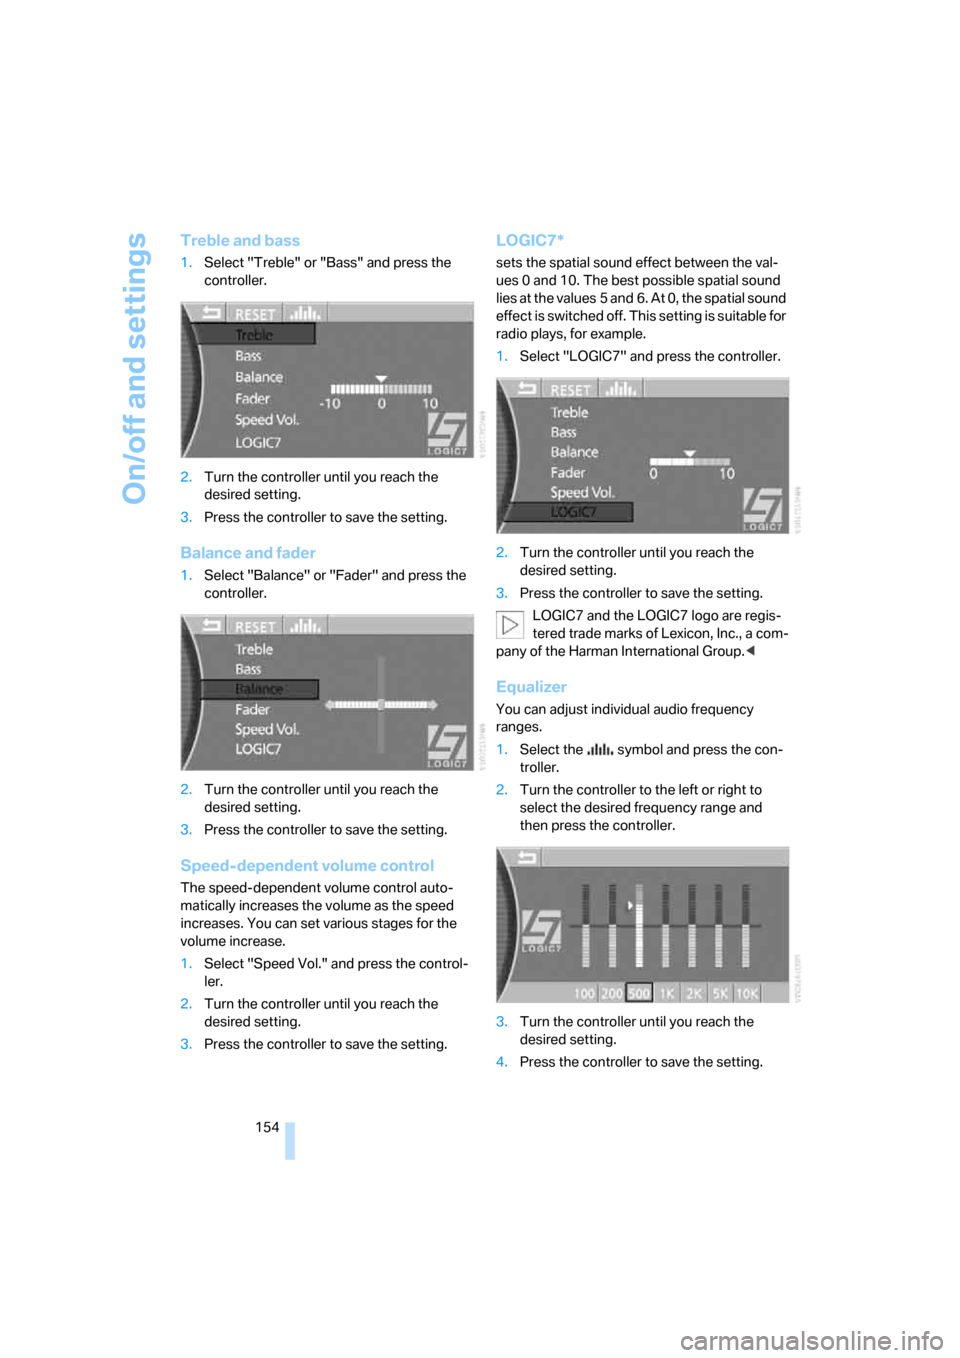
Treble and bass
1.Select "Treble" or "Bass" and press the
controller.
2.Turn the controller until you reach the
desired setting.
3.Press the controller to save the setting.
Balance and fader
1.Select "Balance" or "Fader" and press the
controller.
2.Turn the controller until you reach the
desired setting.
3.Press the controller to save the setting.
Speed-dependent volume control
The speed-dependent volume control auto-
matically increases the volume as the speed
increases. You can set various stages for the
volume increase.
1.Select "Speed Vol." and press the control-
ler.
2.Turn the controller until you reach the
desired setting.
3.Press the controller to save the setting.
LOGIC7*
sets the spatial sound effect between the val-
ues 0 and 10. The best possible spatial sound
lies at the values 5 and 6. At 0, the spatial sound
effect is switched off. This setting is suitable for
radio plays, for example.
1.Select "LOGIC7" and press the controller.
2.Turn the controller until you reach the
desired setting.
3.Press the controller to save the setting.
LOGIC7 and the LOGIC7 logo are regis-
tered trade marks of Lexicon, Inc., a com-
pany of the Harman International Group.<
Equalizer
You can adjust individual audio frequency
ranges.
1.Select the symbol and press the con-
troller.
2.Turn the controller to the left or right to
select the desired frequency range and
then press the controller.
3.Turn the controller until you reach the
desired setting.
4.Press the controller to save the setting.
Page 159 of 254
Navigation
Entertainment
Driving tips
157Reference
At a glance
Controls
Communications
Mobility
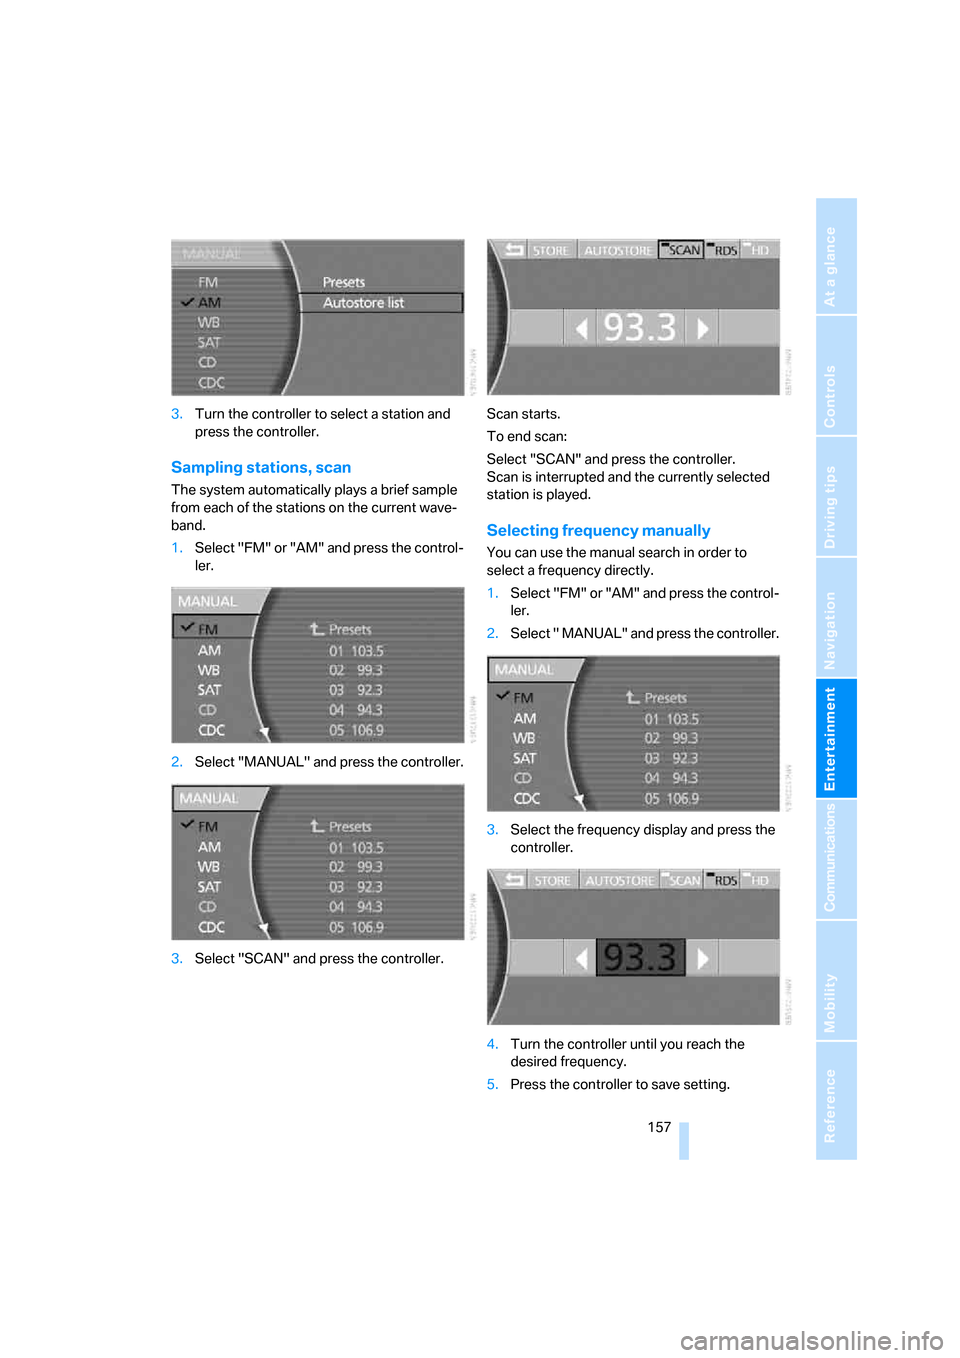
3.Turn the controller to select a station and
press the controller.
Sampling stations, scan
The system automatically plays a brief sample
from each of the stations on the current wave-
band.
1.Select "FM" or "AM" and press the control-
ler.
2.Select "MANUAL" and press the controller.
3.Select "SCAN" and press the controller.Scan starts.
To end scan:
Select "SCAN" and press the controller.
Scan is interrupted and the currently selected
station is played.
Selecting frequency manually
You can use the manual search in order to
select a frequency directly.
1.Select "FM" or "AM" and press the control-
ler.
2.Select " MANUAL" and press the controller.
3.Select the frequency display and press the
controller.
4.Turn the controller until you reach the
desired frequency.
5.Press the controller to save setting.
Page 165 of 254
Navigation
Entertainment
Driving tips
163Reference
At a glance
Controls
Communications
Mobility
CD player
Listening to CDs
1.Switch Entertainment sound output on,
refer to page153.
2.Insert the CD with the labeled side up.
The CD is automatically pulled in.
To start playback when a CD is already in
the player:
iDrive, for principle details, refer to page16.
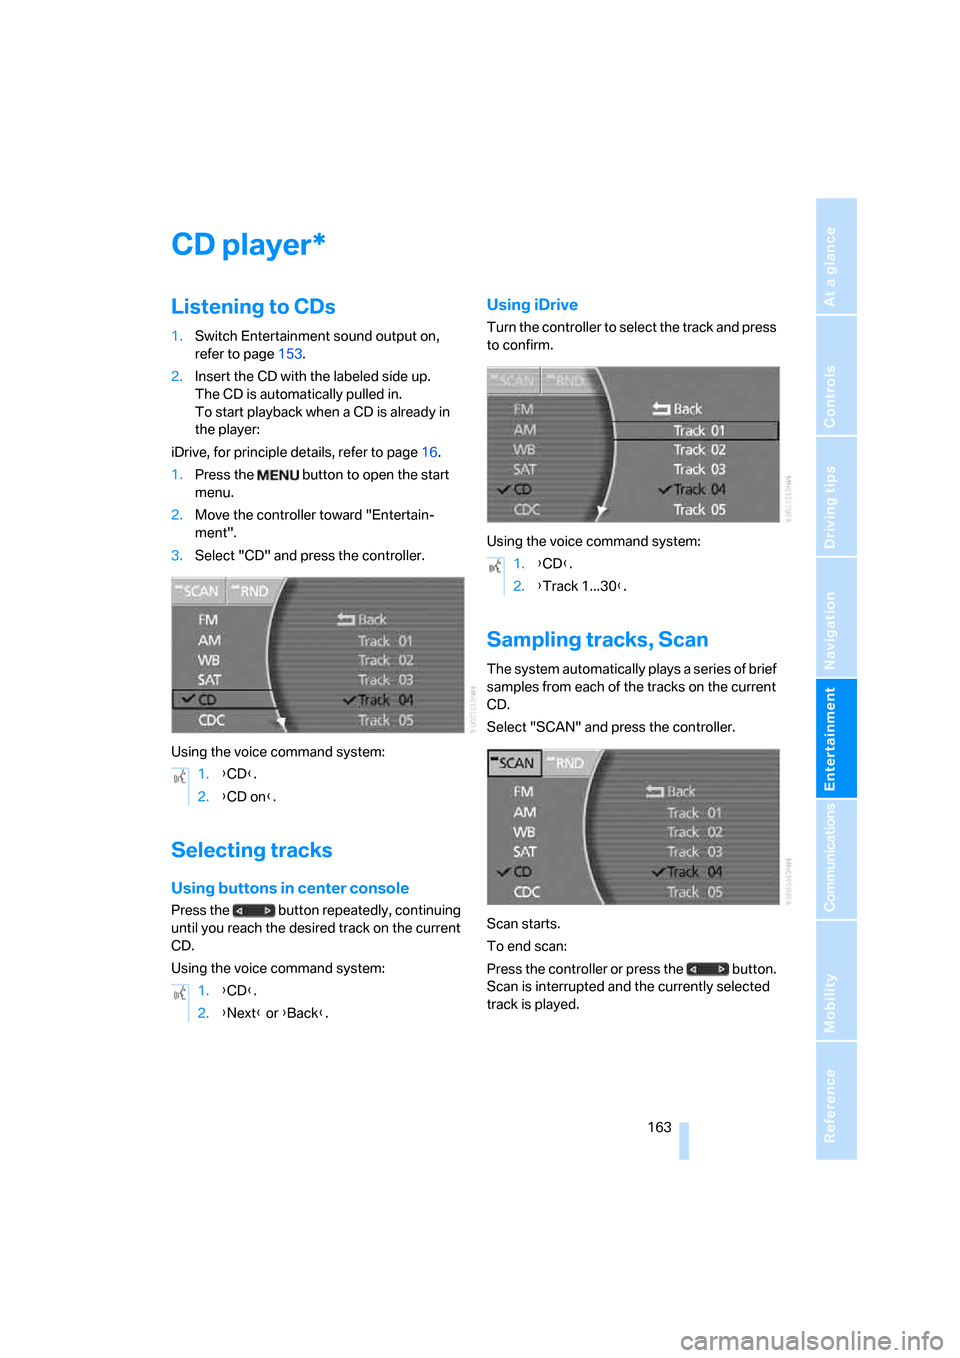
1.Press the button to open the start
menu.
2.Move the controller toward "Entertain-
ment".
3.Select "CD" and press the controller.
Using the voice command system:
Selecting tracks
Using buttons in center console
Press the button repeatedly, continuing
until you reach the desired track on the current
CD.
Using the voice command system:
Using iDrive
Turn the controller to select the track and press
to confirm.
Using the voice command system:
Sampling tracks, Scan
The system automatically plays a series of brief
samples from each of the tracks on the current
CD.
Select "SCAN" and press the controller.
Scan starts.
To end scan:
Press the controller or press the button.
Scan is interrupted and the currently selected
track is played.
*
1.{CD}.
2.{CD on}.
1.{CD}.
2.{Next} or {Back}.
1.{CD}.
2.{Track 1...30}.
Page 166 of 254
CD player
164
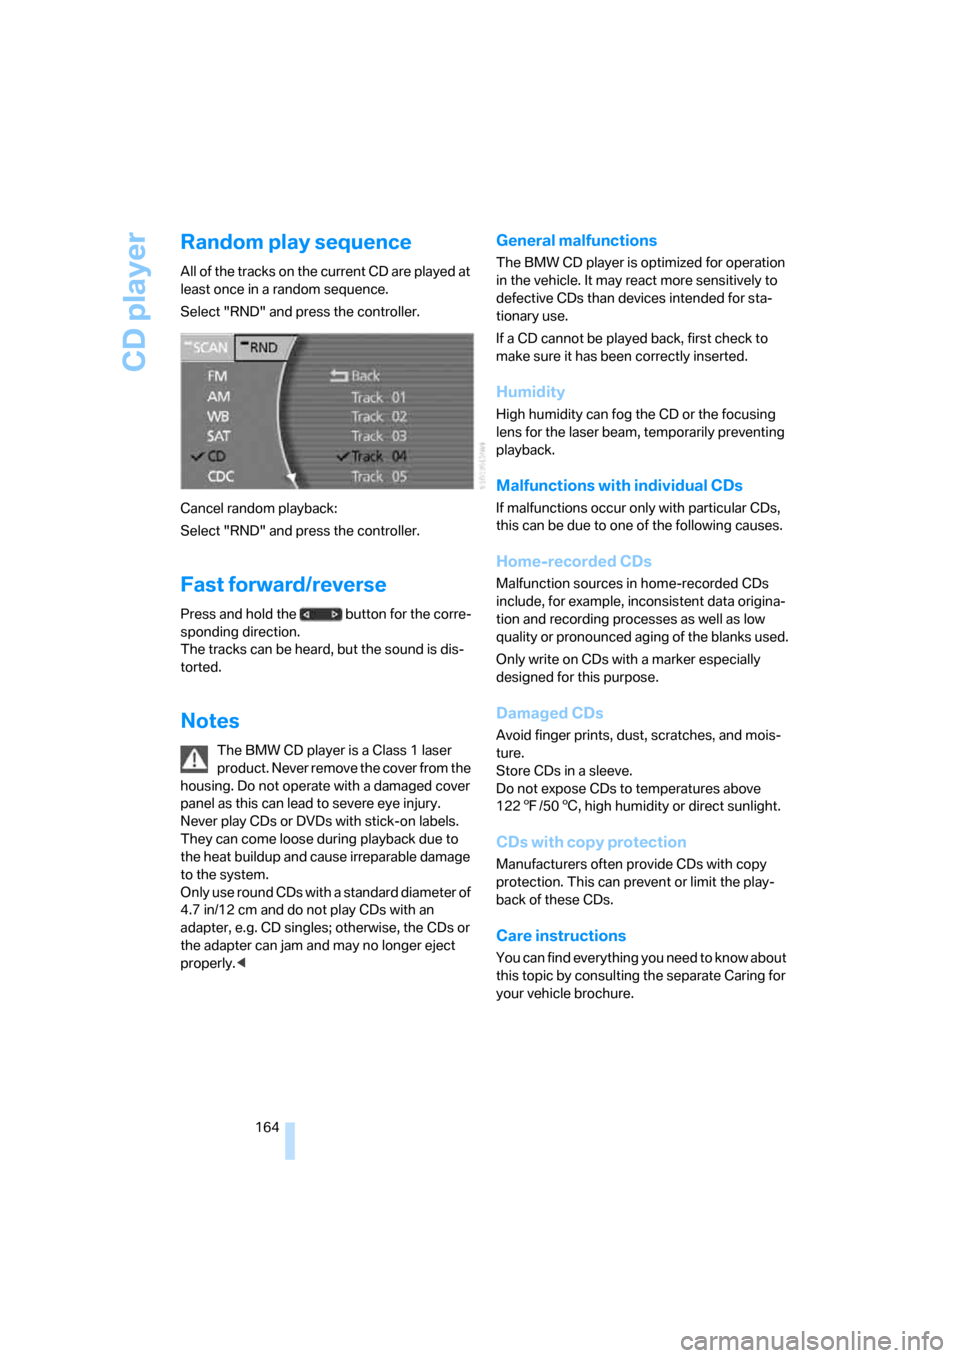
Random play sequence
All of the tracks on the current CD are played at
least once in a random sequence.
Select "RND" and press the controller.
Cancel random playback:
Select "RND" and press the controller.
Fast forward/reverse
Press and hold the button for the corre-
sponding direction.
The tracks can be heard, but the sound is dis-
torted.
Notes
The BMW CD player is a Class 1 laser
product. Never remove the cover from the
housing. Do not operate with a damaged cover
panel as this can lead to severe eye injury.
Never play CDs or DVDs with stick-on labels.
They can come loose during playback due to
the heat buildup and cause irreparable damage
to the system.
Only use round CDs with a standard diameter of
4.7 in/12 cm and do not play CDs with an
adapter, e.g. CD singles; otherwise, the CDs or
the adapter can jam and may no longer eject
properly.<
General malfunctions
The BMW CD player is optimized for operation
in the vehicle. It may react more sensitively to
defective CDs than devices intended for sta-
tionary use.
If a CD cannot be played back, first check to
make sure it has been correctly inserted.
Humidity
High humidity can fog the CD or the focusing
lens for the laser beam, temporarily preventing
playback.
Malfunctions with individual CDs
If malfunctions occur only with particular CDs,
this can be due to one of the following causes.
Home-recorded CDs
Malfunction sources in home-recorded CDs
include, for example, inconsistent data origina-
tion and recording processes as well as low
quality or pronounced aging of the blanks used.
Only write on CDs with a marker especially
designed for this purpose.
Damaged CDs
Avoid finger prints, dust, scratches, and mois-
ture.
Store CDs in a sleeve.
Do not expose CDs to temperatures above
1227/506, high humidity or direct sunlight.
CDs with copy protection
Manufacturers often provide CDs with copy
protection. This can prevent or limit the play-
back of these CDs.
Care instructions
You can find everything you need to know about
this topic by consulting the separate Caring for
your vehicle brochure.
Page 169 of 254
Navigation
Entertainment
Driving tips
167Reference
At a glance
Controls
Communications
Mobility
Using the voice command system:
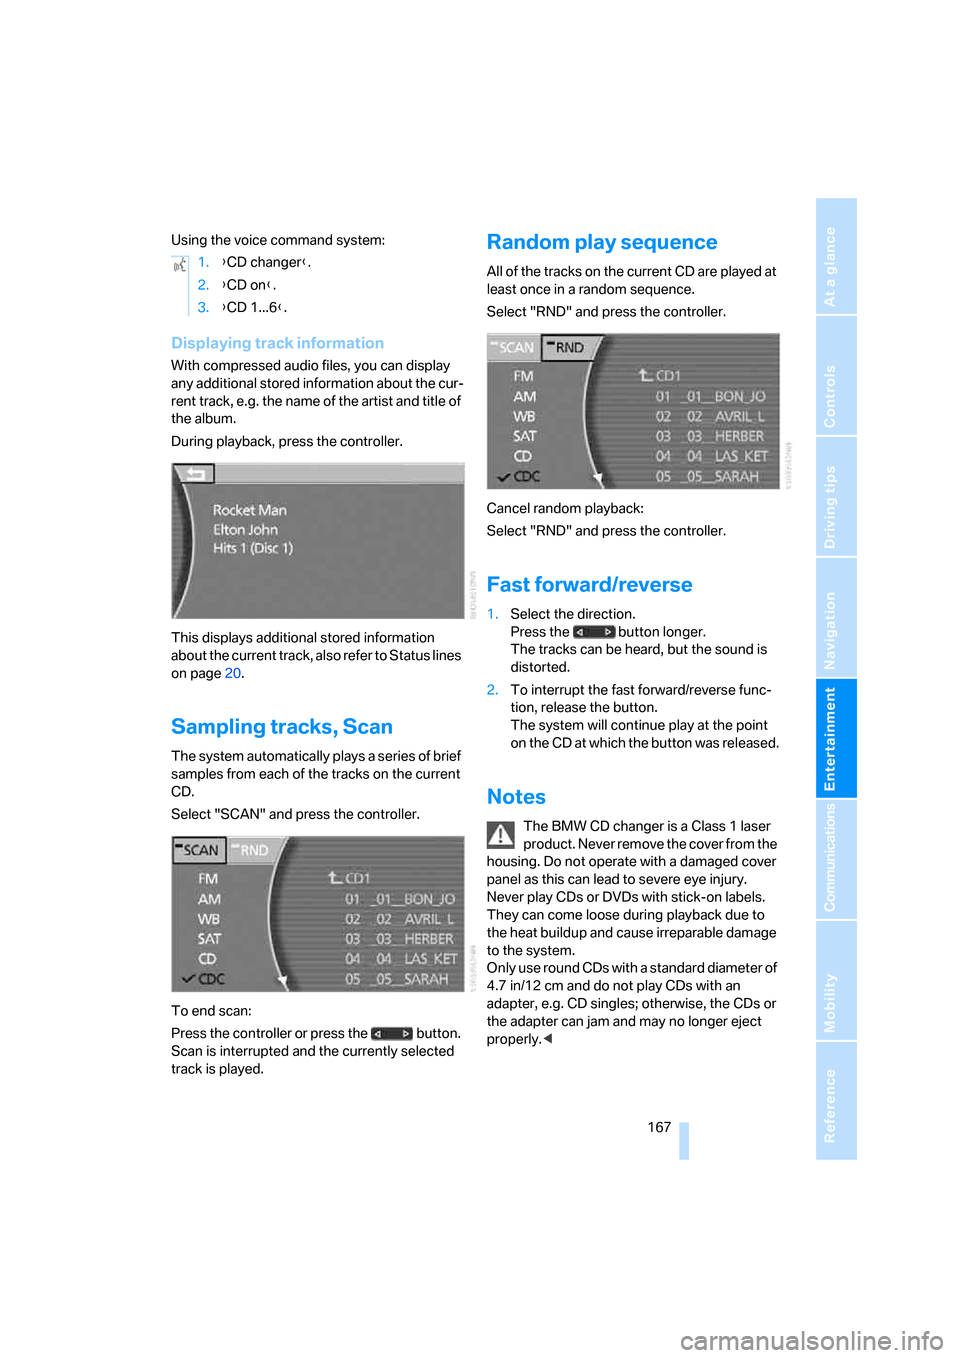
Displaying track information
With compressed audio files, you can display
any additional stored information about the cur-
rent track, e.g. the name of the artist and title of
the album.
During playback, press the controller.
This displays additional stored information
about the current track, also refer to Status lines
on page20.
Sampling tracks, Scan
The system automatically plays a series of brief
samples from each of the tracks on the current
CD.
Select "SCAN" and press the controller.
To end scan:
Press the controller or press the button.
Scan is interrupted and the currently selected
track is played.
Random play sequence
All of the tracks on the current CD are played at
least once in a random sequence.
Select "RND" and press the controller.
Cancel random playback:
Select "RND" and press the controller.
Fast forward/reverse
1.Select the direction.
Press the button longer.
The tracks can be heard, but the sound is
distorted.
2.To interrupt the fast forward/reverse func-
tion, release the button.
The system will continue play at the point
on the CD at which the button was released.
Notes
The BMW CD changer is a Class 1 laser
product. Never remove the cover from the
housing. Do not operate with a damaged cover
panel as this can lead to severe eye injury.
Never play CDs or DVDs with stick-on labels.
They can come loose during playback due to
the heat buildup and cause irreparable damage
to the system.
Only use round CDs with a standard diameter of
4.7 in/12 cm and do not play CDs with an
adapter, e.g. CD singles; otherwise, the CDs or
the adapter can jam and may no longer eject
properly.< 1.{CD changer}.
2.{CD on}.
3.{CD 1...6}.